$15 DIY Farmhouse Bench by Happier Homemaker
Build a bench for $15 in lumber! This is an easy project, makes a great bench for extra seating, outdoor seating, as an end of bed bench, or a dining bench. with detailed diagrams from
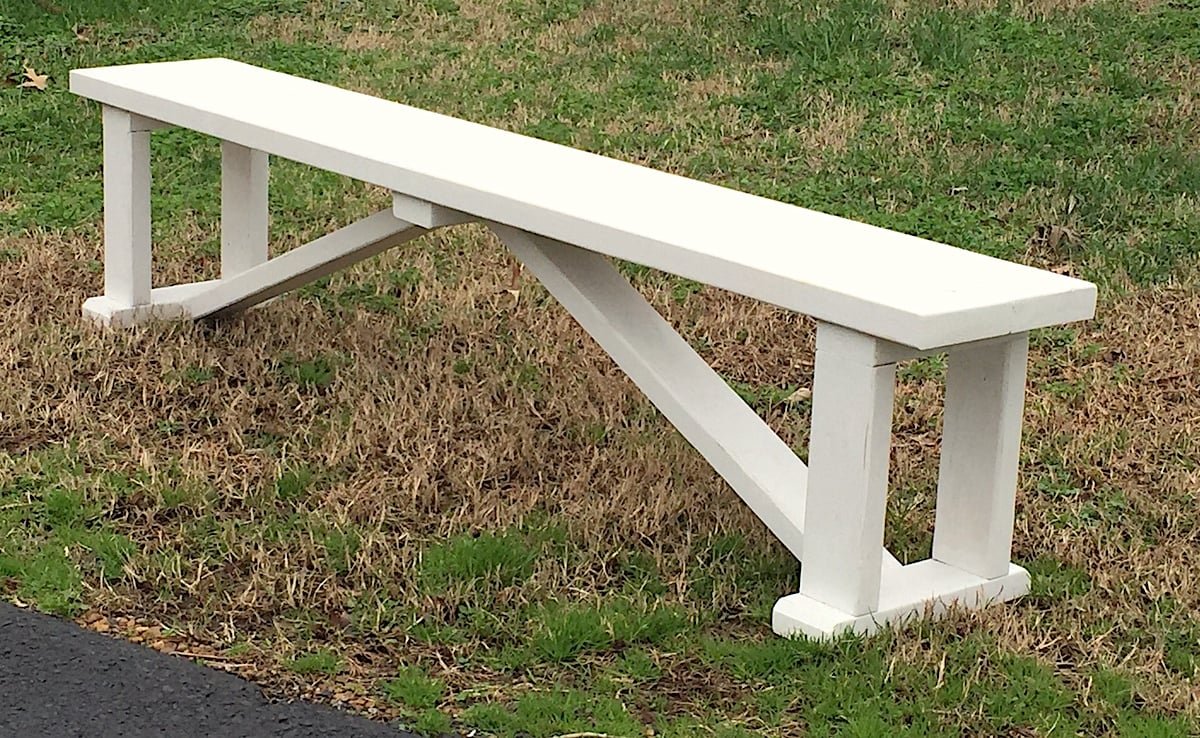
Specifications
| Project type | Bench |
|---|---|
| Room | dining room |
| Style | Farmhouse Furniture |
| Difficulty | Beginner Projects |
Dimensions
Use the size-specific shopping and cut lists below.
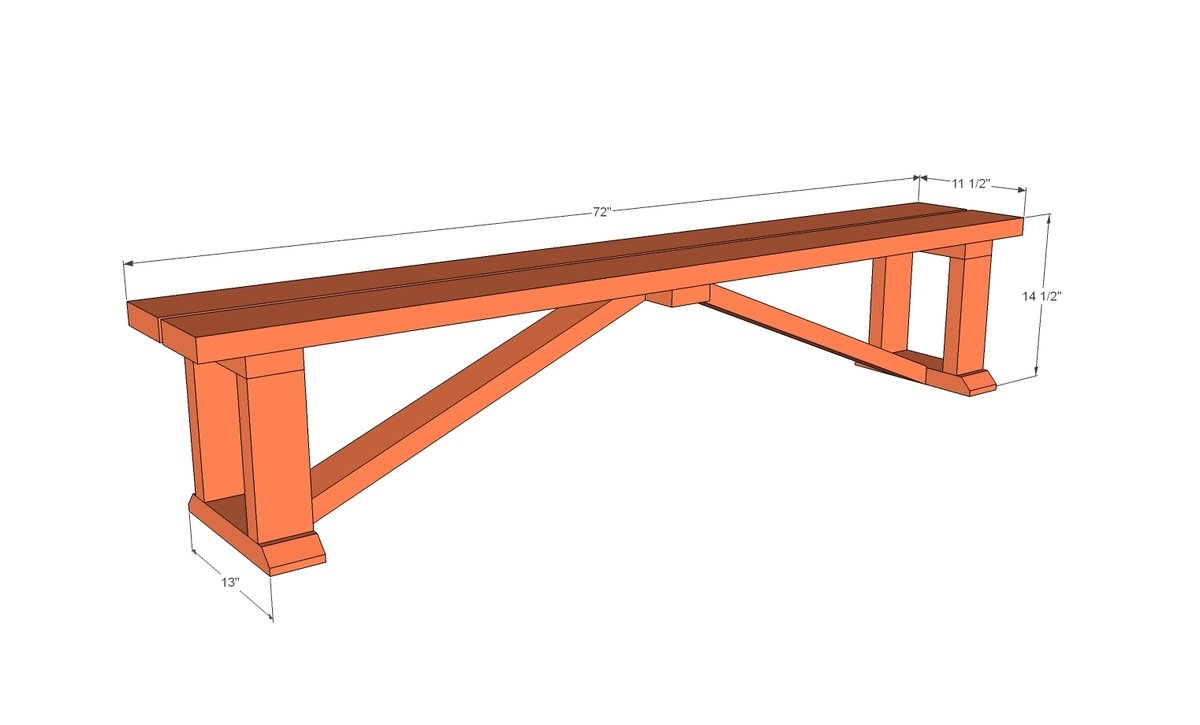
Shopping List
- 1 - 2x6 @ 12 feet long (you can cut this one into 2 - 6' long boards for easier transporting)
- 2 - 2x4 @ 8 feet long
- 2-1/2" self tapping star bit screws (try the exterior deck ones) or 2-1/2" pocket hole screws (for Kreg Jig users)
Cut List
- 3 - 2x4 @ 10" long (under seat boards)
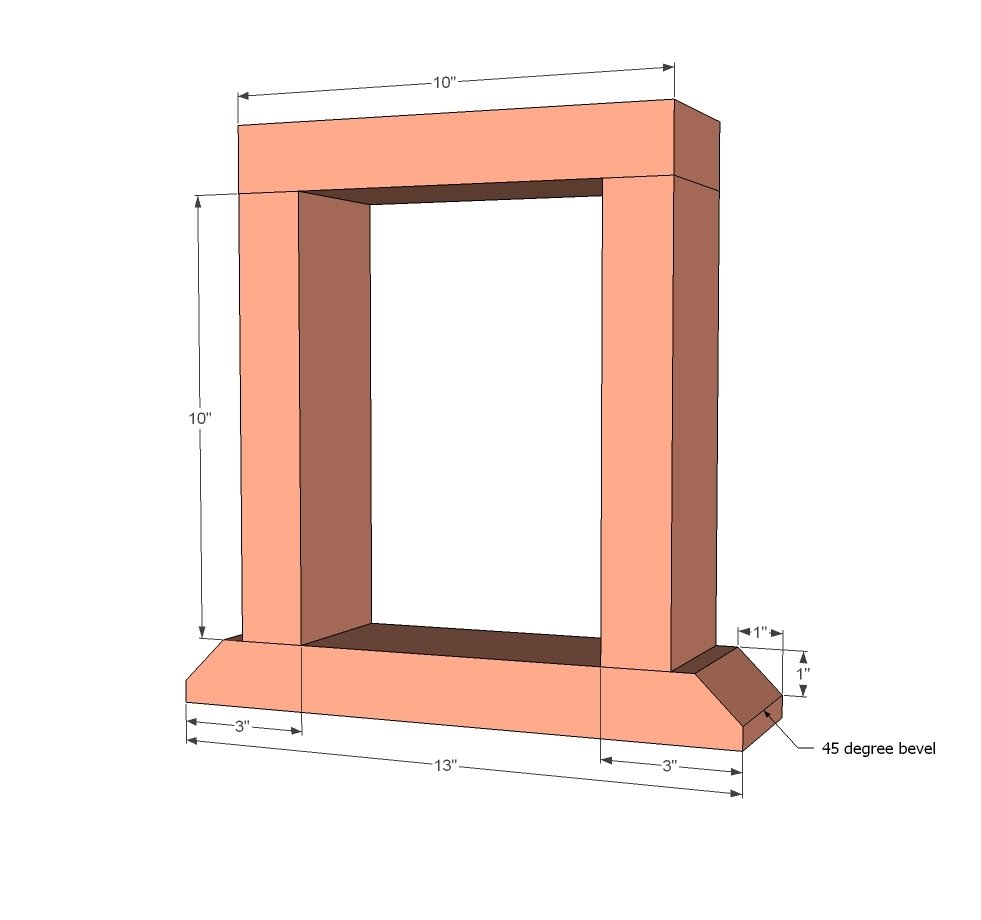
- 4 - 2x4 @ 11" long (legs - note that this is labeled incorrectly in diagram 1 and should be 11" instead of 10")
- 2 - 2x4 @ 13" long (leg bases)
- 2 - 2x6 @ 72" (seat boards)
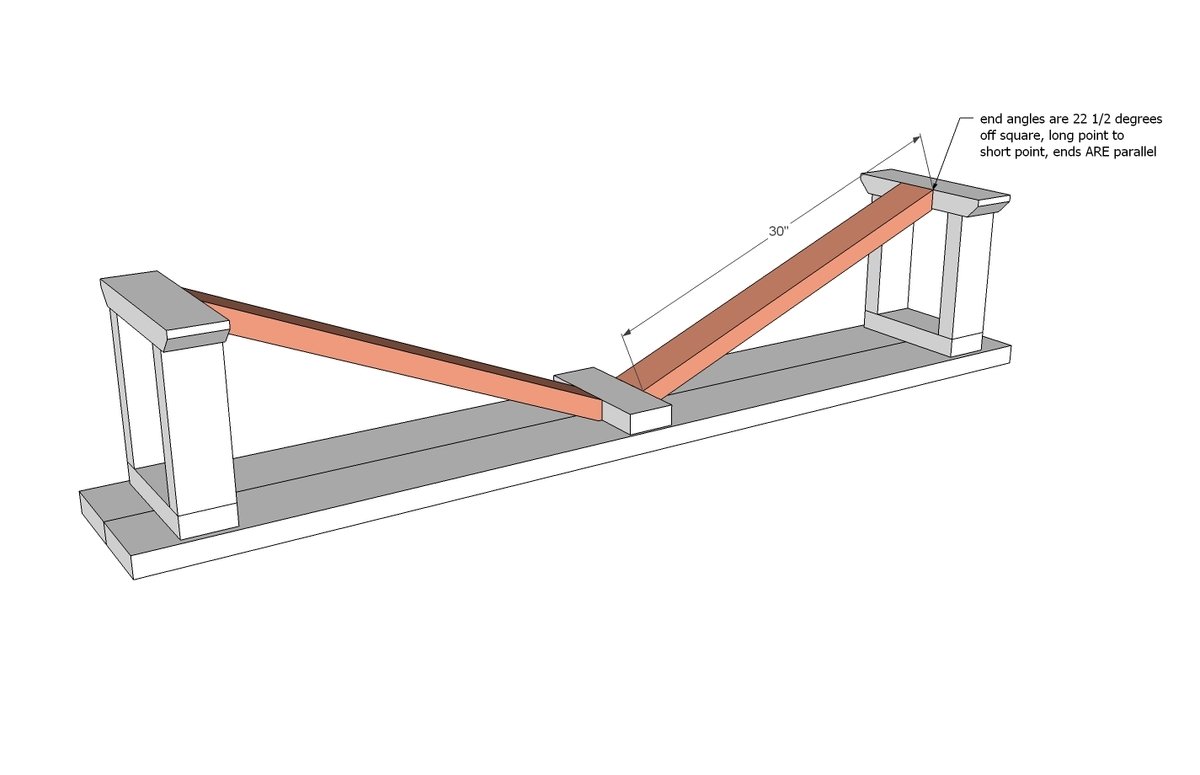
- 2 - 2x4 @ 30" long - long point to long point, both ends cut at 22 1/2 degrees off square BEVEL, ends ARE parallel (angled braces) NOTE: You may wish to cut these later to get the angles just right.
Tools
- measuring tape
- pencil
- safety glasses
- drill
- compound miter saw
- sander
Step-by-step Instructions
First, build your leg sets - the vertical legs are 11" long (not 10" as shown in diagram).
You can attach with countersunk screws (I recommend at least 2-1/2" long self tapping screws) or use 1-1/2" pocket holes and 2-1/2" pocket hole screws. Build two of the leg bases.
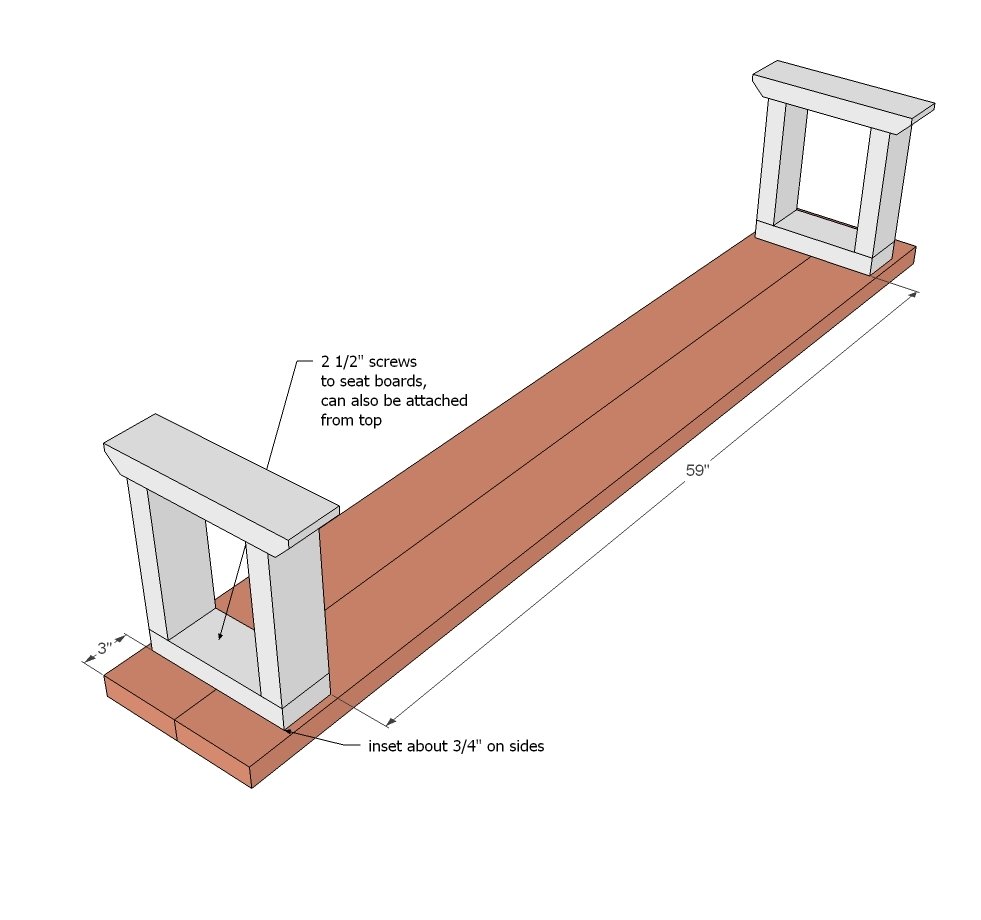
Step 2
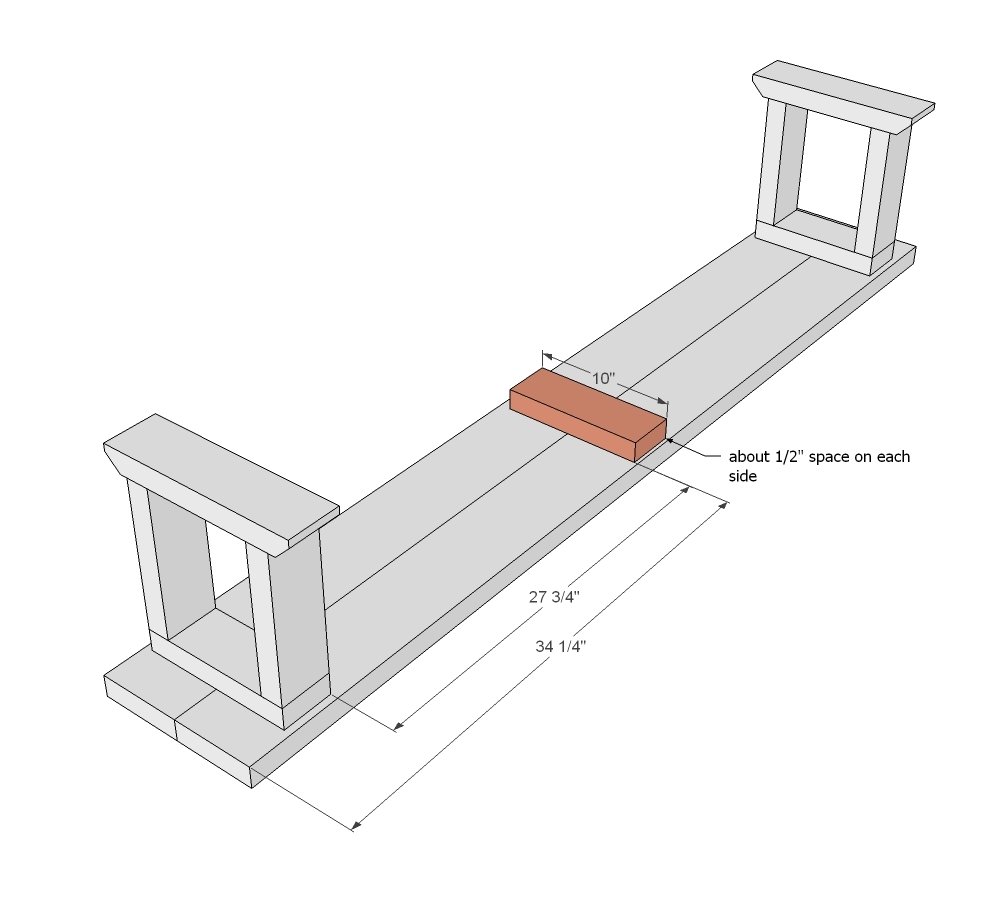
Attach leg bases to the seat boards - use 2-1/2" screws and glue. Kreg jig users - I'd just use the 2-1/2" pocket hole screws to attach here. NOTE: Overhang will vary depending on width of your 2x6s, so split the difference.
Step 3
Attach center board, same as the legs, centered on the 2x6s.
Step 4
Fit the cross bracing boards, and attach in place. Pocket holes are the easiest way to go here, but you could also simple screw at an angle into the legs and the center support board. Enjoy your bench!
Finishing
Sand all surfaces, starting with a medium grit and finishing with fine. Wipe off the dust, fill any holes or gaps with wood filler, and sand smooth once dry. Apply primer if you're painting, then finish with your choice of paint or stain and seal with a durable clear topcoat. For outdoor projects, use exterior-rated primer, paint or stain, and sealer so the piece stands up to the weather.
Source (temporary): https://www.ana-white.com/woodworking-projects/15-diy-farmhouse-bench-happier-homemaker