18" Kitchen Cabinet Drawer Base
build your own kitchen cabinets with
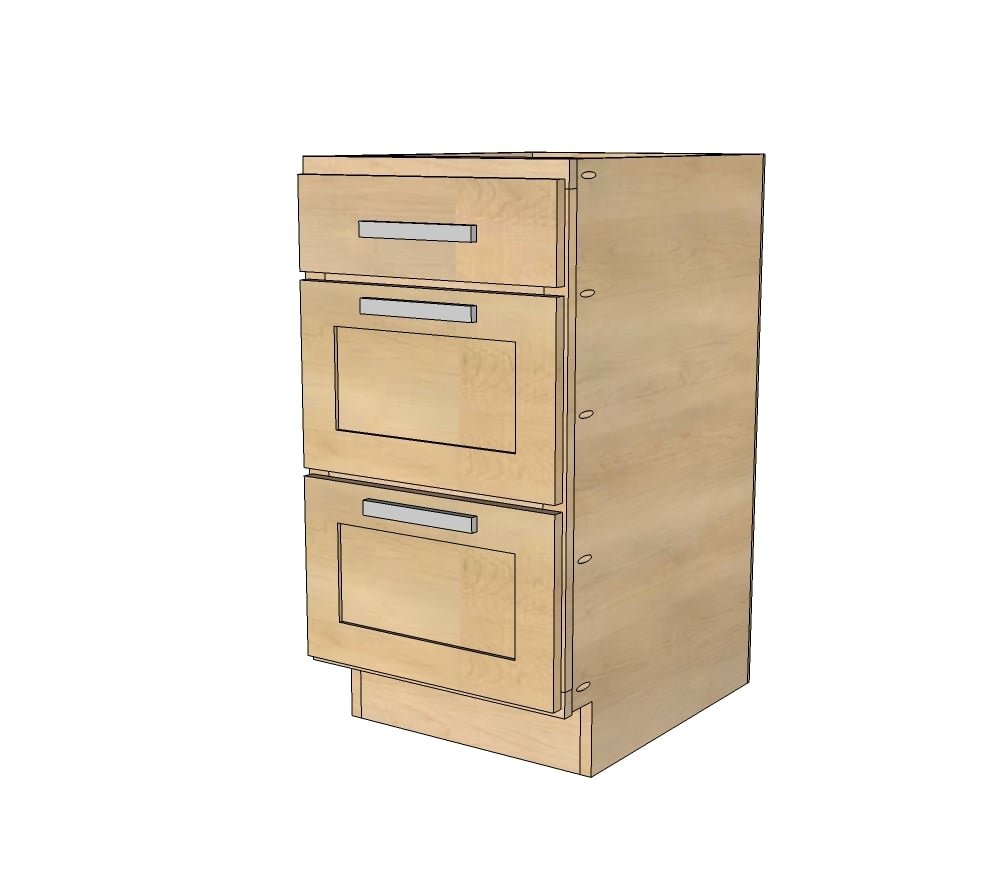
Specifications
| Project type | Kitchen Cabinet Plan, Accessories and Serving |
|---|---|
| Room | kitchen |
| Difficulty | Advanced |
Dimensions
Use the size-specific shopping and cut lists below.
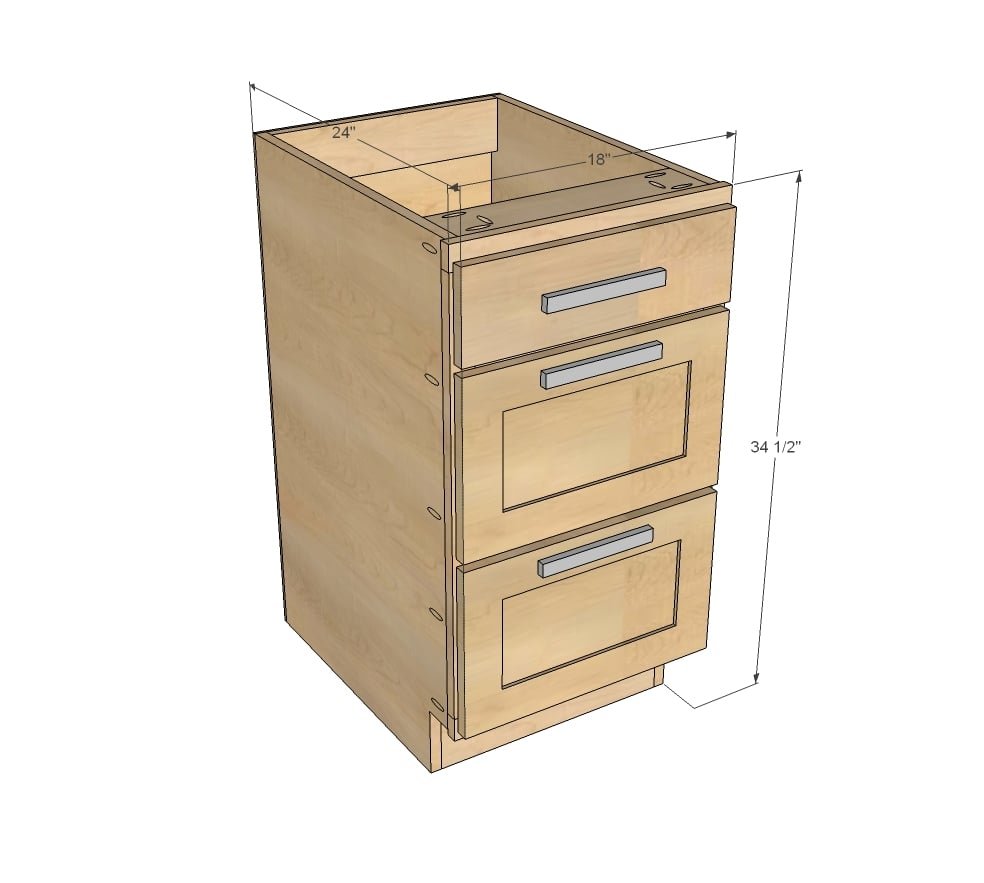
Shopping List
3/4" plywood ripped into strips 22 1/4" long (for sides and shelves)
3/4" plywood scrap from ripping sides and shelves about 3" wide (for top supports)
3/4" plywood ripped into strips 5" long (for base supports - use cheaper plywood here)
1x2s for face frames
1/4" plywood (for backs)
1-1/4" pocket hole screws
3/4" finish nails
3 sets of drawer slides with interior max length of 21-1/2" if attached to top support, 22-1/4" if attached to sides or back plywood (we used metaboxes)
Cut List
CARCASS
2 - 3/4" plywood @ 22 1/4" x 34 1/2" (side panels)
1 - 3/4" plywood @ 22 1/4" x 16" (bottom shelf)
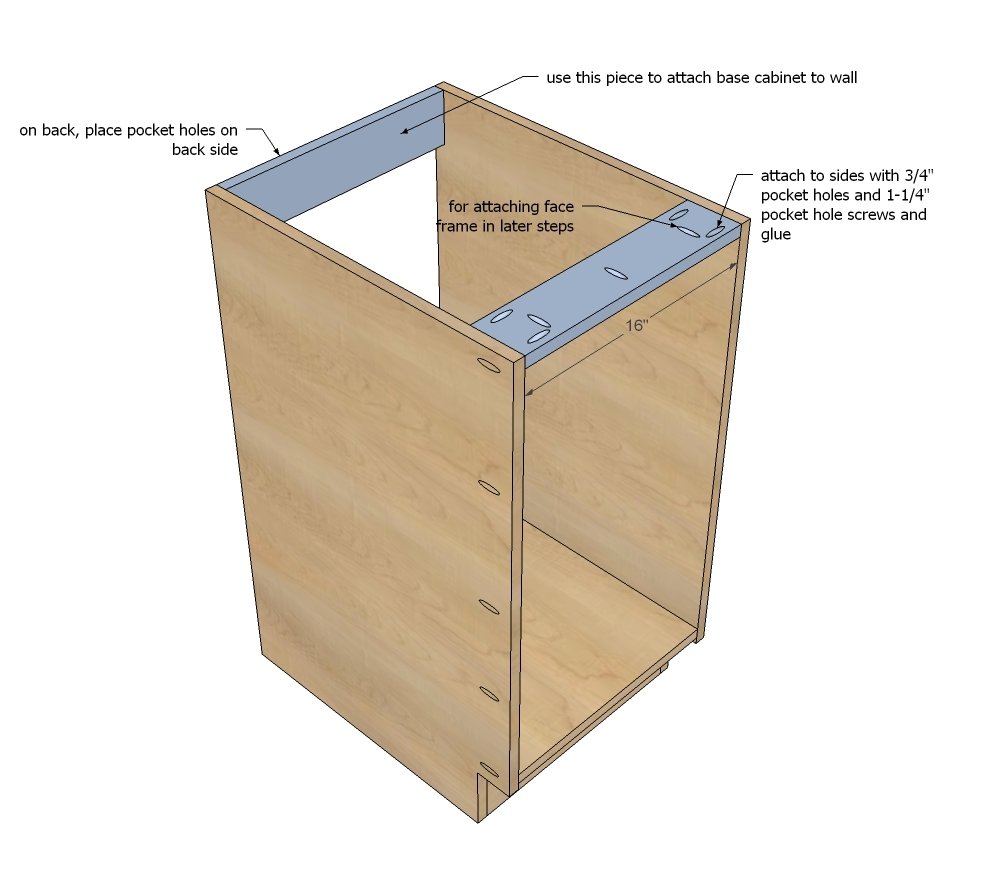
2 - 3/4" plywood @ 5" x 16" (bottom supports)
2 - 3/4" plywood @ 3 1/2" (can vary) x 16" (top supports)
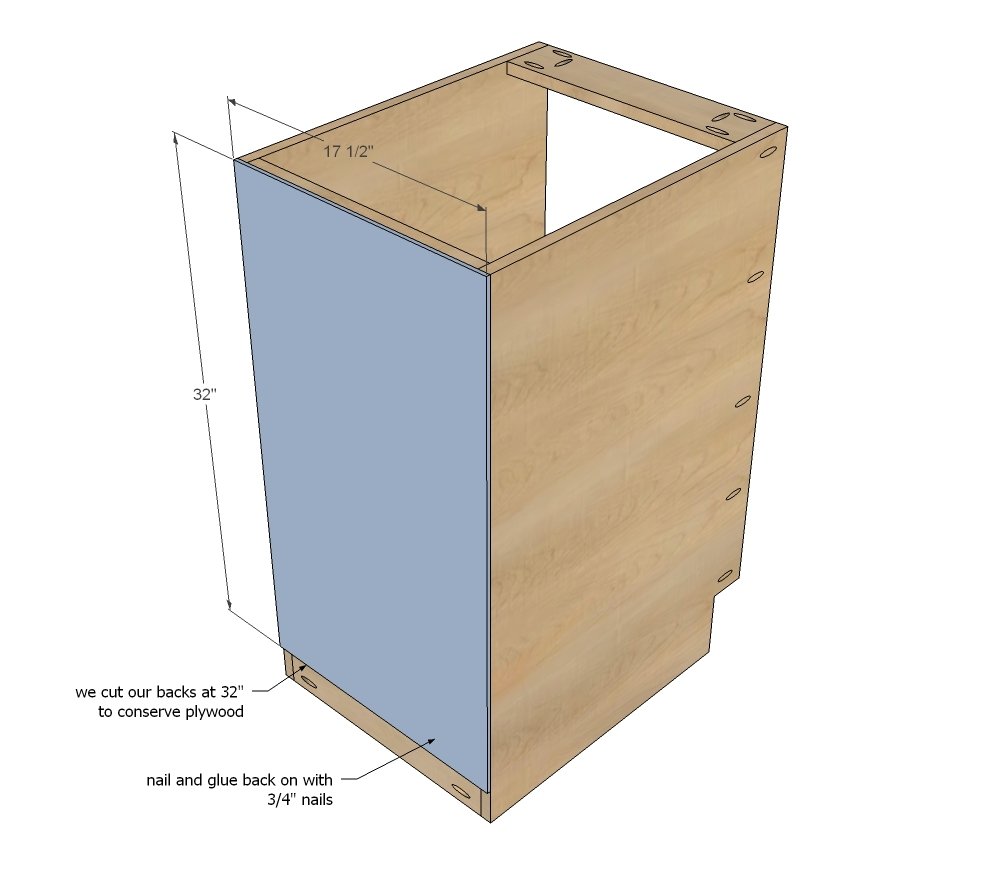
1 - 1/4" plywood @ 32" x 17 1/2" (back)
FACE FRAME
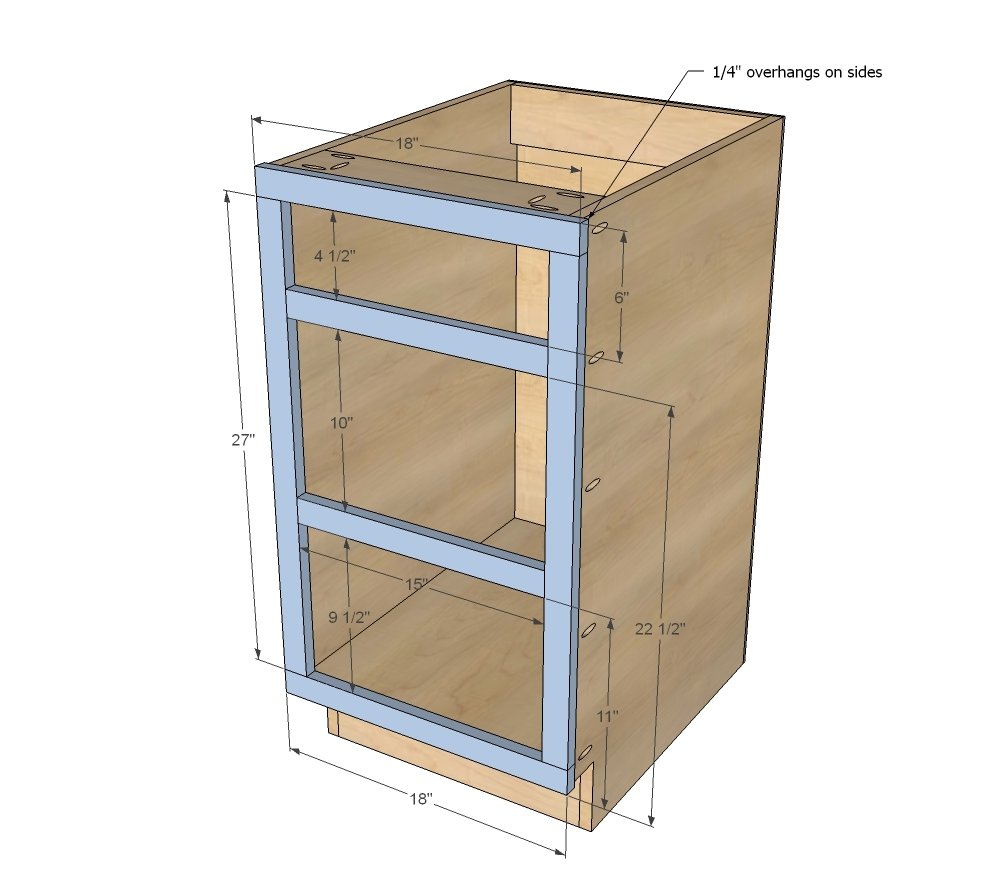
2 - 1x2 @ 27"
2 - 1x2 @ 18"
2 - 1x2 @ 15"
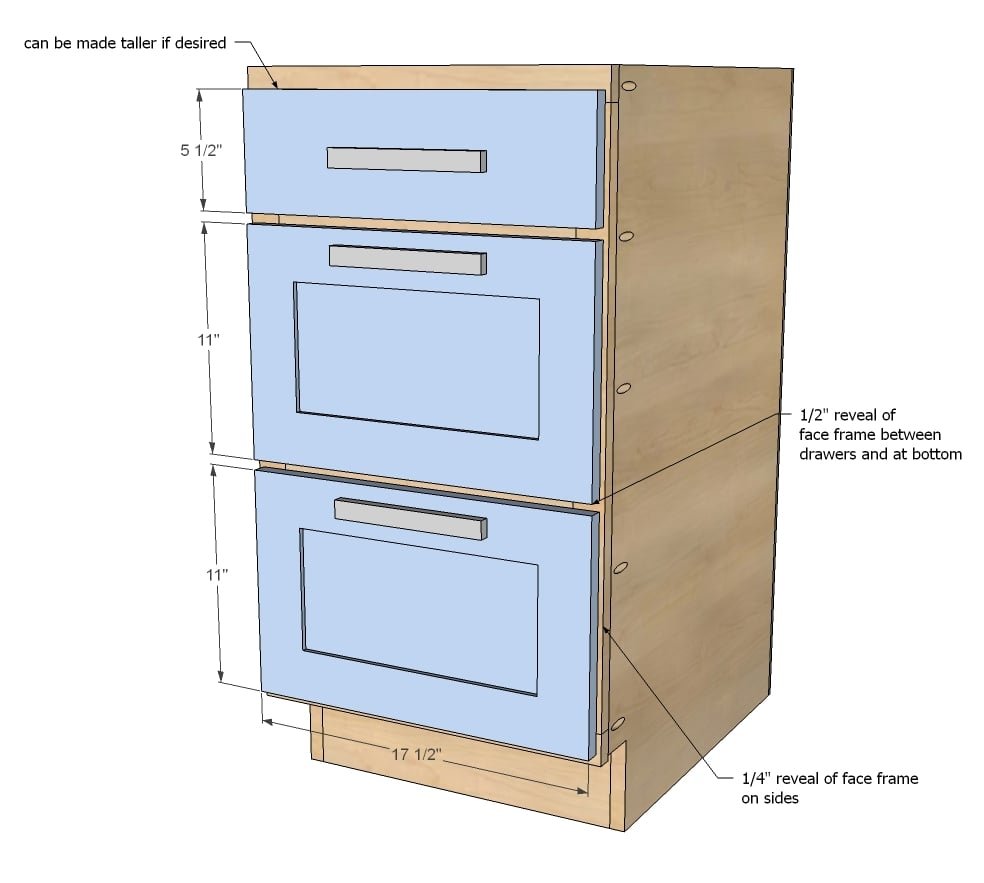
DOOR/DRAWER FACE for FULL OVERLAY (1-1/4")
5 1/2" x 17 1/2" (drawer face)
11" x 17-1/2" (large drawer faces - you'll need 2)
Tools
- measuring tape
- square
- pencil
- safety glasses
- hearing protection
- kreg-jig
- drill
- jigsaw
- compound miter saw
- table saw
- nailer
Step-by-step Instructions
Before you begin building - we highly recommend watching this video on making base kitchen cabinets:
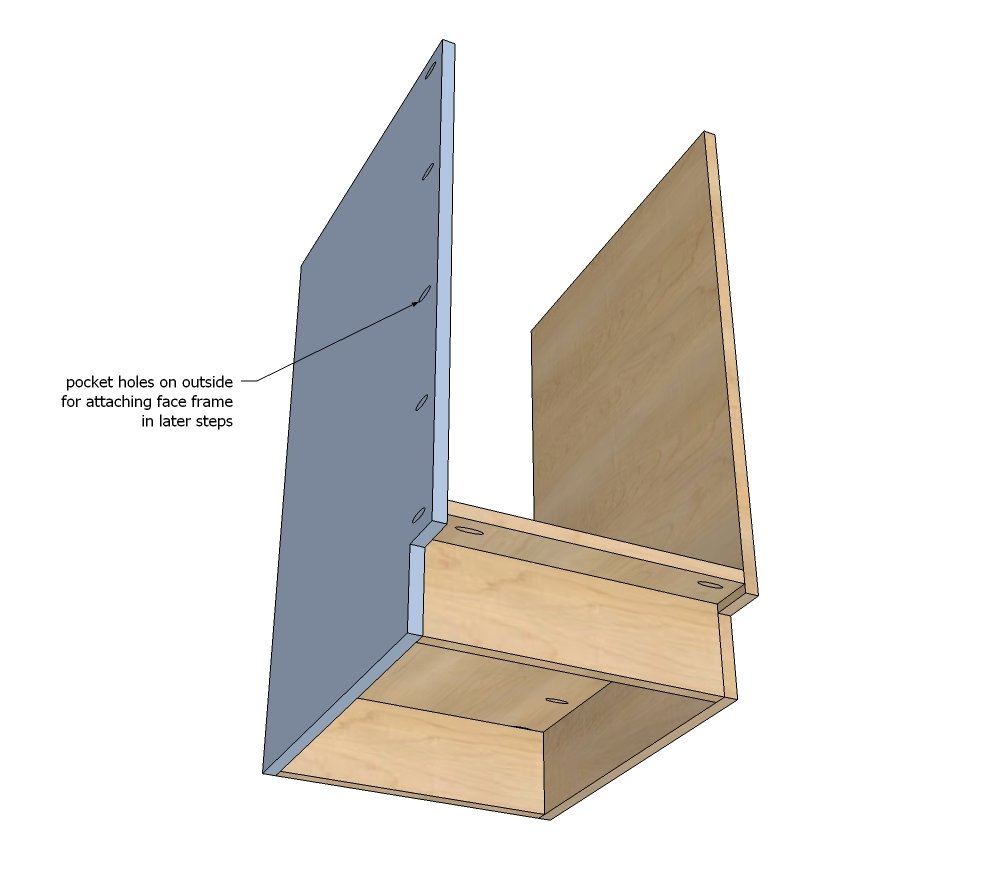
Start by ripping your plywood down to size - for the side panels, we choose to rip at 22-1/4" wide for a finished cabinet, back to door front of 24". This width can vary - just make sure all of your cabinets are made the same depth. Cut toekicks out with a jigsaw - we made a toekick pattern block and used it to cut out all the sides. Drill 3/4" pocket holes along OUTSIDES of side panels - remember the two panels are in mirror - for attaching face frame in later steps.
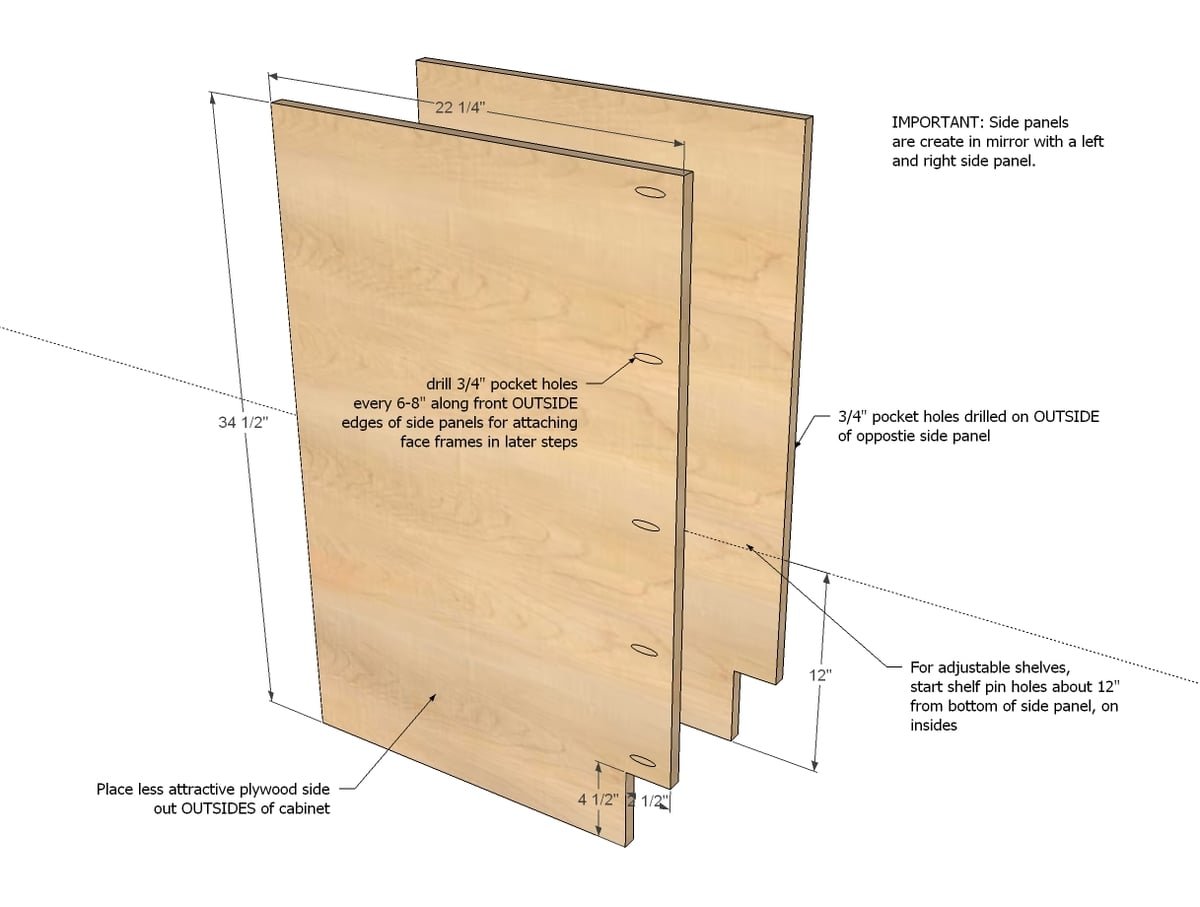
Step 2
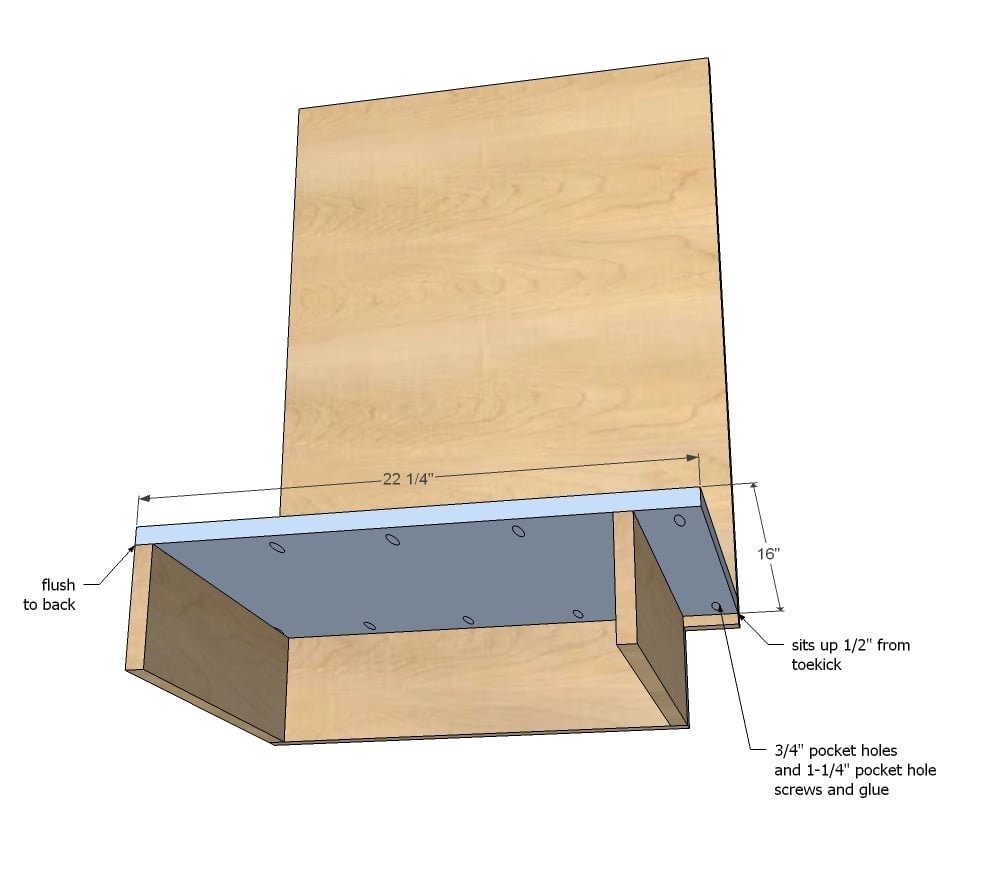
Attach the two base supports to one side panel - pocket holes on side panel are on OUTSIDE.
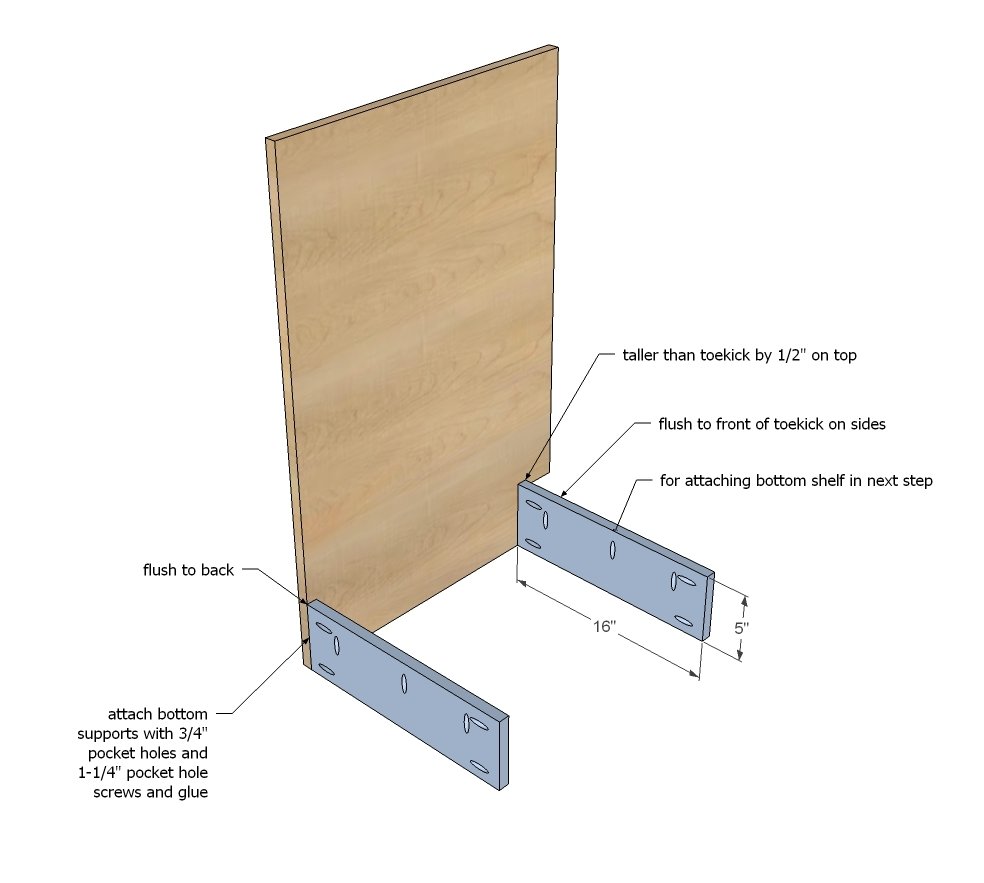
Step 3
Then attach bottom shelf to bottom supports and first side panel.
Step 4
Next, attach remaining side panel to bottom supports and shelf.
Step 5
Step 6
Add the back with glue and finish nails or staples.
Step 7
Build your face frame separately, and then attach to front of cabinet with 3/4" pocket holes. One drawer opening is slightly bigger than the other - this is done on purpose so the drawer facess are the same size, with the bottom 1x2 rail centered between the drawers. Check this video out on building and attaching face frames:
Step 8
For our cabinets, we choose to use Metabox drawer slides, but it's really the same process as using standard drawer slides - you can check out how we built drawers here. Build your drawers to fit your openings and drawer slides, and install drawers. Then attach drawer faces - shown above for full overlay doors/drawers - to the drawers.
Finishing
Sand all surfaces, starting with a medium grit and finishing with fine. Wipe off the dust, fill any holes or gaps with wood filler, and sand smooth once dry. Apply primer if you're painting, then finish with your choice of paint or stain and seal with a durable clear topcoat. For outdoor projects, use exterior-rated primer, paint or stain, and sealer so the piece stands up to the weather.
Source (temporary): https://www.ana-white.com/woodworking-projects/18-kitchen-cabinet-drawer-base