1x12 Cubby Bench
for an easy-to-build entryway bench! This simple organizer is made entirely from affordable 1x12 pine boards—no fancy tools needed. It features three roomy cubbies perfectly sized for storage bins, plus open upper shelves for grab-and-go items. A great beginner project that adds tons of function to any entryway, mudroom, or hallway. feature step by step drawings, shopping and cut list - everything you need to build today.
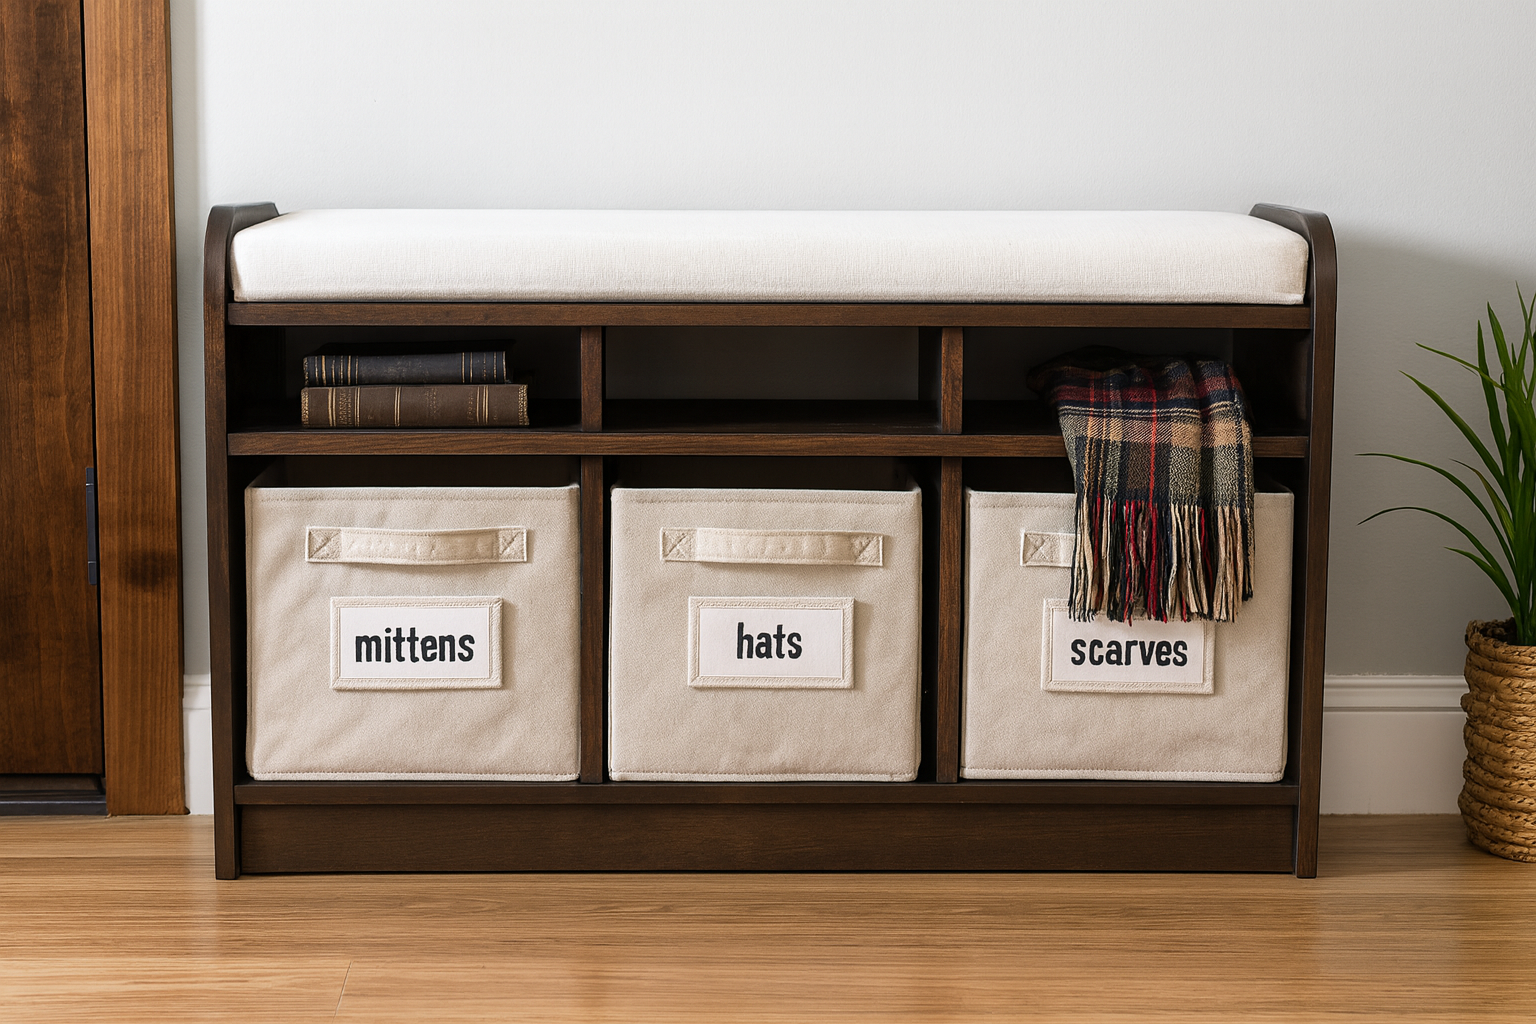
Specifications
| Project type | Bench |
|---|---|
| Room | Entryway and Mudroom |
| Style | Cottage Style Furniture Plans |
| Difficulty | Beginner Projects |
| Estimated cost | $20 - $50 |
Dimensions
Use the size-specific shopping and cut lists below.
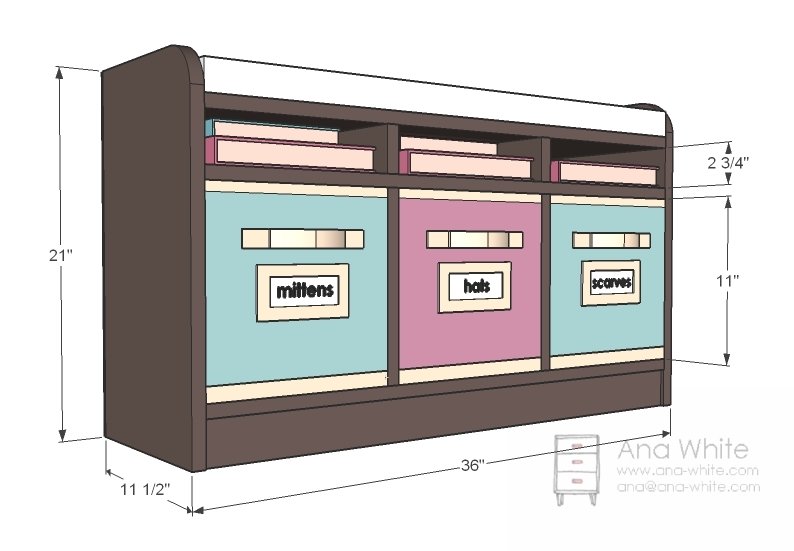
Shopping List
- 2 – 1×12 @ 8 feet long
- 1 – 1×3 @ 8 feet long
- 1/4″ plywood for the back (optional)
- 2″ screws or 1 1/4″ pocket hole screws
- 1 1/4″ brad nails
- wood glue
- wood filler
- sandpaper
- paint and primer
- 3 Fabric Drawers (11" size recommended)
Cut List
- 2 – 1×12 @ 21″ (Sides)
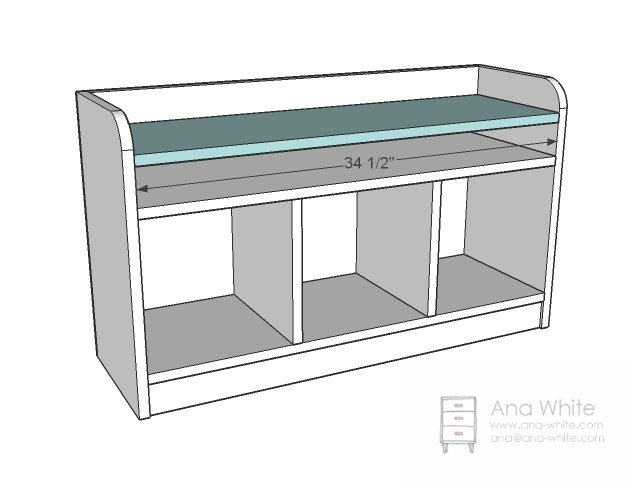
- 3 – 1×12 @ 34 1/2″ (Shelves)
- 2 – 1×3 @ 34 1/2″ (Footer/Back)
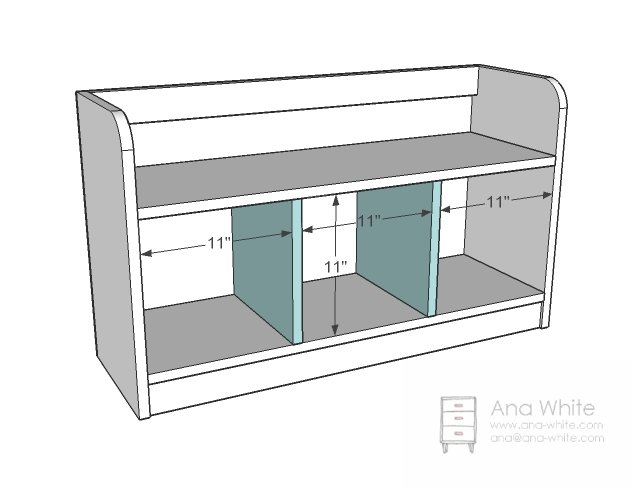
- 2 – 1×12 @ 11″ (Cubby Dividers)
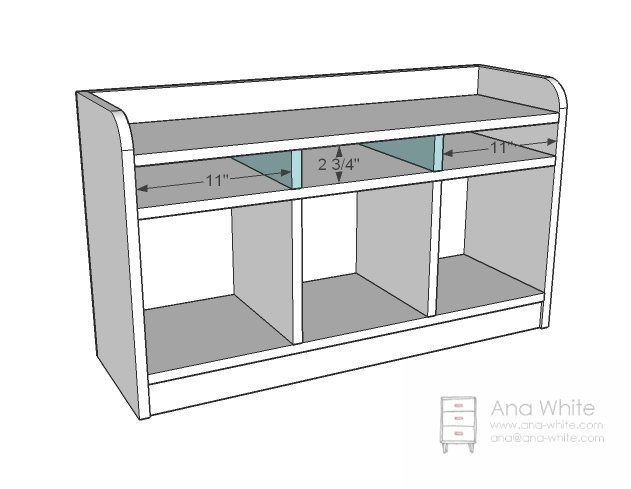
- 2 – 1×12 @ 2 3/4″ (Top Cubby Dividers)
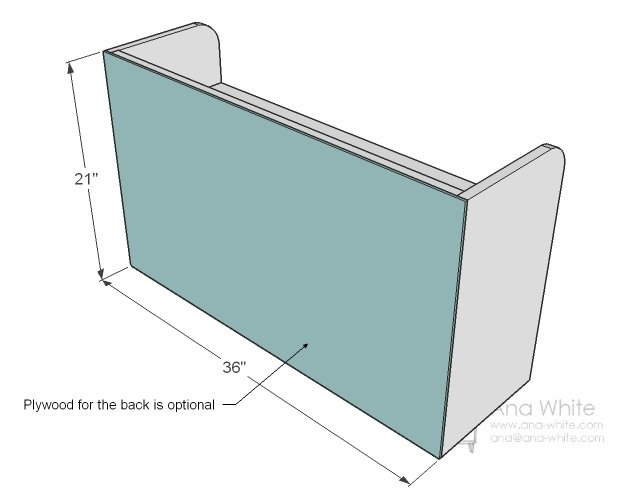
- 1/4″ plywood or other backing @ 36″ x 21″ (Back, optional)
Tools
- measuring tape
- square
- pencil
- safety glasses
- hearing protection
- drill
- circular saw
- jigsaw
- sander
- level
- countersink drill bit
Step-by-step Instructions
Box
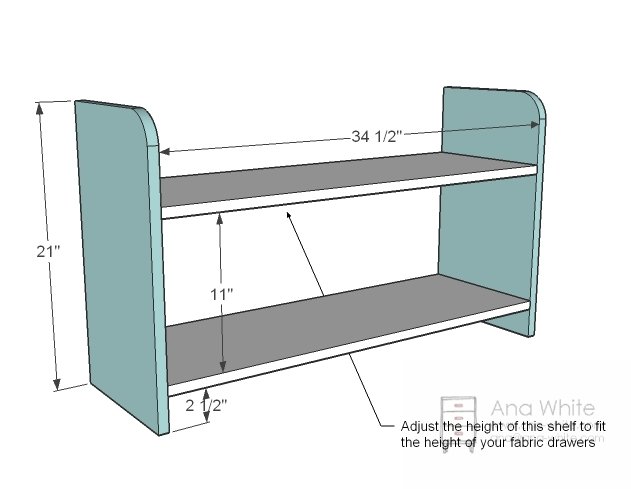
Start by rounding off the top corners of the sides with a jigsaw. Clamp the two cut edges together and sand as one to get the same curve. Then mark then sides for the placement of the shelves. Predrill holes and attach the shelves to the sides with 2″ screws and glue or pocket hole screws and glue.
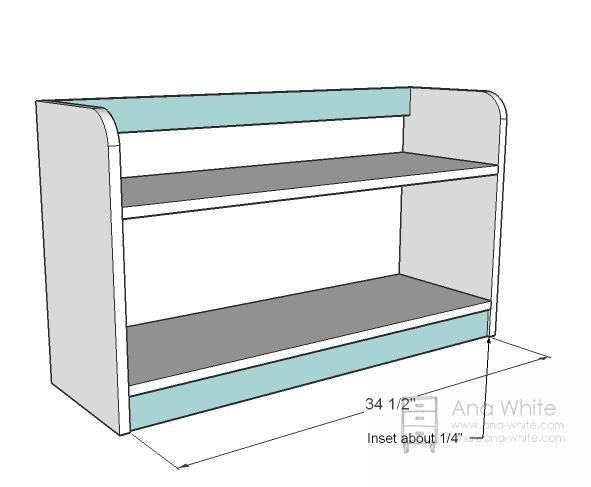
Front/Back
Attach the front and back as shown in the diagram. For the bottom piece, make sure you also attach from the top into the top edge of the footer.
Back
Attach the back with 1 1/4″ finish nails and glue. If you have some smaller nails on hand, attach to the top. Otherwise, glue and clamp in place. Don’t worry, we’ll be adding more shelves to help with attaching the back better. The back is also optional.
Cubby Dividers
This should be pretty easy – just mark, place your cubby dividers in place, and predrill holes. Screw down.
Step 5
Top Dividers
Now this step isn’t so much as tricky, but will require some trust in glue. Measure out the placement of the final dividers and apply glue. Slide the dividers in place. Screw the dividers down through the seat and with 2″ screws. Let dry. They won’t budge. Not when the dividers are that s
Finishing
Sand all surfaces, starting with a medium grit and finishing with fine. Wipe off the dust, fill any holes or gaps with wood filler, and sand smooth once dry. Apply primer if you're painting, then finish with your choice of paint or stain and seal with a durable clear topcoat. For outdoor projects, use exterior-rated primer, paint or stain, and sealer so the piece stands up to the weather.
Source (temporary): https://www.ana-white.com/woodworking-projects/1x12-cubby-bench