1x12 Easy to Build and Hang Modular Closet System
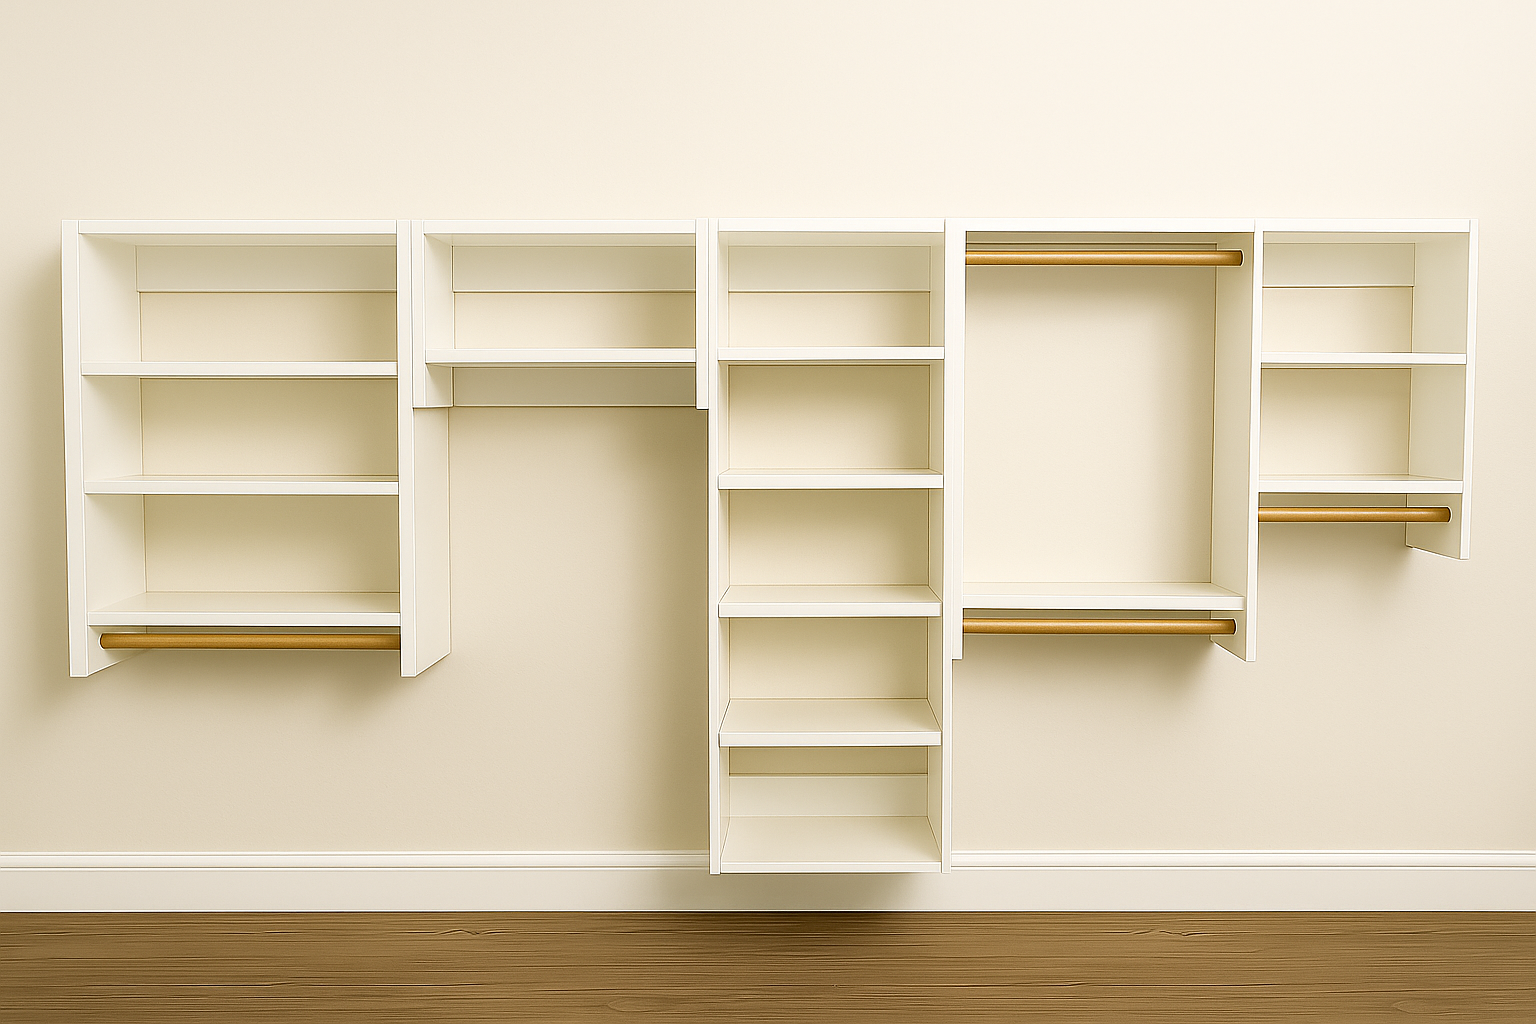
Save hundreds of dollars and build your dream closet with this modular, mix-and-match organizing system! Easy to build using 1x12 boards and basic tools, simple to hang and install,, step-by-step instructions, custom configurator to get the perfect size, and a full video tutorial!
Specifications
| Project type | Storage Woodworking Plans |
|---|---|
| Room | Closets |
| Difficulty | Intermediate |
Shopping List
- 1x12 finger joined boards
- 1x6 boards - two times the overall length of the closet (for example, for an 8 foot closet, buy two 8 foot long 1x6 boards)
- 1x3 board, entire length of closet (for example, for an 8 foot closet, buy one 1x3 board 8 feet long)
- 3" long self tapping wood construction screws (star bit)
- 1-1/4" pocket hole screws
- 1-5/8" trim screws
- wood glue
- finishing supplies to include sandpaper, paint, or stain
- closet rod sockets and 1-1/4" wood dowels for closet rods
Cut List
1 Shelf Hanging Cut List
- 2 - 1x12 @ 18-1/4" - sides
- 2 - 1x12 @ desired width of organizer, up to 36", minus 1-1/2" - shelves
- 1x6 and french cleat @ desired width of organizer
- 1-1/4" closet rod dowel cut to fit
2 Shelf Hanging Cut List
- 2 - 1x12 @ 31" - sides
- 3 - 1x12 @ desired width of organizer, up to 36", minus 1-1/2" - shelves
- 1x6 and french cleat @ desired width of organizer
- 1-1/4" closet rod dowel cut to fit
3 Shelf Hanging Cut List
- 2 - 1x12 @ 43-3/4" - sides
- 4 - 1x12 @ desired width of organizer, up to 36", minus 1-1/2" - shelves
- 1x6 and french cleat @ desired width of organizer
- 1-1/4" closet rod dowel cut to fit
5 Shelf Hanging Cut List
- 2 - 1x12 @ 64-1/2" - sides
- 6 - 1x12 @ desired width of organizer, up to 36", minus 1-1/2" - shelves
- 1x6 and french cleat @ desired width of organizer
Double Hanging Cut List
- 2 - 1x12 @ 43-3/4" - sides
- 2 - 1x12 @ desired width of organizer, up to 36", minus 1-1/2" - shelves
- 1x6 and french cleat @ desired width of organizer
- 2 - 1-1/4" closet rod dowel cut to fit
Tools
- measuring tape
- square
- pencil
- safety glasses
- kreg-jig
- drill
- compound miter saw
- table saw
- sander
- level
Step-by-step Instructions
Hanging the 1x3 Wall Cleat
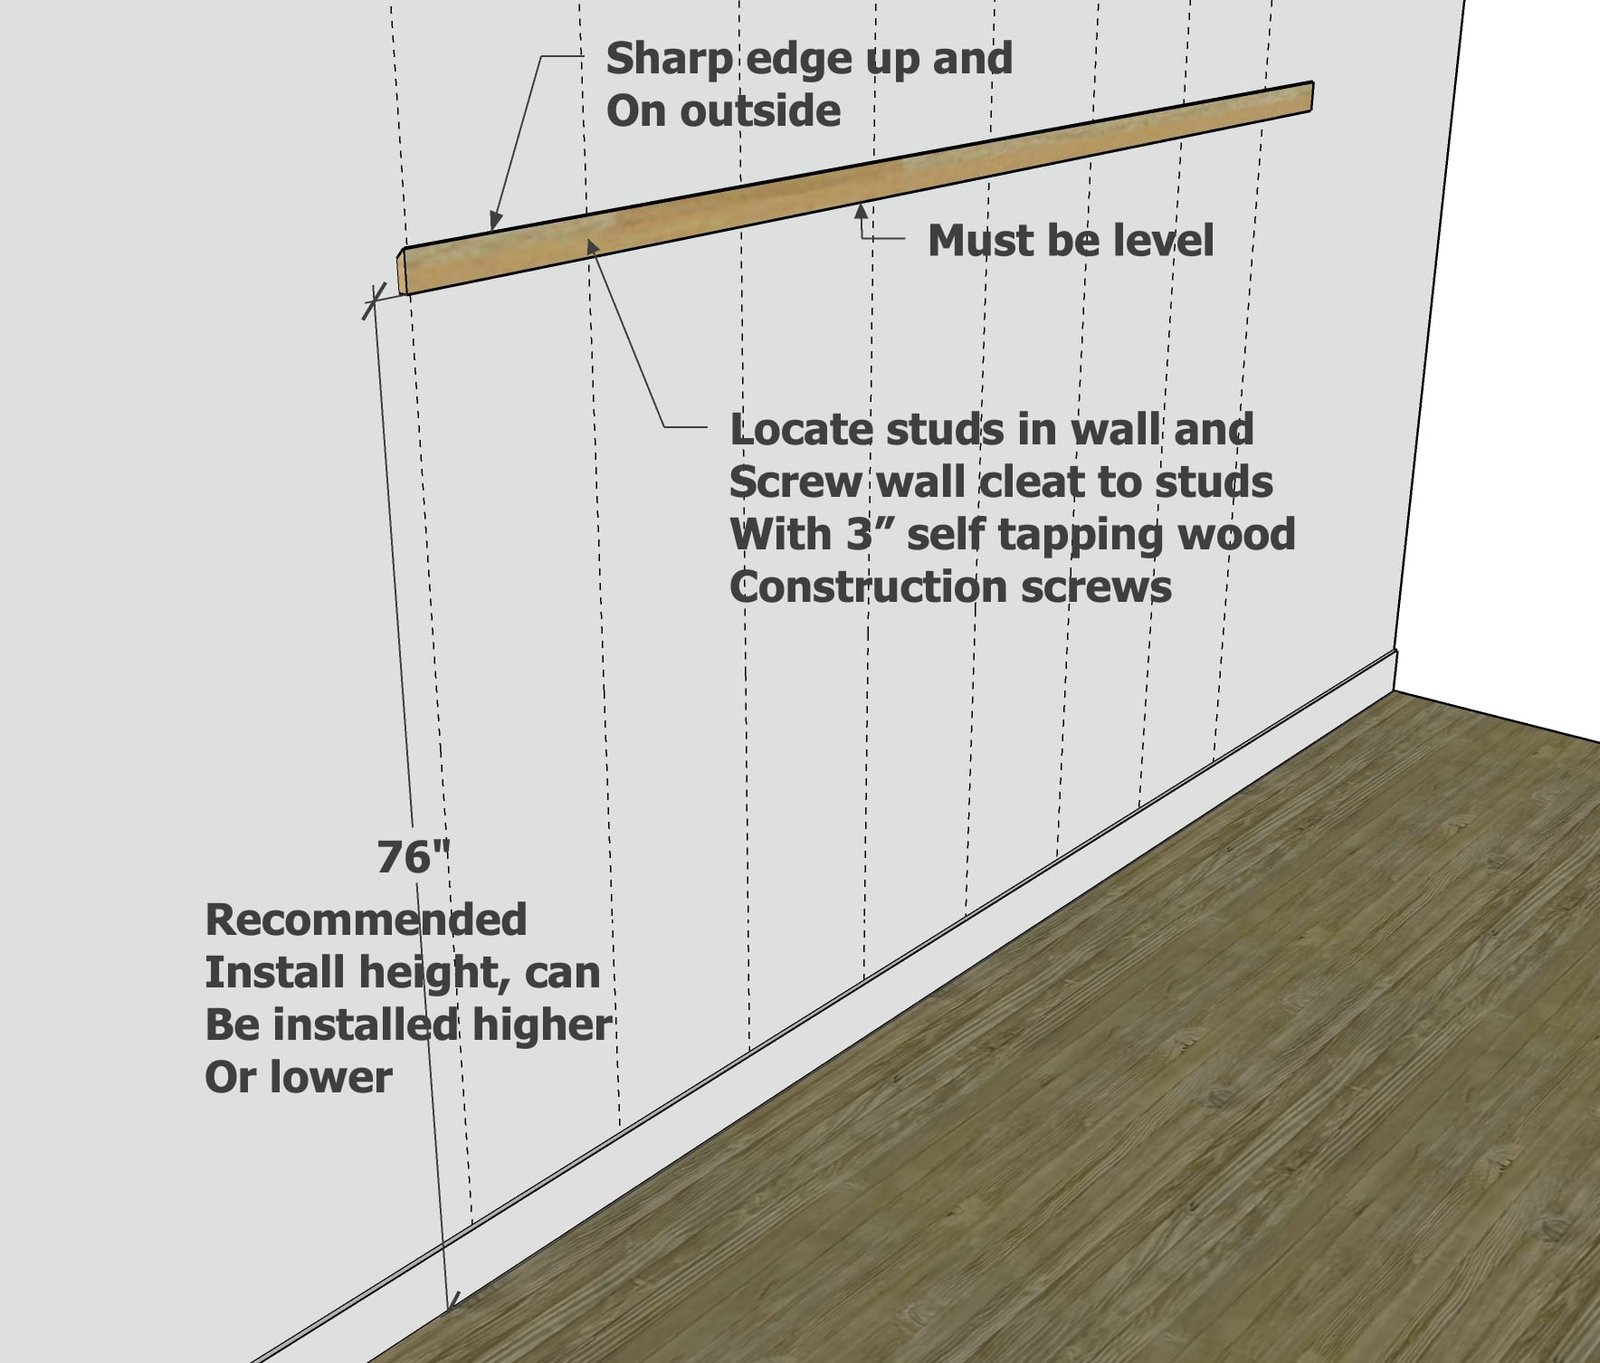
Locate studs in the wall at about the height you'd like to hang the cleat, remember the closet organizer will sit 5-1/2" ABOVE the cleat. Hanging the top of the 1x3 at 76" is a recommended height. Attach using 3" long self tapping star bit screws to studs in the wall. Use a level to make sure the cleat is hung perfectly level. Add additional screws so the cleat is attached to multiple studs in the wall. NOTE: Diagram shows some components of hanging as a French cleat as done in the video.
Closet Component Carcass Construction
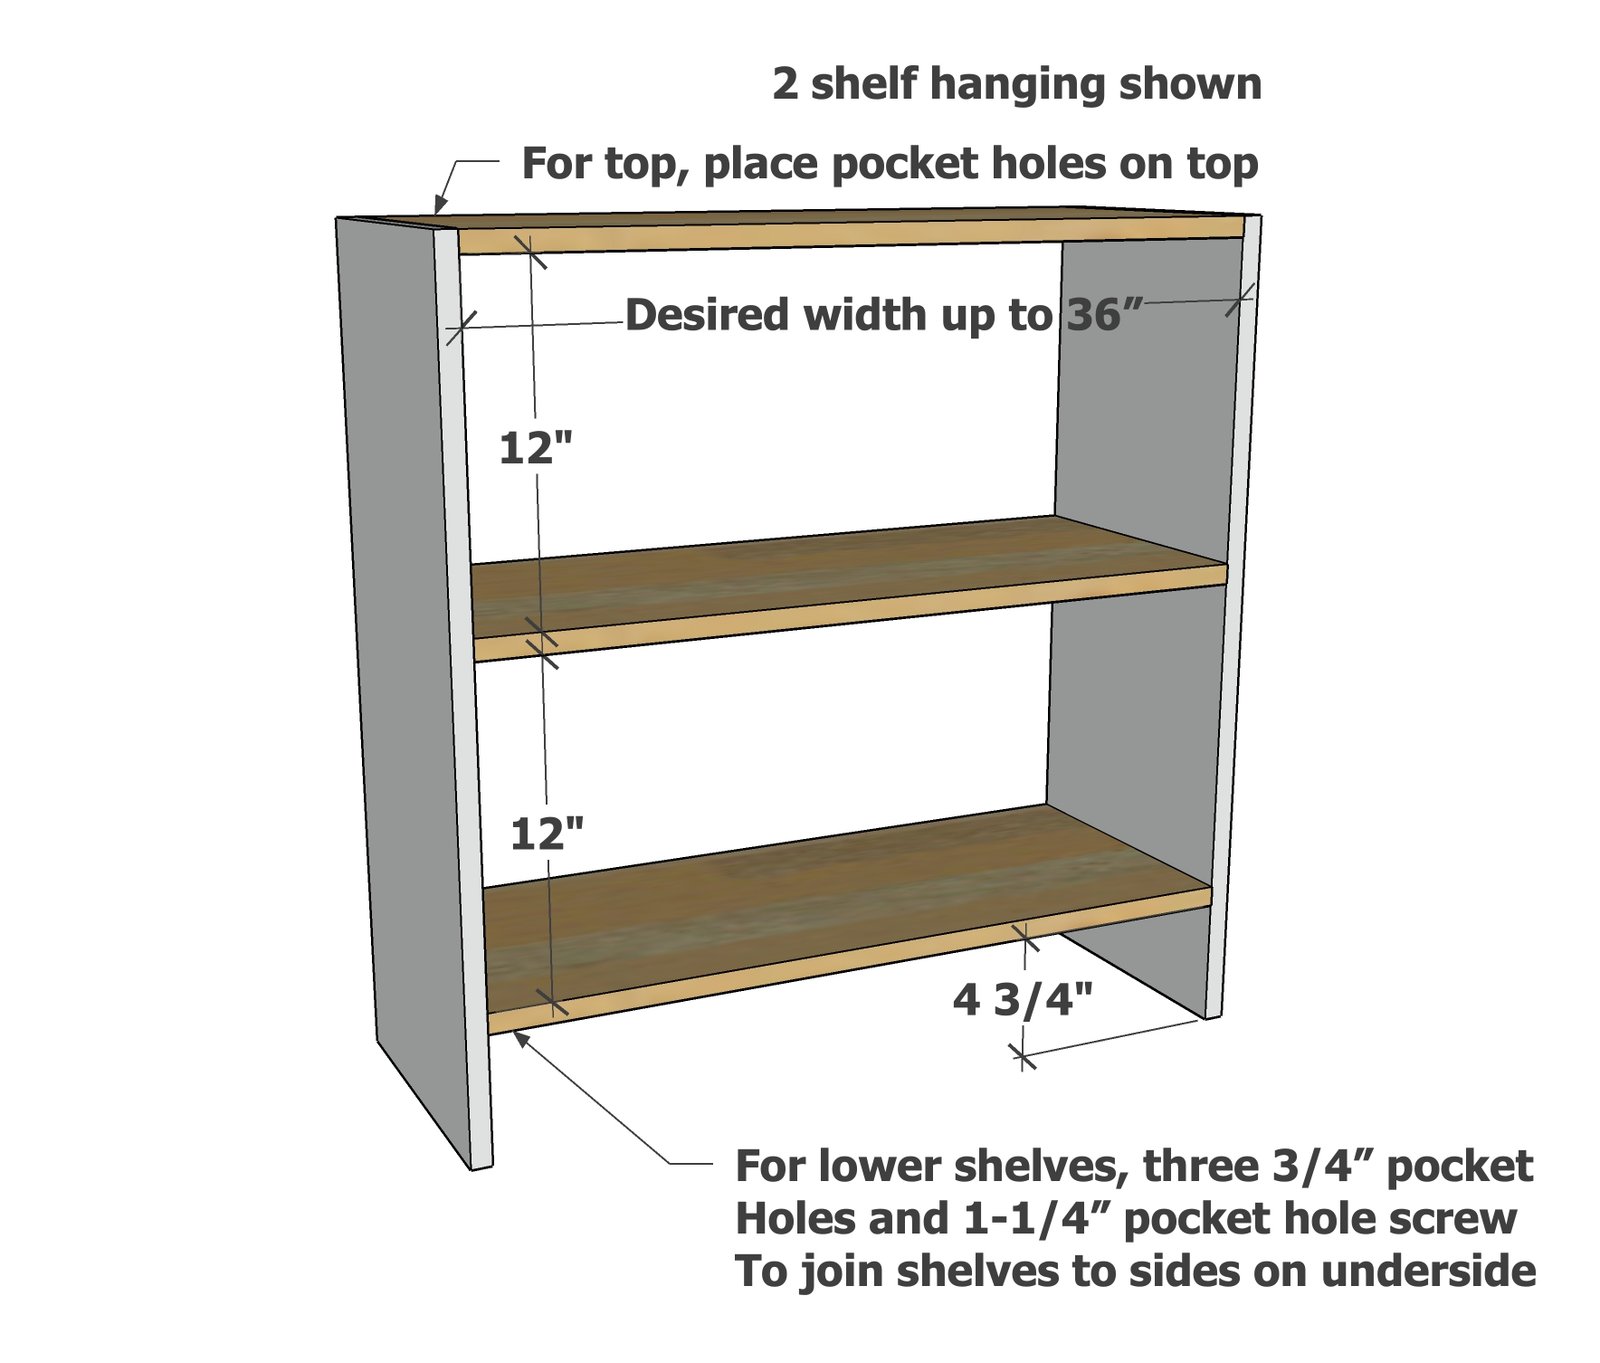
All components follow same building steps, just change the size and number of shelves to create different options. For each shelf, drill three 3/4" pocket holes on each end of each shelf boards. No pocket holes are drilled in the side boards. Attach the shelves to the side boards with 1-1/4" pocket hole screws.
Closet Component Back Pieces
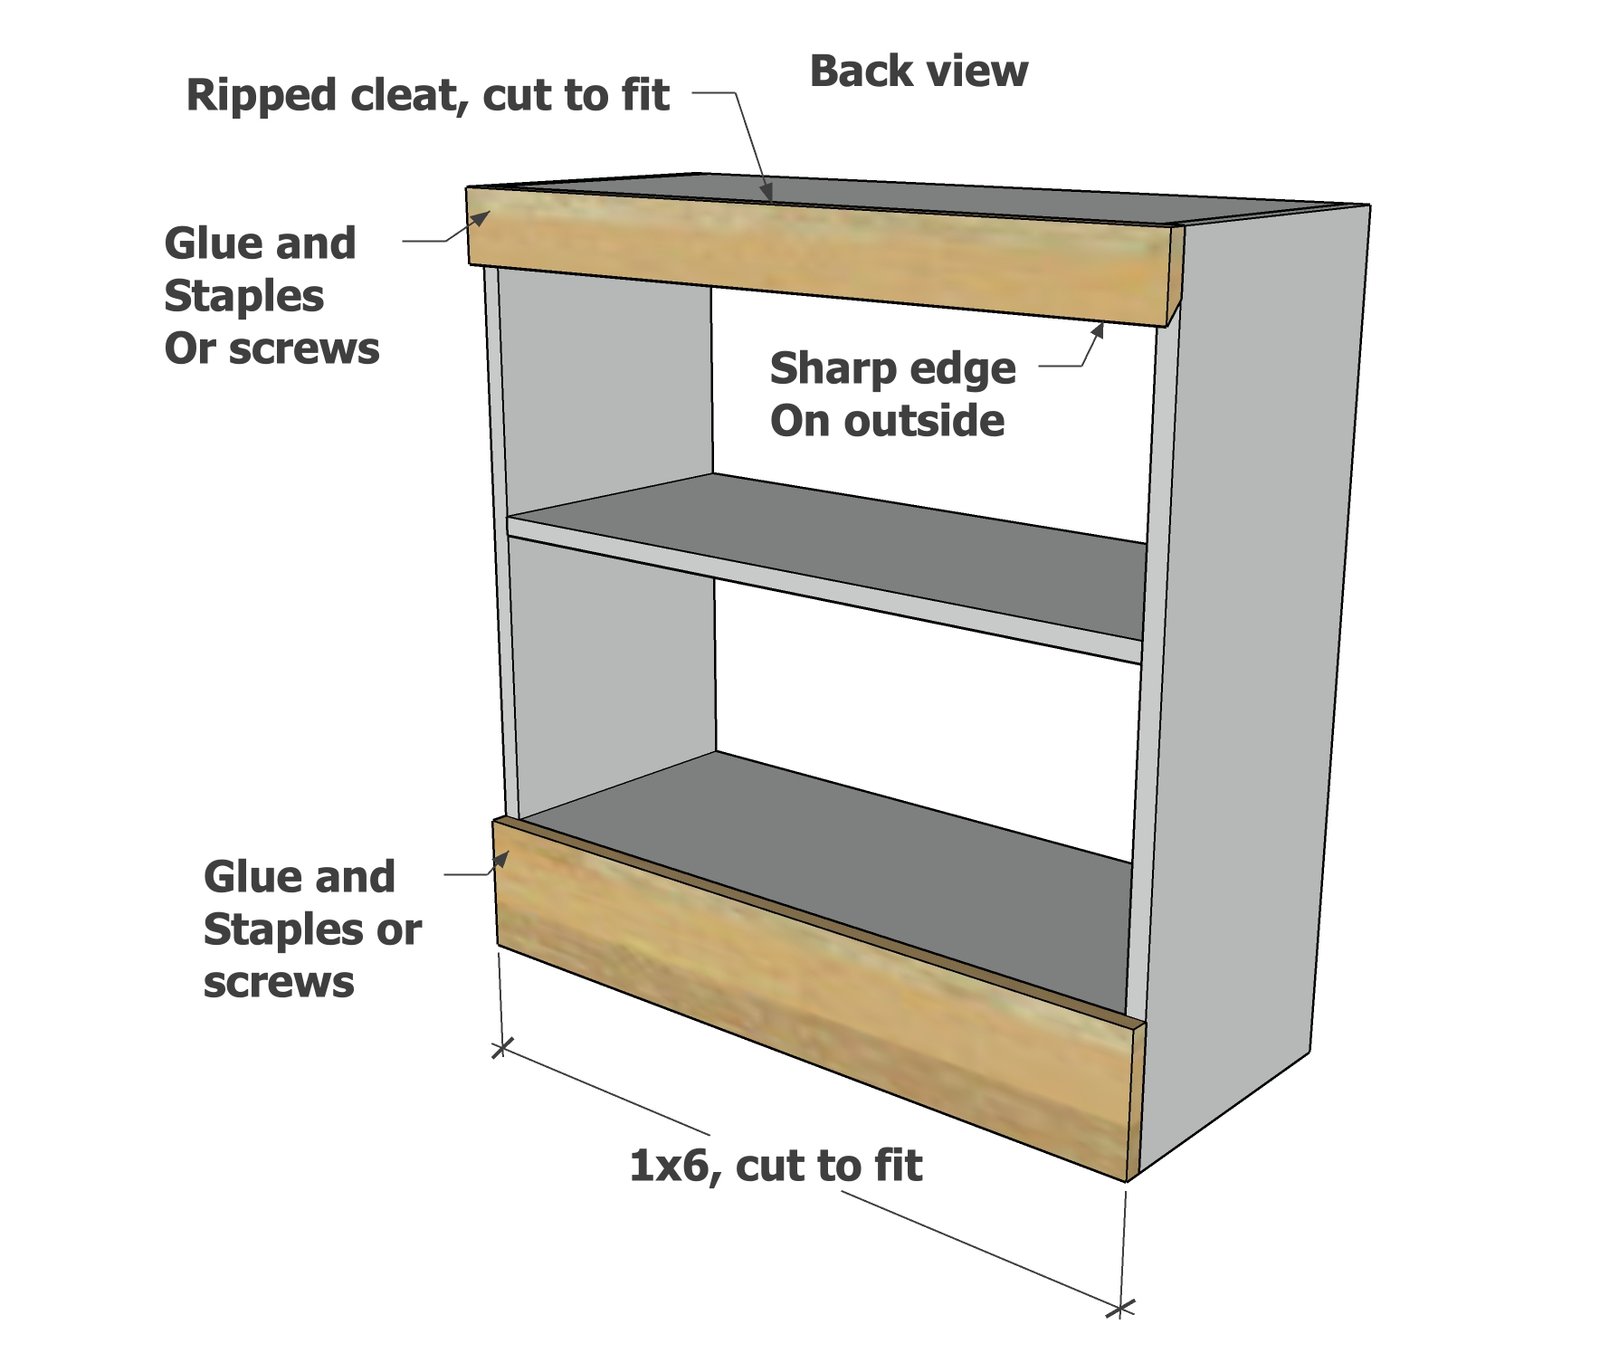
On the top and bottom of the closet components, attach with glue and trim screws 1x6 board, cut to fit. Instead of the French cleat, just attach a second full 1x6 to the top of the closet component.
Closet Rod Installation
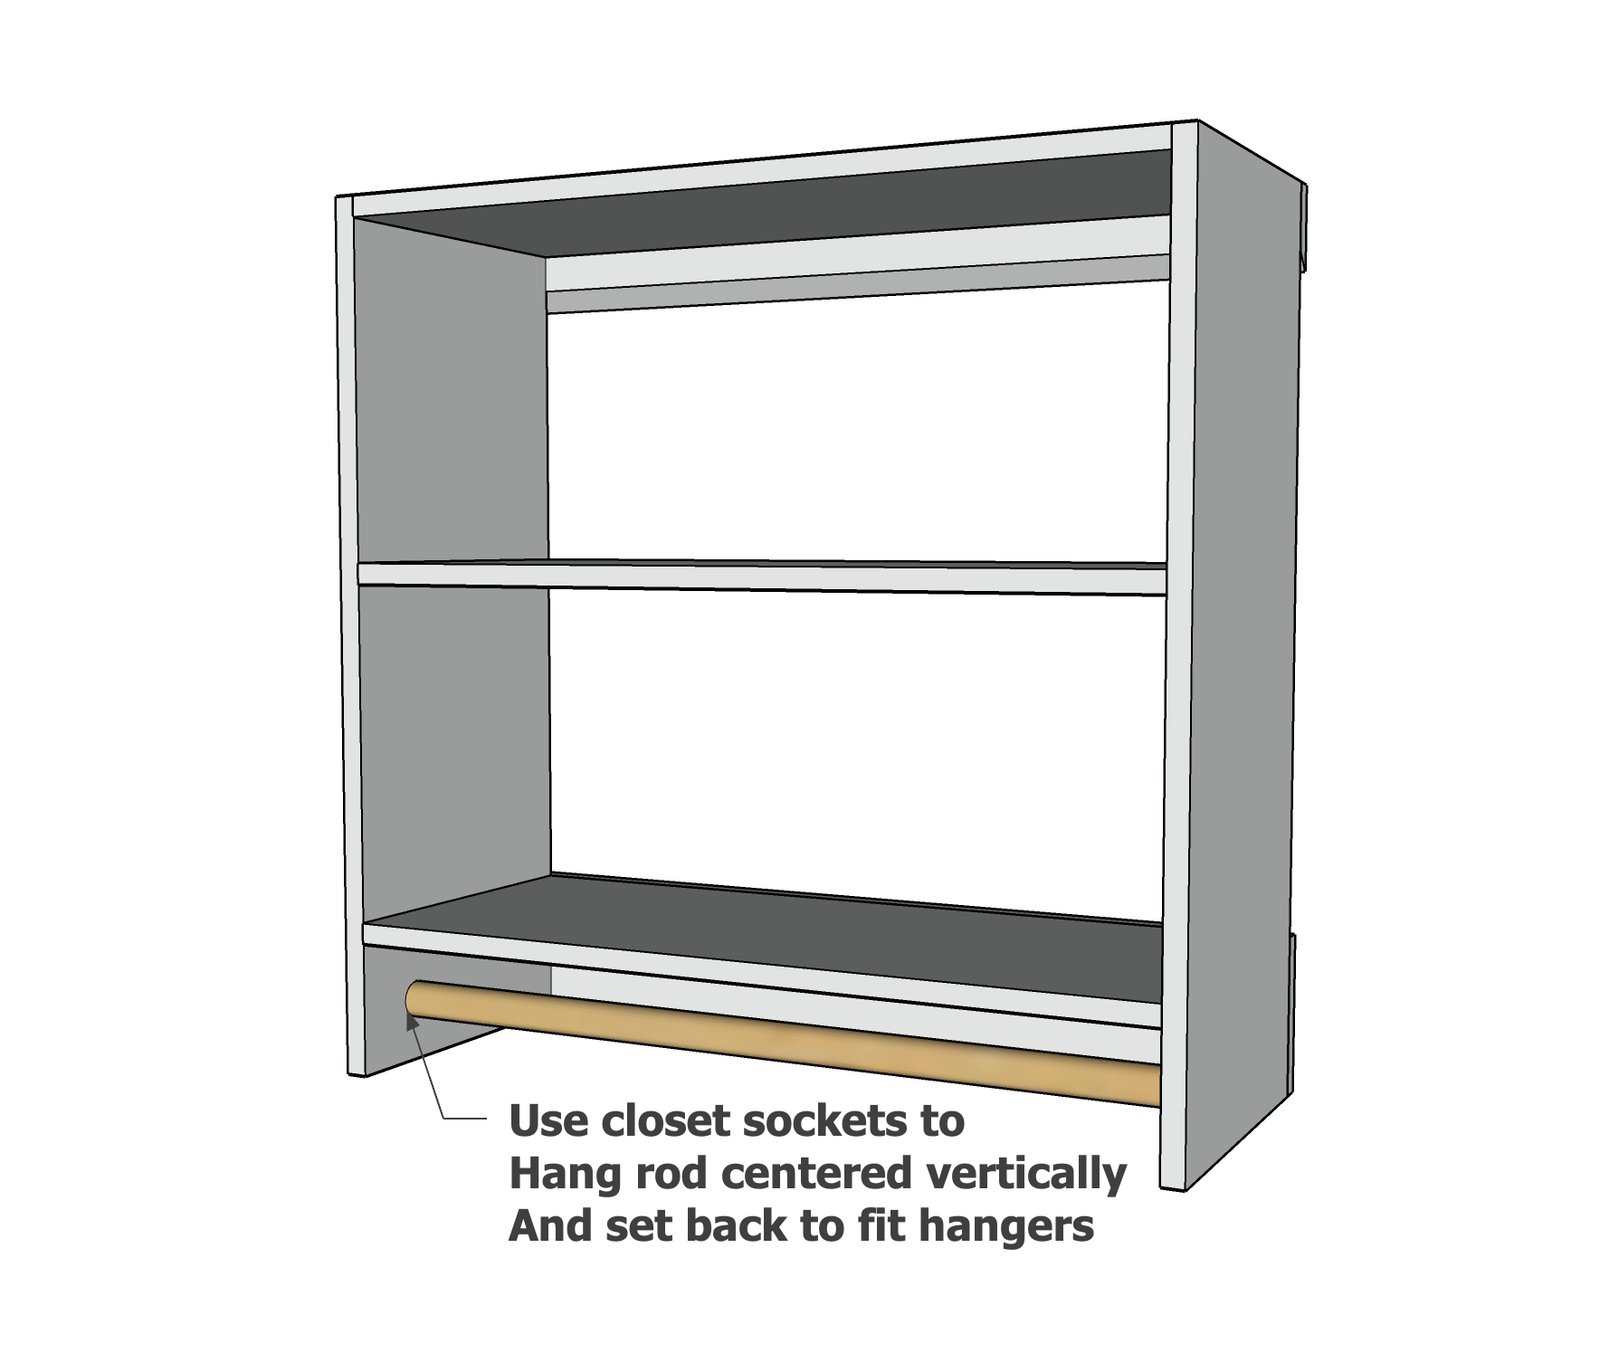
Use closet rod sockets to hold the closet rods. Install centered vertically, and spaced back to accommodate a hanger (depending on your closet carcass rip depth).
Hanging Closet on Wall Cleat
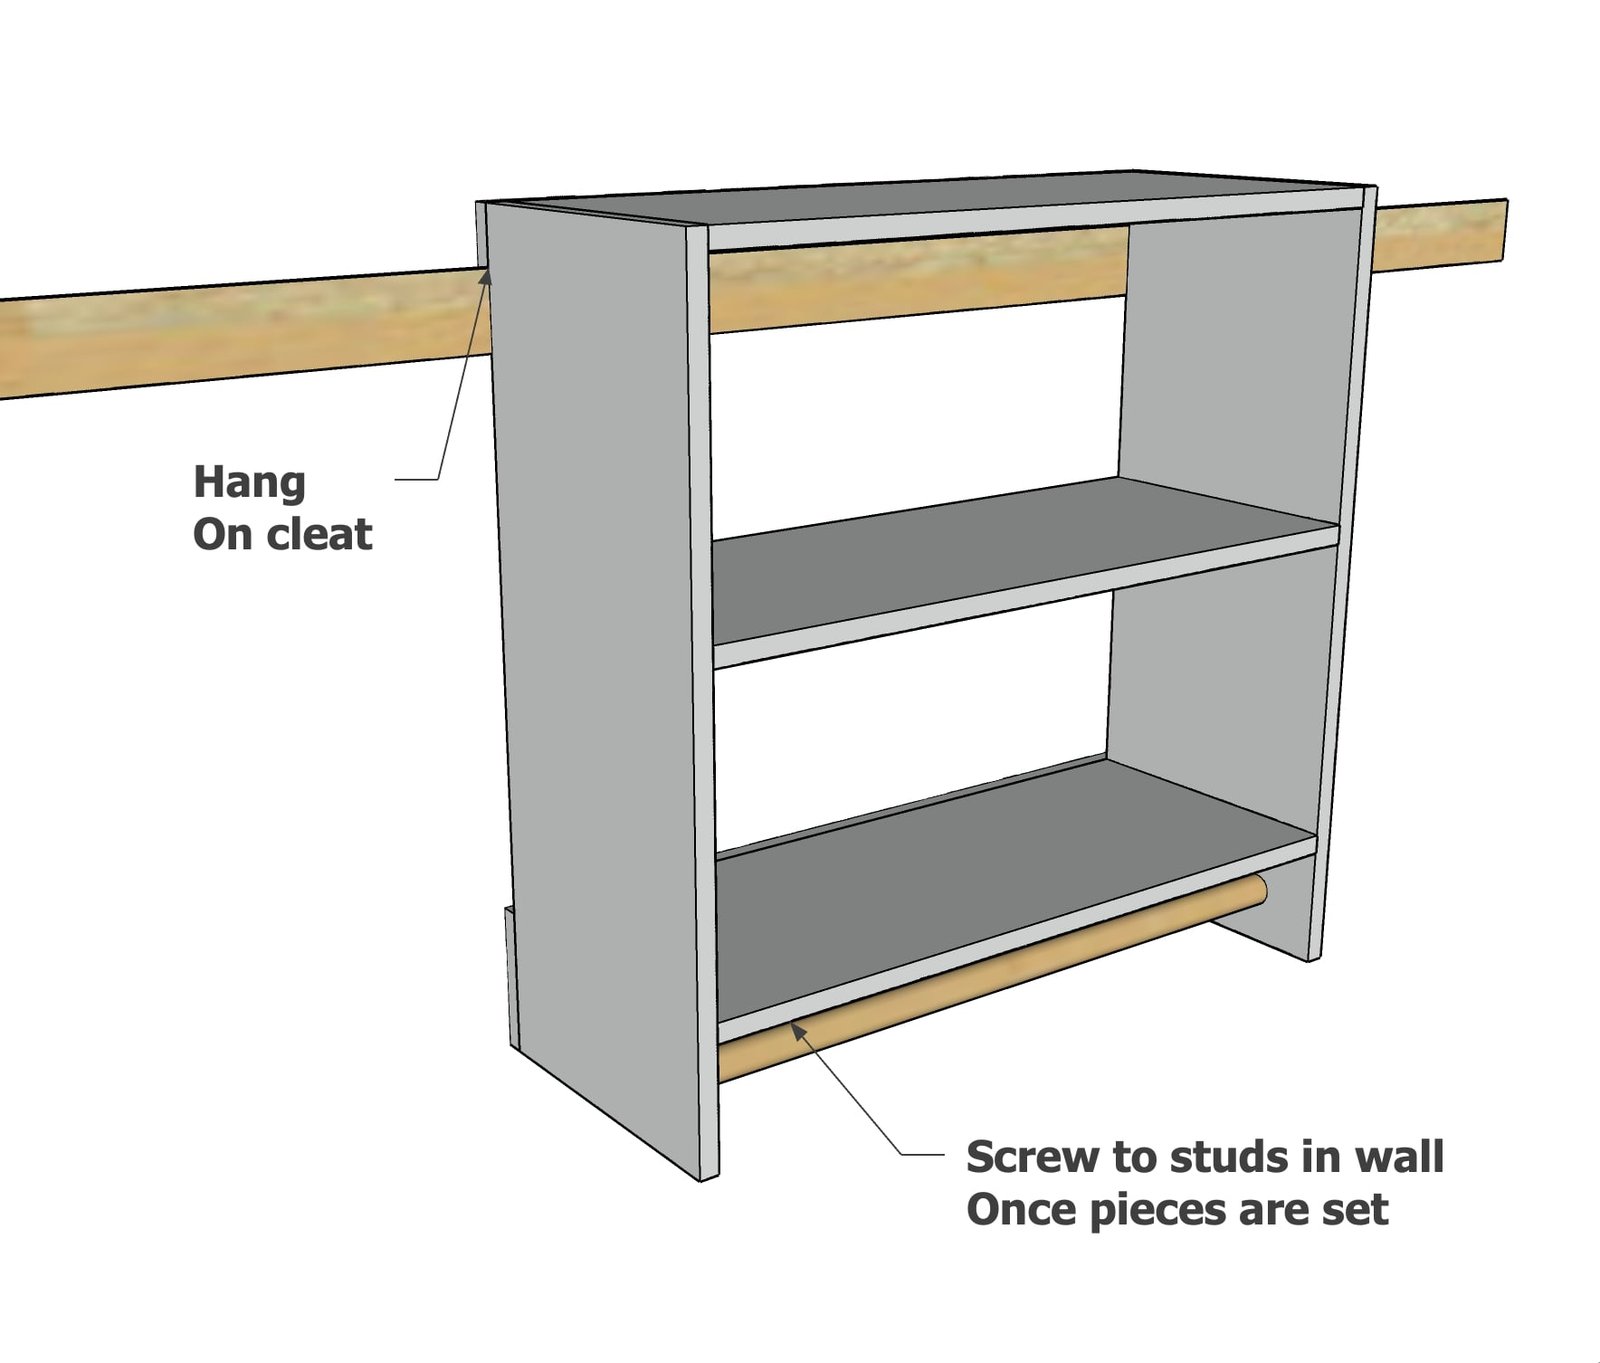
Set the closet components on the wall cleat and place where you'd like them to go. Screw through the back 1x6s into studs in the wall. For smaller sections that do not cover a wall stud, simply screw to neighboring closet components.
Exposed Ends
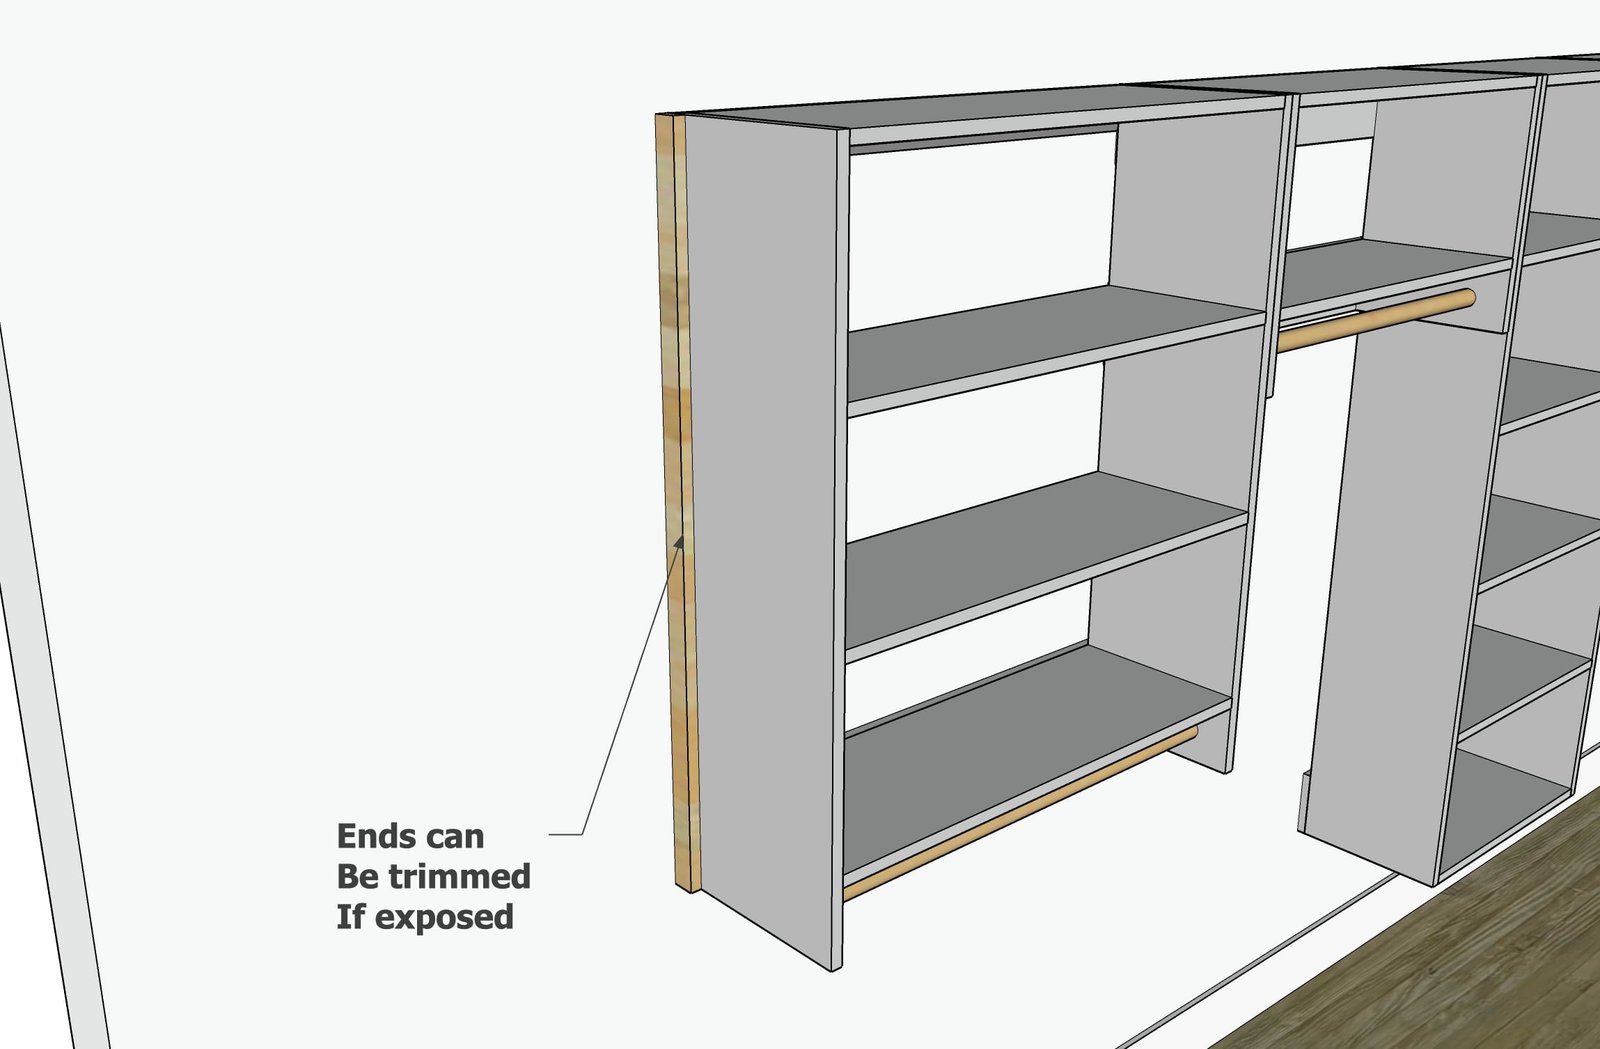
If the closet has an exposed end, the end can be trimmed out with a 1x2. Attach with 1-1/4" brad nails.
Finishing
Sand all surfaces, starting with a medium grit and finishing with fine. Wipe off the dust, fill any holes or gaps with wood filler, and sand smooth once dry. Apply primer if you're painting, then finish with your choice of paint or stain and seal with a durable clear topcoat. For outdoor projects, use exterior-rated primer, paint or stain, and sealer so the piece stands up to the weather.
Source (temporary): https://www.ana-white.com/woodworking-projects/1x12-easy-build-and-hang-modular-closet-system-free-plans-configurator-custom