1x12 Play Table Bench with Storage
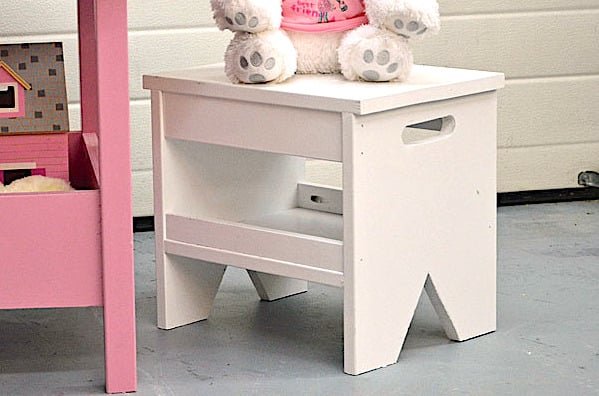
Perfect for a play table or extra seating and storage, this little bench is easy to make, easy to move around, and versatile! This is an easy build. from
Specifications
| Project type | Kids Tables and Chairs |
|---|---|
| Room | Kids and Toys |
| Style | Children's and Kid's Room Furniture and Toy Plans |
| Difficulty | Starter Projects |
| Estimated cost | Under $20 |
Dimensions
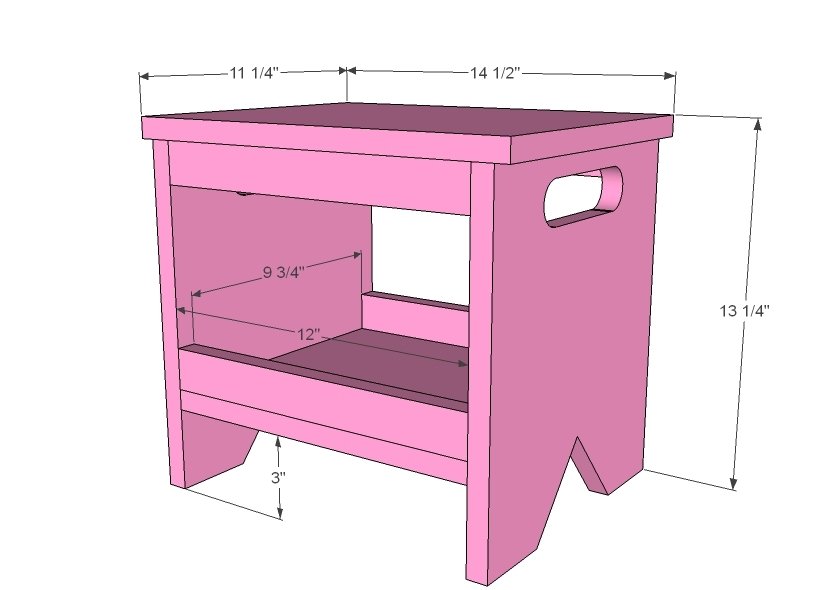
Use the size-specific shopping and cut lists below.
Shopping List
- 1 - 1x12 @ 5 feet long
- 1 - 1x2 @ 5 feet long
- Use 2" self tapping star bit screws or 1-1/4" nails or 1 1/4" pocket hole screws
Cut List
- 2 - 1x12 @ 12 1/2" - sides (cut to 17" for a standard seat height)
- 1 - 1x12 @ 14 1/2" - top
- 1 - 1x12 @ 12" - shelf
- 4 - 1x2 @ 12" - trip
Tools
- measuring tape
- square
- pencil
- safety glasses
- hearing protection
- drill
- jigsaw
- countersink drill bit
Step-by-step Instructions
Step 1
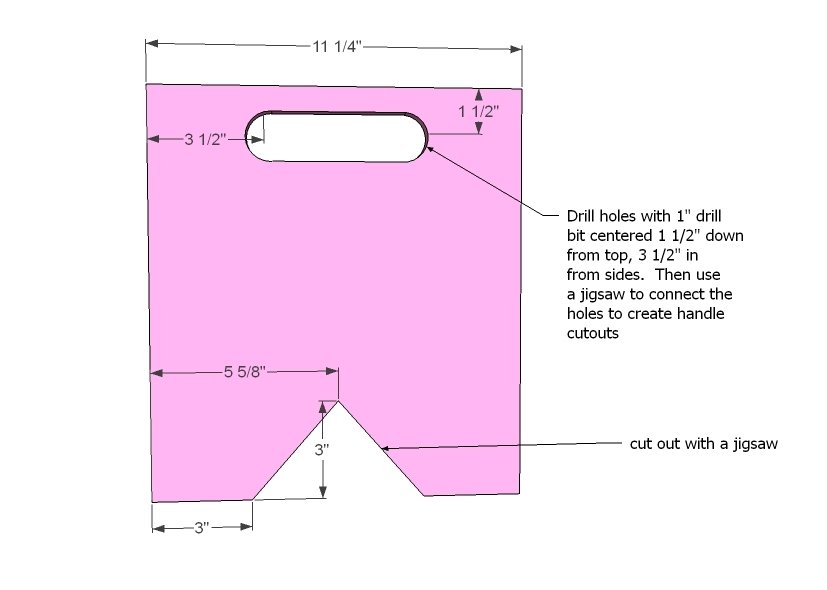
Cut sides as shown in diagram. Make sure you take your time with the jigsaw and be patient. Sand any rough edges.
Step 2
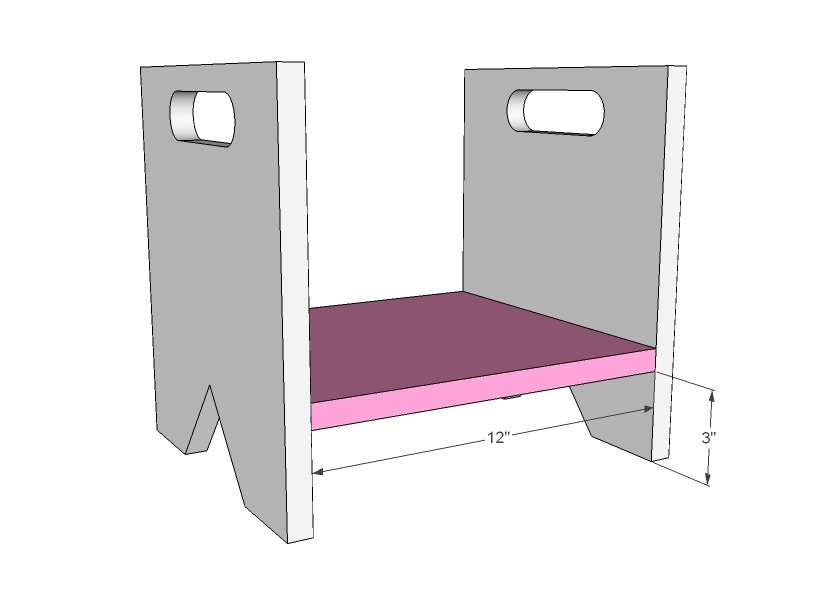
Mark the sides 3" from bottom, on insides and out. Attach shelf to sides using marked line as guide. You can use 2" finish nails and glue, 2" screws or 1 1/4" pocket hole screws.
Step 3
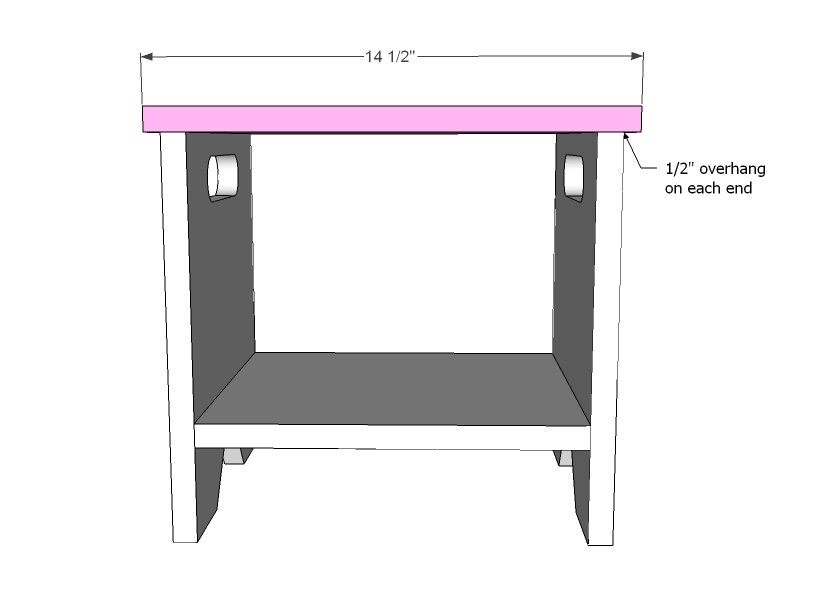
Now add the top. Mark 1/2" overhangs, center, and attach.
Step 4
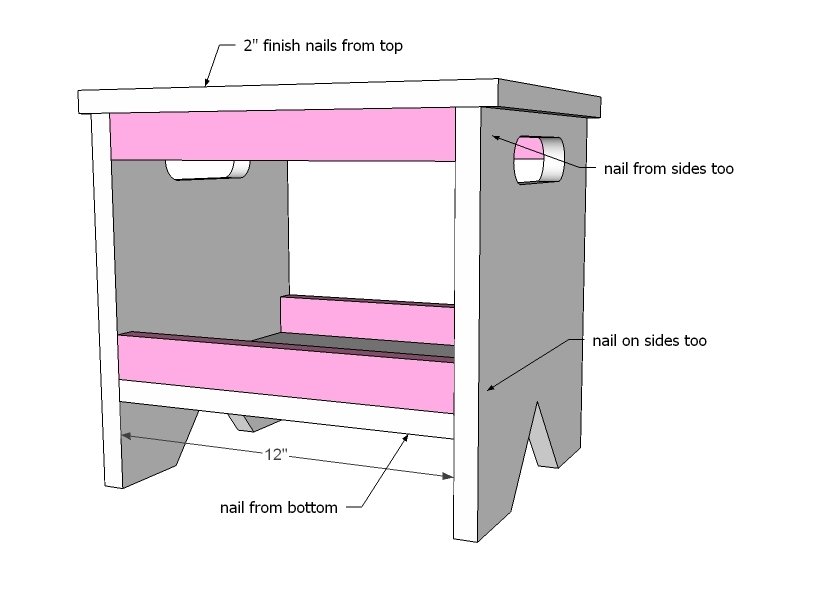
Finally, add the 1x2 trim. These 1x2s actually add a considerable amount of support to the bench (think kids jumping on the benches) so use glue and nails or screws to attach.
Finishing
Sand all surfaces, starting with a medium grit and finishing with fine. Wipe off the dust, fill any holes or gaps with wood filler, and sand smooth once dry. Apply primer if you're painting, then finish with your choice of paint or stain and seal with a durable clear topcoat. For outdoor projects, use exterior-rated primer, paint or stain, and sealer so the piece stands up to the weather.
Source (temporary): https://www.ana-white.com/woodworking-projects/1x12-play-table-bench-storage