1x12 Stacking Toy Box Bin
Keep clutter stylishly contained with this classic wooden toy crate, designed to blend seamlessly into modern farmhouse or minimalist homes. Built from simple lumber, this generously sized box (26" wide x 17½" deep x 14" high) is ideal for organizing toys, books, blankets, or games. Smooth inset ends, built-in handles, and a crisp white painted finish give it a polished, timeless look—while its sturdy base allows for safe stacking when multiple bins are built. are included, making it easy for anyone with basic tools and a free afternoon to create their own. The plans feature a full material list, cut guide, and step-by-step instructions to ensure success at every skill level. Features: – Large capacity with wide, stable base – Integrated handles on all sides – Clean farmhouse-style construction with flush sides and visible end grain – Stackable and paint/stain friendly – included Perfect for family rooms, play spaces, or entryways—organize beautifully with the satisfaction of building it yourself.
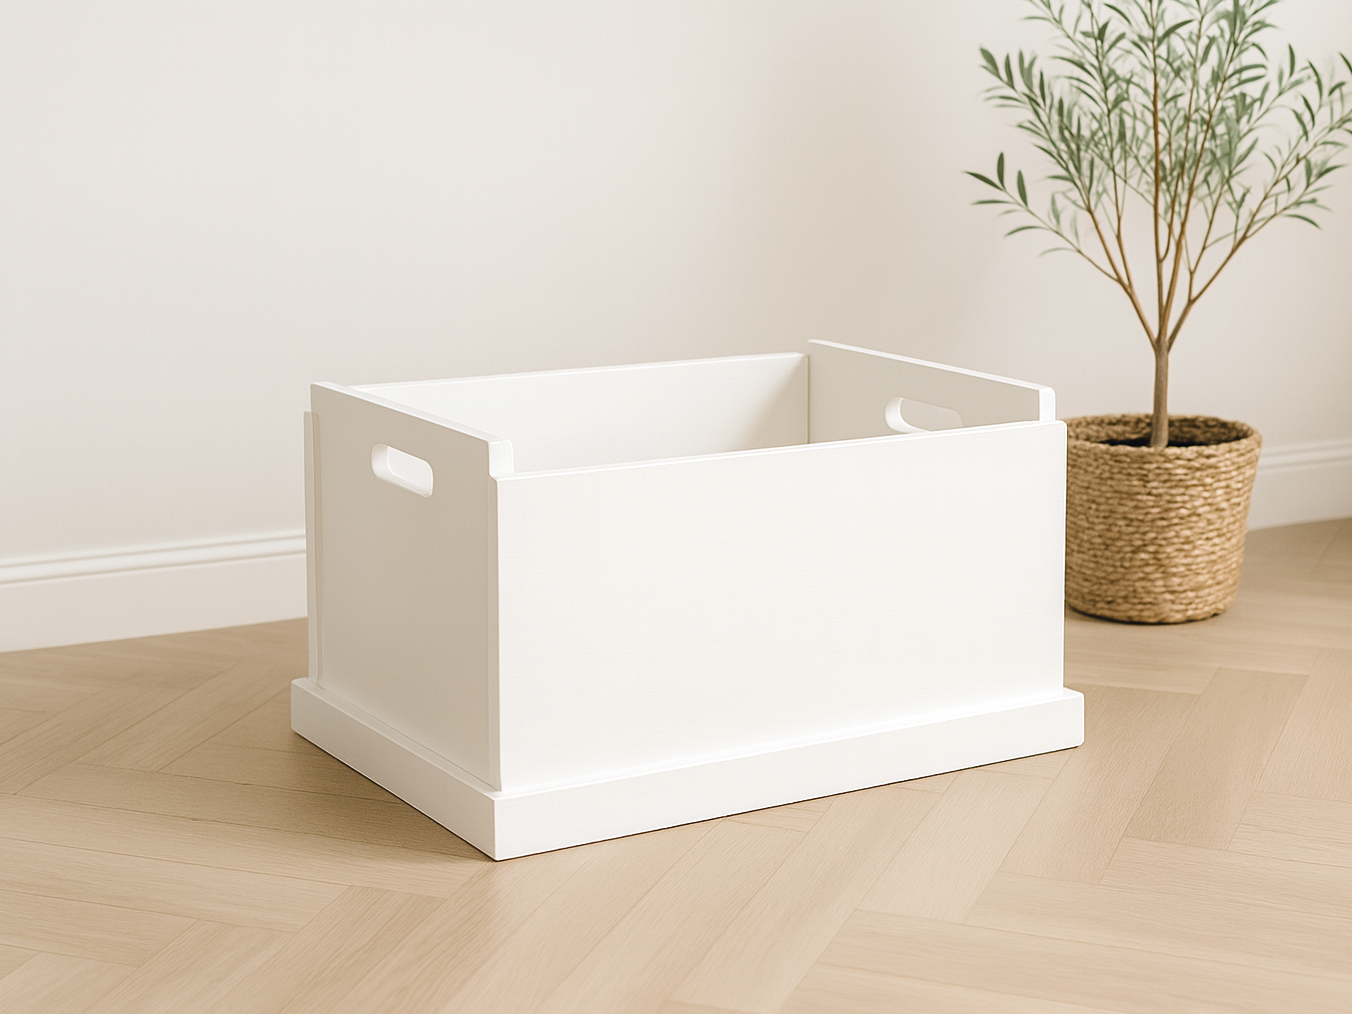
Specifications
| Project type | Toy box Plans |
|---|---|
| Room | Kids and Toys |
| Style | Children's and Kid's Room Furniture and Toy Plans |
| Difficulty | Beginner Projects |
| Estimated cost | $20 - $50 |
Dimensions
Use the size-specific shopping and cut lists below.
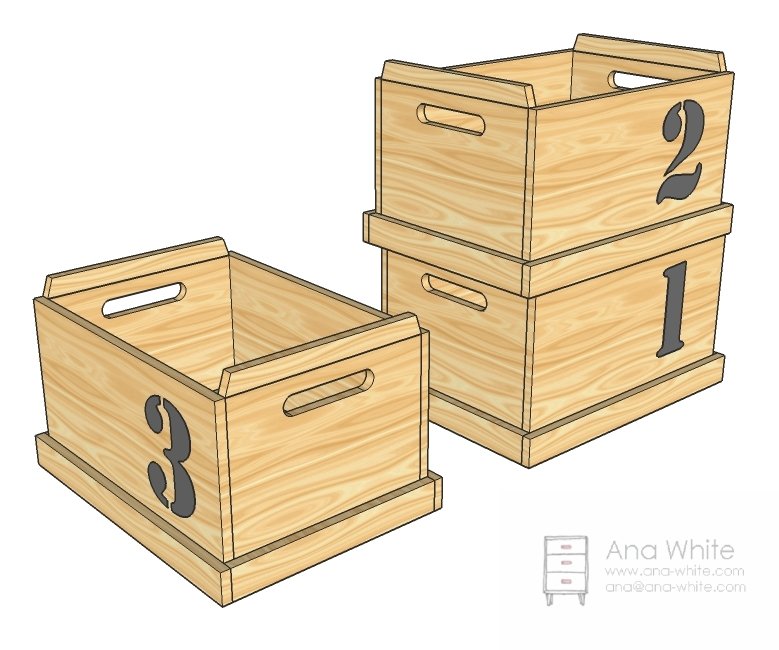
Shopping List
- 1 - 1×12, 8 feet long
- 1 – 1×3, 8 feet long
- 1 – 1×2, 8 feet long or scraps 16″ long
- 1 – 1/4″ plywood 16″ x 24″
- 2″ screws
- 1 1 /4″ screws
- wood glue, filler, and finishing supplies
Cut List
2 – 1×12 @ 16″
2 – 1×12 @ 24″
2 – 1×3 @ 17 1/2″
2 – 1×3 @ 25 1/2″
2 – 1×2 @ 16″
1 – 1/4″ plywood @ 24″ x 17 1/2″
Tools
- measuring tape
- square
- pencil
- safety glasses
- hearing protection
- drill
- circular saw
- jigsaw
- sander
- countersink drill bit
Step-by-step Instructions
Build the Box
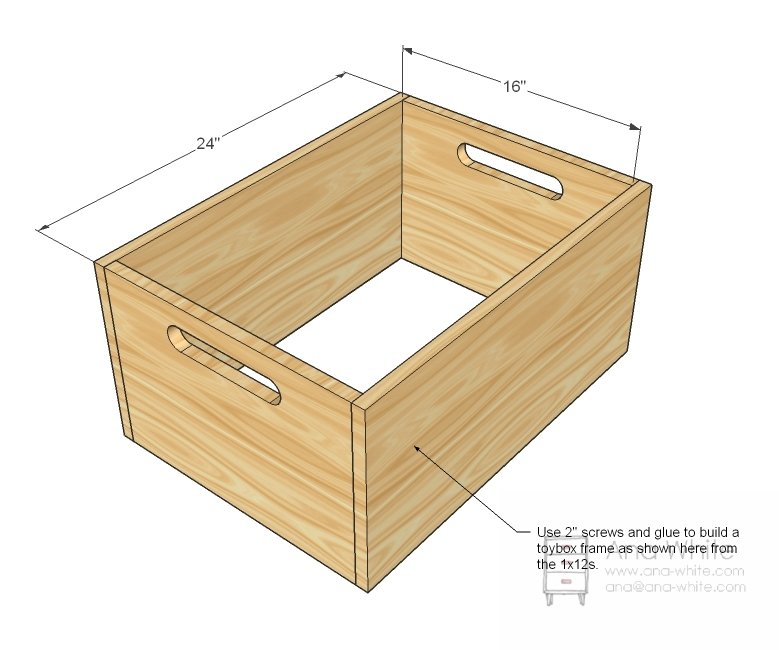
As with most storage that we do, start by build a simple box out of 1x12s. Predrill your holes and use glue. Adjust for square – especially if you are stacking. Off square boxes won’t stack right.
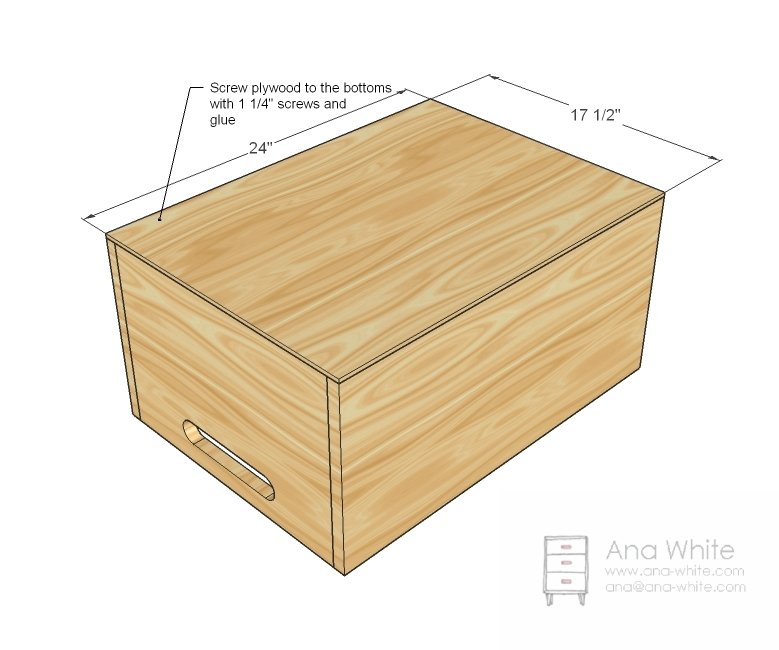
Bottom
Use 1/4″ plywood screwed and glued to the bottom as shown above.
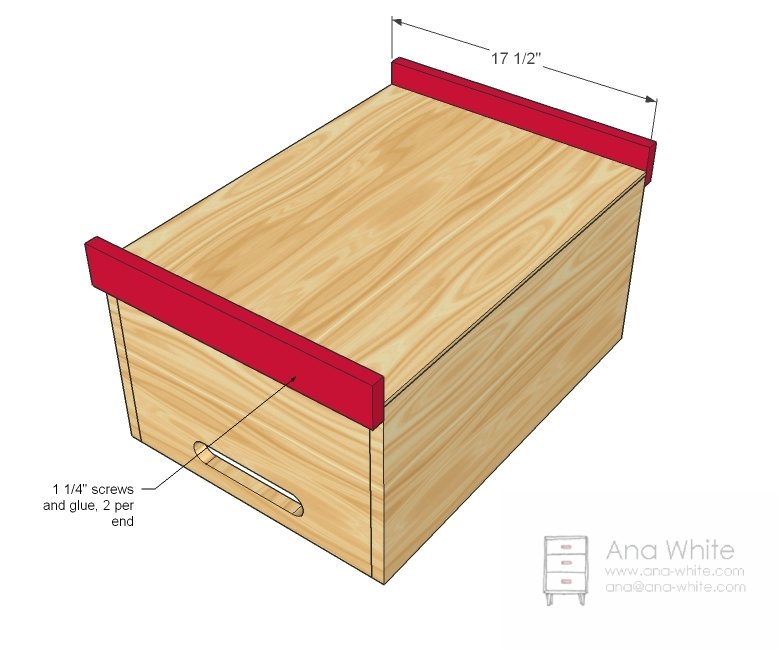
Footer Ends
Now screw the 1×3 end footers on. I overlapped the footer and the box by 1″.
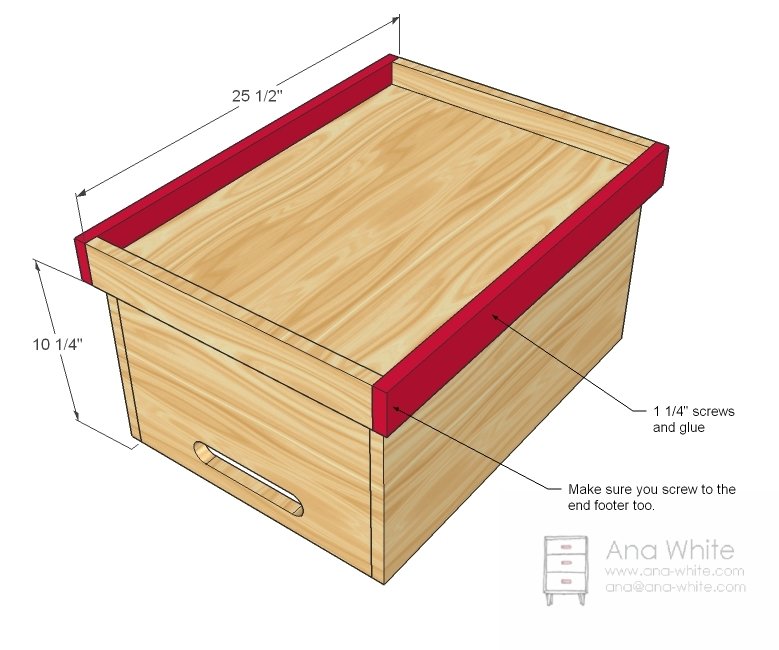
Side Footer
Glue and screw and the footer is done
Step 5
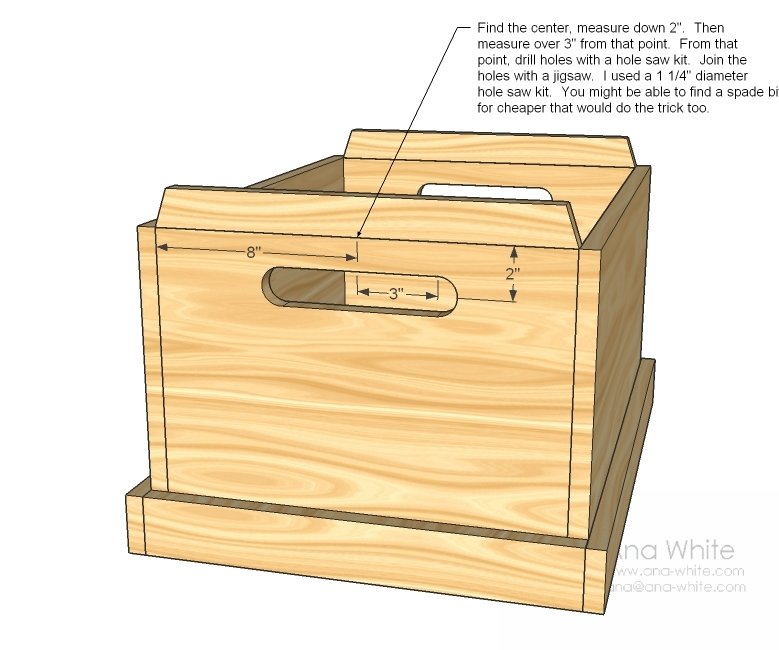
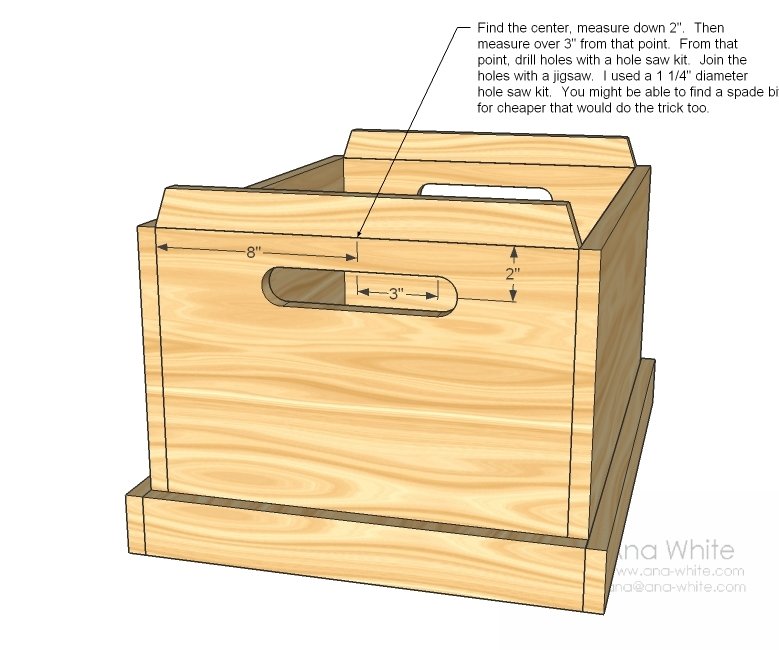
Handles
Handles are real simple, just find the centers of your holes, drill holes, and connect the dots – literally
Finishing
Sand all surfaces, starting with a medium grit and finishing with fine. Wipe off the dust, fill any holes or gaps with wood filler, and sand smooth once dry. Apply primer if you're painting, then finish with your choice of paint or stain and seal with a durable clear topcoat. For outdoor projects, use exterior-rated primer, paint or stain, and sealer so the piece stands up to the weather.
Source (temporary): https://www.ana-white.com/woodworking-projects/1x12-stacking-toy-box-bin-free-plans