1x3 and 1x4 Wood Box Tray
Wood boxes are fun and easy to make, great gift ideas and easy to customize in size and color! This walks you through how to make a 1x wood box. You can easily modify the size by simply make the bottom up, and measure and cut the trim to fit around the sides.

Specifications
| Project type | Home Decor |
|---|---|
| Room | Decor for Any Room |
| Difficulty | Starter Projects |
Dimensions
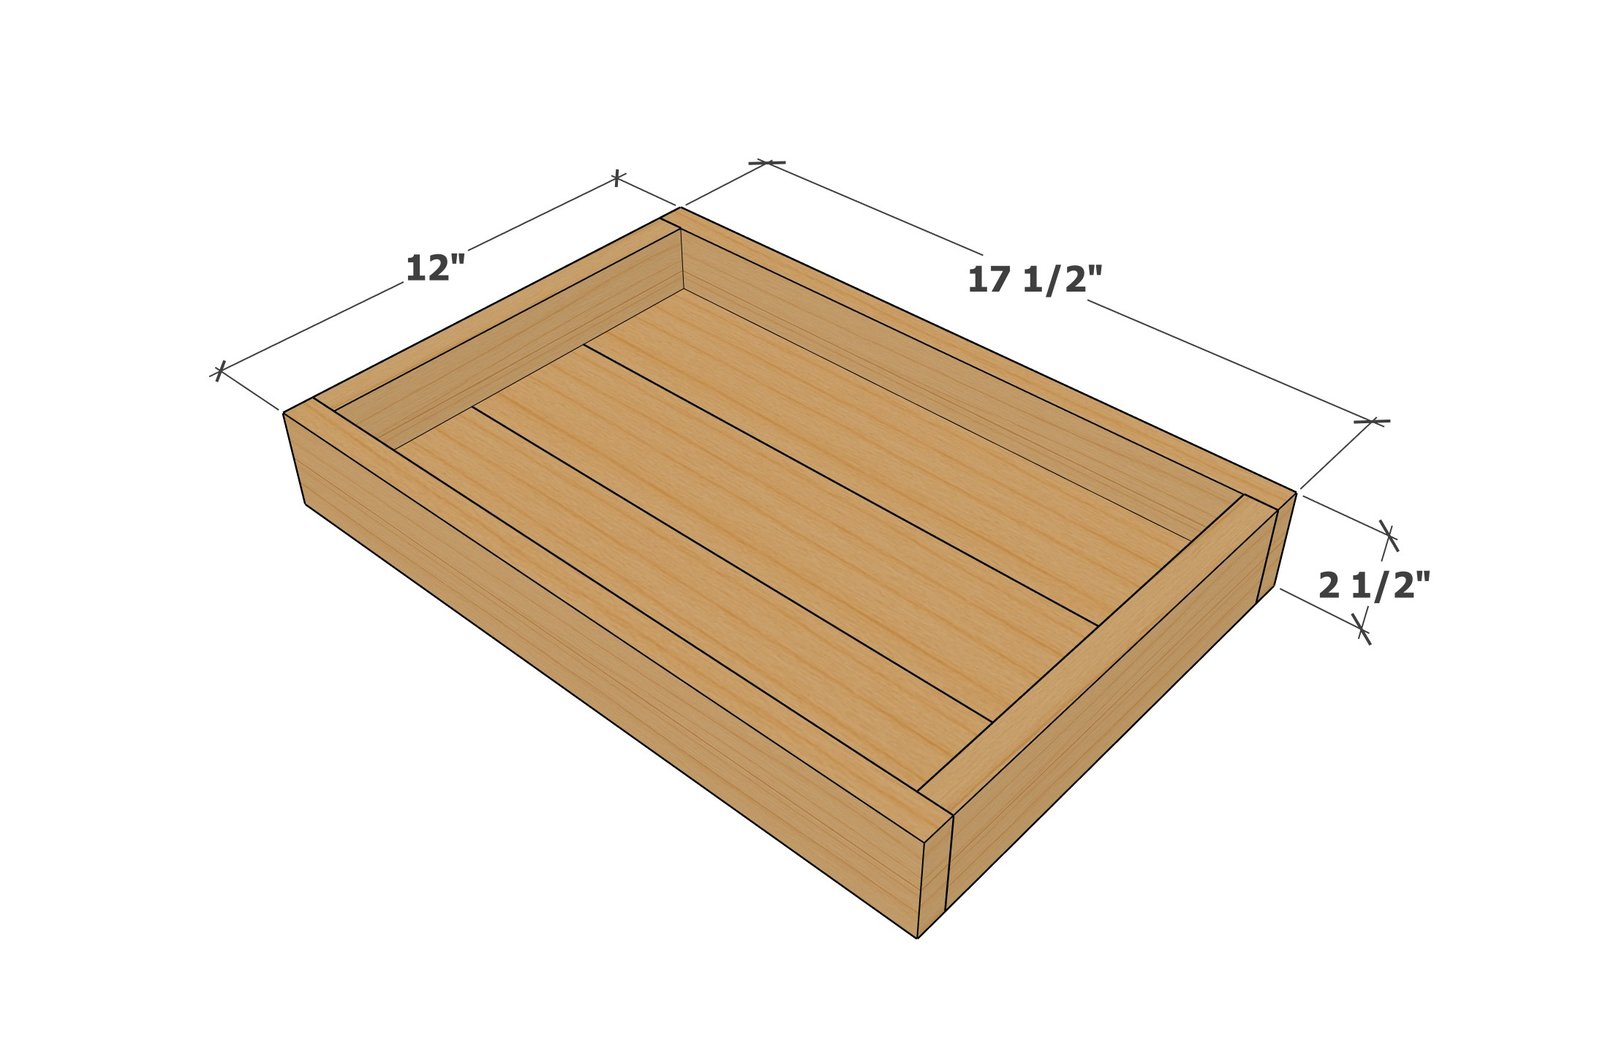
Use the size-specific shopping and cut lists below.
Shopping List
- 1 - 1x4 @ 4 feet long
- 1 - 1x3 @ 5 feet long
- wood filler
- 1-1/4" brad nails
- wood stain
- handles (if desired)
Cut List
- 3 - 1x4 @ 15-3/4" - bottom boards
- 2 - 1x3 @ about 10-1/2" - end trim boards
- 2 - 1x3 @ about 17-1/2" - side trim boards
Tools
- measuring tape
- safety glasses
- circular saw
- nailer
Step-by-step Instructions
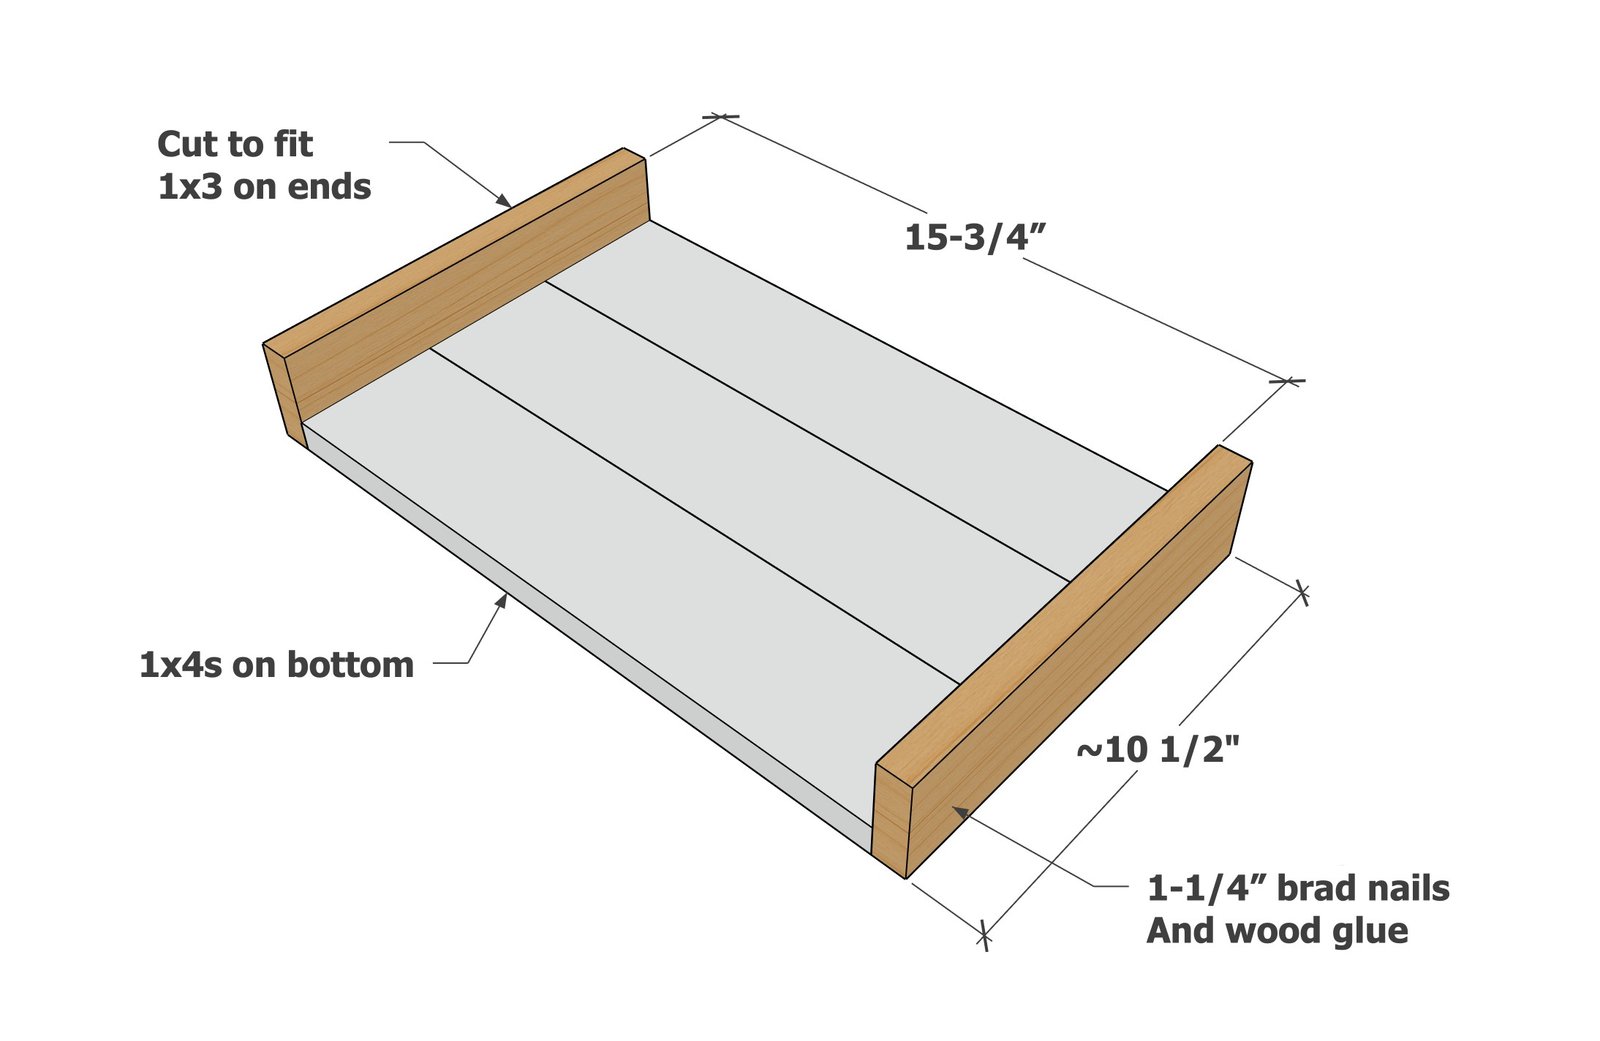
Glue the 1x4 boards together edge to edge and let set.
Measure the width of the 1x4 boards combined. Cut 1x3 end boards to match and use 1-1/4" brad nails to attach to the bottom.
Step 2
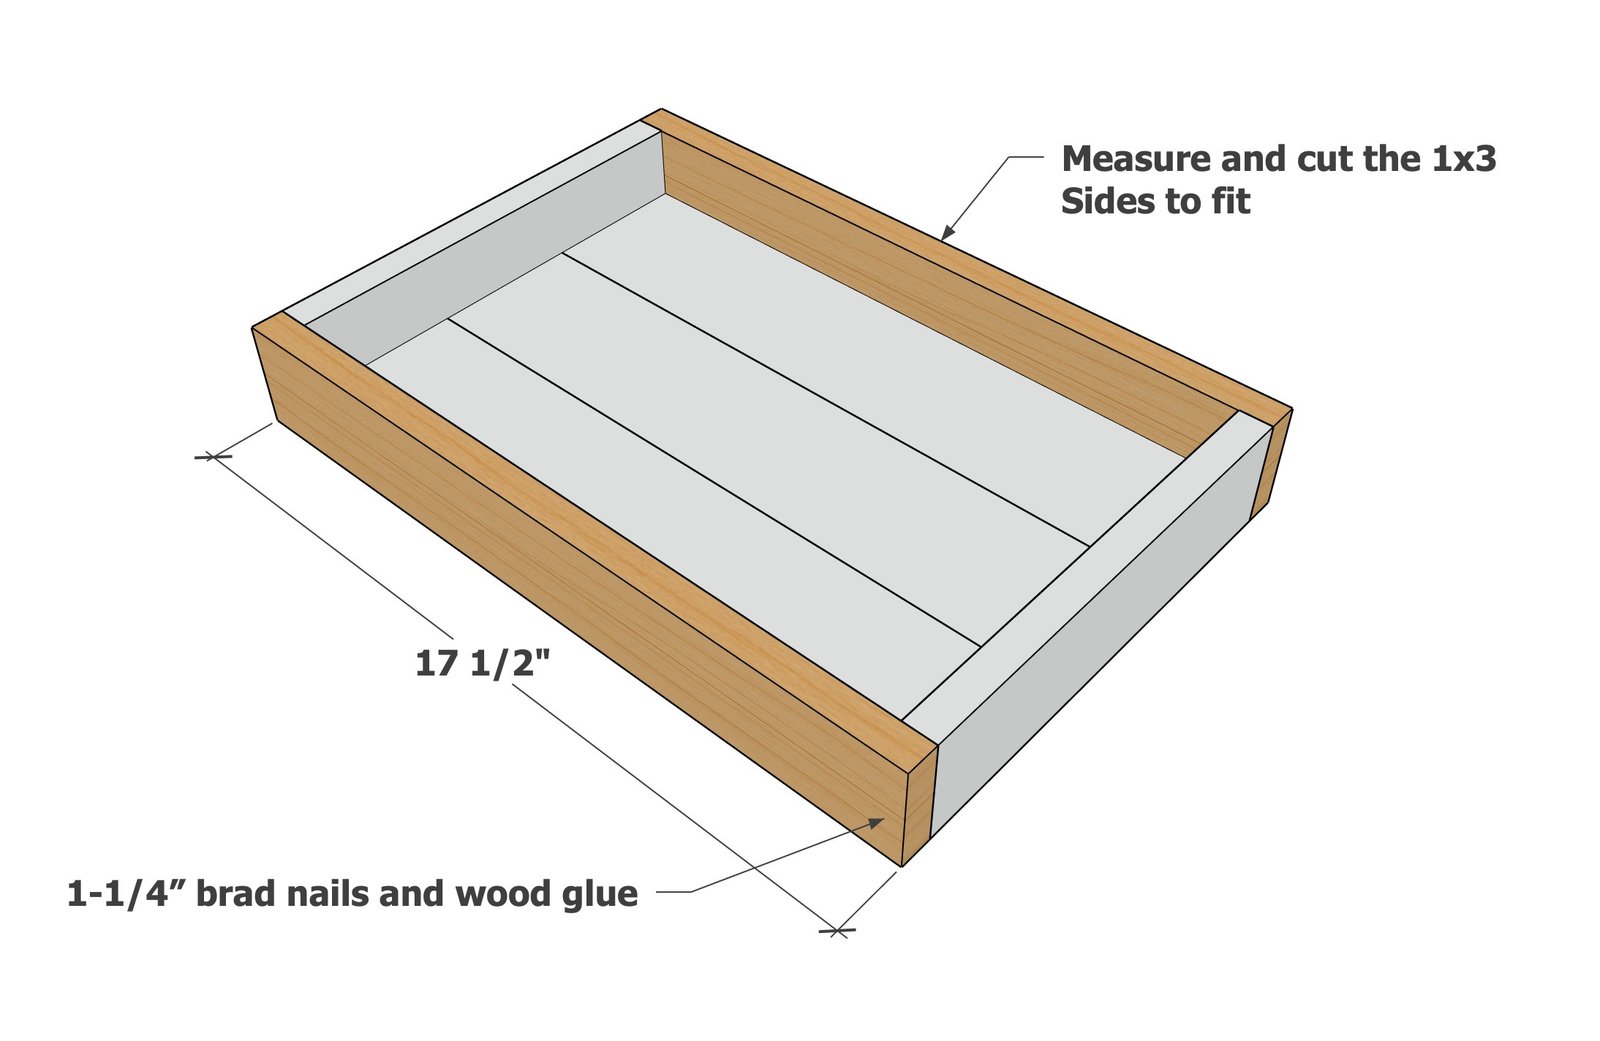
Measure and cut the side pieces and nail and glue to the sides.
Finishing
Sand all surfaces, starting with a medium grit and finishing with fine. Wipe off the dust, fill any holes or gaps with wood filler, and sand smooth once dry. Apply primer if you're painting, then finish with your choice of paint or stain and seal with a durable clear topcoat. For outdoor projects, use exterior-rated primer, paint or stain, and sealer so the piece stands up to the weather.
Source (temporary): https://www.ana-white.com/woodworking-projects/1x3-and-1x4-wood-box-tray