1x3 Furring Strip Cake Stand
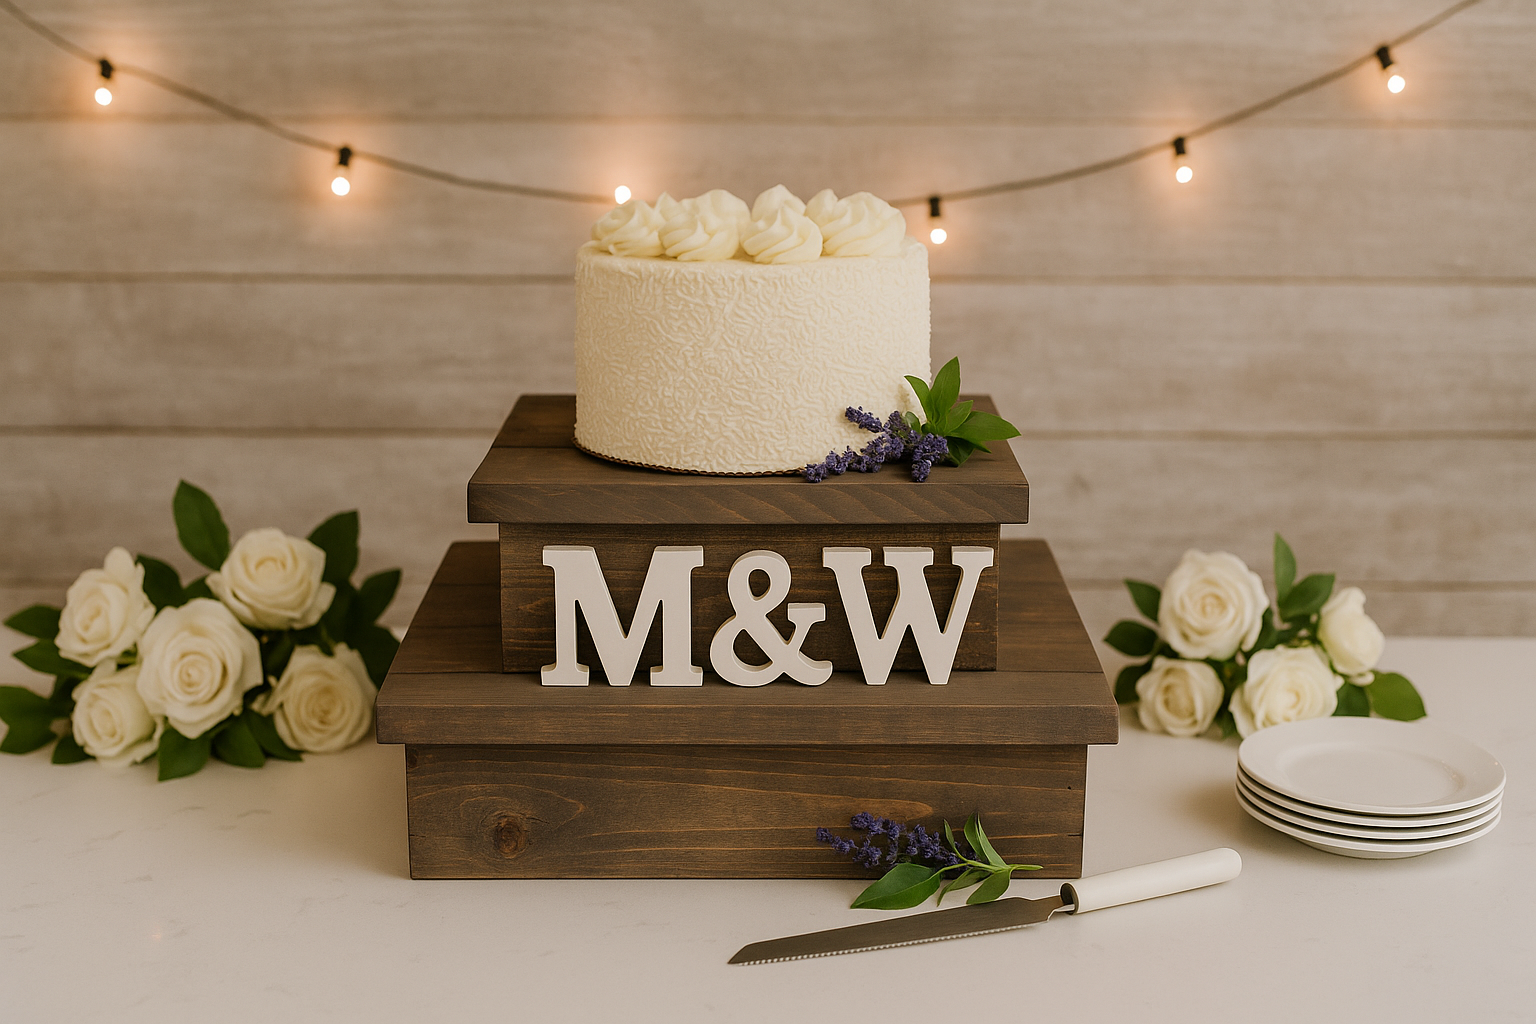
Get the tall, tiered cake look - without all the cakes! This tiered cake stand will elevate your single cake, without dealing with layers of cakes to stack and eat. Build a rustic wood cake stand with 1x3 furring strips. This is a free project plan with detailed diagrams and photos to build your own cake stand. This cake stand can be either built as a 10", 12",or build both and stack for a grand cake display. You'll just need inexpensive 1x3 furring strips, some brad nails and glue, and your favorite stain to build these cake stands.
Specifications
| Project type | Kitchen Cabinet Plan, Accessories and Serving |
|---|---|
| Room | kitchen |
| Difficulty | Starter Projects |
Dimensions
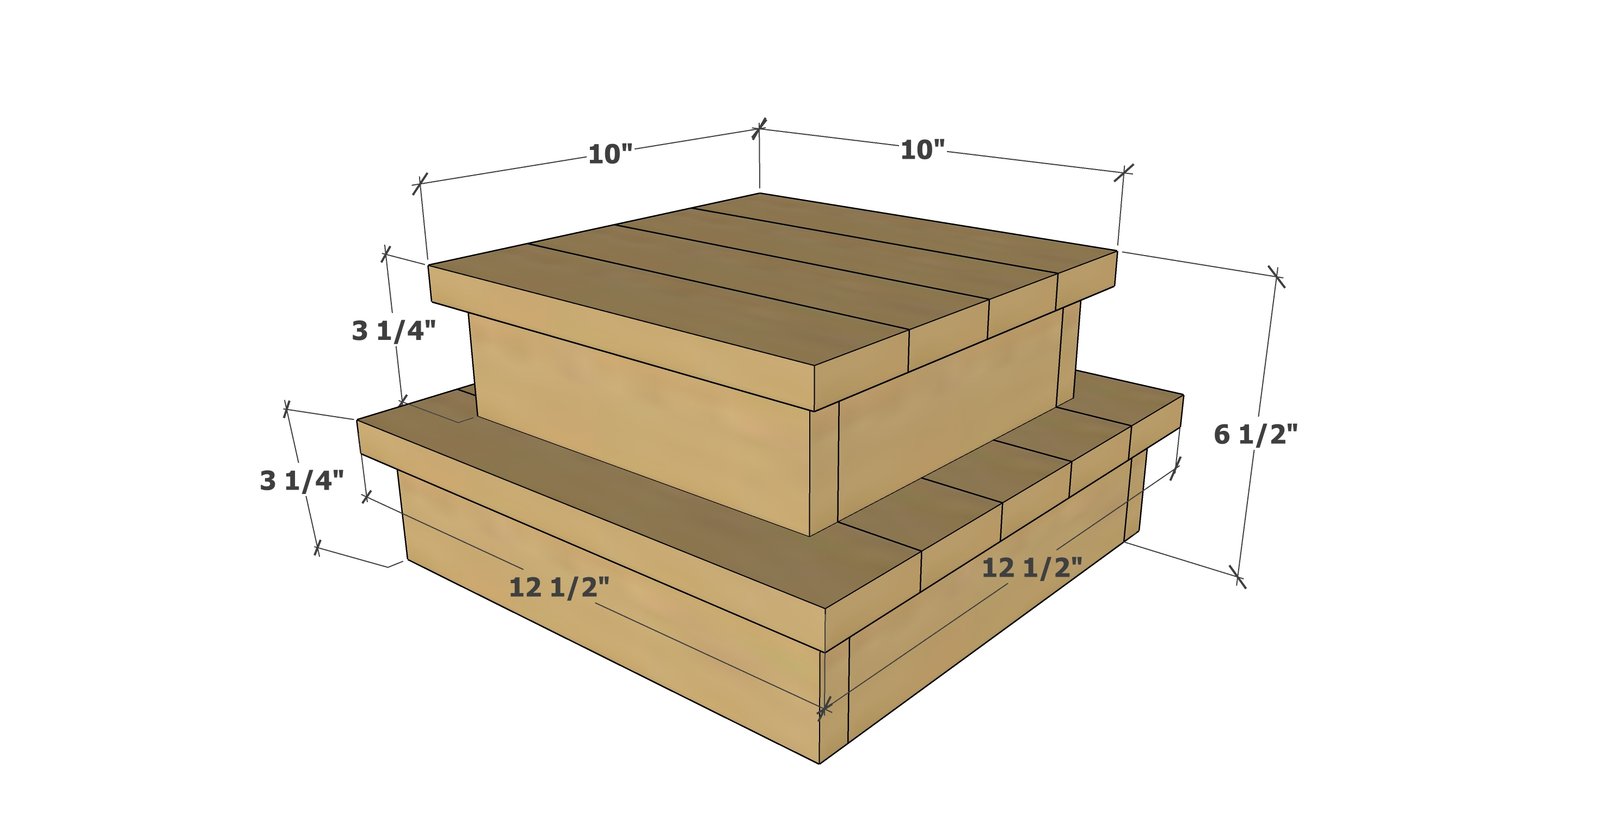
Use the size-specific shopping and cut lists below.
Shopping List
10" Cake Stand Shopping List
- 1 - 1x3 @ 8 feet long
- 1-1/4" brad nails
- wood glue
- wood stain
12" Cake Stand Shopping List
- 1 - 1x3 @ 8 feet long
- 1-1/4" brad nails
- wood glue
- wood stain
Cut List
10" Cake Stand Cut List
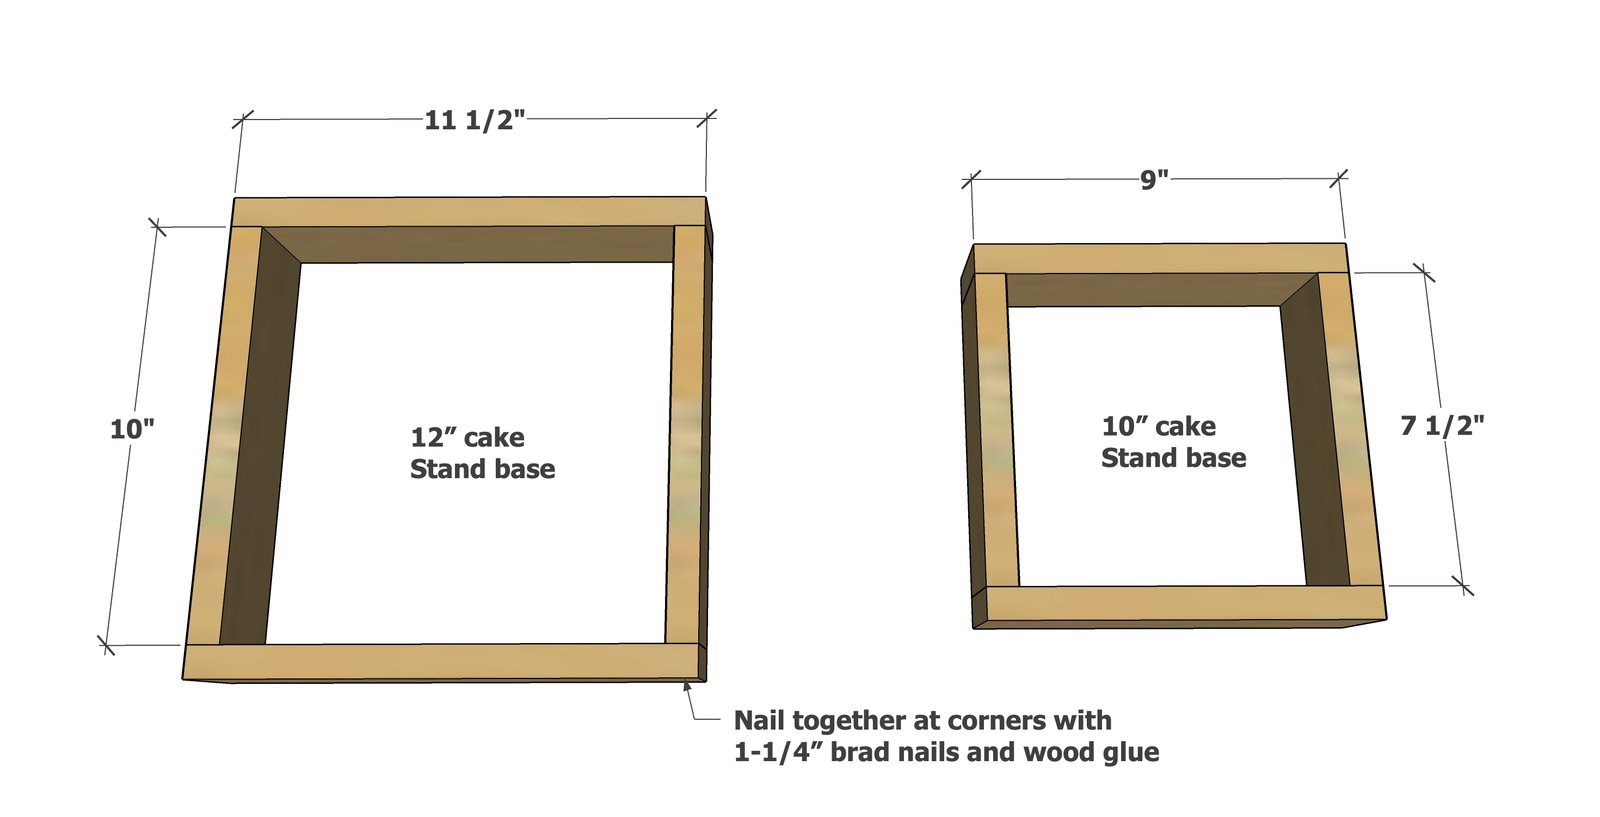
- 2 - 1x3 @ 7-1/2"
- 2 - 1x3 @ 9"
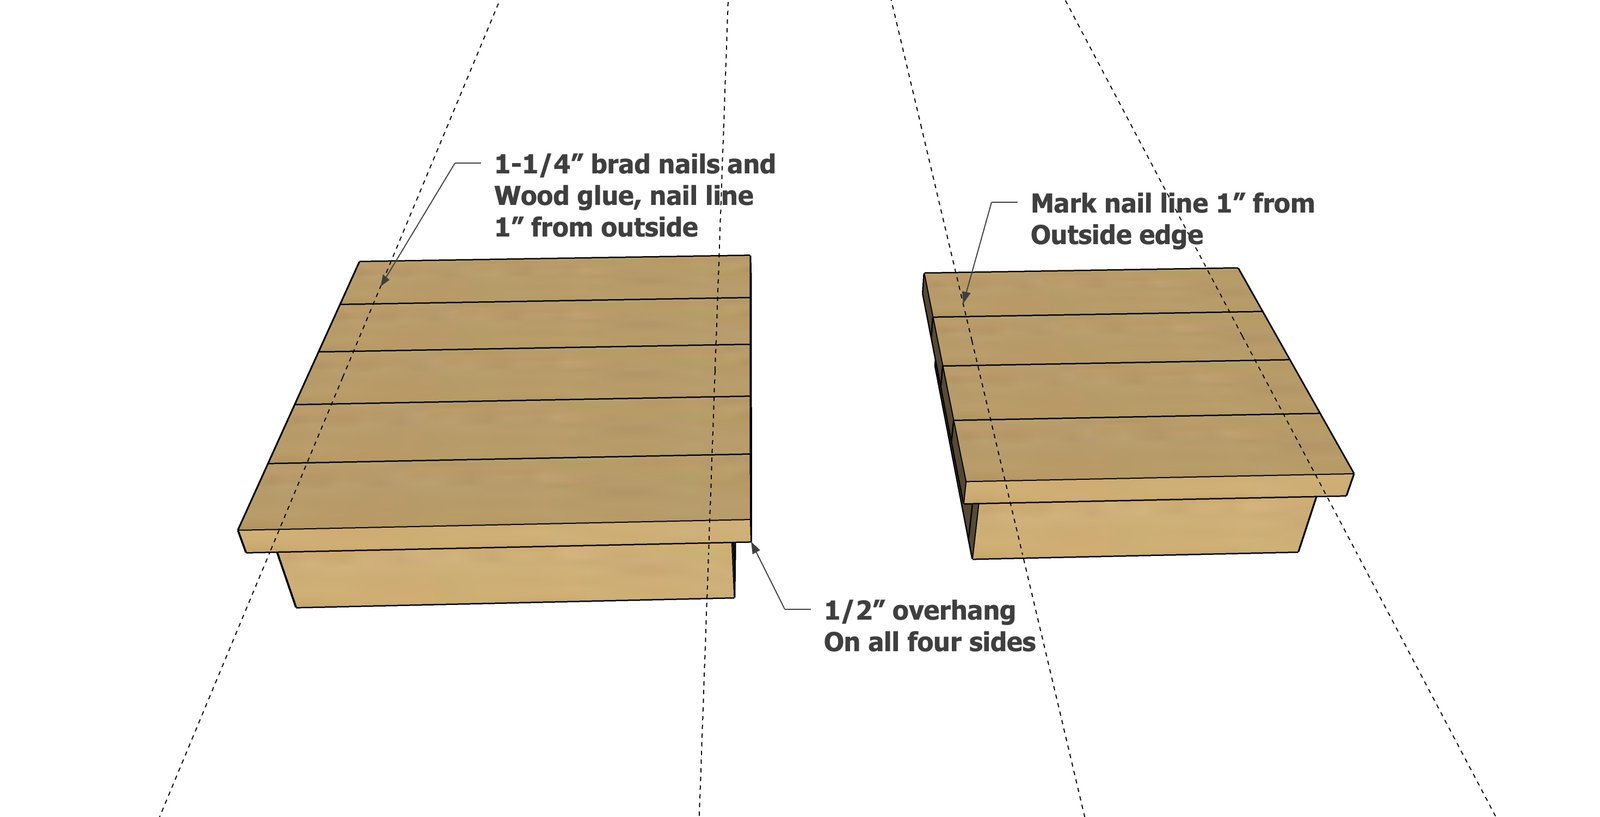
- 4 - 1x3 @ 10"
12" Cake Stand Cut List
- 2 - 1x3 @ 10"
- 2 - 1x3 @ 11-1/2"
- 5 - 1x3 @ 12-1/2"
Tools
- measuring tape
- pencil
- safety glasses
- circular saw
- nailer
- sander
Step-by-step Instructions
Step 1
Step 2
Finishing
Sand all surfaces, starting with a medium grit and finishing with fine. Wipe off the dust, fill any holes or gaps with wood filler, and sand smooth once dry. Apply primer if you're painting, then finish with your choice of paint or stain and seal with a durable clear topcoat. For outdoor projects, use exterior-rated primer, paint or stain, and sealer so the piece stands up to the weather.
Source (temporary): https://www.ana-white.com/woodworking-projects/1x3-furring-strip-cake-stand-10-and-12-bases