1x3 Sawhorse Desk
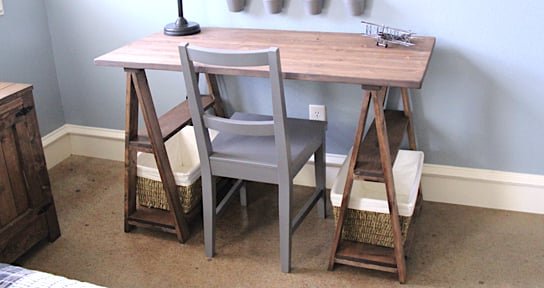
Easy to build sawhorse desk is doable by most any DIYer! Using standard off the shelf lumber, a premade project panel for the tabletop, you can build yourself a solid wood sawhorse desk for a fraction of retail costs! Features two large bottom shelves, two smaller shelves. Full plans include everything you need to build for yourself with step by step diagrams, shopping and cut list
Specifications
| Project type | Desk, Desk Systems and Project Table Plans |
|---|---|
| Room | Teens |
| Style | Modern Style Furniture Plans |
| Difficulty | Intermediate |
| Estimated cost | $20 - $50 |
Dimensions
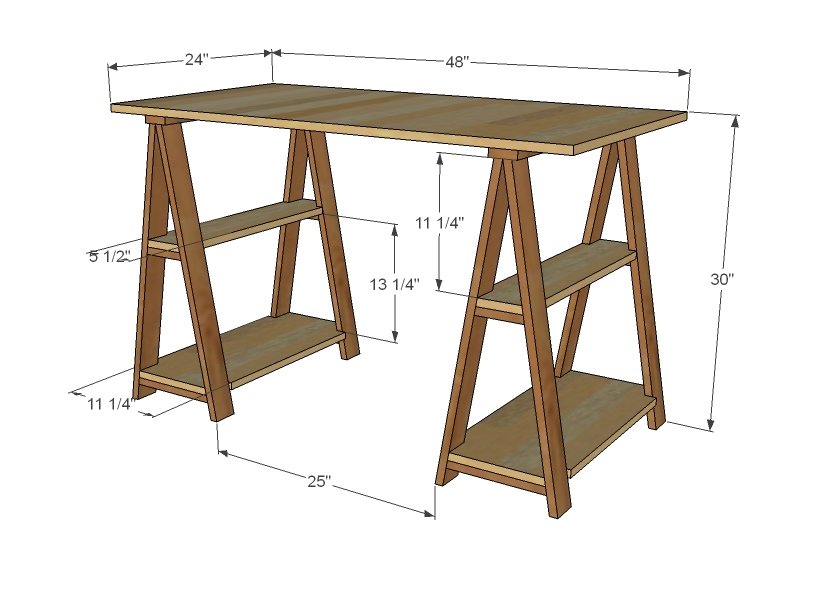
Use the size-specific shopping and cut lists below.
Shopping List
- 4 - 1x3 @ 8 feet long
- 1 - 1x6 @ 4 feet long
- 1 - 1x12 @ 4 feet long
- 1 - 24" x 48" pine project panel
Cut List
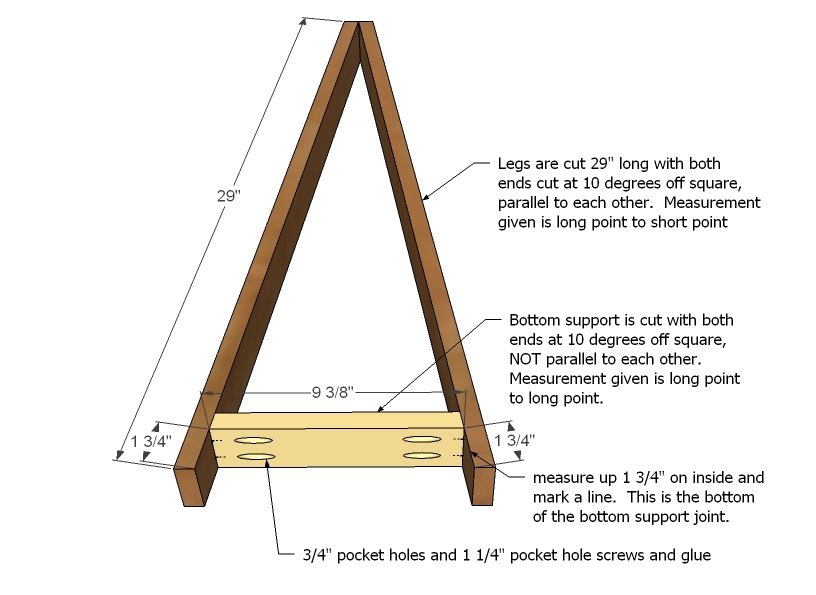
- 8 - 1x3 @ 29" Both ends beveled at 10 degrees off square,ends are parallel to each other, long point to short point measurement
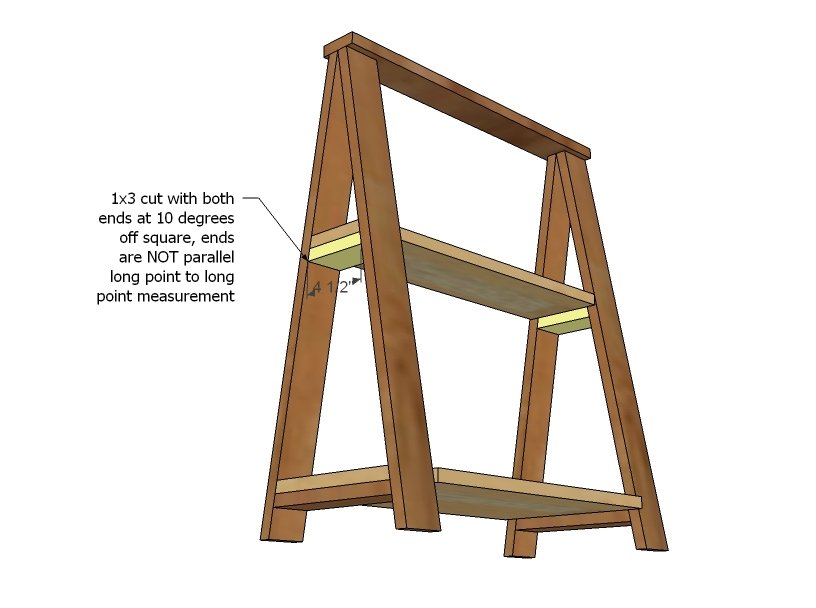
- 4 - 1x3 @ 9 3/8" Both ends beveled at 10 degrees off square, ends are NOT parallel to each other, long point to long point measurement
- 2 - 1x3 @ 24"
- 2 - 1x12 @ 24" corners are notched out - ASSUMES 1x12 is 11 1/4" wide - adjust if yours is not
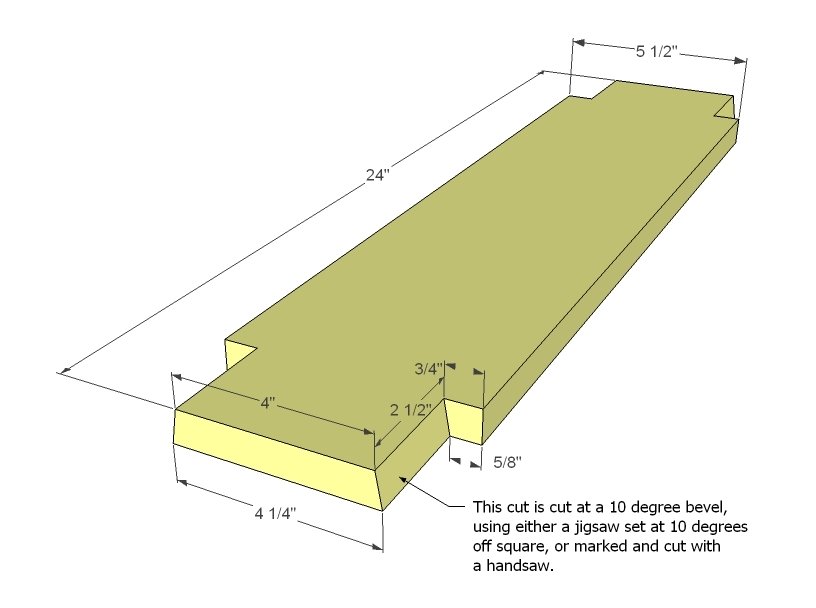
- 2 - 1x6 @ 24" corners are notched out - ASSUMES 1x6 is 5 1/2" wide - adjust if yours is not
- 4 - 1x3 @ 4 1/2" Both ends beveled at 10 degrees off square, ends are NOT parallel to each other, long point to long point measurement
Tools
- measuring tape
- square
- pencil
- safety glasses
- hearing protection
- kreg-jig
- drill
- jigsaw
- compound miter saw
- nailer
- sander
- level
Step-by-step Instructions
Step 1
Start by marking the insides of each leg up 1 3/4". This will be the bottom of the bottom support to leg joint. Then attach bottom supports with either a Kreg Jig or with screws and glue.
Step 2
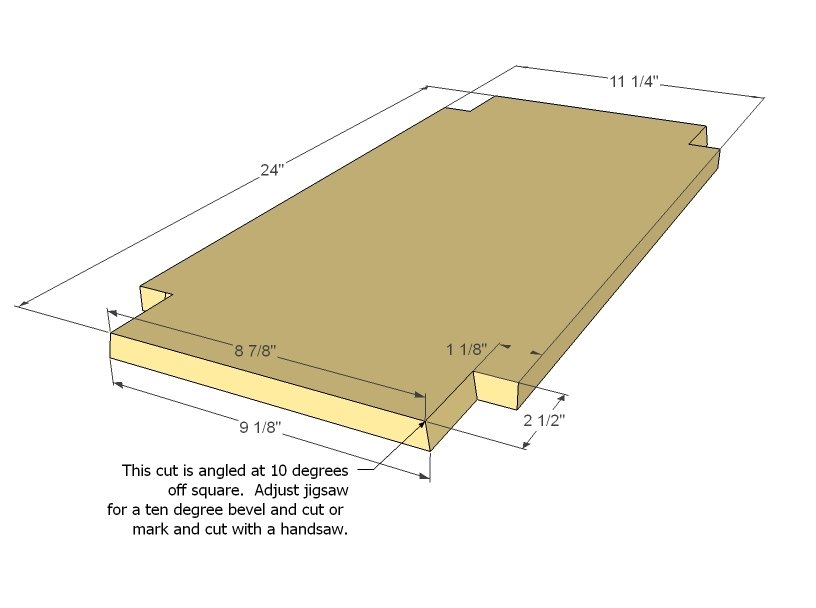
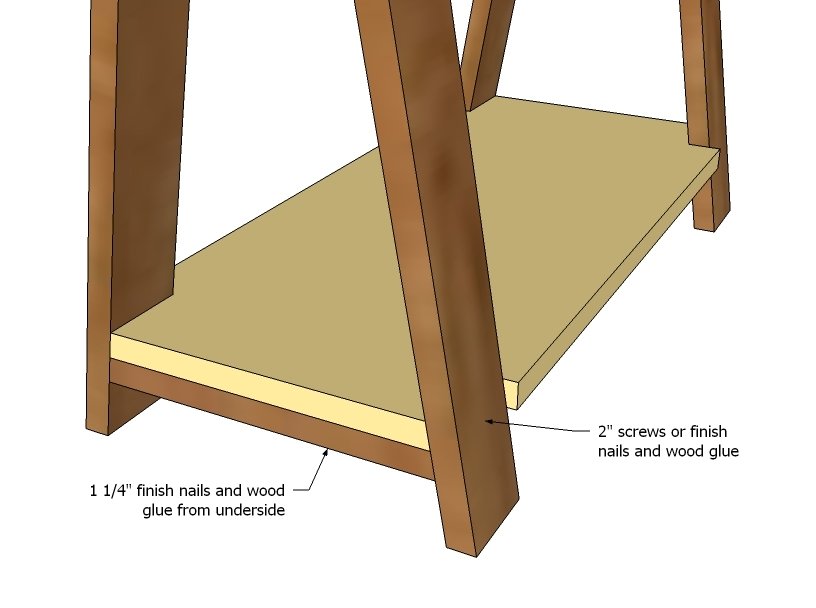
Now the tricky part that I talked about earlier. What I would do is use a precut beveled board as a guide and carefully mark out the notches. Then either use a jigsaw set for 10 degree bevel to make the angled cut or use a handsaw. The cross cut (cut that is made against the grain) is a straight cut and you can use a handsaw or jigsaw set square - don't worry if it notches into the bottom board a little - the support boards will cover all this up. Practice first on a scrap to make sure the cut fits within the sawhorse as shown in the next step.
Step 3
Once you are happy with your cuts, attach bottom shelf in place.
Step 4
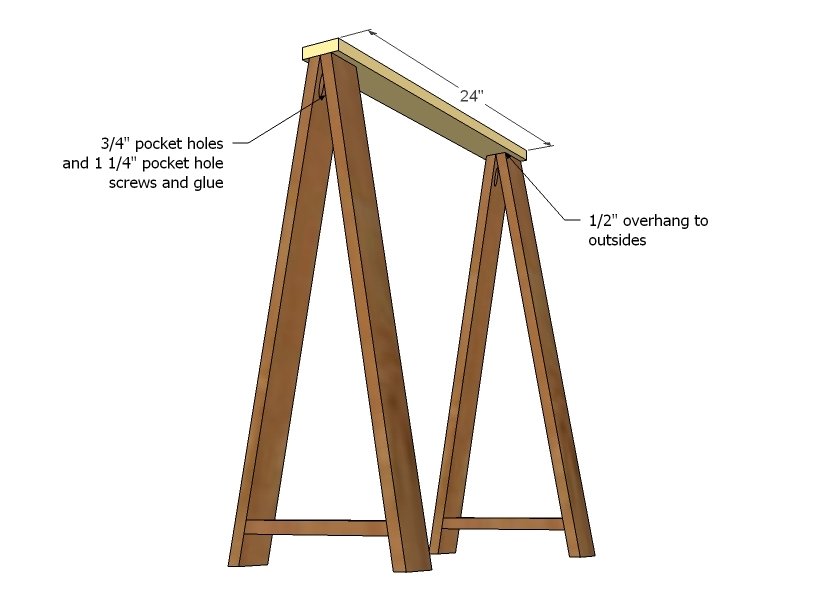
Now mark 1/2" in from each side on top boards and attach legs to top.
Step 5
Step 6
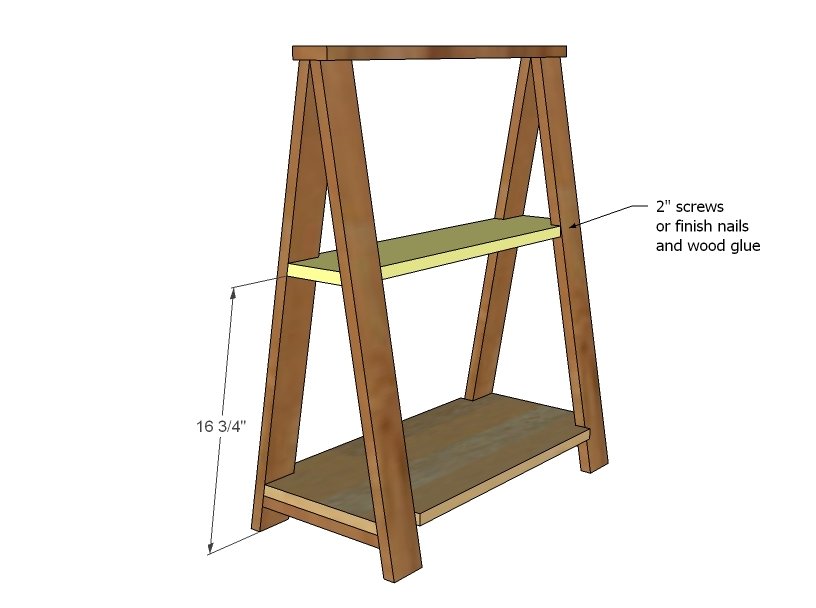
Mark each leg 16 3/4" from bottom along inside edge. This is the bottom of the bottom shelf joint. Attach in place.
Step 7
Step 8
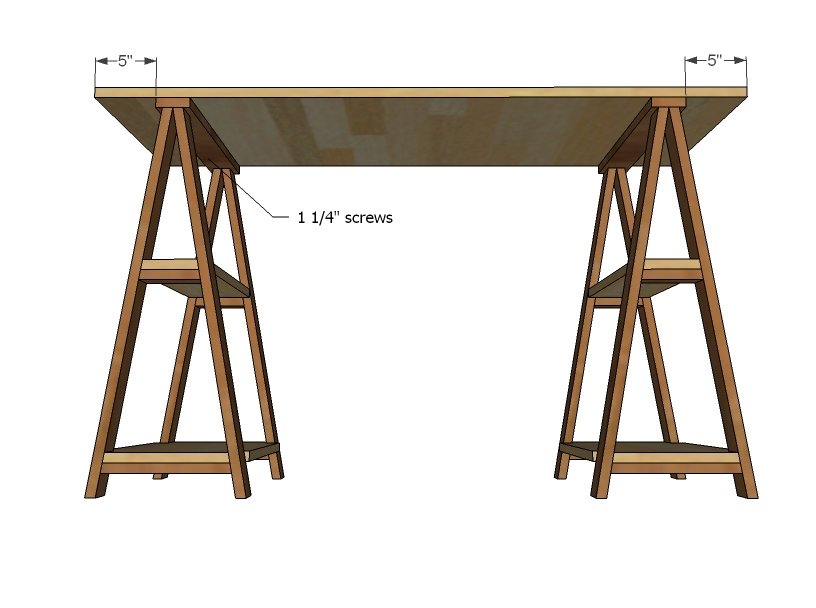
And attach the top!
Finishing
Sand all surfaces, starting with a medium grit and finishing with fine. Wipe off the dust, fill any holes or gaps with wood filler, and sand smooth once dry. Apply primer if you're painting, then finish with your choice of paint or stain and seal with a durable clear topcoat. For outdoor projects, use exterior-rated primer, paint or stain, and sealer so the piece stands up to the weather.
Source (temporary): https://www.ana-white.com/woodworking-projects/1x3-sawhorse-desk