$20 Raised Planter Box
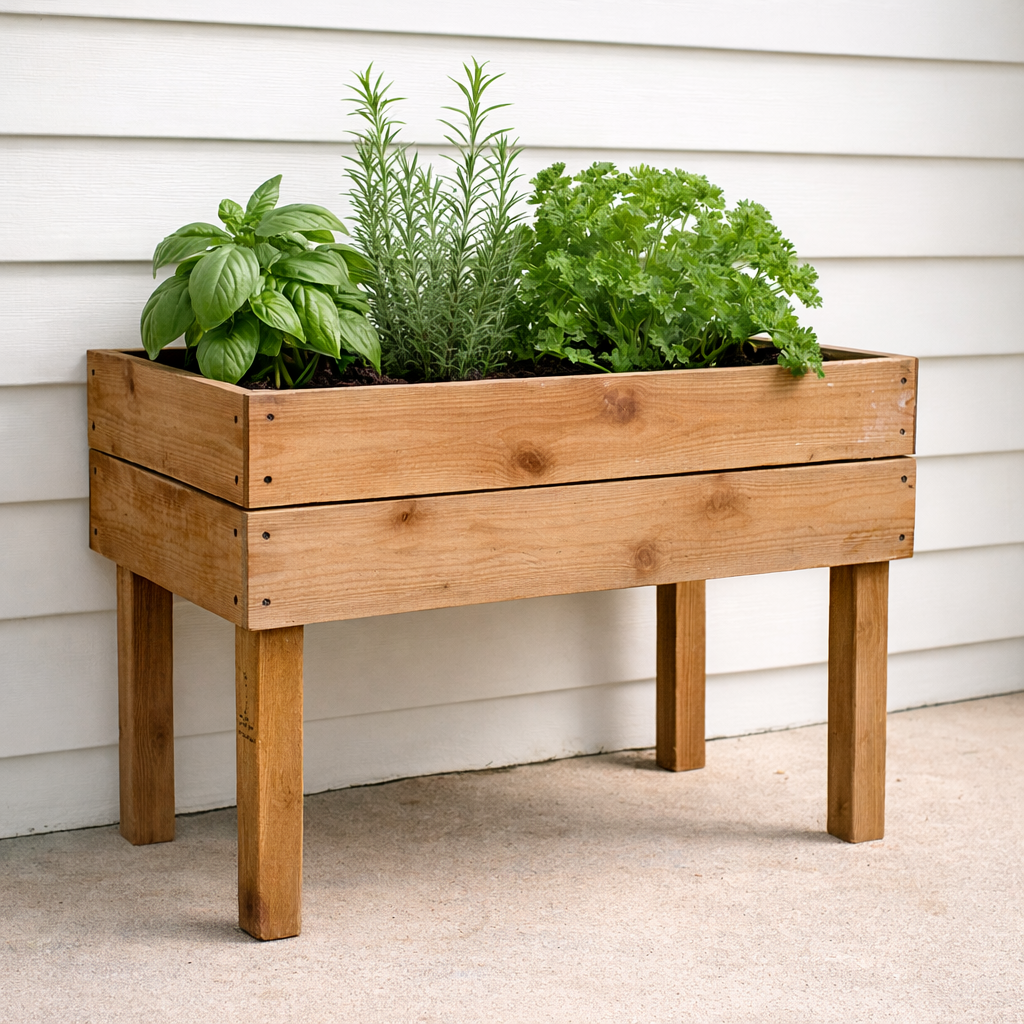
$20 Raised Planter Box – Build a beautiful, functional raised planter box for as little as $20 in materials! This DIY project is designed to use cedar fence pickets, making it one of the most budget-friendly ways to add style and function to your outdoor space. Perfect for flowers, herbs, or veggies, this planter’s elevated design keeps gardening comfortable while also adding charm to patios, porches, or backyards. With simple cuts and straightforward assembly, it’s a great beginner project and even makes a fun build for kids learning woodworking. Features: • Budget-Friendly Build – Construct using cedar pickets for about $20 • Beginner-Friendly – Minimal tools, easy-to-follow steps • Kid-Friendly Project – A perfect first woodworking project • Functional Design – Raised height for easy gardening • Customizable Finish – Stain, paint, or leave natural cedar This simple weekend project proves you don’t need to spend big to create something useful and beautiful. Download the and start building your own raised planter box today!
Specifications
| Project type | Planters, Garden Beds, and Greenhouses |
|---|---|
| Room | Outdoor |
| Difficulty | Starter Projects |
| Estimated cost | Under $20 |
Dimensions
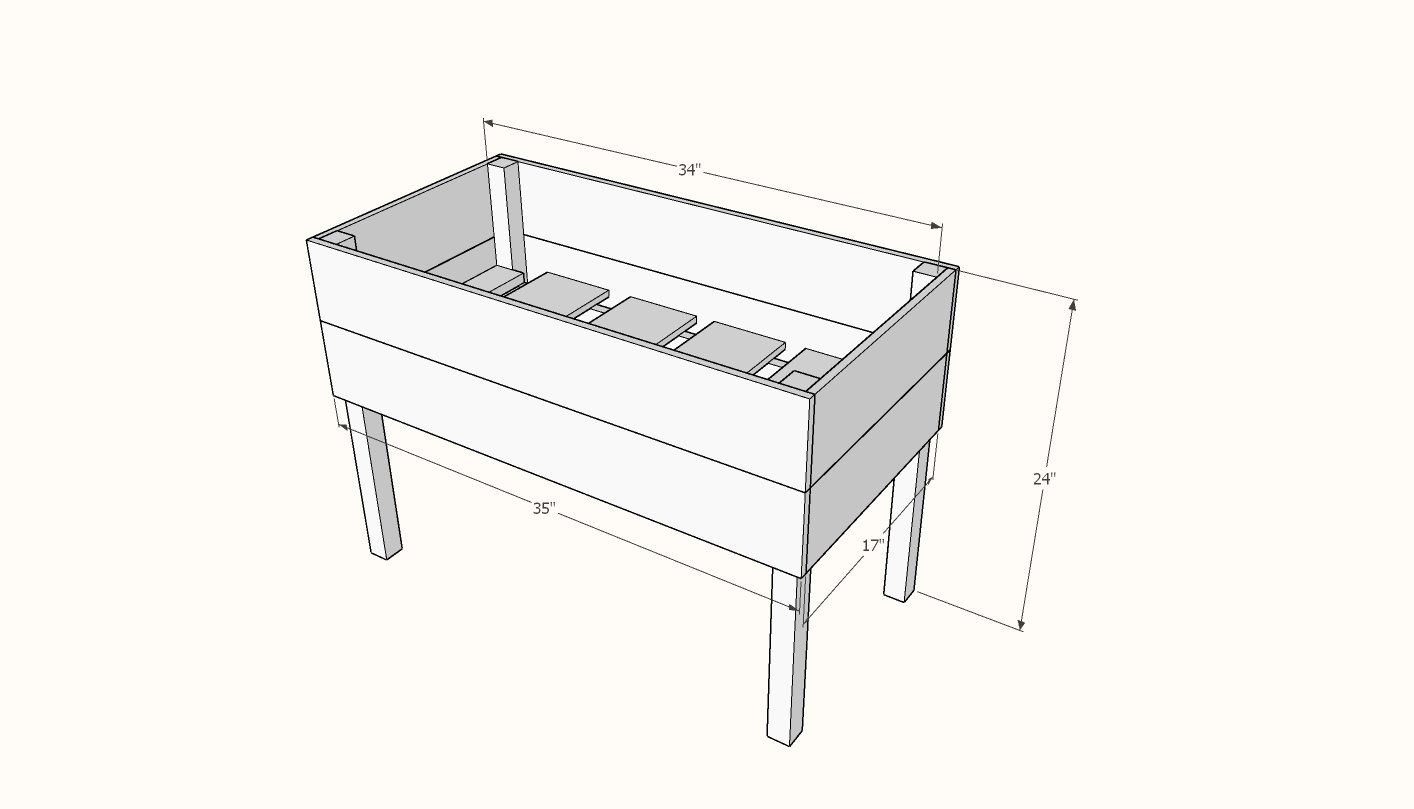
Use the size-specific shopping and cut lists below.
Shopping List
- 1 - 1x2 @ 8 feet long (furring strips are fine)
- 4 - 5-1/2" wide cedar fence pickets (can be dogeared)
- 1 - 2x2 @ 8 feet long (furring strips are fine)
- About 50 - 1-1/4" self tapping wood screws (I used these)
- landscaping fabric for the bottom
- About 3 cubic yards of soil
Cut List
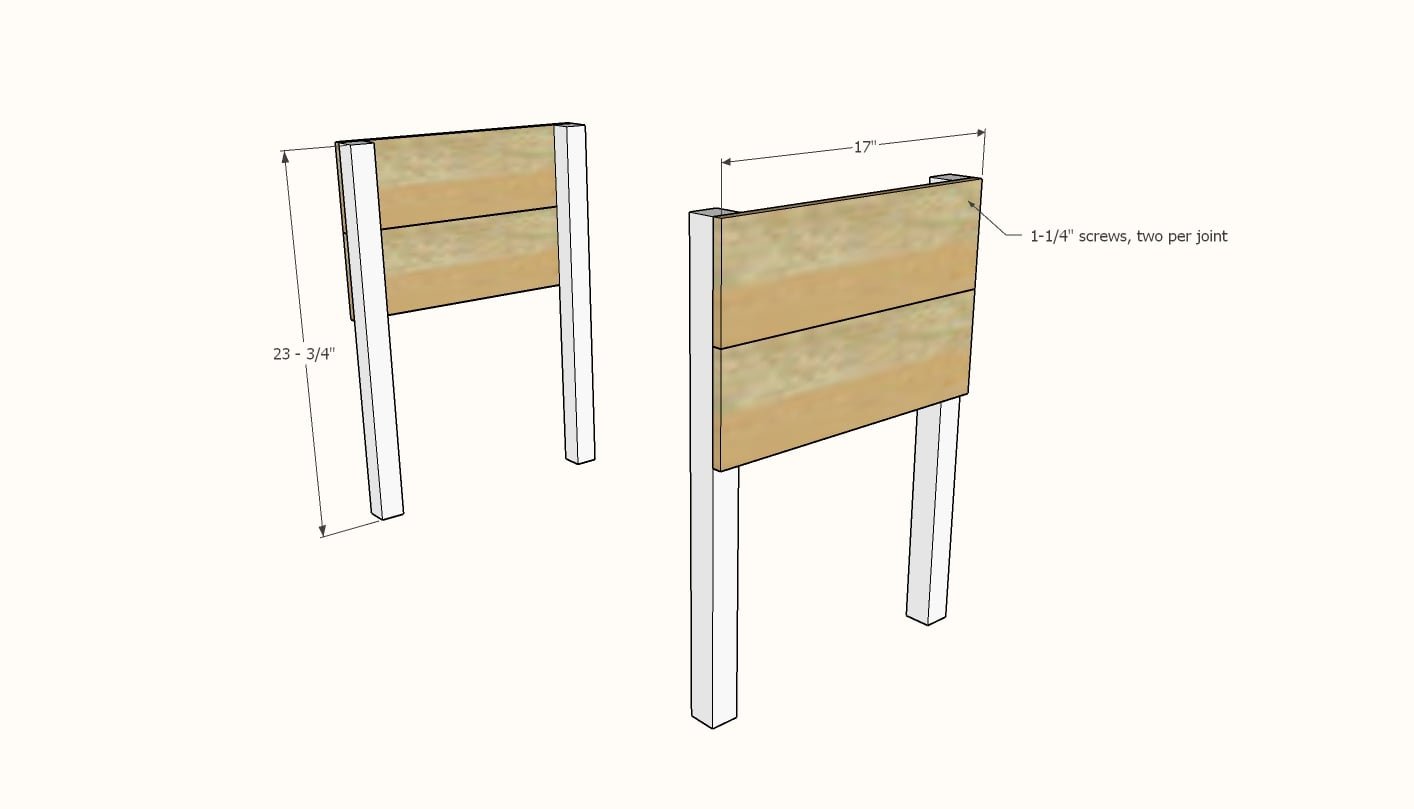
- 4 - 2x2 @ 23-3/4" - legs
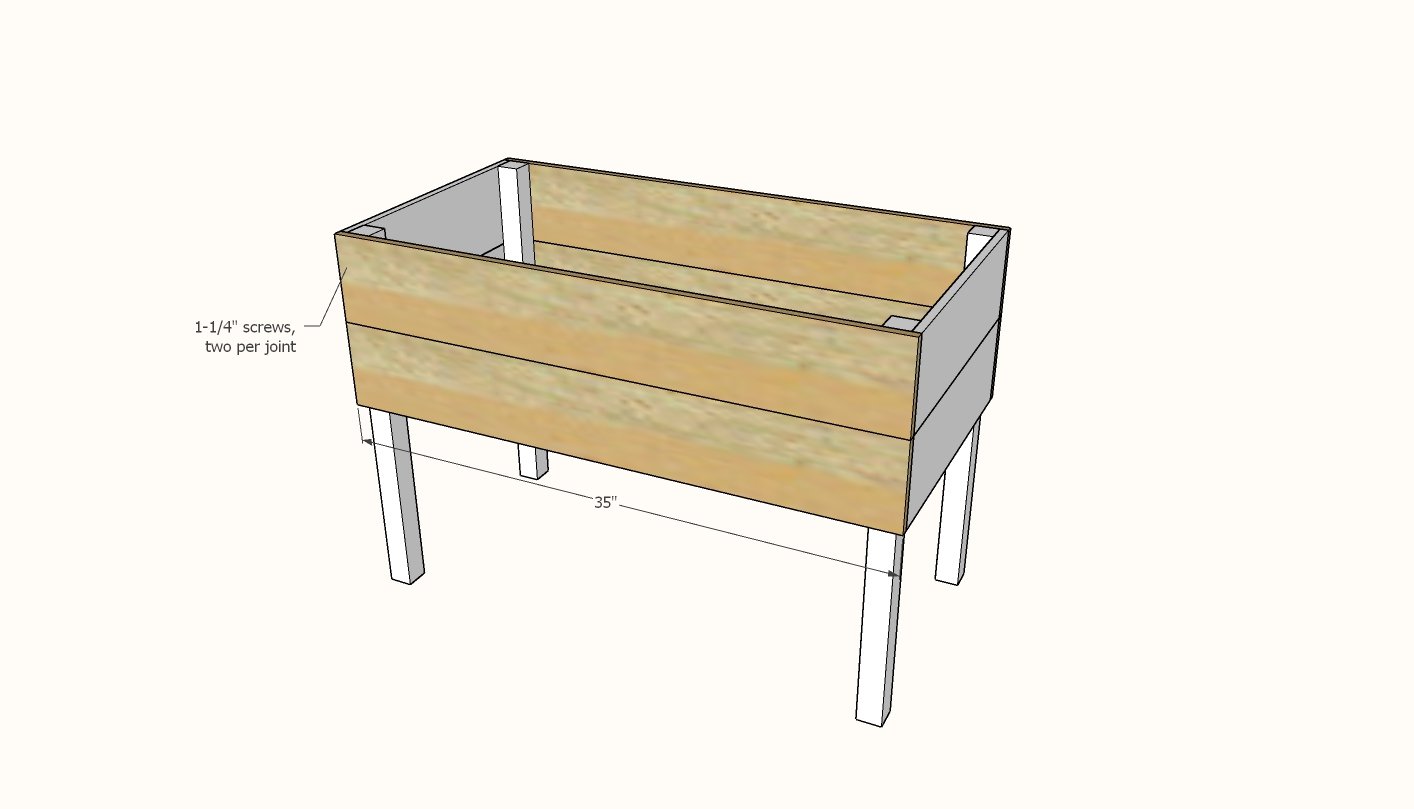
- 4 - 5-1/2" wide cedar fence pickets @ 35-1/2" - sides
- 4 - 5-1/2" wide cedar fence pickets @ 17" - ends
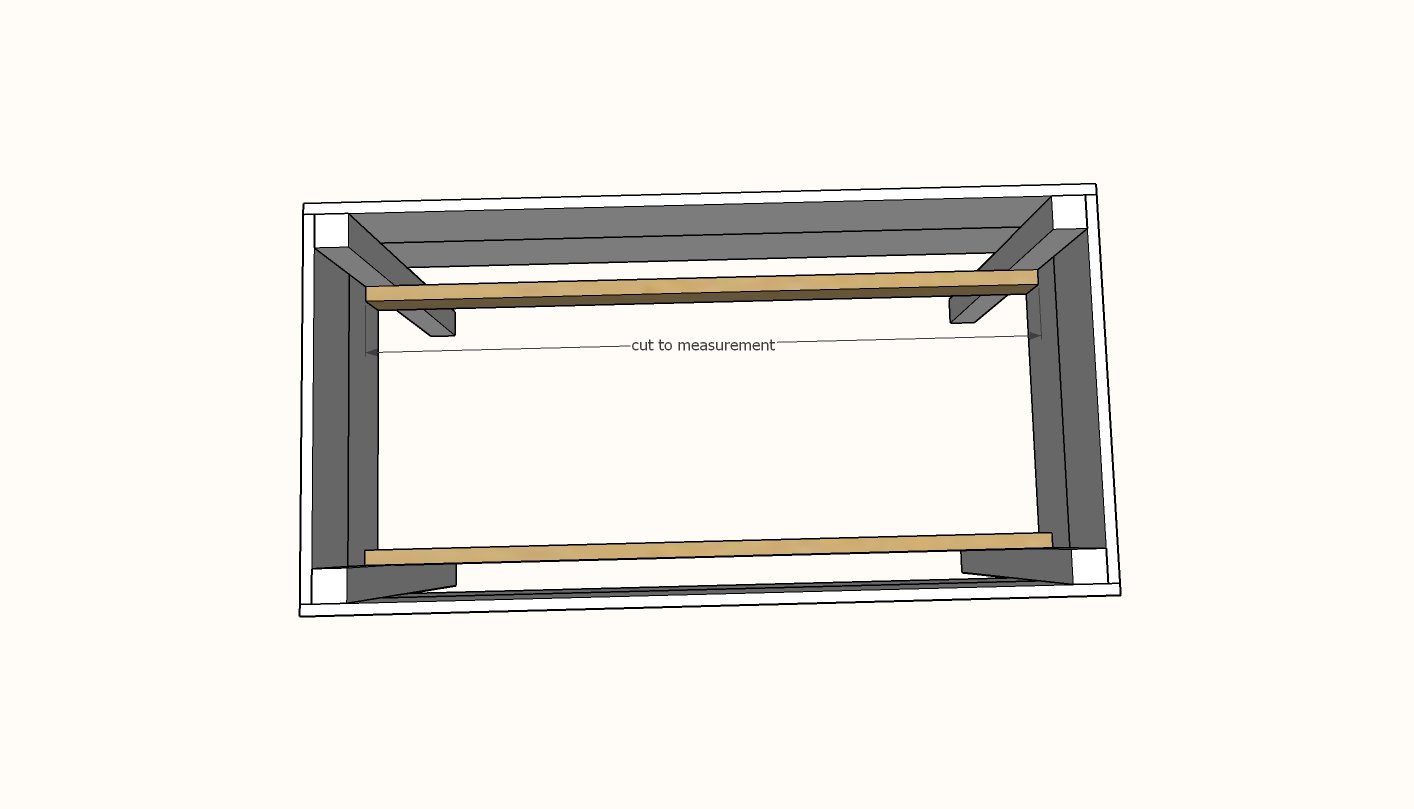
- 2 - 1x2 @ 34" (recommend cutting this one to fit as the length could change slightly depending on board thicknesses) - bottom supports
- 2 - 1x2 @ 14" - inside slat ends
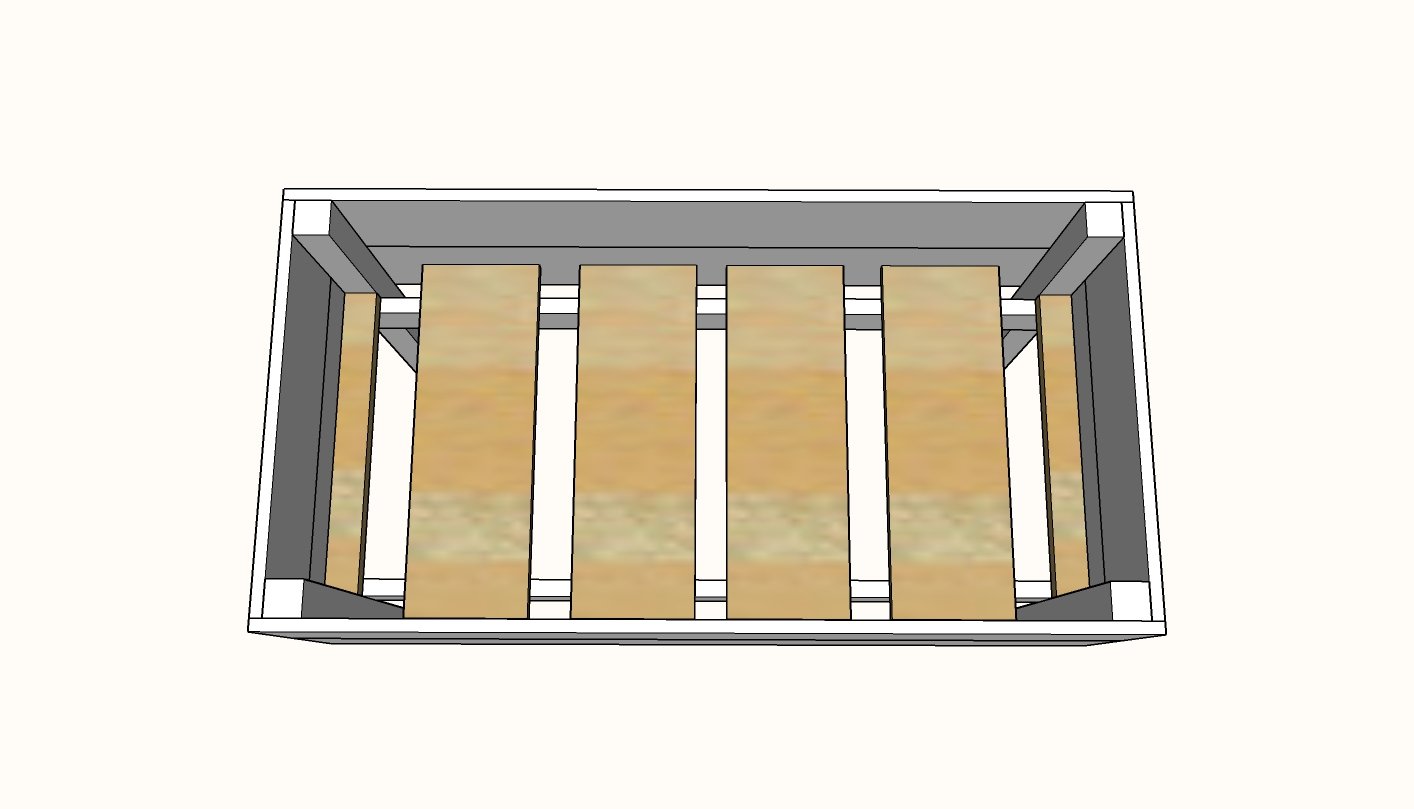
- 4 - 5-1/2" wide cedar fence pickets @ 17" - main slats
Tools
- measuring tape
- pencil
- safety glasses
- hearing protection
- drill
- compound miter saw
Step-by-step Instructions
Step 1
Build the two ends with 1-1/4" screws, two per joint, attaching the shorter cedar fence pickets to the legs. Everything is flush to outside edges.
Step 2
Attach the longer cedar fence pickets to the legs with all outside edges flush.
Step 3
Measure and cut the cleats. Attach to the legs with 1-1/4" screws, two screws per joint.
Step 4
Lay the slats evenly inside the planter box. Attach with a single screw per joint.
Finishing
Sand all surfaces, starting with a medium grit and finishing with fine. Wipe off the dust, fill any holes or gaps with wood filler, and sand smooth once dry. Apply primer if you're painting, then finish with your choice of paint or stain and seal with a durable clear topcoat. For outdoor projects, use exterior-rated primer, paint or stain, and sealer so the piece stands up to the weather.
Source (temporary): https://www.ana-white.com/woodworking-projects/20-raised-planter-box-cedar-sided