21" Base Cabinet Door/Drawer Combo (Momplex White Kitchen)
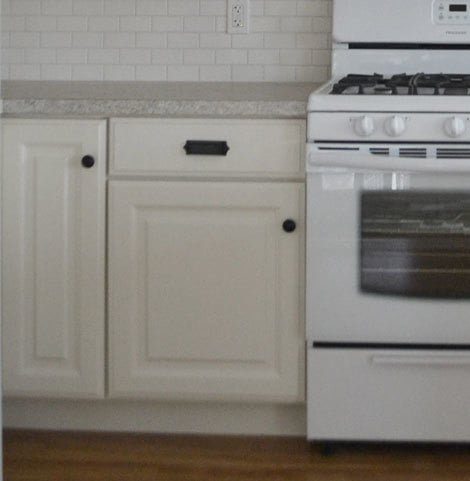
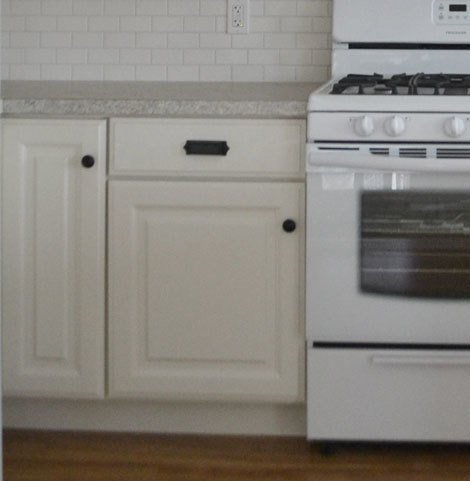
21" DIY Kitchen base cabinet plans with full overlay door - Momplex White kitchen cabients.
Specifications
| Project type | Kitchen Cabinet Plan, Accessories and Serving |
|---|---|
| Room | kitchen |
| Style | Farmhouse Furniture |
| Difficulty | Intermediate |
| Estimated cost | $50 - $100 |
Dimensions
Use the size-specific shopping and cut lists below.
Shopping List
3/4" plywood ripped into strips 22 1/4" long (for sides and shelves)
3/4" plywood scrap from ripping sides and shelves (for top supports)
3/4" plywood ripped into strips 5" long (for base supports - use cheaper plywood here)
1x2s for face frames
1/4" plywood (for backs)
1-1/4" pocket hole screws
3/4" finish nails
edge banding for shelves
Cut List
CARCASS
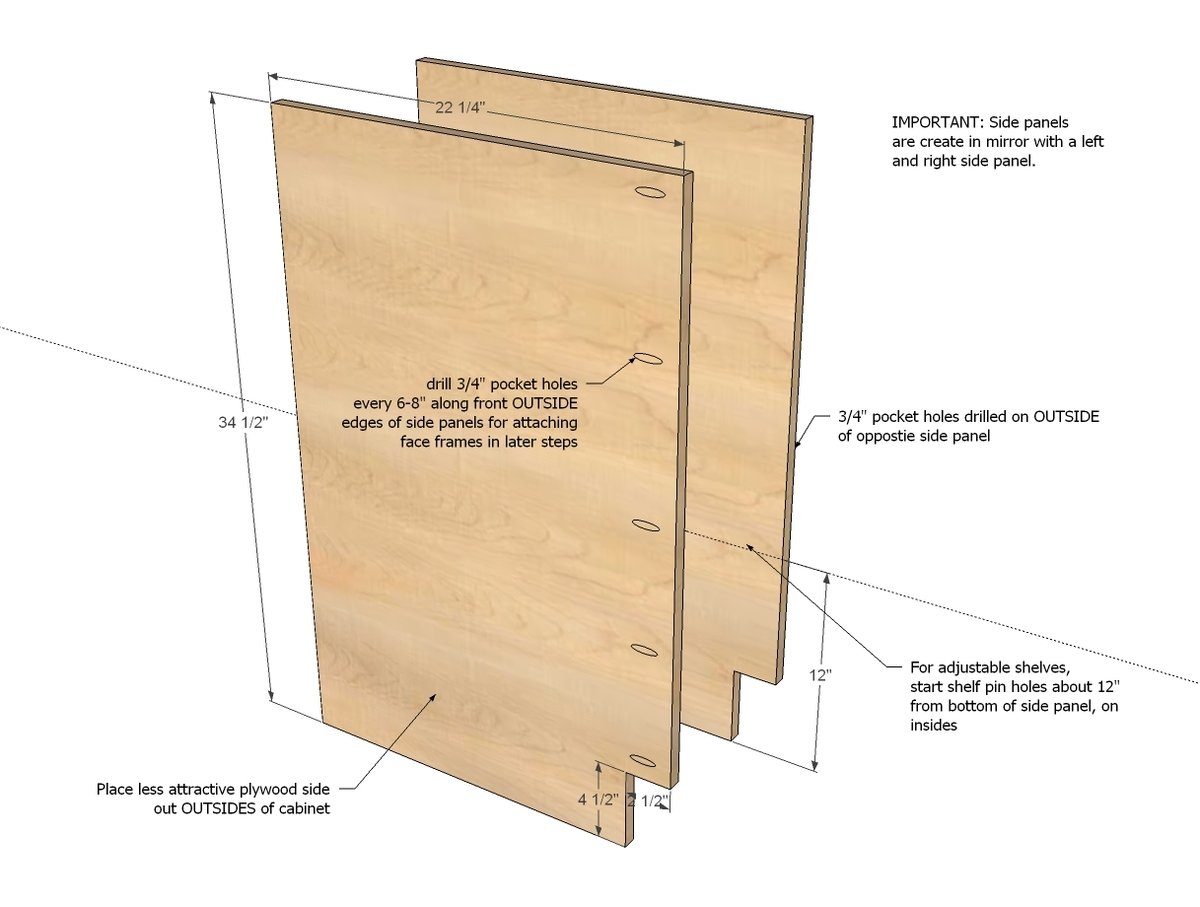
2 - 3/4" plywood @ 22 1/4" x 34 1/2" (side panels)
1 - 3/4" plywood @ 22 1/4" x 19" (bottom shelf)
2 - 3/4" plywood @ 5" x 19" (bottom supports)
2 - 3/4" plywood @ 3 1/2" (can vary in rip width) x 19" (top supports)
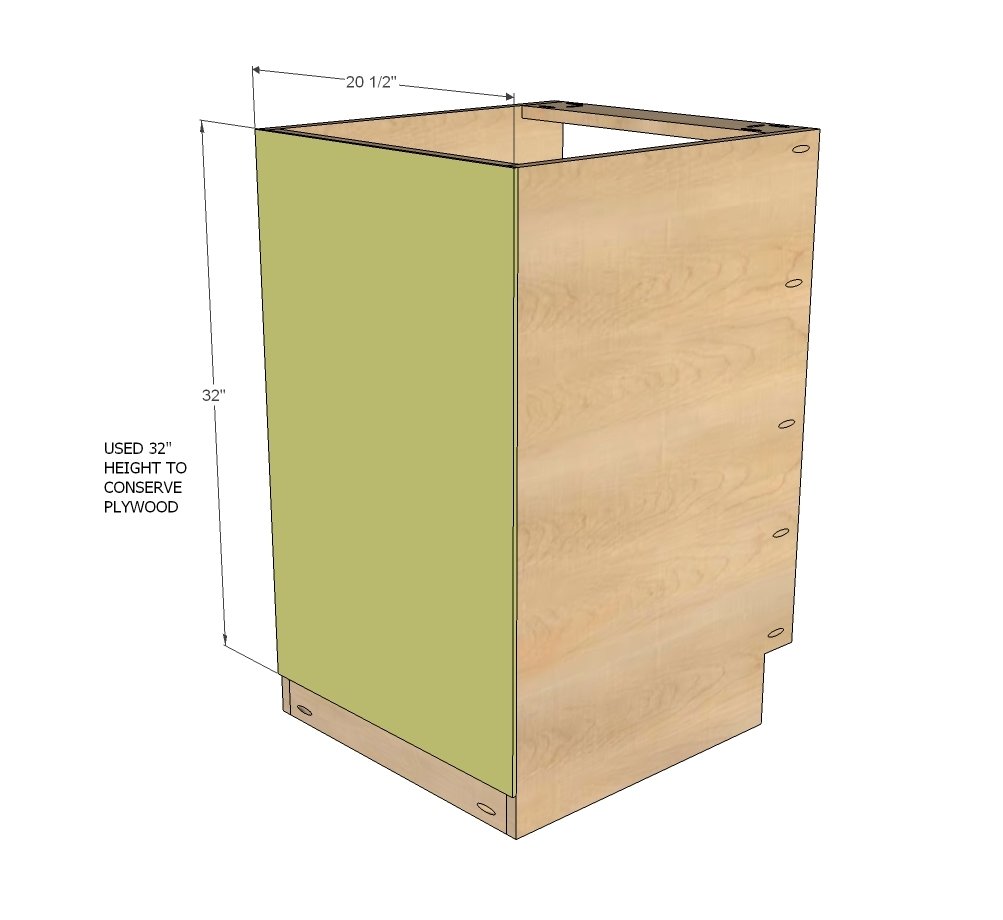
1 - 1/4" plywood @ 32" x 20 1/2" (back)
FACE FRAME
2 - 1x2 @ 27"
2 - 1x2 @ 21"
1 - 1x2 @ 18"
SHELVES
3/4" plywood @ 22" x 18 3/4" (measure and adjust to fit shelf pins)
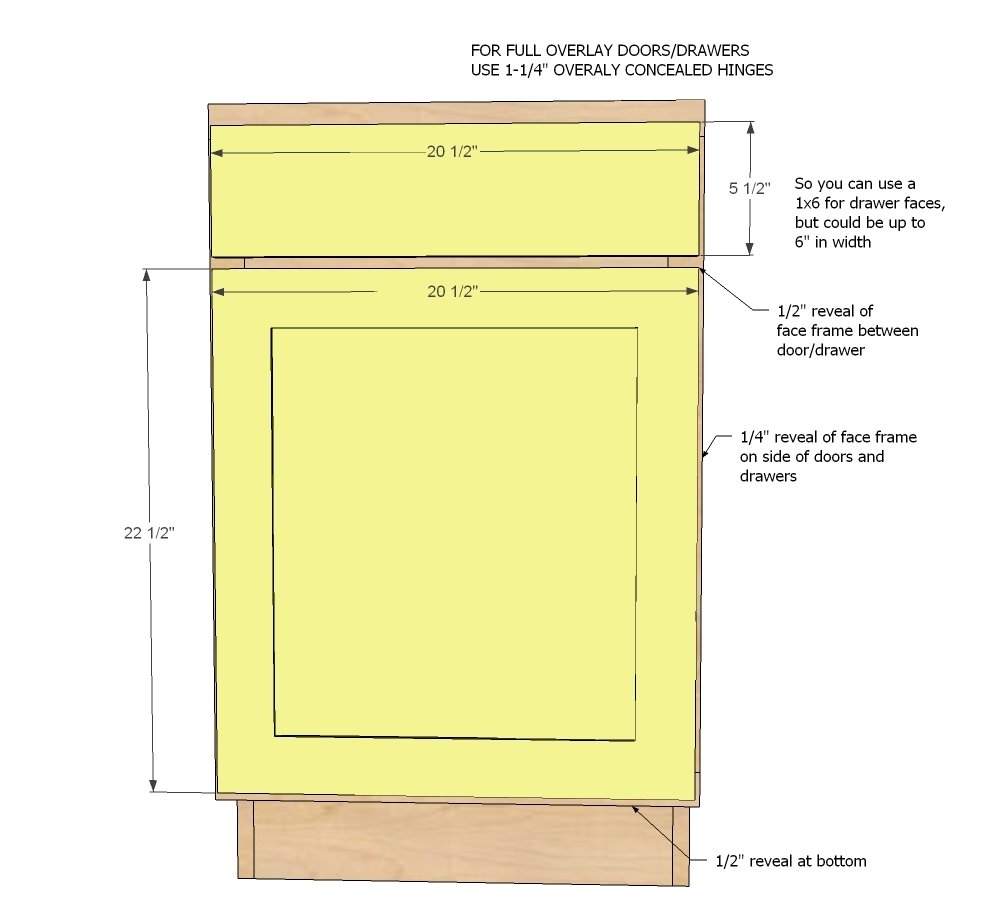
DOOR/DRAWER FACE for FULL OVERLAY (1-1/4")
5 1/2" x 20 1/2" (drawer face)
22-1/2" x 20-1/2" (door)
Tools
- measuring tape
- square
- pencil
- safety glasses
- hearing protection
- kreg-jig
- drill
- jigsaw
- compound miter saw
- table saw
- nailer
Step-by-step Instructions
Step 1
First, create the side panels - remember that the two side panels are mirrors of each other.
Step 2
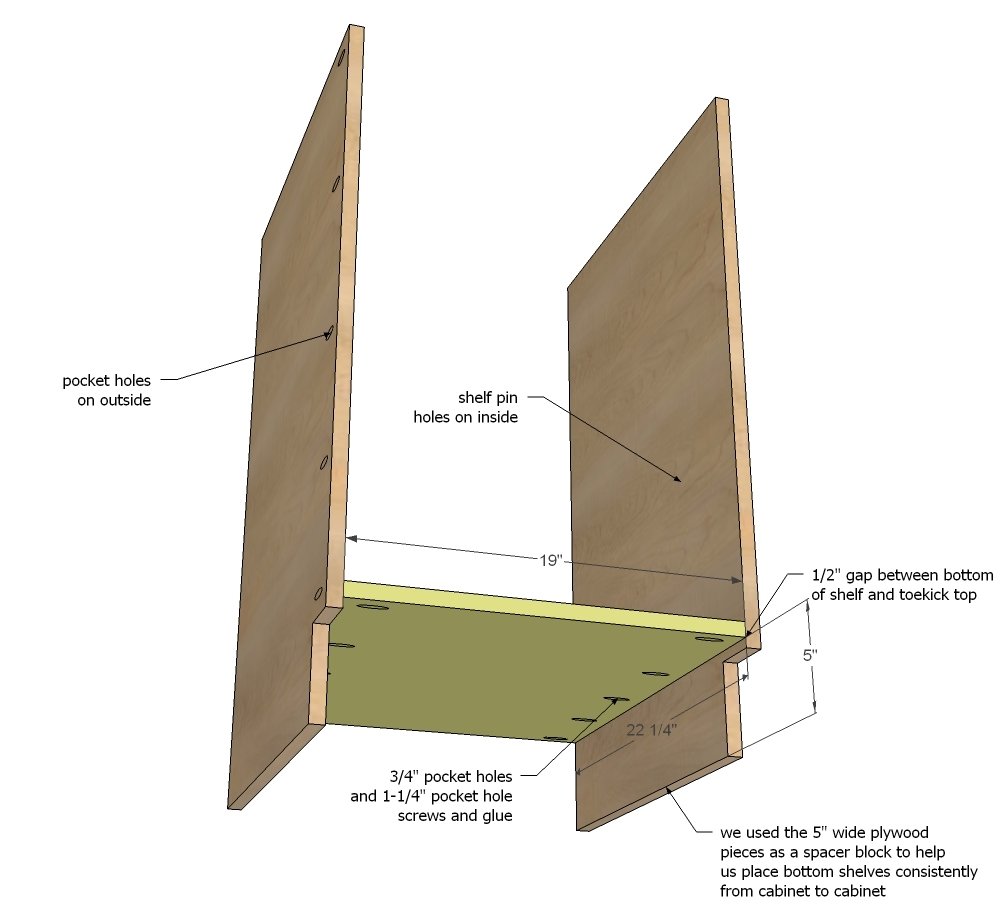
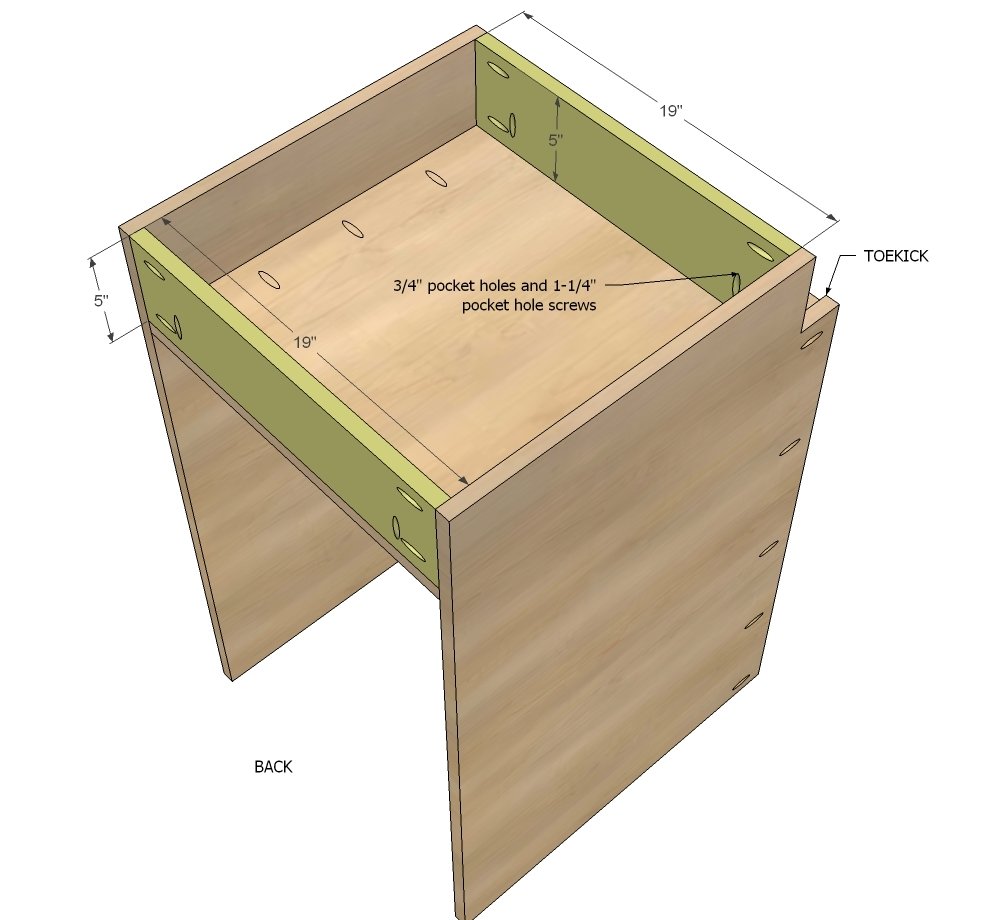
The bottom shelf is attached 5" up from the bottom of the sides. We used 1-1/4" pocket hole screws (drilling pocket holes on the 3/4" setting) - spacing about ever 6-8".
Step 3
Back and front supports are attached to both the sides and the bottom shelf with 3/4" pocket holes and 1-1/4" pocket hole screws. NOTE: Since these pieces of plywood will be hidden under cabinet and behind finished toekick, we opted to use a cheaper plywood than the prefinished stuff here.
Step 4
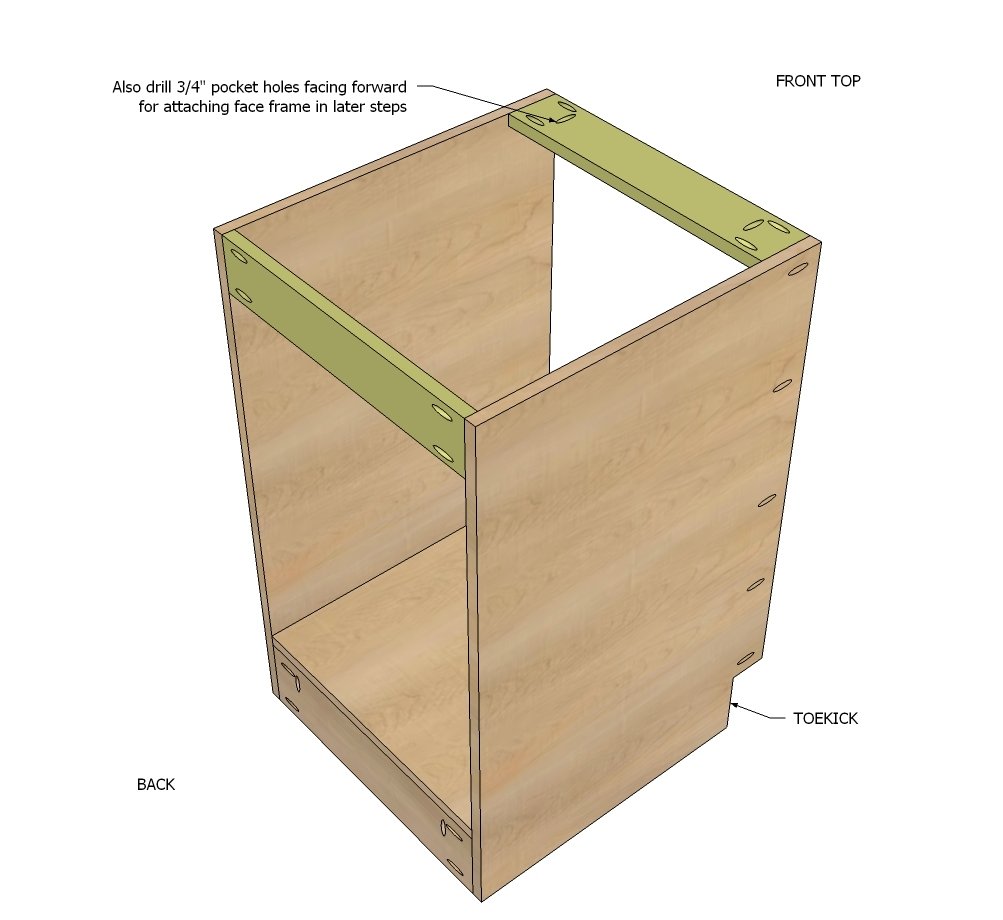
We cut our top supports from the leftover scrap from ripping plywood down to the side/shelf width (22-1/4"). This ended up being about 3-1/2" wide. Depending on the type of drawer slides you are using (we used Metabox drawer slides that mount to the top of the drawer so not a problem for us) you may wish to place extra support for mounting the drawer slides to the back or a larger back piece.
Step 5
Step 6
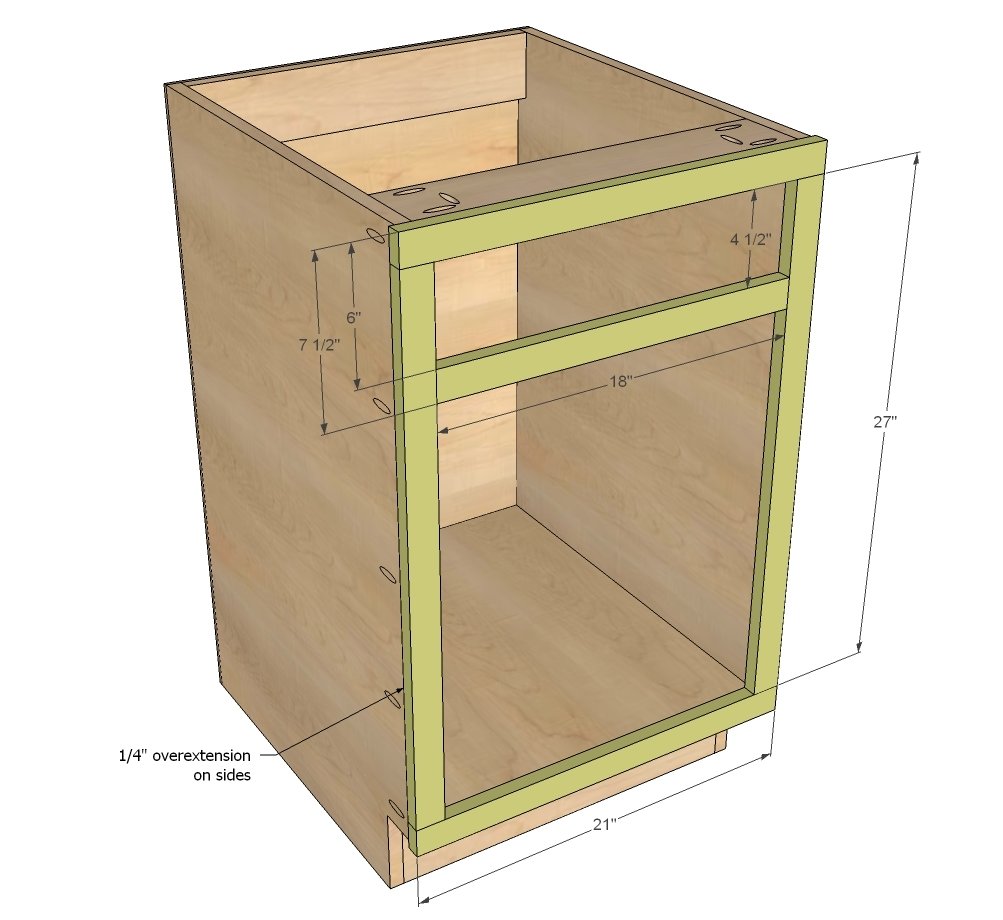
We built our face frames seperately on a clean table, clamping each joint. Then we attached the face frame (after painting it) to the front of the cabinet through the pocket holes drilled in the outsides of the sides and the top. We did have to glue and nail the bottom of the face frame, as it is too tight to fit a drill in there to attach at the base.
Step 7
These cabinets would also work with partial overlay hinges, but we opted for full overlay doors. These are the door and drawer sizes we ordered for full overaly doors. We used 1-1/4" overlay hinges (concealed euro style - more on this later) for hinges.
Finishing
Sand all surfaces, starting with a medium grit and finishing with fine. Wipe off the dust, fill any holes or gaps with wood filler, and sand smooth once dry. Apply primer if you're painting, then finish with your choice of paint or stain and seal with a durable clear topcoat. For outdoor projects, use exterior-rated primer, paint or stain, and sealer so the piece stands up to the weather.
Source (temporary): https://www.ana-white.com/woodworking-projects/21-base-cabinet-doordrawer-combo-momplex-white-kitchen