26" Waterfall Framed End Table
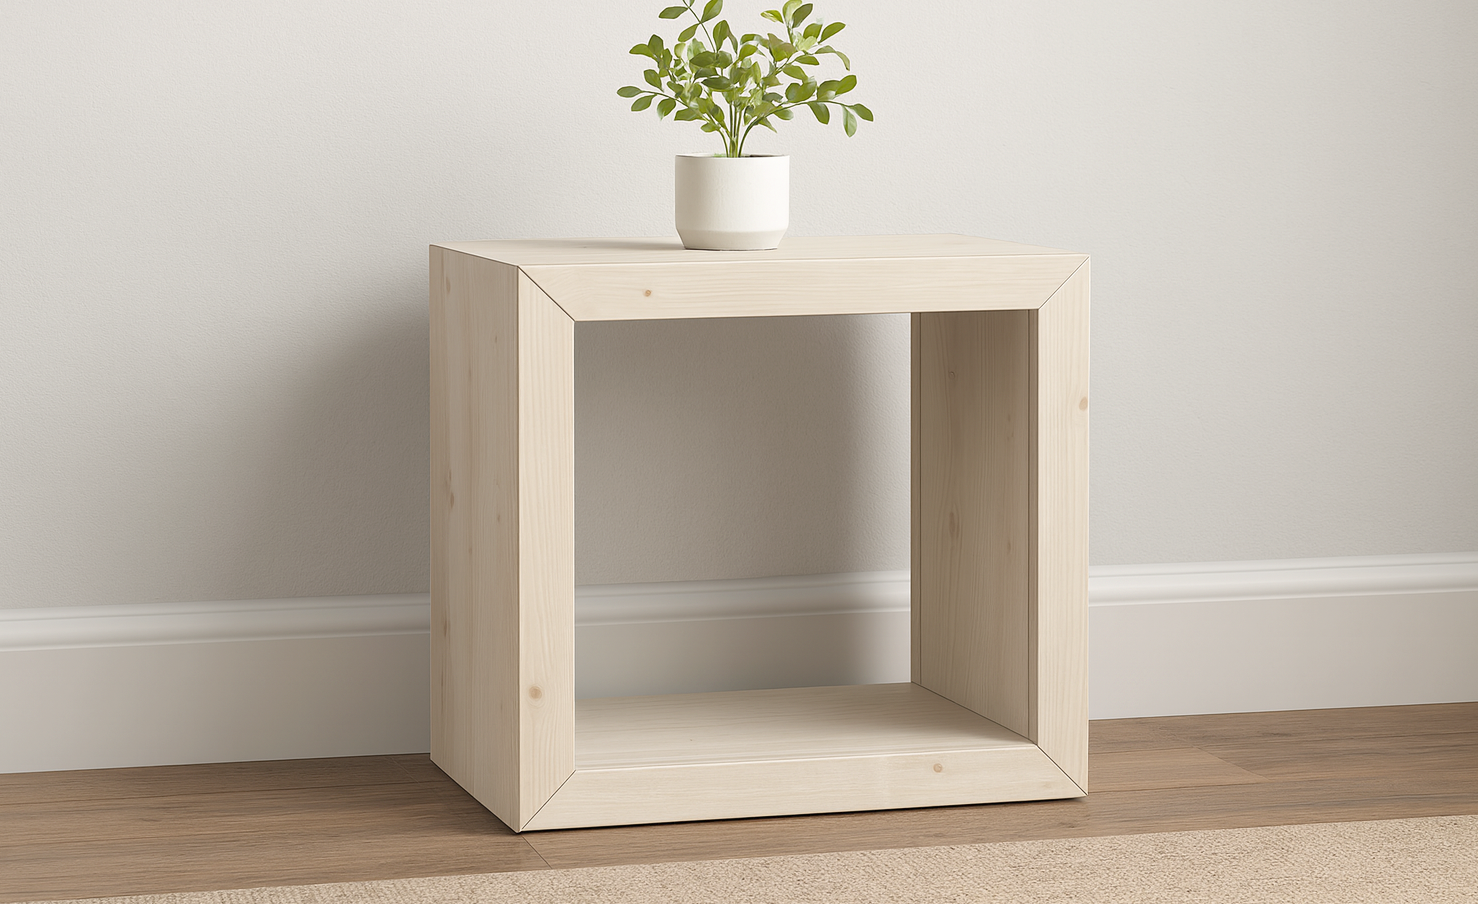
Free DIY End Table Woodworking Plans – Modern Farmhouse Build Create a custom modern farmhouse end table using just a 16" pine project panel with these easy-to-follow,. This design offers a clean, high-end look with mitered edges and a minimalist silhouette—perfect for any room needing a warm, handcrafted touch.
Specifications
| Project type | Nightstands |
|---|---|
| Room | Bedroom |
| Difficulty | Intermediate |
Dimensions
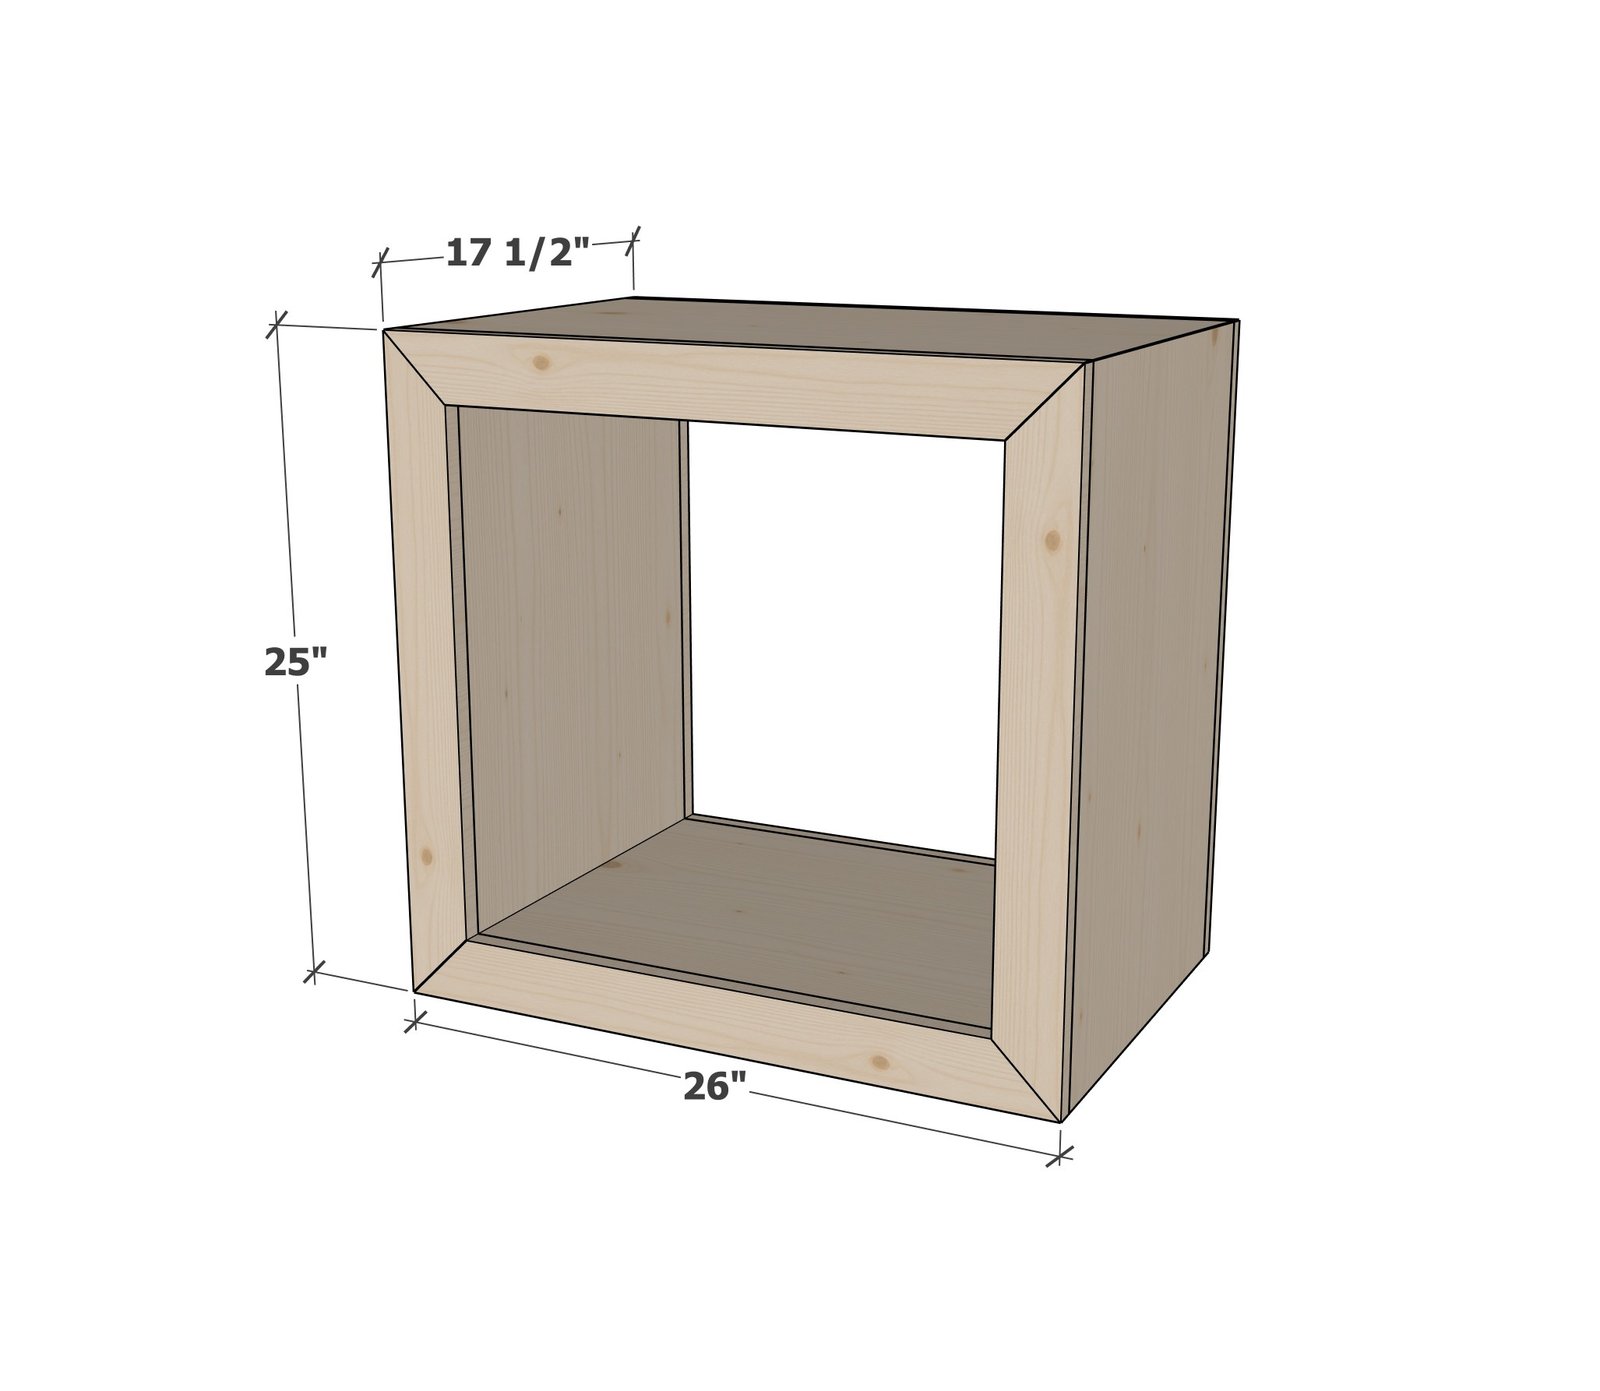
Use the size-specific shopping and cut lists below.
Shopping List
- 2 - 1x3 @ 10 feet long
- 1 - 16" wide** pine project panel, 12 feet long*
- 1-1/4" brad nails
- 1-1/4" pocket hole screws (recommended
- wood glue
- wood finishing supplies
*It will be very tight to fit all the cuts on a 12 foot long project panel, it is recommended to first cut an outer side panel (one end is 45 degree bevel), then use that cut 45 degree bevel to cut the top panel, then flip to use the bevel cut for the remaining side panel. Then cut the remaining pieces from the leftovers. If you are a beginner, you may need to buy two panels, one 8' and one 6', to give you some more cutting room.
**The project panel can be in a wider width to make a deeper end table
Cut List
Cut List for 1 End Table
- 2 - 1x3 @ 16" (same width as your project panel) - inside cleats
- 1 - 16" wide project panel @ 26" - both ends cut at 45 degree bevel, long point measurement, ends NOT parallel - top
- 2 - 16" wide project panels @ 25" - one end cut at 45 degree bevel, long point measurement - outside panels, sides
- 1 - 16" wide project panel @ 24-1/2" - bottom shelf
- 2 - 16" wide project panel @ 21-3/4" - inside panels, sides
- 4 - 1x3 @ about 26" - long point to long point measurement, both ends cut at 45 degree angle, ends not parallel - top and bottom trim
- 4 - 1x3 @ about 25" - long point to long point measurement, both ends cut at 45 degree angle, ends not parallel - top and bottom trim
Tools
- measuring tape
- square
- pencil
- safety glasses
- kreg-jig
- drill
- circular saw
- compound miter saw
- nailer
Step-by-step Instructions
Step 1
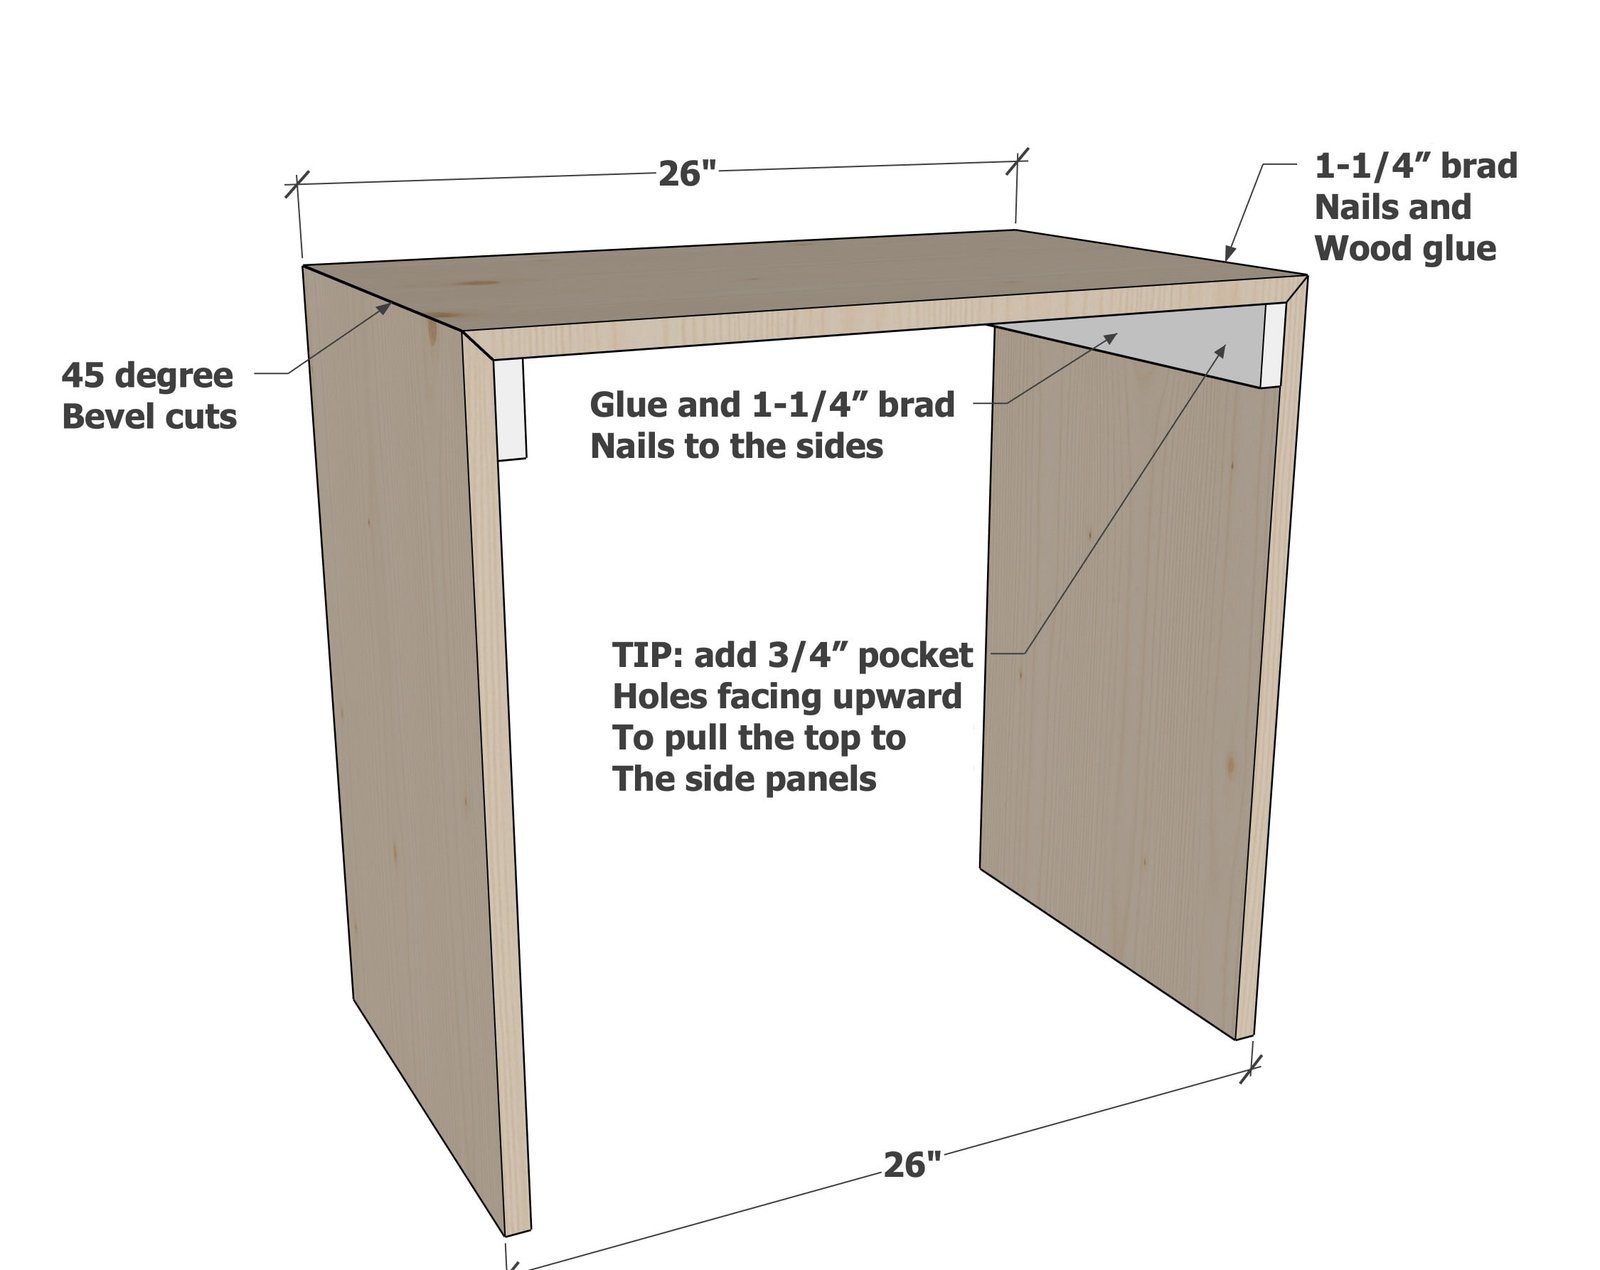
Cutting these bevel corners will be the most difficult part of this project. Make practice cuts first on scrap wood and check for square, adjust your saw if necessary. Once cuts are made, attach 1x3 blocking to the inside with glue and brad nails. Attach top. If you have a pocket hole jig, attaching the 1x3s to the top with pocket holes will help pull the top to the sides.
Step 2
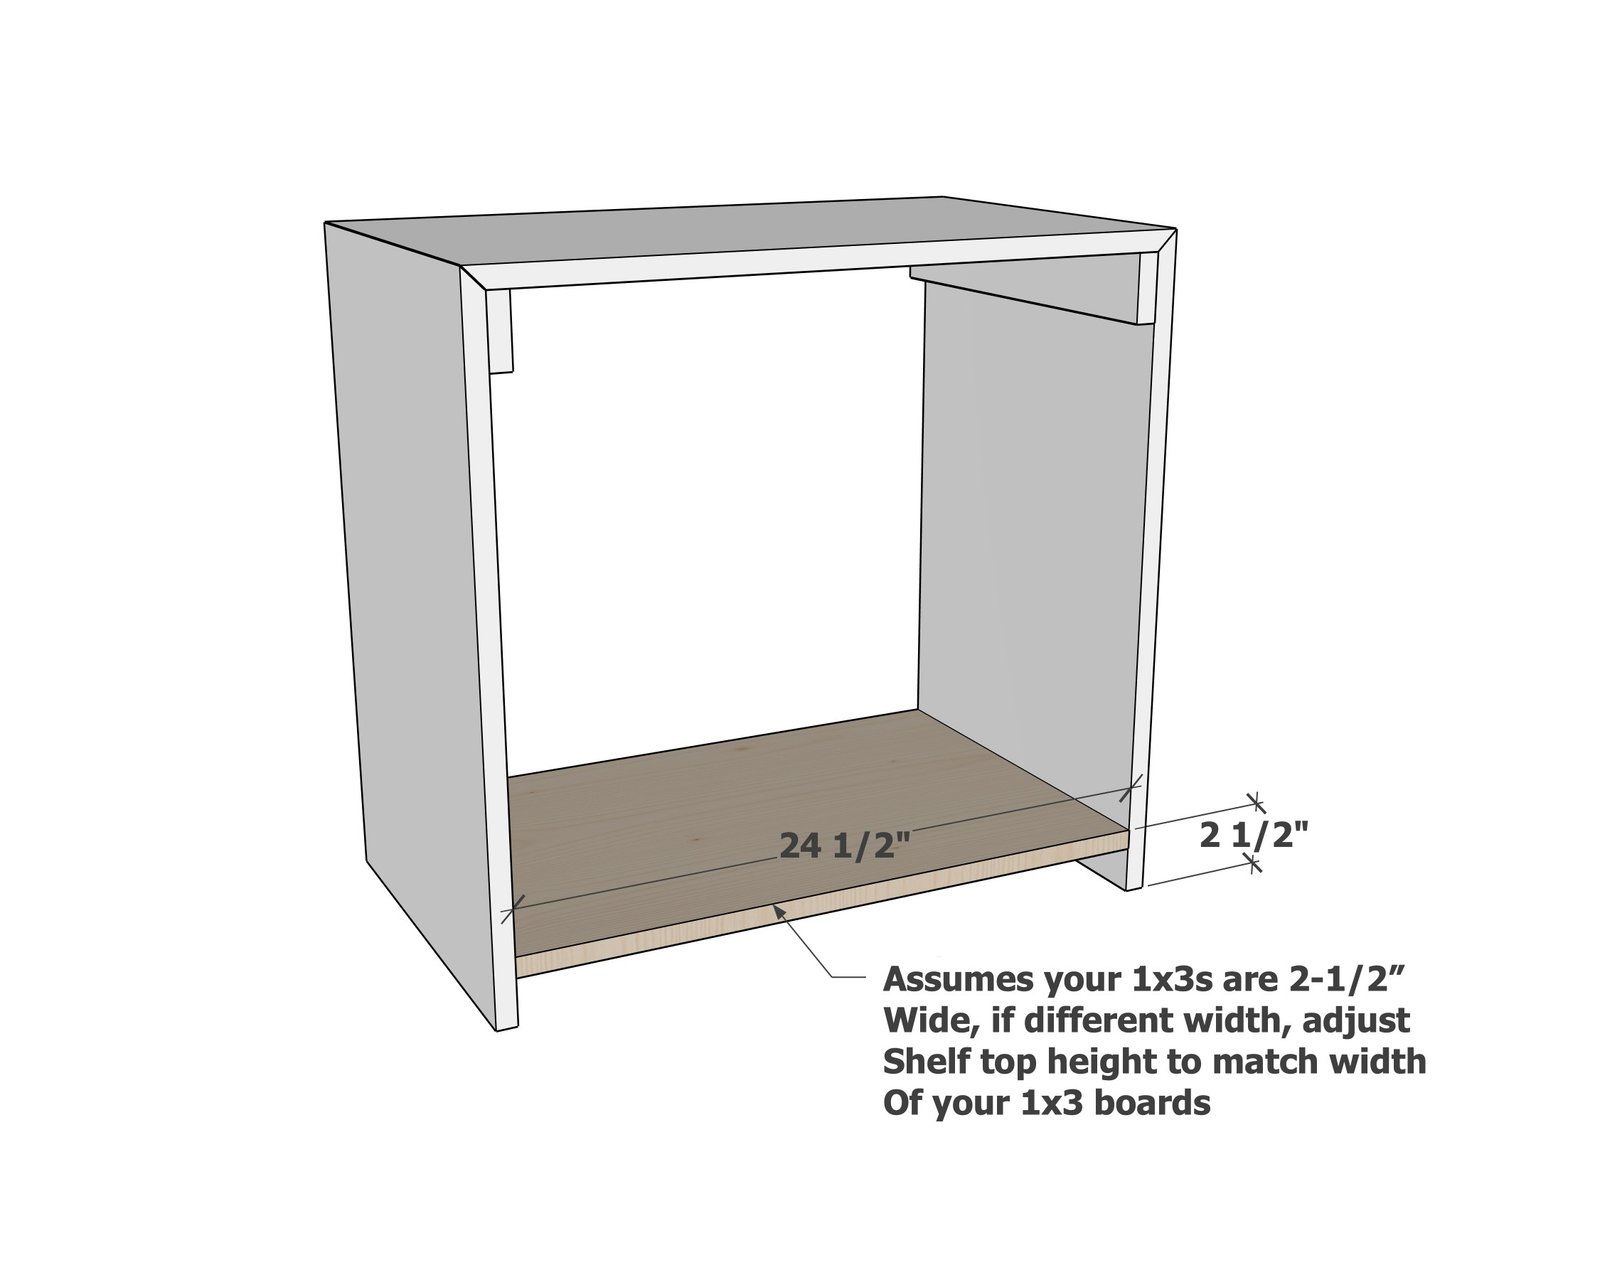
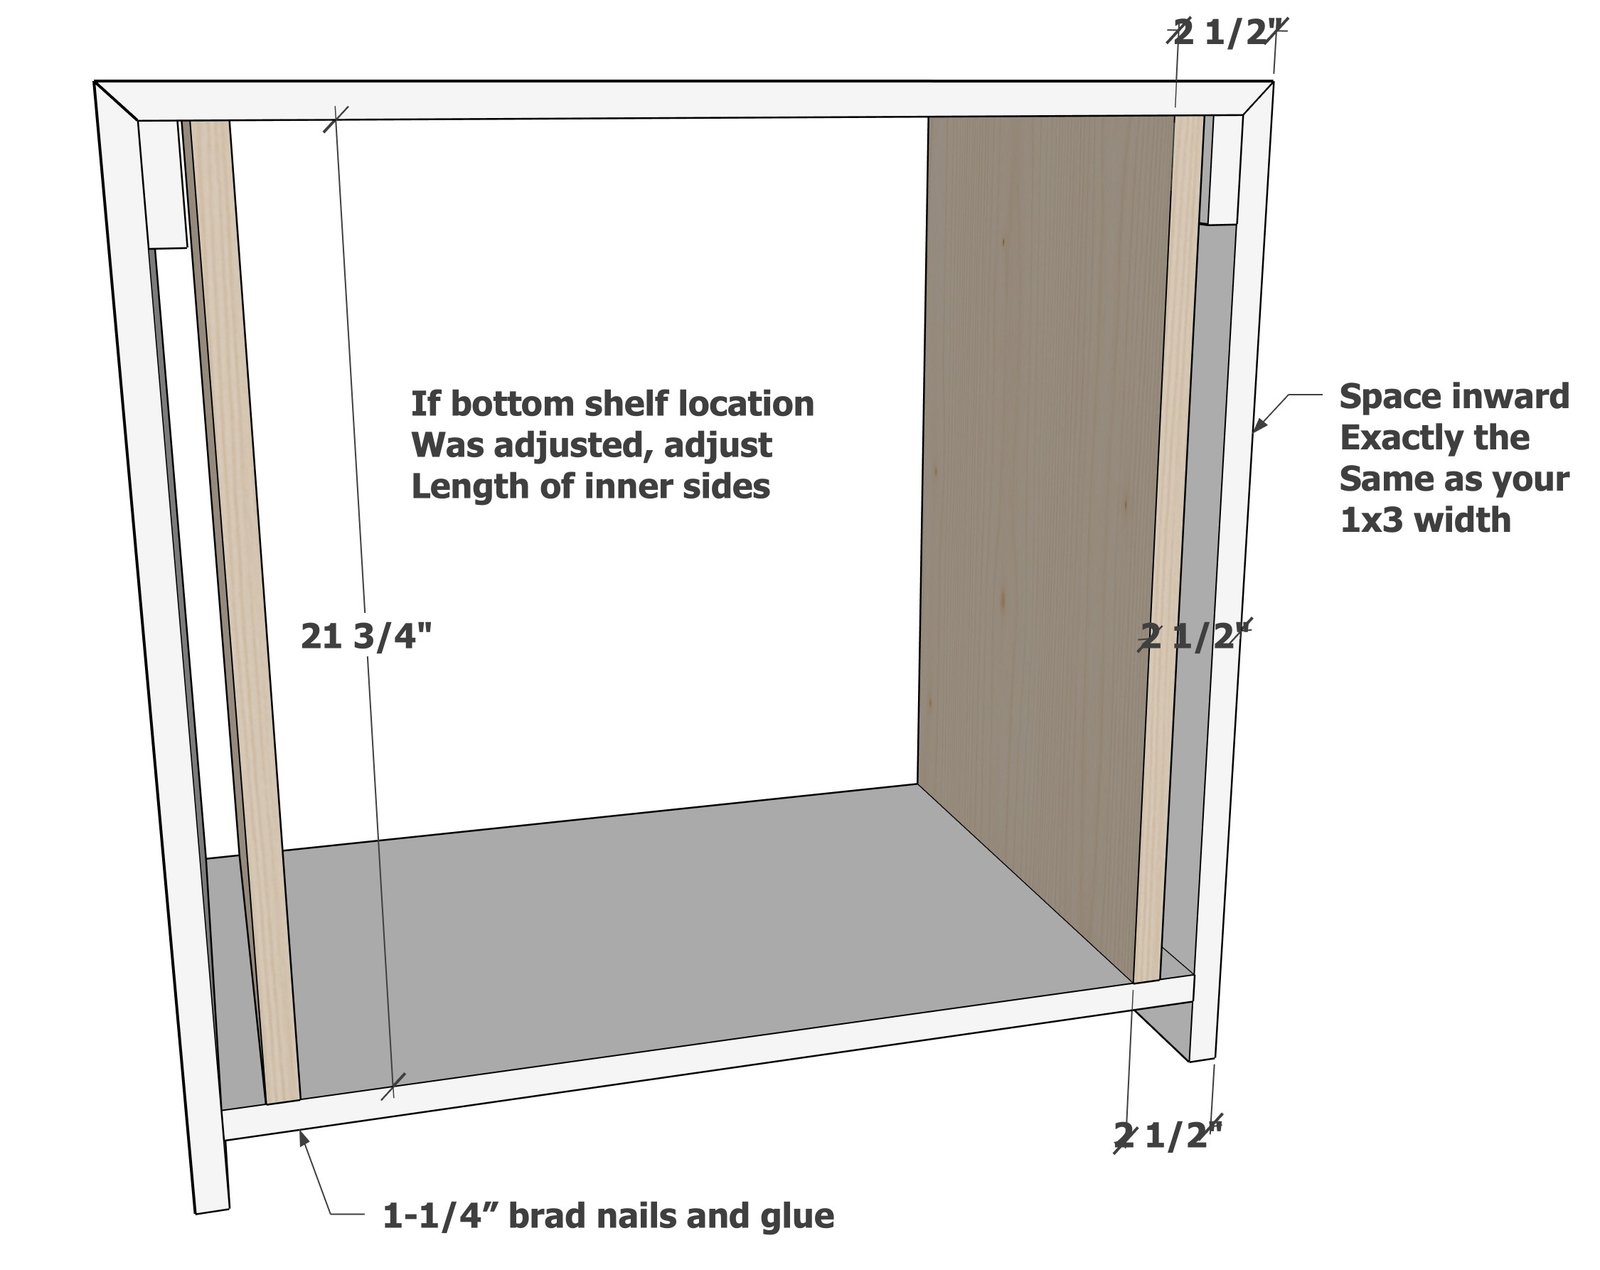
Next step is to add the bottom shelf. First, measure and make sure your 1x3s are 2-1/2" wide. Attach the bottom shelf so the distance from the top of the bottom shelf to the bottom of the sides matches your 1x3 widths.
Step 3
The inside panels need to be exactly spaced to match your 1x3 widths as well. Cut to fit and attach with glue and brad nails.
Step 4
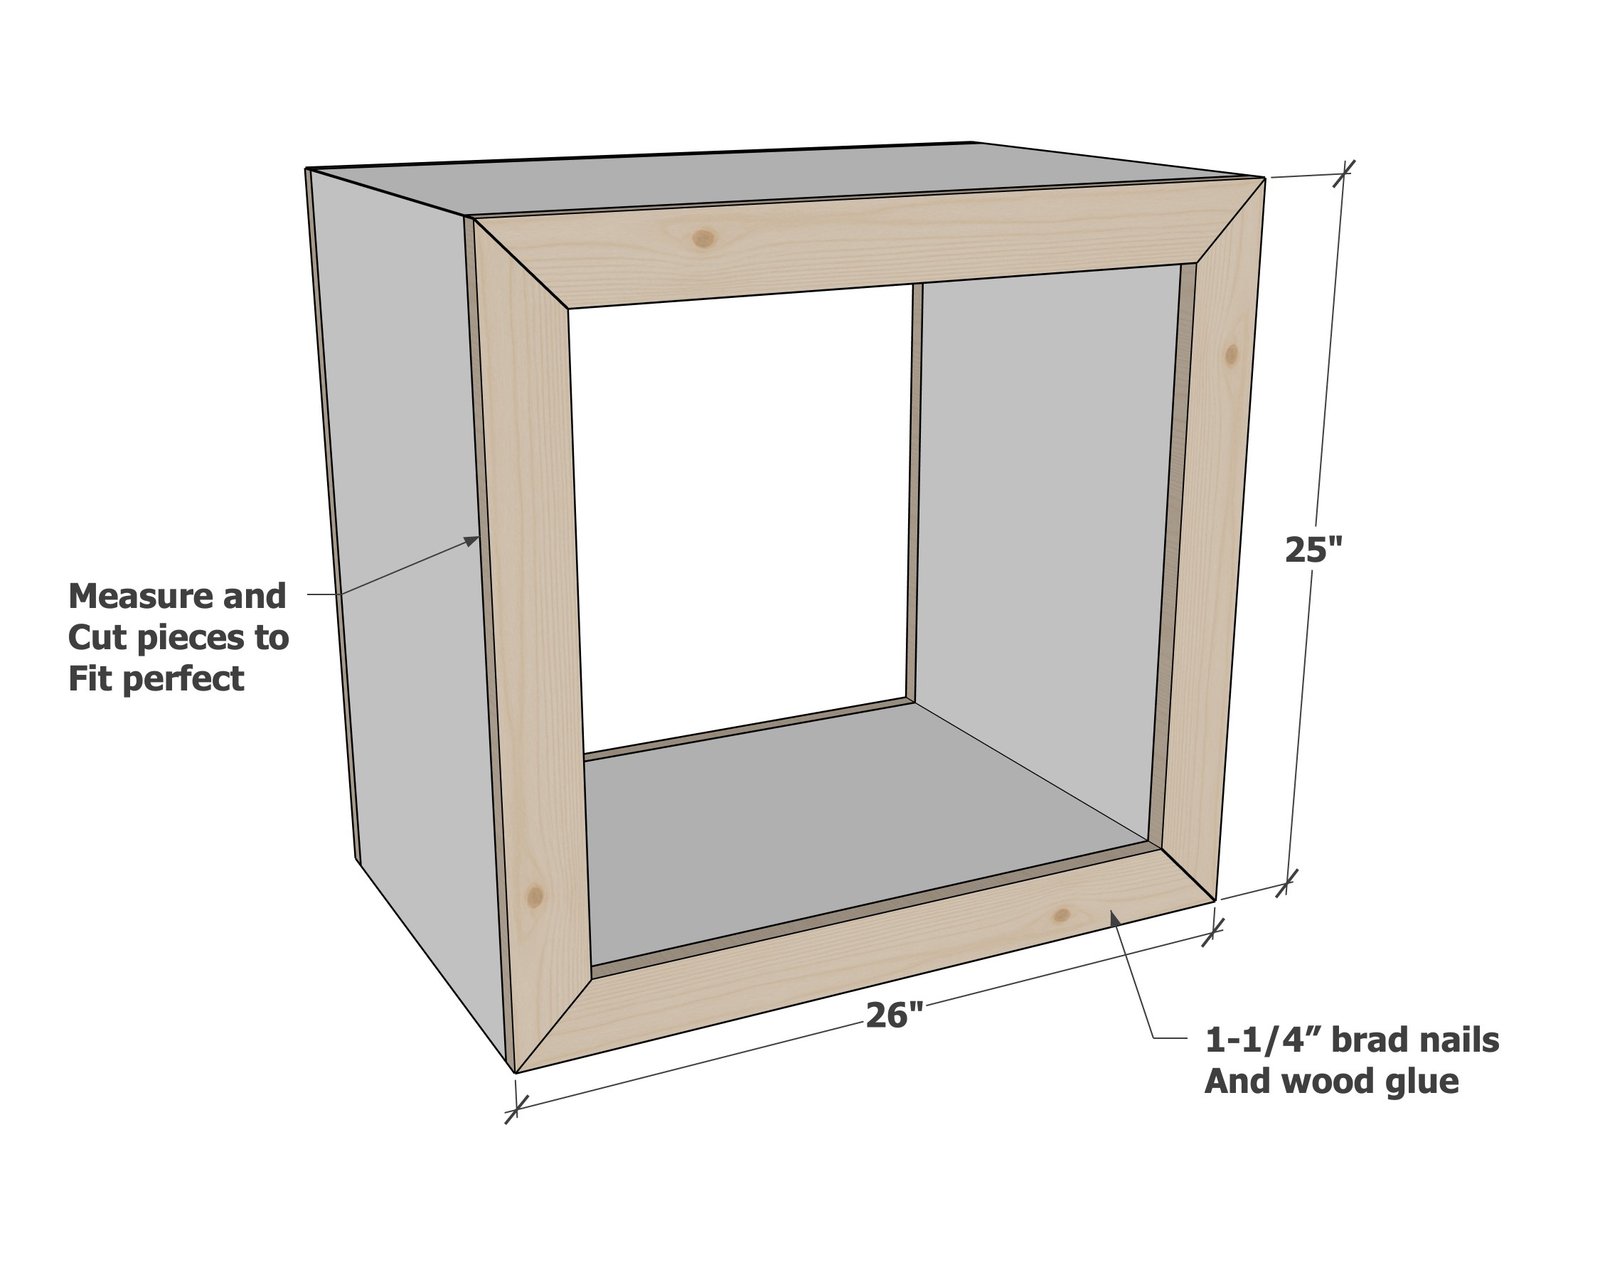
The final step is the mitered frames on both the front and back. These should be cut to fit, and then dry fit before attaching. You can also attach the insides of the miters together with 3/4" pocket holes and 1-1/4" pocket hole screws to make the corners tight. Attach all boards to the project with 1-1/4" brad nails and wood glue.
Finishing
Sand all surfaces, starting with a medium grit and finishing with fine. Wipe off the dust, fill any holes or gaps with wood filler, and sand smooth once dry. Apply primer if you're painting, then finish with your choice of paint or stain and seal with a durable clear topcoat. For outdoor projects, use exterior-rated primer, paint or stain, and sealer so the piece stands up to the weather.
Source (temporary): https://www.ana-white.com/woodworking-projects/26-waterfall-framed-end-table