2x Wood Rolling Shelf
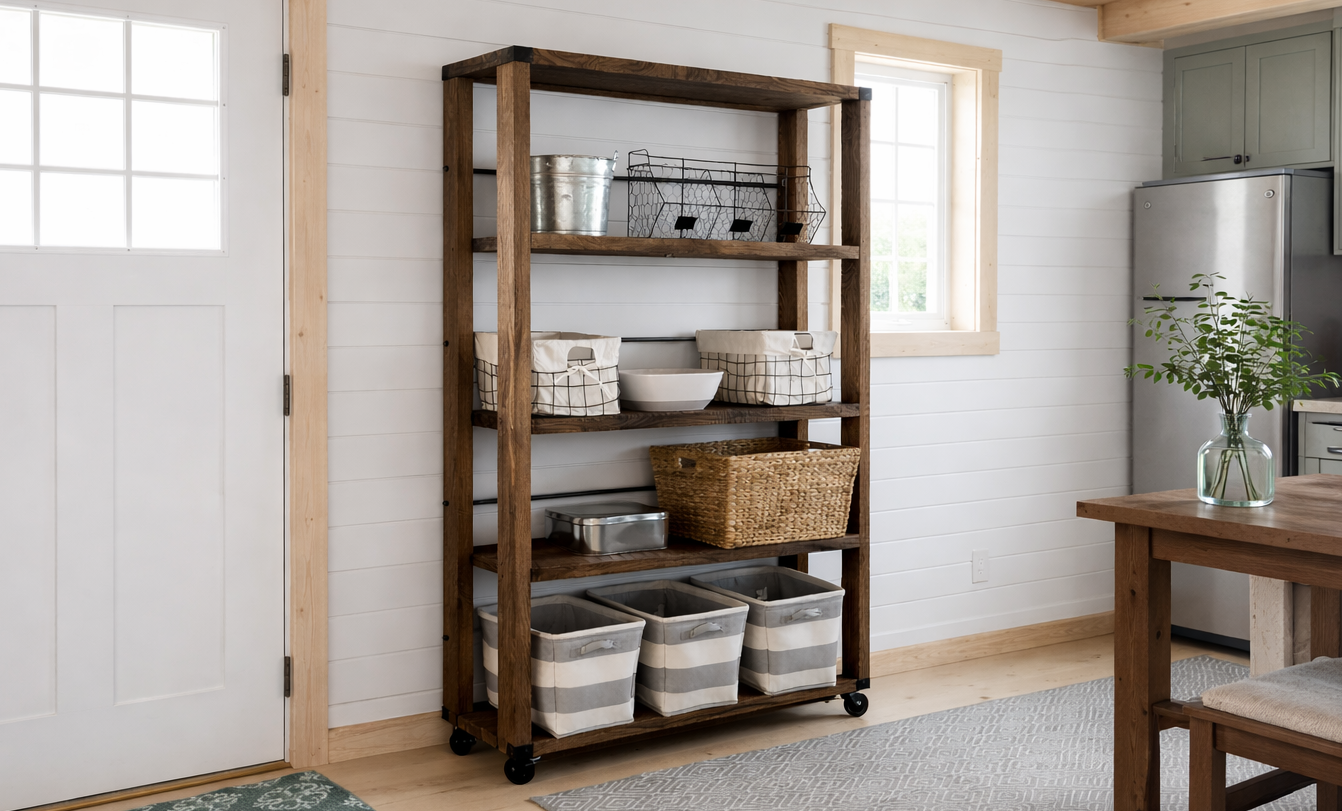
Reclaimed Wood Rolling Shelf ( ) This reclaimed wood rolling shelf is the perfect mix of rustic style and everyday function. Built entirely from standard 2x lumber, it’s an easy, beginner-friendly project that delivers serious storage without complicated cuts or tools. The open shelves keep everything visible and accessible—great for kitchens, pantries, laundry rooms, mudrooms, or workshops. Heavy-duty casters make it easy to roll wherever you need extra storage, while the chunky wood frame gives it a sturdy, furniture-quality feel. Why you’ll love this build: • ✔️ Free, step-by-step plans • ✔️ Built with simple 2x lumber • ✔️ Straight cuts only – no special joinery • ✔️ Beginner-friendly and fast to build • ✔️ Customizable size, finish, and shelf spacing • ✔️ Adds instant rustic charm and storage Whether you’re just getting started or want a quick, satisfying weekend project, this rolling shelf is proof that simple materials can make something beautiful and functional. 👉 below so you can build it yourself!
Specifications
| Project type | Bookshelf and Bookcase Plans |
|---|---|
| Room | Storage Solutions |
| Style | Farmhouse Furniture |
| Difficulty | Beginner Projects |
Dimensions
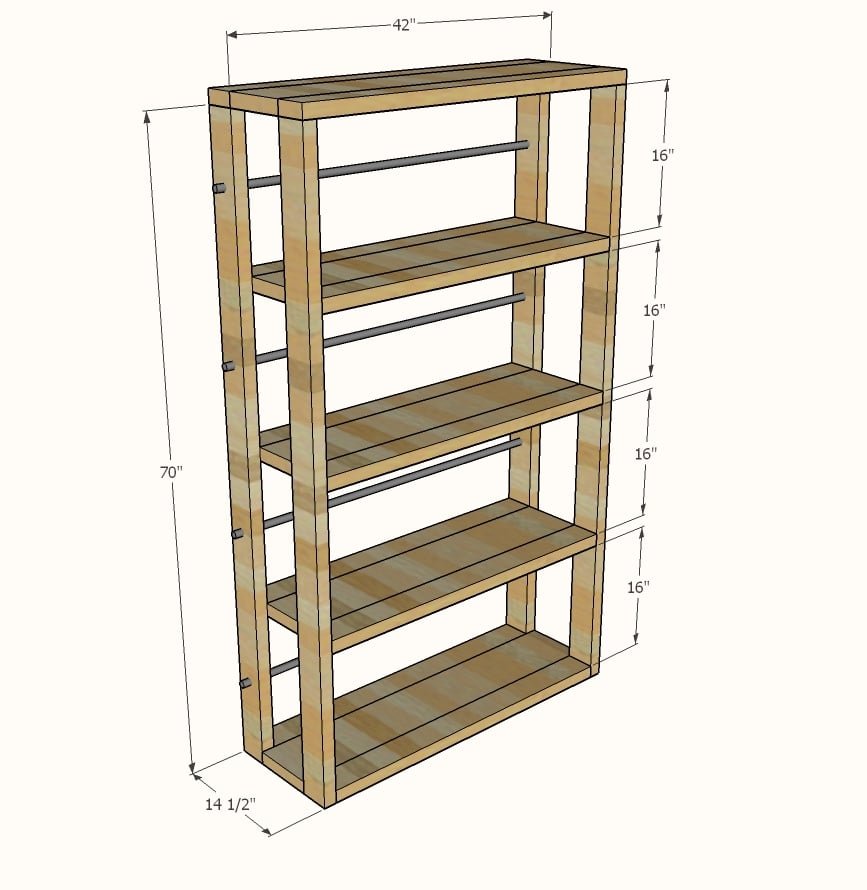
Use the size-specific shopping and cut lists below.
Shopping List
- 2 - 2x4 @ 12 feet long (cut legs out of these)
- 5 - 2x4 @ 8 feet or stud length (cut shelf boards out of these)
- 1 - 2x8 @ 12 feet long
- 1 - 2x8 @ 8 feet long
- 16 feet of 1/2" pipe (I used EMT spray painted black)
- 8 - corner brackets
- 4 - caster wheels
Cut List
- 2 - 2x4 @ 42"
- 8 - 2x4 @ 39"
- 3 - 2x8 @ 39"
- 2 - 2x8 @ 42"
- 4 - 2x4 @ 70"
Tools
- measuring tape
- square
- pencil
- safety glasses
- hearing protection
- kreg-jig
- drill
- circular saw
- sander
Step-by-step Instructions
Step 1
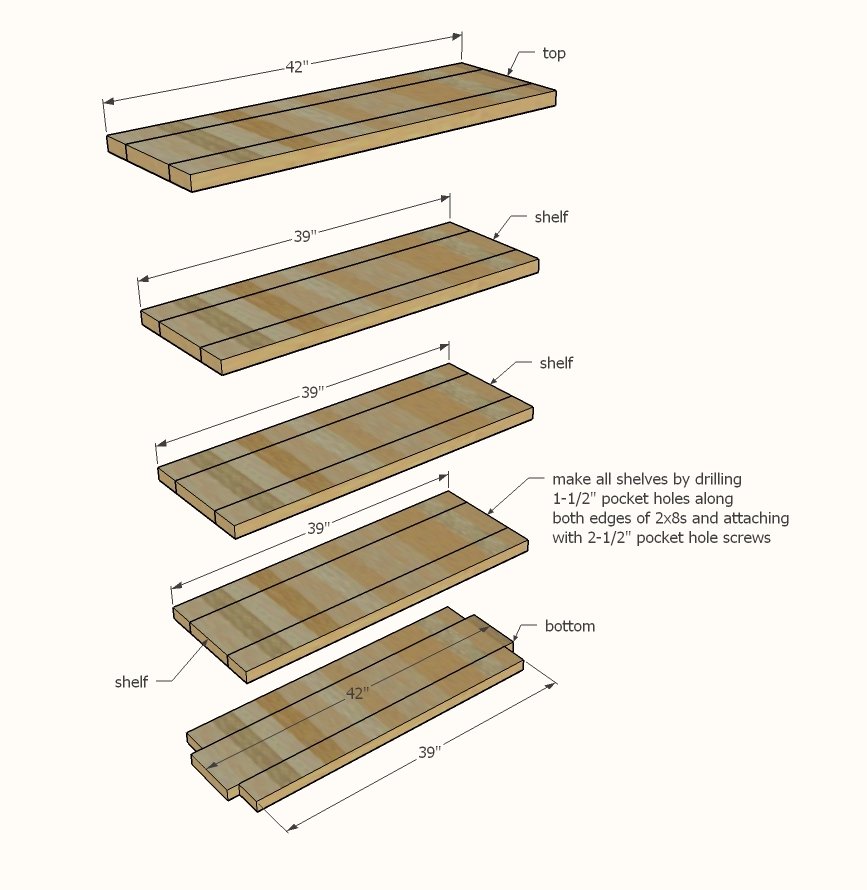
First, build all of the shelves as pictured, using 1-1/2" pocket holes and 2-1/2" pocket hole screws. You can also drill pocket holes for attaching legs in next step.
Step 2
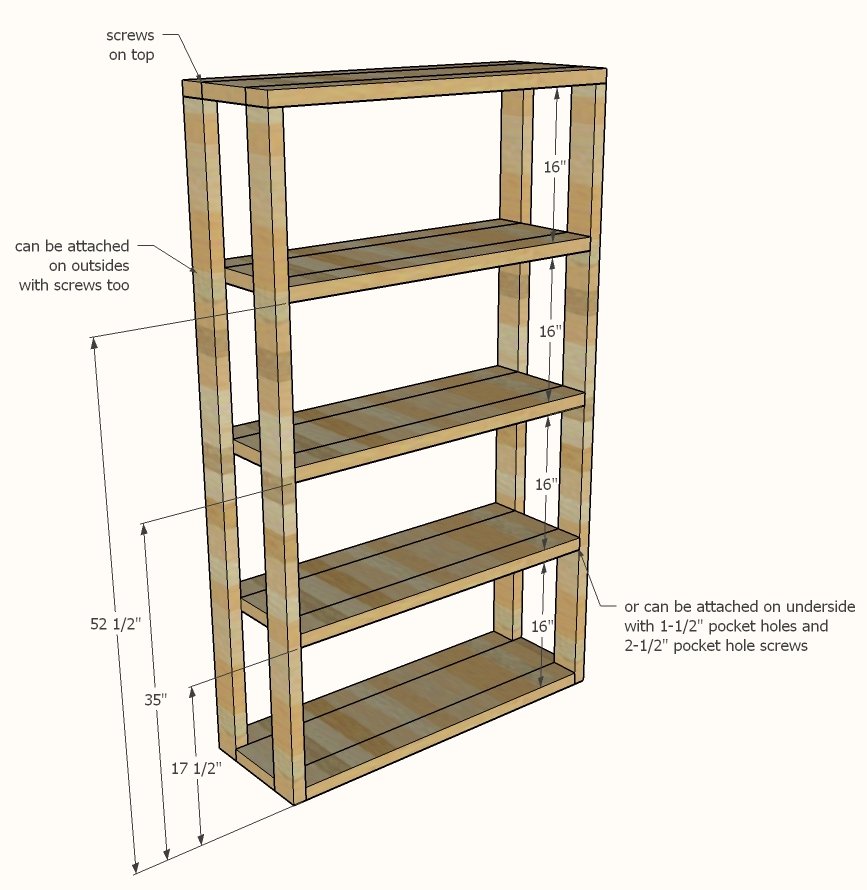
Attach legs to shelves, either with pocket holes or 3" wood screws. Attach top to shelves with 3" wood screws.
Step 3
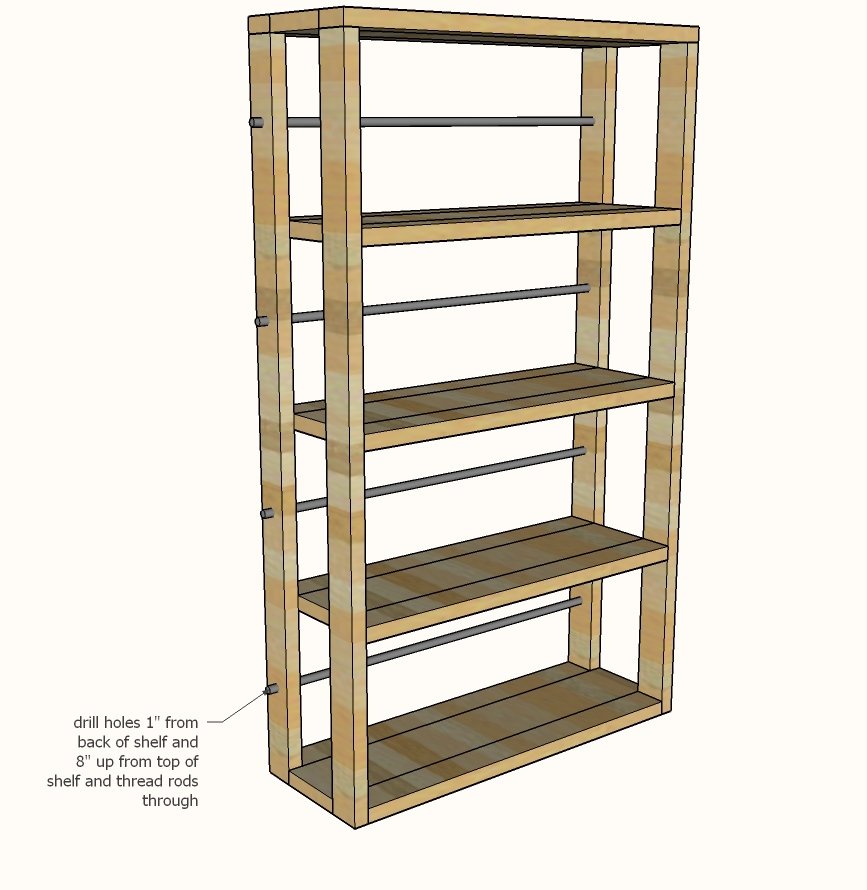
Cut pipe 1" longer than outside dimensions of shelf (should be 43"). Drill holes to match pipe size 1" from back, 8" from top of lower shelf. Thread pipe through holes. If the holes are drilled snug, the pipe will stay in place without added hardware.
Step 4
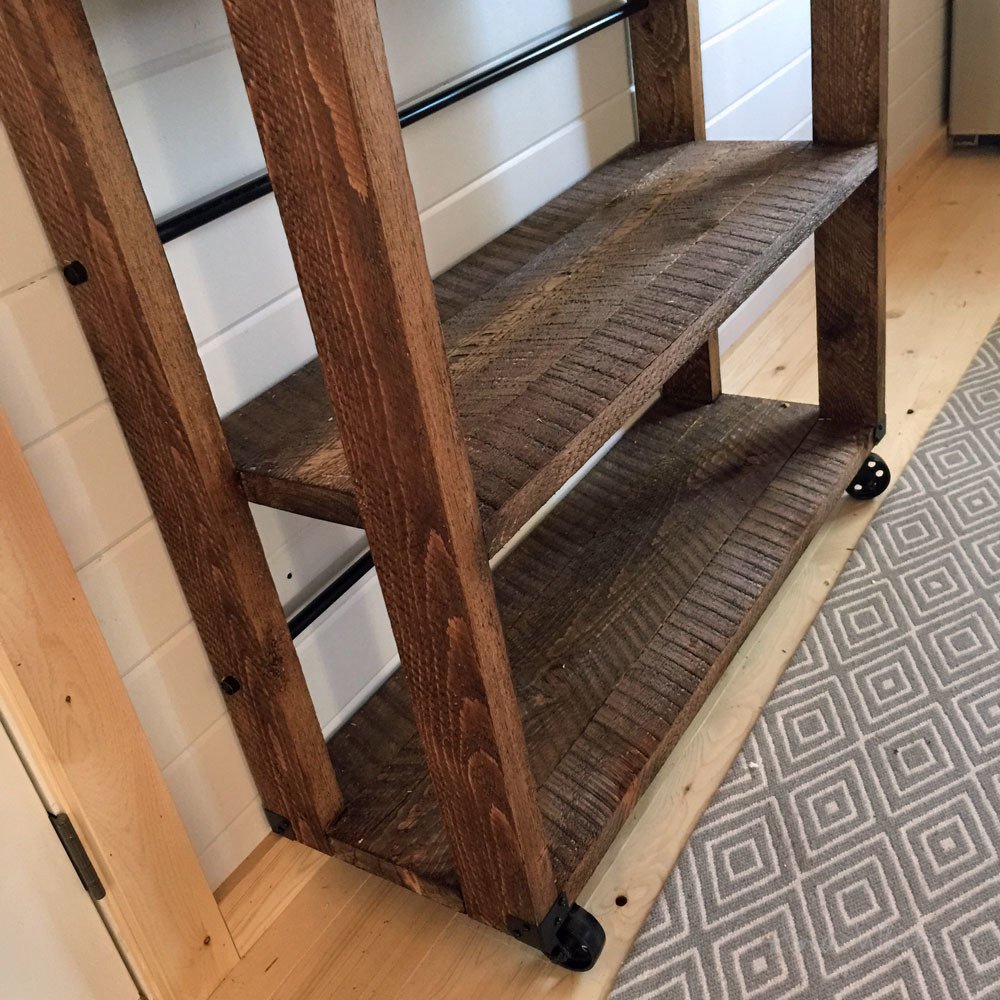
Attach caster wheels to base of project. I also added metal brackets to the corners for an added industrial style touch.
Step 5
Finishing
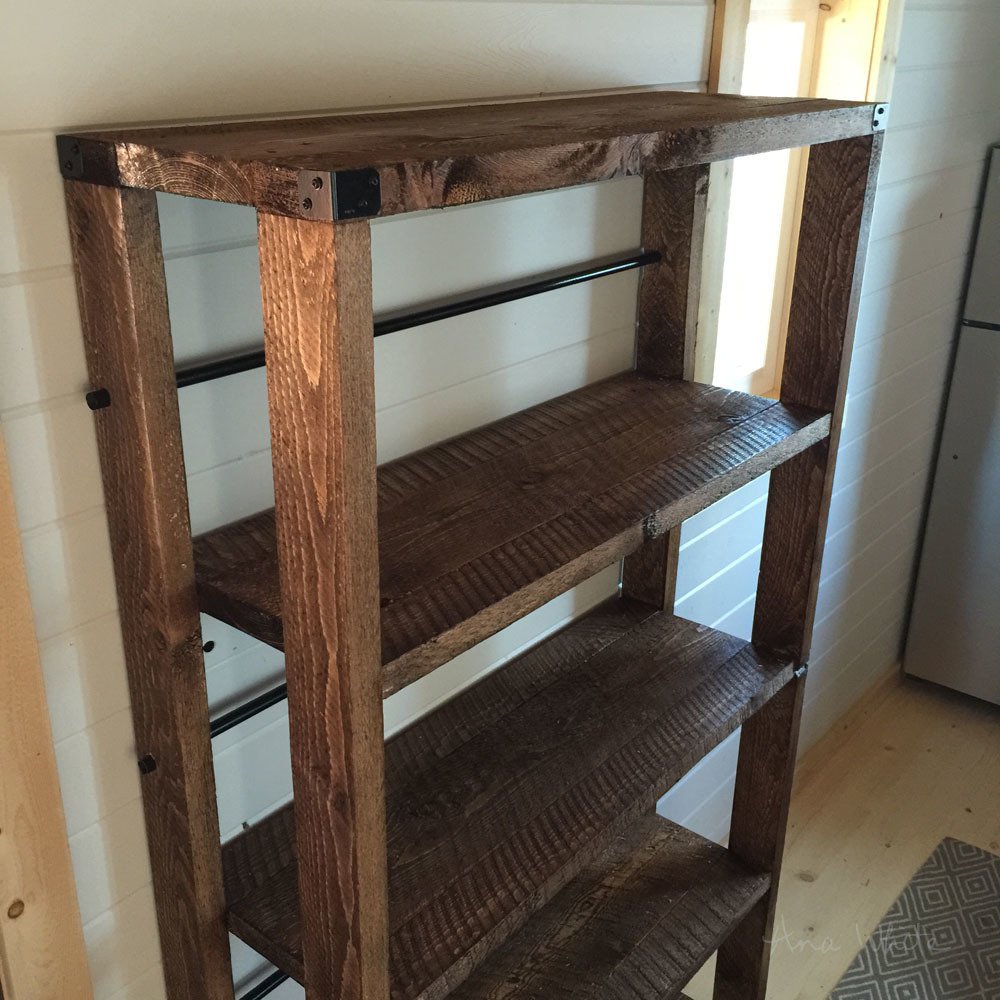
Sand all surfaces, starting with a medium grit and finishing with fine. Wipe off the dust, fill any holes or gaps with wood filler, and sand smooth once dry. Apply primer if you're painting, then finish with your choice of paint or stain and seal with a durable clear topcoat. For outdoor projects, use exterior-rated primer, paint or stain, and sealer so the piece stands up to the weather.
Source (temporary): https://www.ana-white.com/woodworking-projects/2x-wood-rolling-shelf-pantry-storage-or-display-shelving-free-plans