2x2 Outdoor Dining Chair
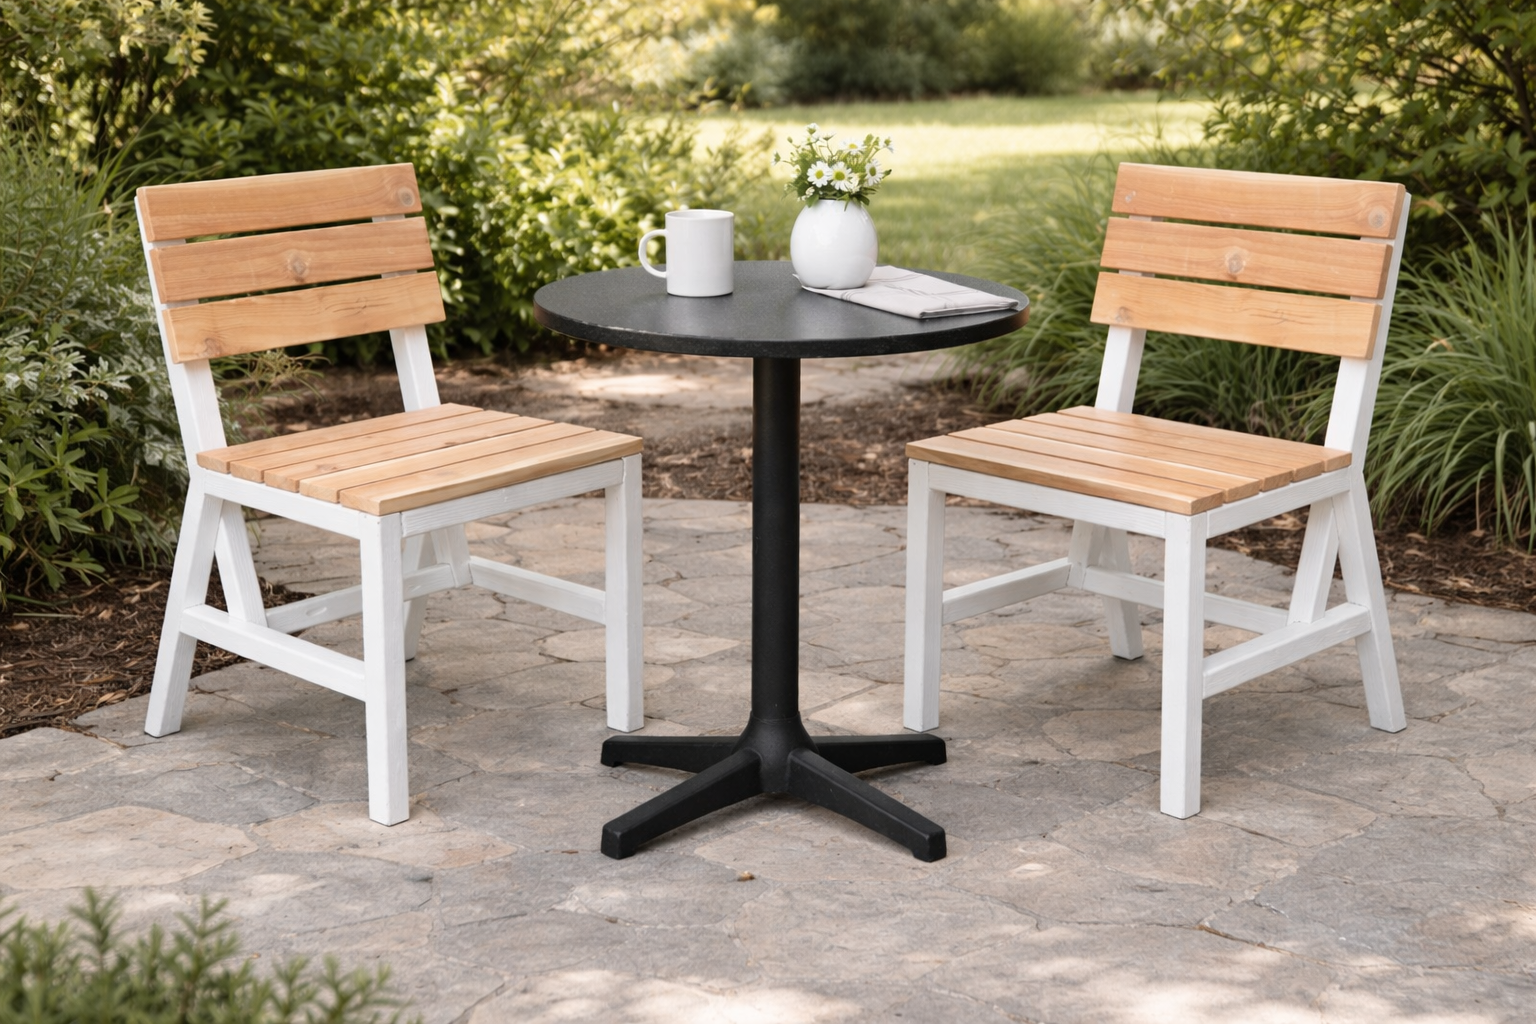
Build your own outdoor dining chairs from This modern style outdoor dining chair is both easy and inexpensive to build. Features slatted seat and back, additional base supports, it's sturdy and stylish! You can use cedar fence pickets for the seat, or 1x3s. Step by step plans with detailed diagrams, shopping and cut list with lots of reader submitted photos.
Specifications
| Project type | Chairs |
|---|---|
| Room | Outdoor |
| Style | Modern Style Furniture Plans |
| Difficulty | Beginner Projects |
| Estimated cost | Under $20 |
Dimensions
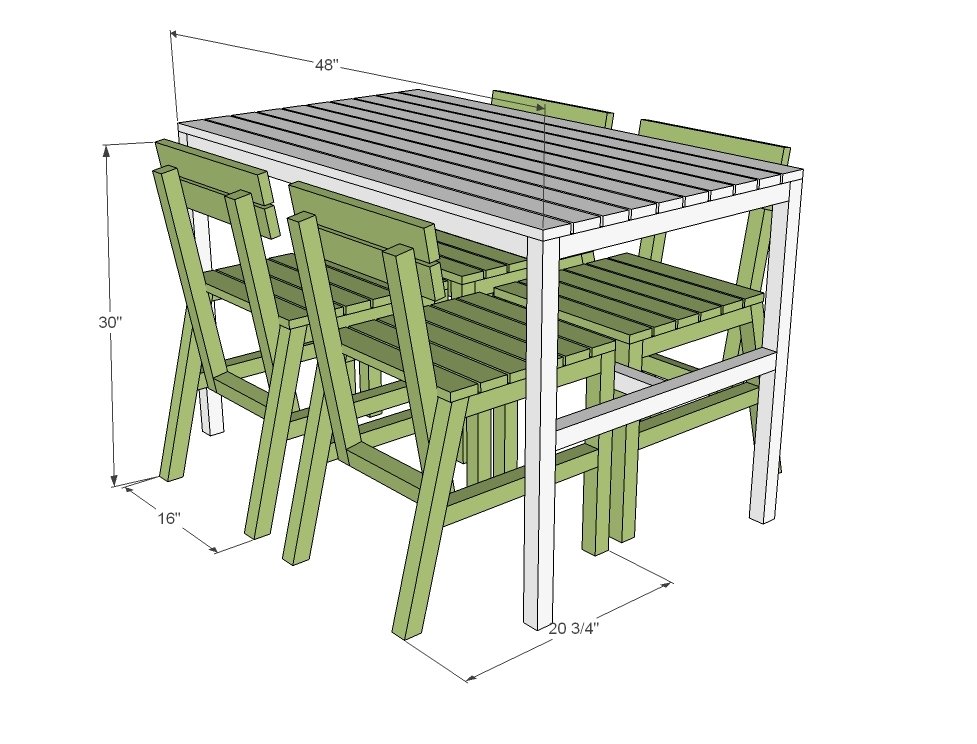
Use the size-specific shopping and cut lists below.
Shopping List
- 2 - 2x2 @ 8 feet long
- 2 - 1x3 @ 8 feet long or one cedar fence picket, 5-1/2" x 72"
Cut List
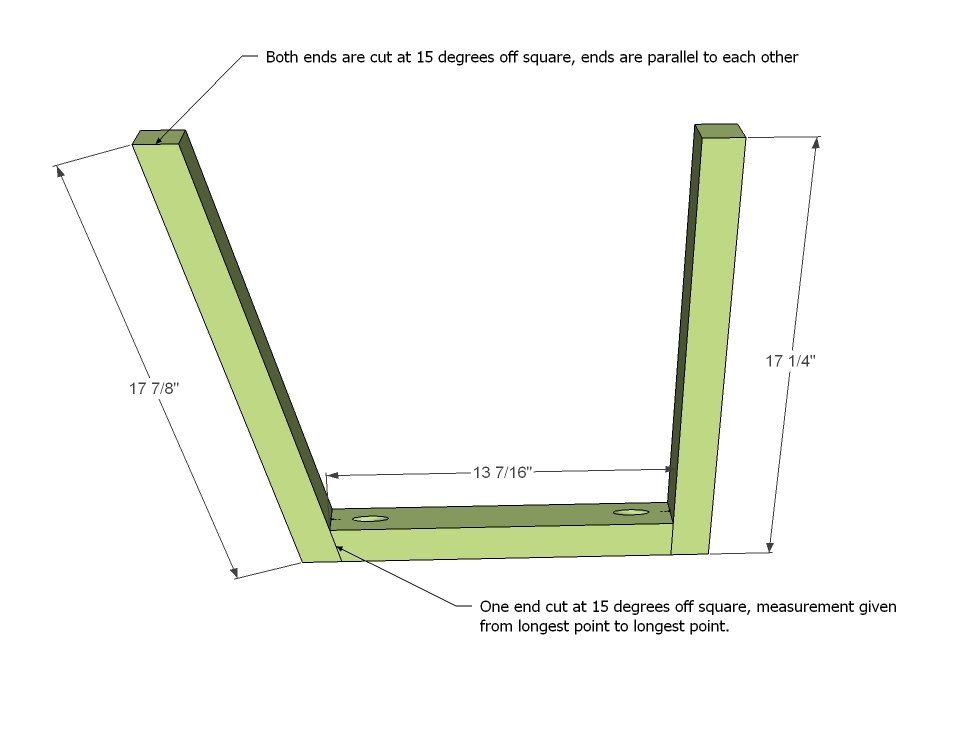
- 2 - 2x2 @ 17 7/8" (Back Legs - both ends cut at 15 degrees off square, parallel to each other)
- 2 - 2x2 @ 13 7/16" (Side Aprons - one end cut at 15 degrees off square, longest point measurement)
- 2 - 2x2 @ 17 1/4" (Front Legs)
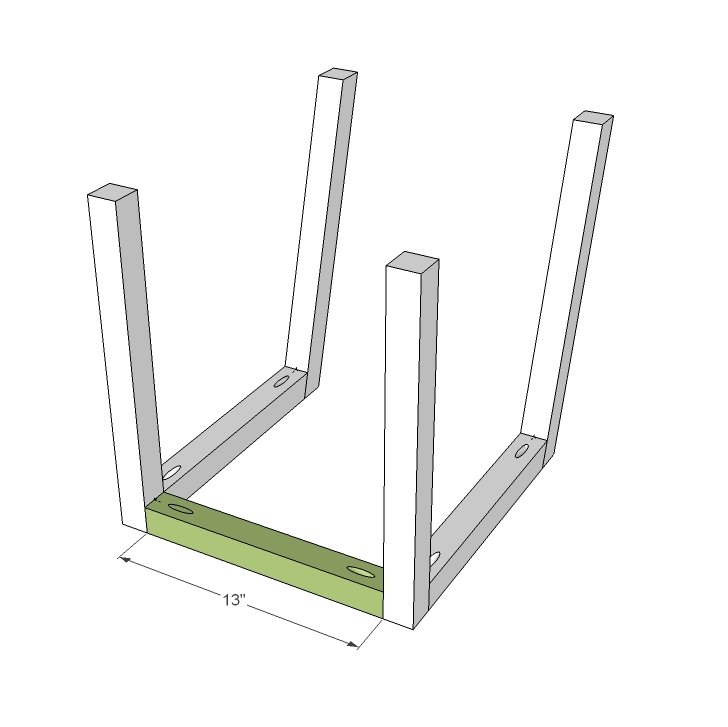
- 1 - 2x2 @ 13" (Front Apron)
- 8 - 1x3 @ 16" (Seat Slats) or 4 - cedar fence pickets @ 16"
- 2 - 2x2 @ 15 5/8" (One end cut at 15 degrees off square, longest point measurement given)
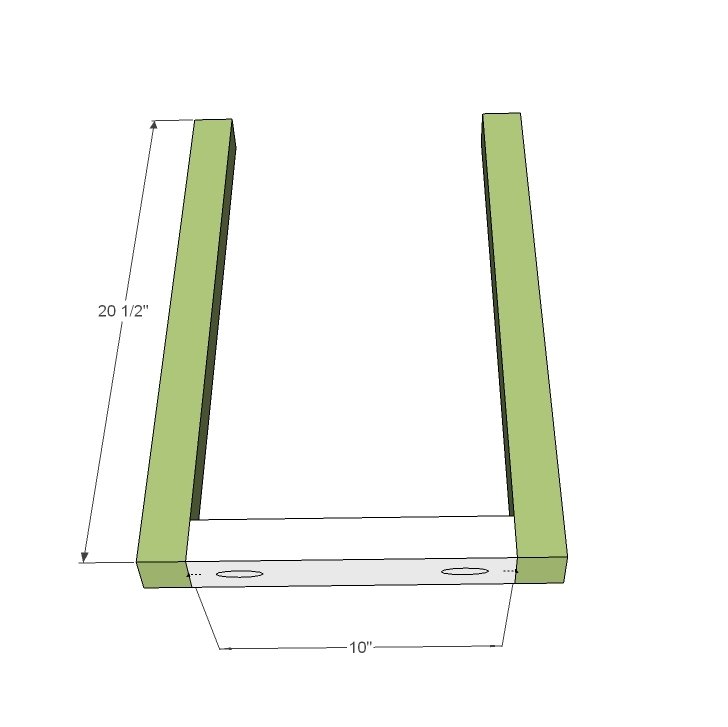
- 2 - 2x2 @ 20 1/2" (Back Rest)
- 1- 2x2 @ 10" (Back Base Support)
Tools
- measuring tape
- square
- pencil
- safety glasses
- hearing protection
- kreg-jig
- drill
- compound miter saw
- sander
- level
- countersink drill bit
Step-by-step Instructions
Step 1
Before we get into the actual plan details, let's talk about joinery. I have decided to add pocket holes to diagrams for those of you who use a Kreg Jig, but that does not mean that you have to use pocket holes. If you do use pocket holes for this project, set your Kreg Jig for 1 1/2" stock and use 2 1/2" pocket hole screws. I find it hard to add more than 1 pocket hole on a 2x2 - certainly not impossible, but I find wood starts to split out and such - but you need to make up for the lone screw with lots of glue. If you are using traditional screws, countersink from the outsides carefully with a countersink bit and use 2 1/2" or 3" screws. Then general rule is to use the longest screw possible without poking through. Again, use glue. For the first step, you will need to build two as shown above.
Step 2
Then attach the two legs to the center as shown in the diagram.
Step 3
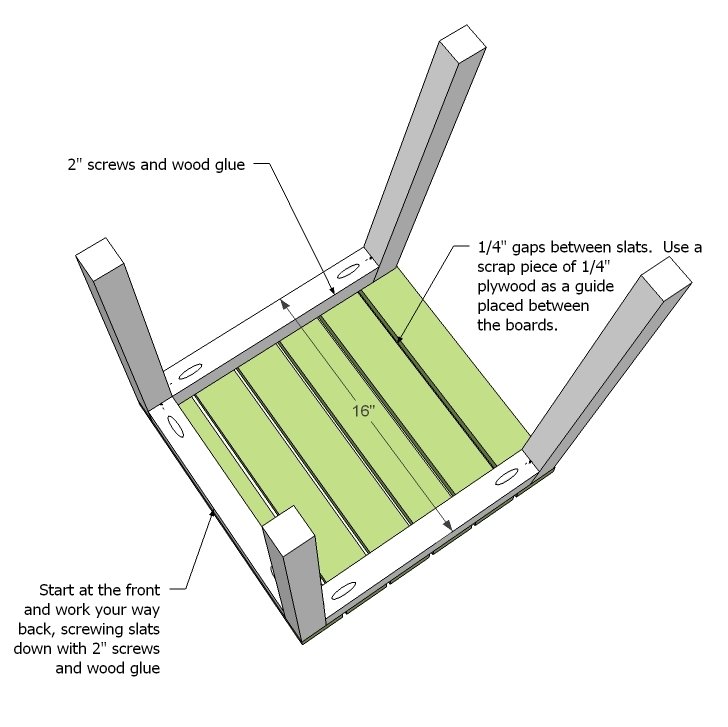
Now the slats. My trick is to use a piece of 1/4" scrap plywood as a spacer as I screw down the slats. By screwing from underneath, you will not have to worry about holes in your seat. If using cedar fence pickets, use three pieces for the seat.
Step 4
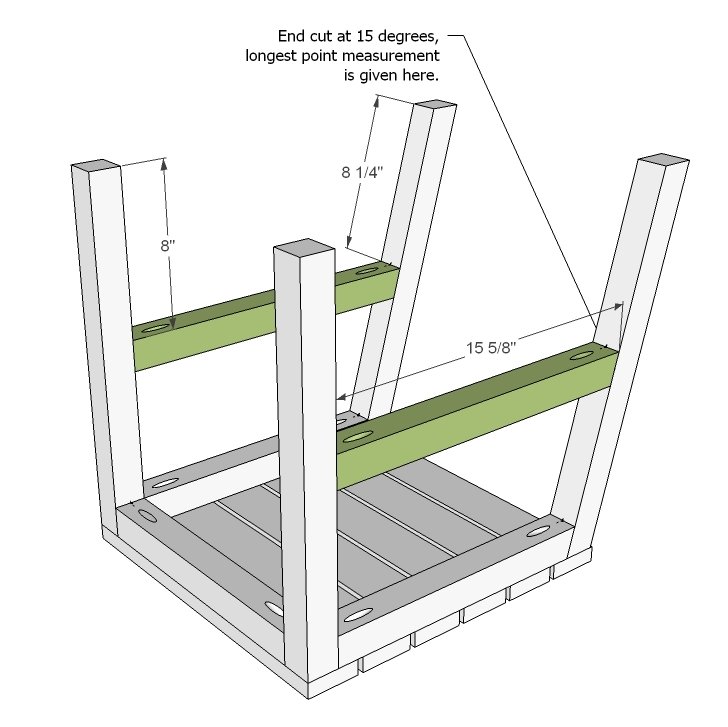
In the original Harriet Chair Plan, we put the supports in first. But I found this left little room for my drill - not a problem for the original Harriet Chair with the solid seat, but with the slatted seat, you need considerably more screws, so I choose to add the support after the slats. Measure carefully and attach in place.
Step 5
Step 6
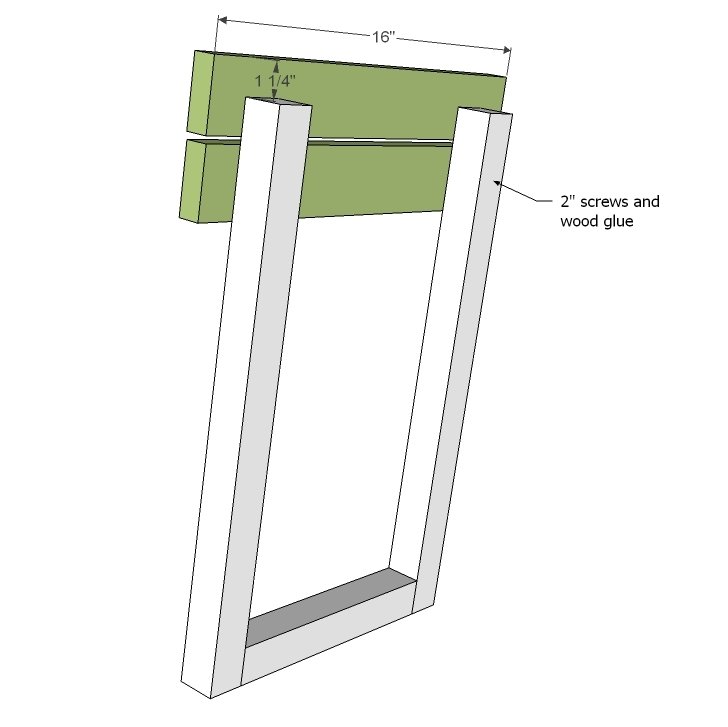
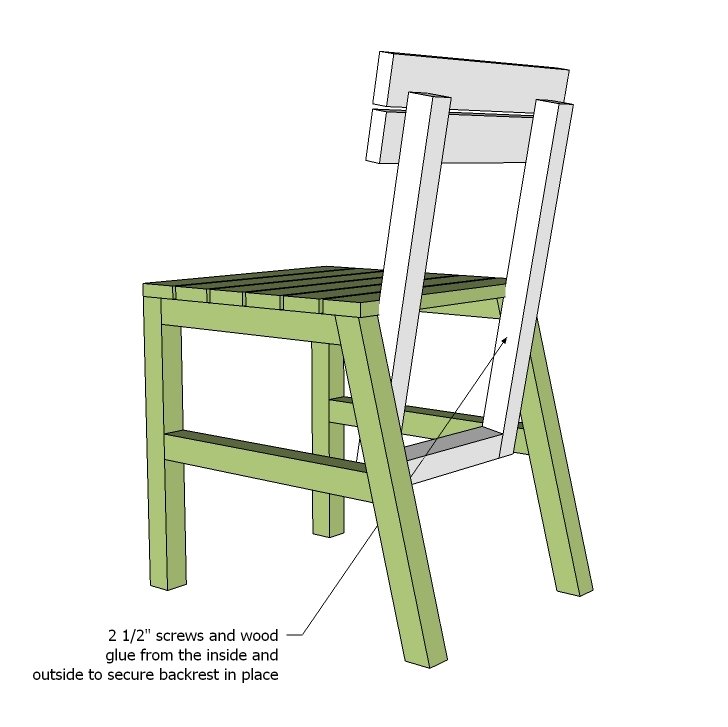
And add the back slats. The overhang should be 1 1/2" on each end, 1 1/4" to the top. Leave 1/4" gap between the slats. There is no reason why you could not add additional slats if you wanted - I really considered three back slats. If using cedar fence pickets, use one piece for the back.
Step 7
And the fun part. Attach the back to the seat.
Finishing
Sand all surfaces, starting with a medium grit and finishing with fine. Wipe off the dust, fill any holes or gaps with wood filler, and sand smooth once dry. Apply primer if you're painting, then finish with your choice of paint or stain and seal with a durable clear topcoat. For outdoor projects, use exterior-rated primer, paint or stain, and sealer so the piece stands up to the weather.
Source (temporary): https://www.ana-white.com/woodworking-projects/2x2-outdoor-dining-chair