2x4 Storage Shelving
Free tutorial to build your own sturdy and inexpensive pantry shelving using 2x4s and 1x6 boards. No plywood, no pocket holes - this is a beginner friendly plan that you can tackle in no time. Step by step tutorial by
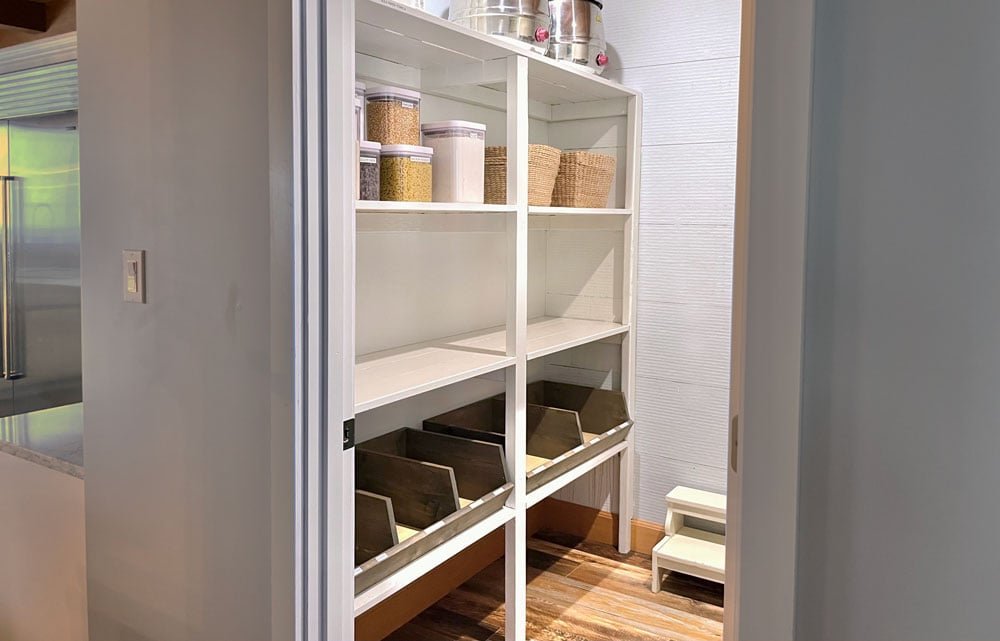
Specifications
| Project type | Garage Storage |
|---|---|
| Room | Storage Solutions |
| Difficulty | Beginner Projects |
Dimensions
Use the size-specific shopping and cut lists below.
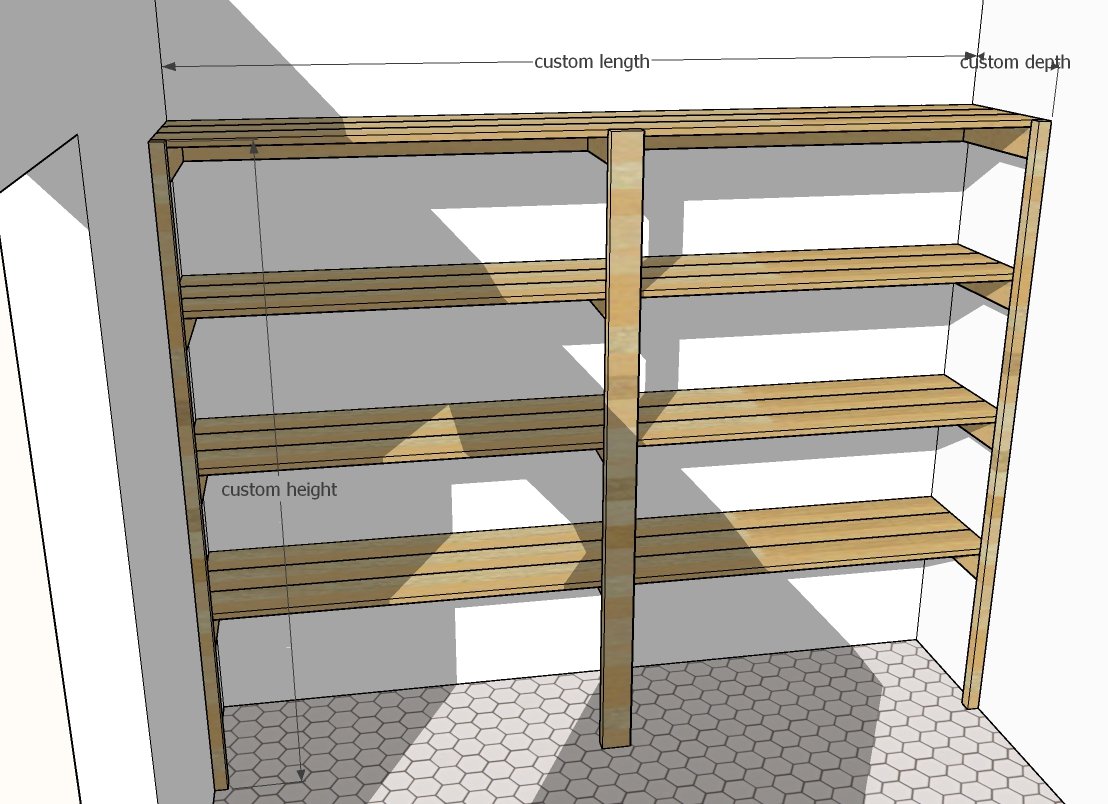
Shopping List
- 2x4s for the shelf supports and center legs
- 2x2s for the outside legs (can also use 2x4s)
- 1x boards for tops of shelves (I used three 1x6 boards for a shelf depth of 16-1/2")
- 3" self tapping wood screws (torq head) for 2x construction
- 2" self tapping wood screws (torq head) for screwing shelving down
- You'll also need a stud finder and a level
Tools
- measuring tape
- square
- pencil
- safety glasses
- drill
- circular saw
- sander
- level
Step-by-step Instructions
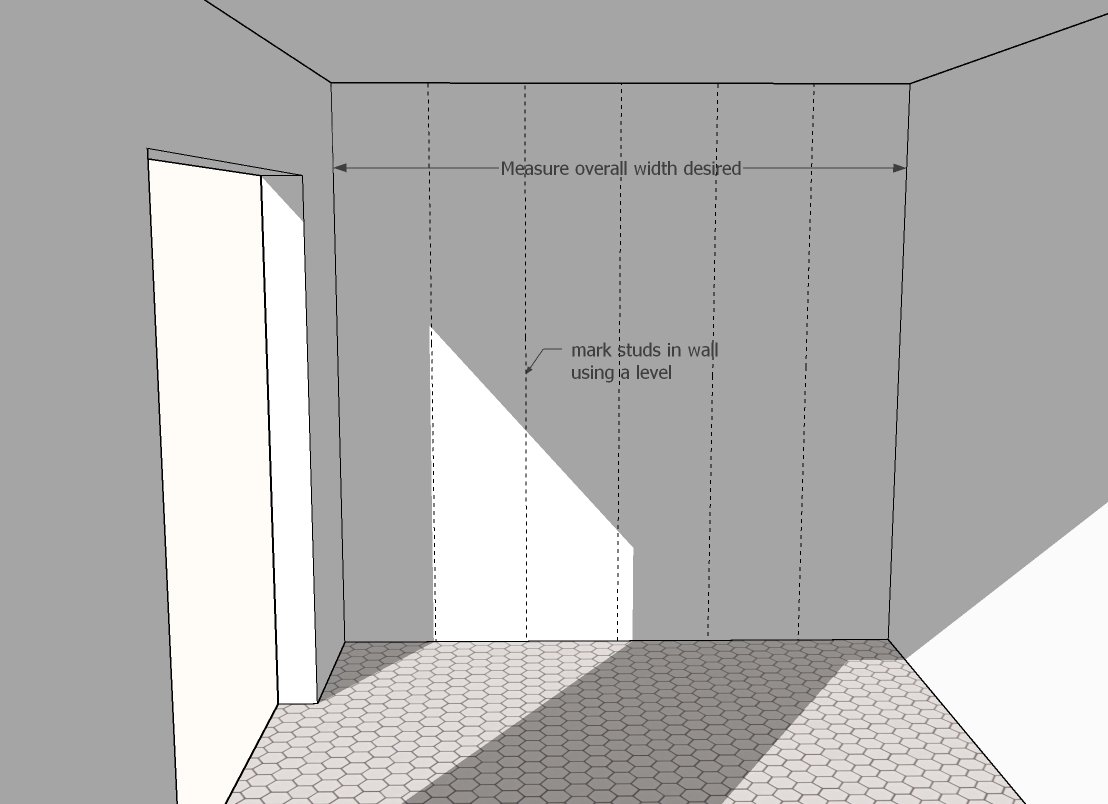
Measure the wall to install the shelving on.
Determine how long the shelves should be. Determine the depth you'd like to make your shelves. Some common depths are 11-1/4" (1x12), 14-1/2" (2-1x8s), or 16-1/2" (3-1x6s, this is what I did). Use a stud finder to locate studs in the wall. Mark the studs with a pencil on the wall vertically, using a four foot level, as shown in the diagram.
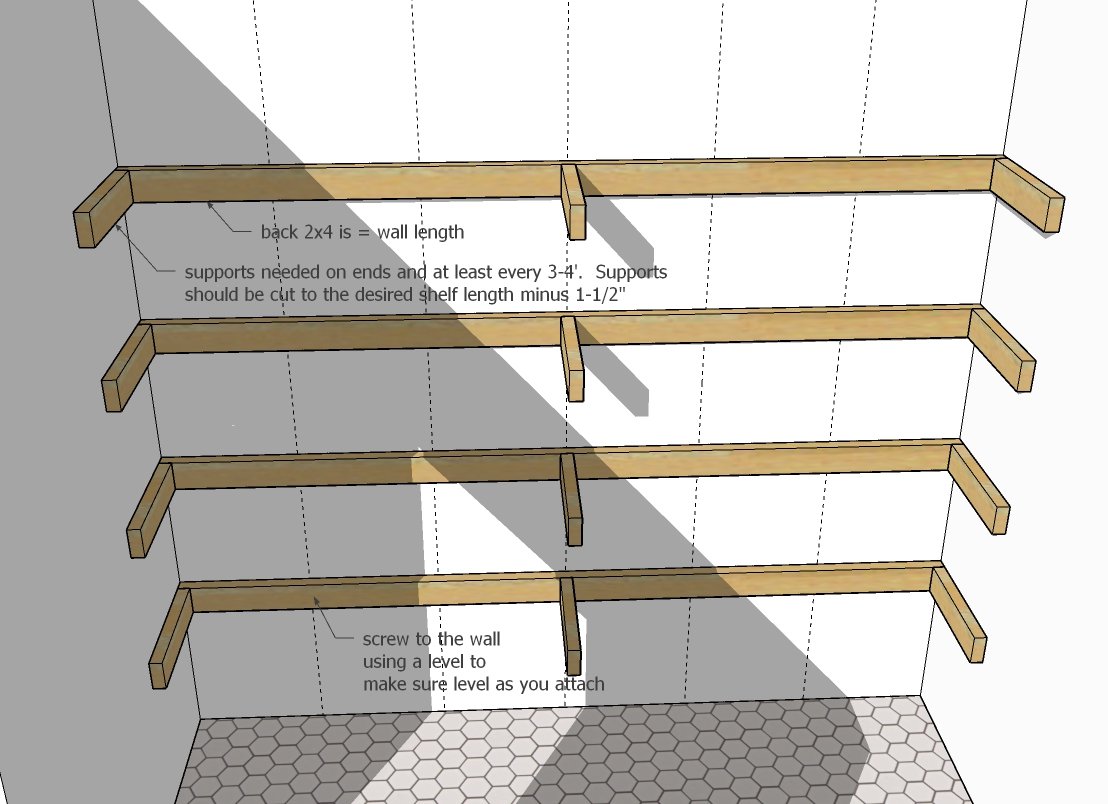
Cut for each shelf a 2x4 in the desired shelf length.
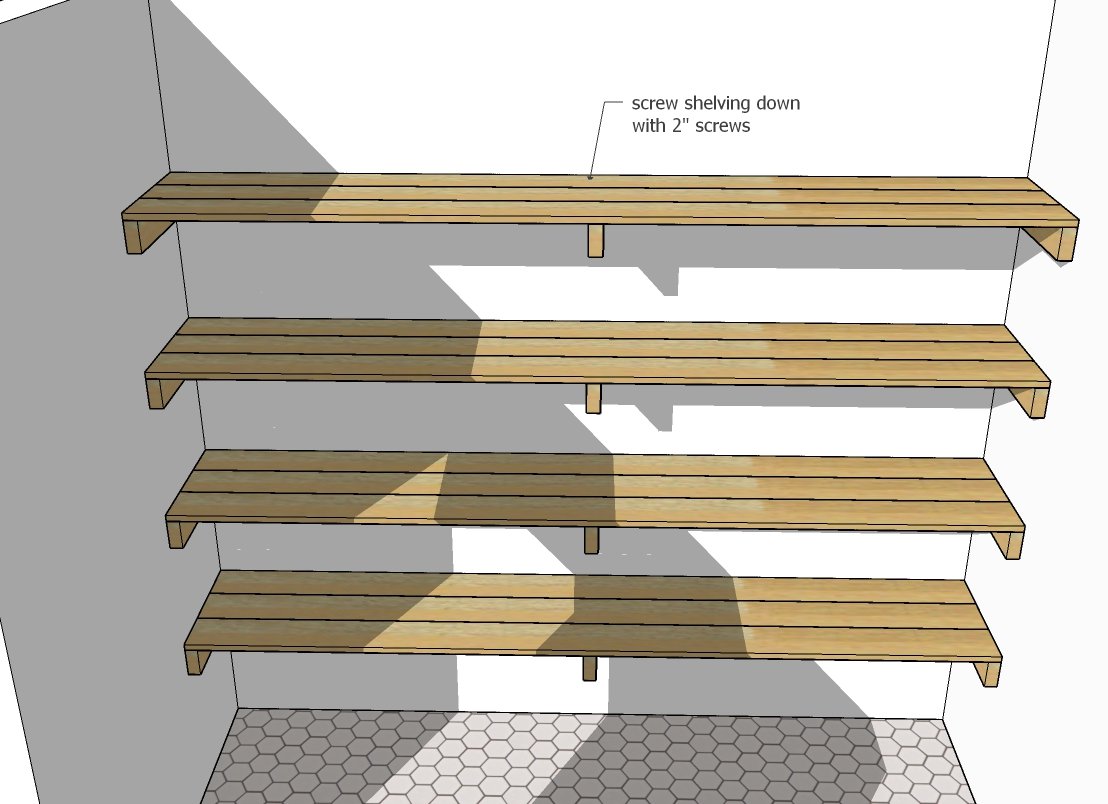
Then cut supports in the desired shelf depth minus 1-1/2". You'll need a support on each end, and then center supports about every 3-4 feet. For heavier loads, keep spans about 3' max. Then build the shelf supports first on a flat level surface, using the longer screws. Install the shelf supports in the pantry, using a level, at desired shelf location heights, screwing to studs in the wall. Also screw to any side wall studs if available.
Measure and cut the shelf boards.
Lay the shelving boards on the supports. You can screw down now, or screw down after the legs go in, but once you add the legs, it may be difficult to get the shelf boards in place.
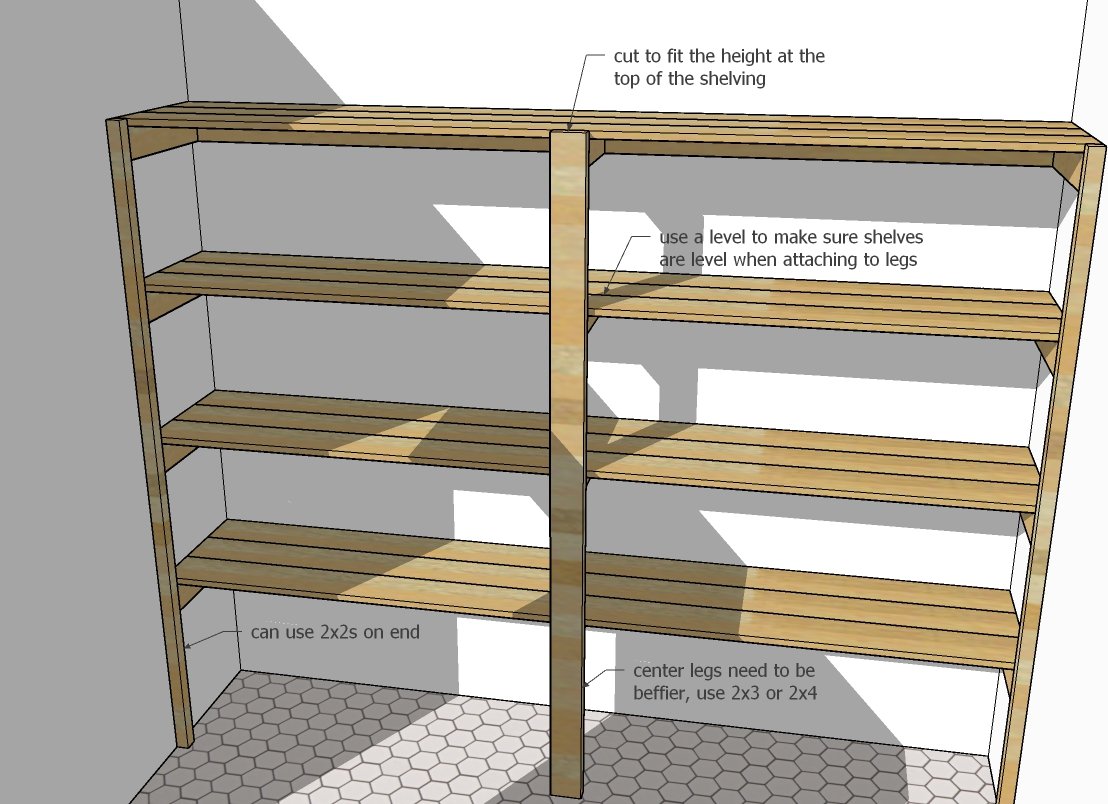
Making sure the top shelf is level front to back, measure and cut the legs.
Attach legs to the top shelf support. Then attach to lower shelf supports, using the level to ensure that each shelf front to back is level as you attach it to the legs.
Finishing
Sand all surfaces, starting with a medium grit and finishing with fine. Wipe off the dust, fill any holes or gaps with wood filler, and sand smooth once dry. Apply primer if you're painting, then finish with your choice of paint or stain and seal with a durable clear topcoat. For outdoor projects, use exterior-rated primer, paint or stain, and sealer so the piece stands up to the weather.
Source (temporary): https://www.ana-white.com/woodworking-projects/2x4-storage-shelving