3-in-1 Fire Pit Bench with Table and Storage
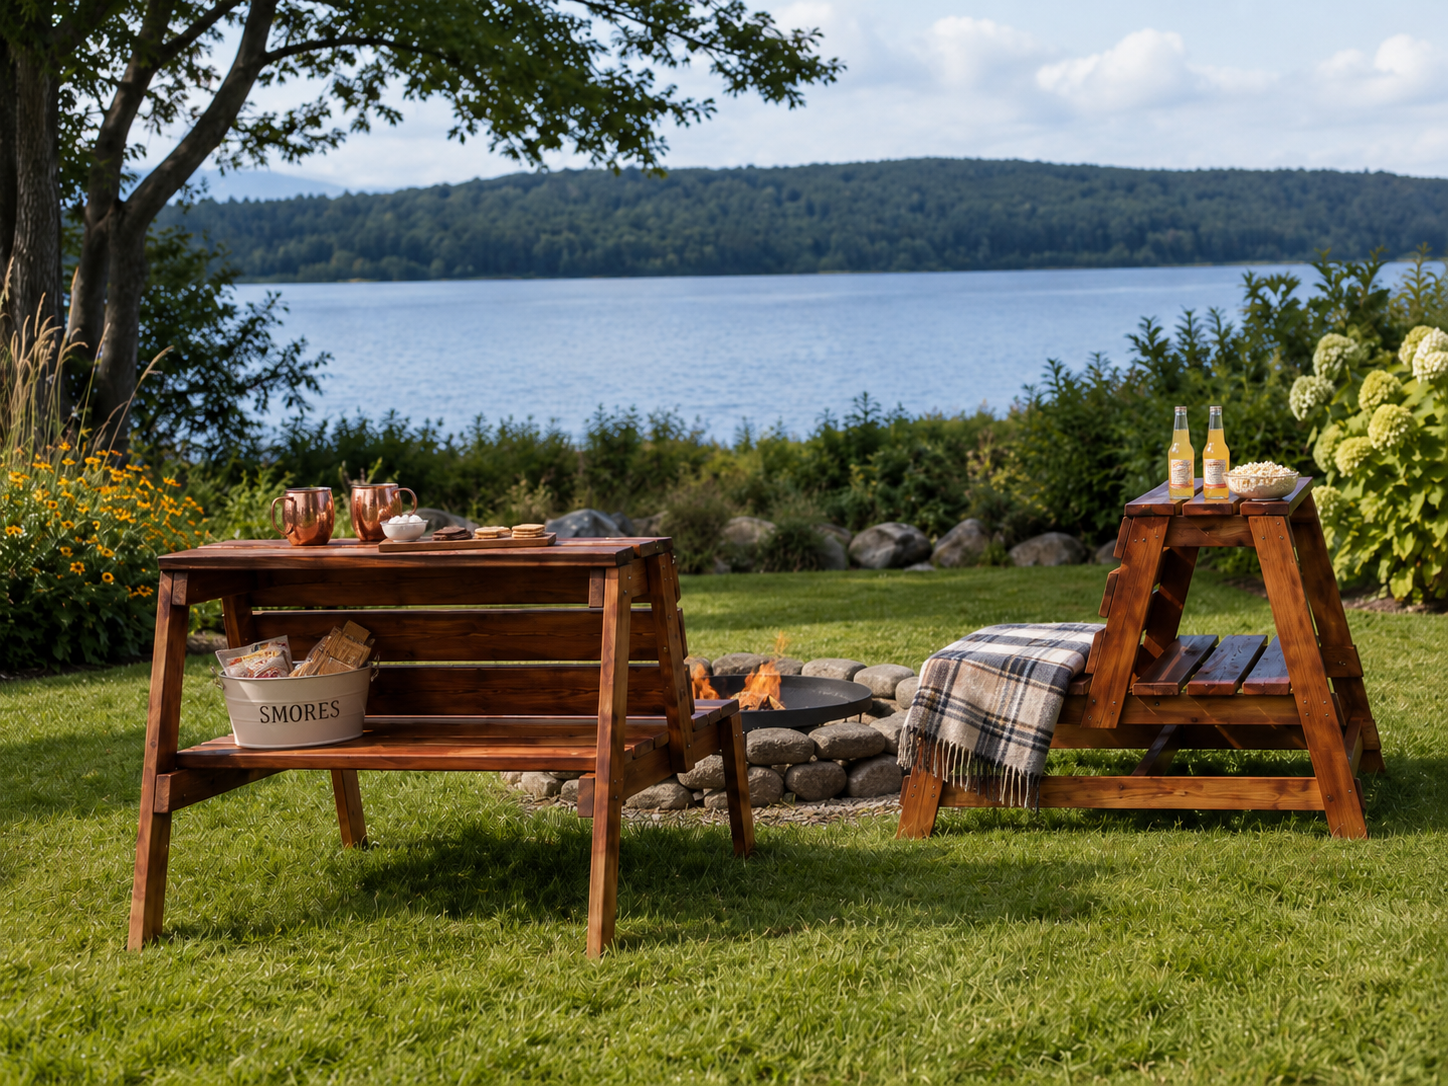
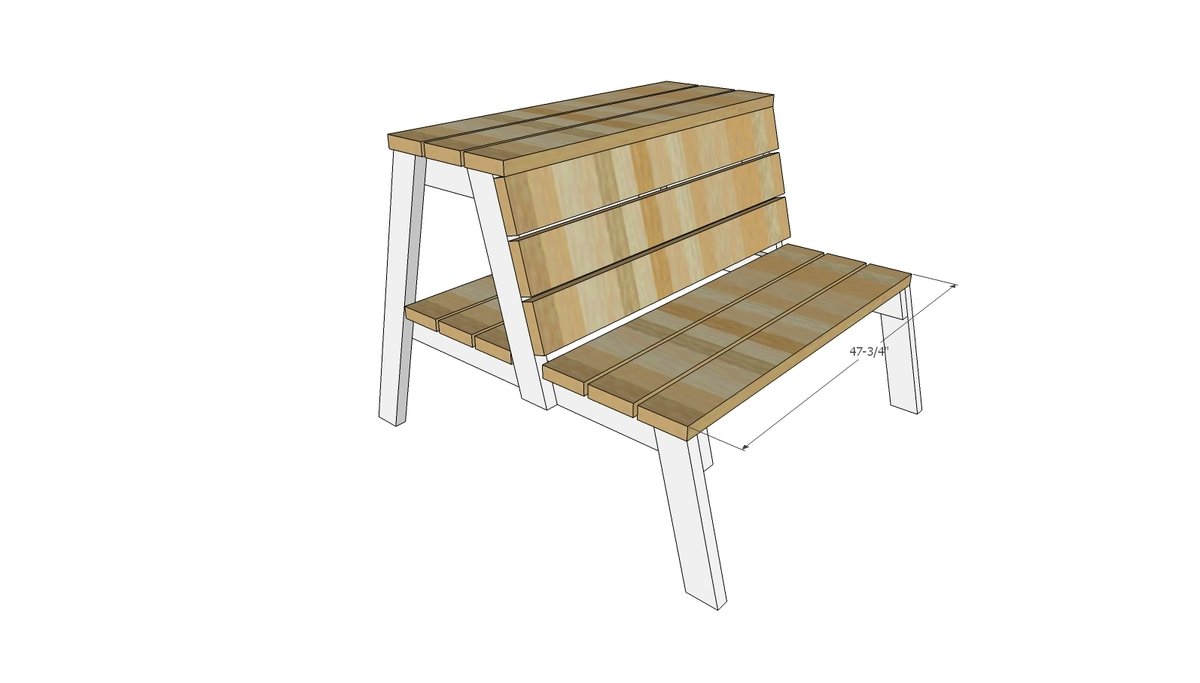
These DIY fire pit benches are such a smart outdoor project! Each bench has built-in table space and storage, making them perfect for drinks, snacks, blankets, and s’mores supplies. They are especially handy around a fire pit because everything stays within reach without needing extra side tables. The design is practical, beautiful, and space-saving, with seating, serving space, and storage all in one easy build. Add a cozy blanket, a tub of s’mores supplies, and a few drinks, and you have the perfect backyard gathering spot. Best of all, the plans are free and beginner-friendly, making these benches a great weekend project for any patio, backyard, cabin, or fire pit area.
Specifications
| Project type | Bench |
|---|---|
| Room | Outdoor |
| Style | Cottage Style Furniture Plans |
| Difficulty | Beginner Projects |
| Estimated cost | $20 - $50 |
Dimensions
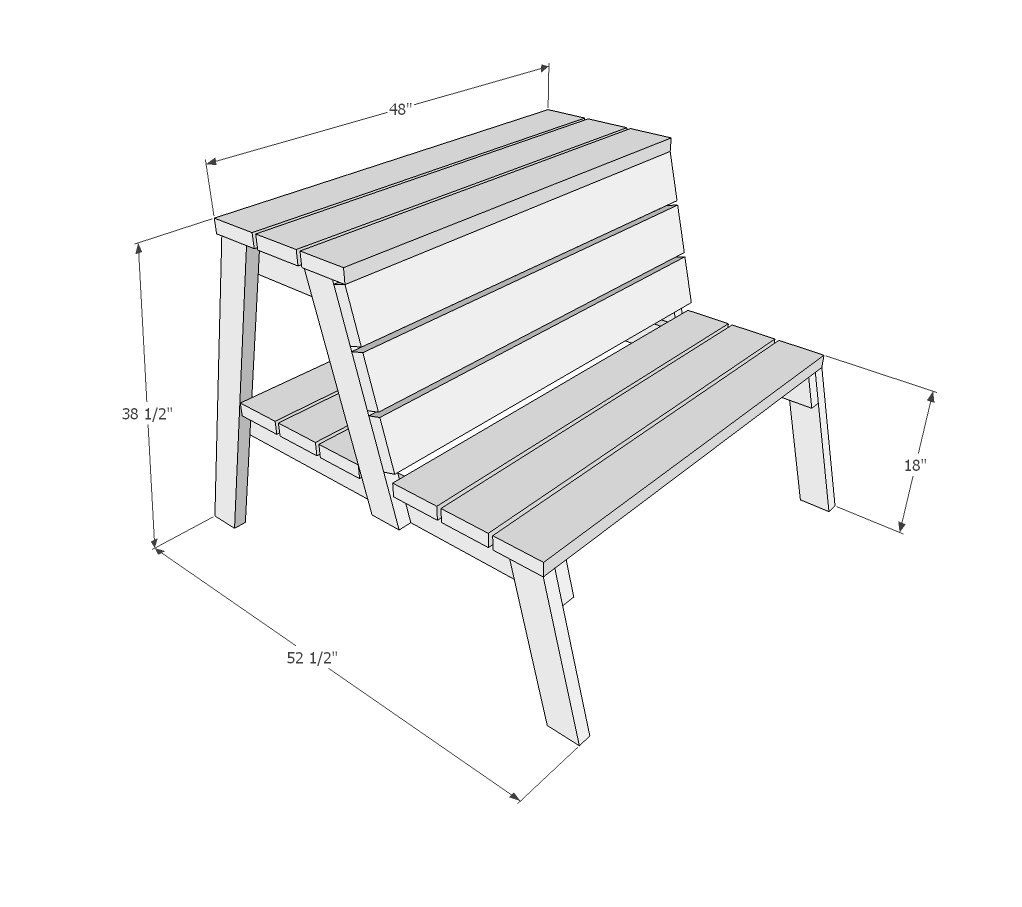
Use the size-specific shopping and cut lists below.
Shopping List
6 - 2x6 @ 8 feet long
4 - 2x4 @ 8 feet long
2-3/4" exterior self tapping deck screws
Cut List
FOR ONE BENCH
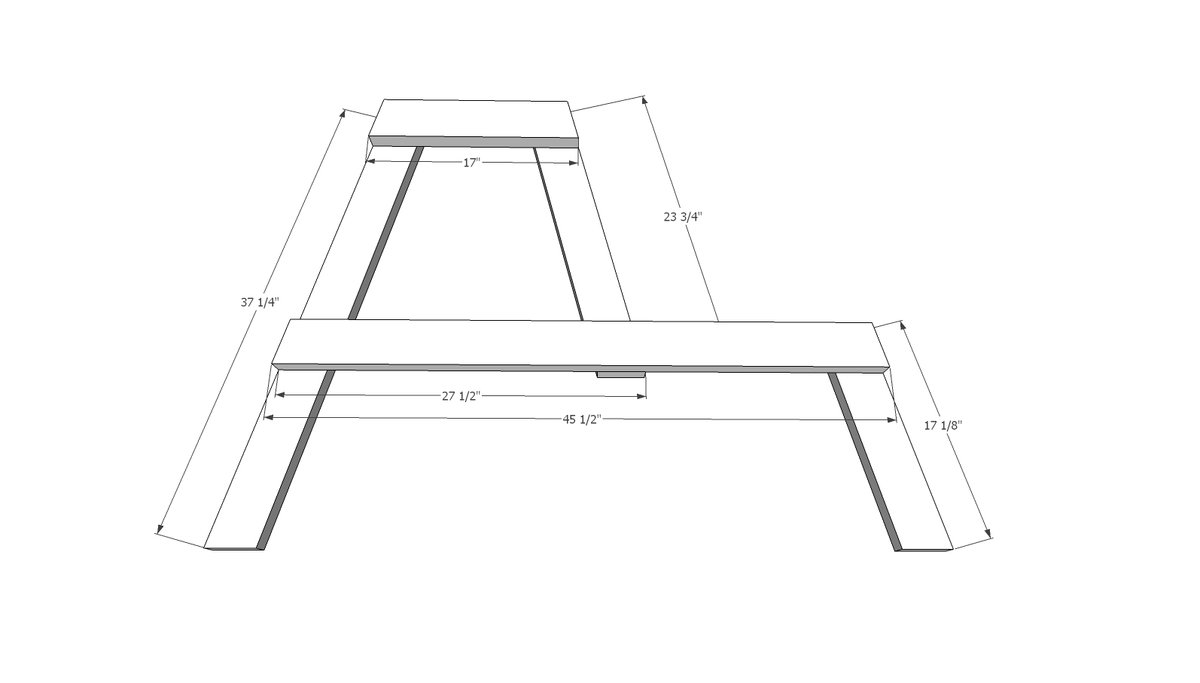
2 - 2x4 @ 17" - long point to long point, both ends cut at 15 degrees, not parallel
2 - 2x4 @ 45-1/2" - long point to long point, both ends cut at 15 degrees, not parallel
2 - 2x4 @ 37-1/4" - long point to short point, both ends cut at 15 degrees, ends are parallel
2 - 2x4 @ 23-3/4" - long point to short point, both ends cut at 15 degrees, ends are parallel
2 - 2x4 @ 17-1/8" - long point to short point, both ends cut at 15 degrees, ends are parallel
12 - 2x6 @ 47-3/4"
Tools
- measuring tape
- pencil
- safety glasses
- hearing protection
- drill
- compound miter saw
Step-by-step Instructions
Step 1
Lay out one leg set and attach together at overlaps with 2-3/4" screws. Exterior wood glue can be used to strengthen joints.
Step 2
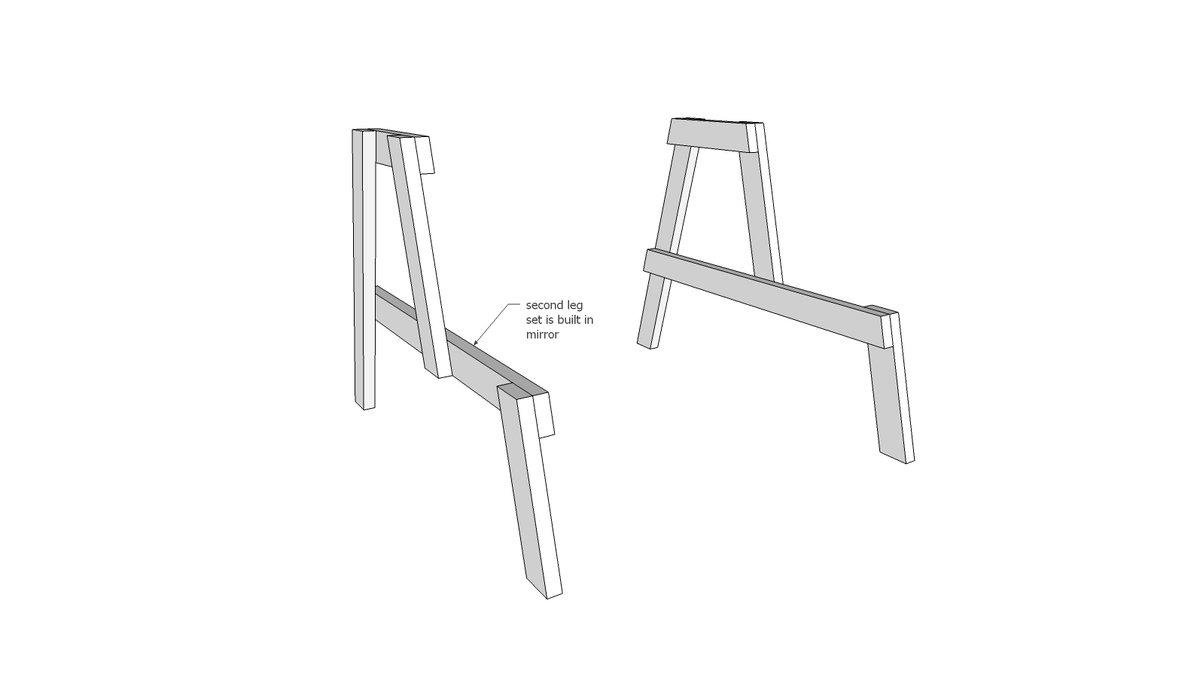
Build the second leg set exactly the same, but in mirror.
Step 3
Place 2x6 boards on top, and attach, evenly spacing gaps in between. Screw down with 2-3/4" screws and glue.
Finishing
Sand all surfaces, starting with a medium grit and finishing with fine. Wipe off the dust, fill any holes or gaps with wood filler, and sand smooth once dry. Apply primer if you're painting, then finish with your choice of paint or stain and seal with a durable clear topcoat. For outdoor projects, use exterior-rated primer, paint or stain, and sealer so the piece stands up to the weather.
Source (temporary): https://www.ana-white.com/woodworking-projects/3-1-fire-pit-bench-table-and-storage