3 Drawer Dresser or Baby Changing Table
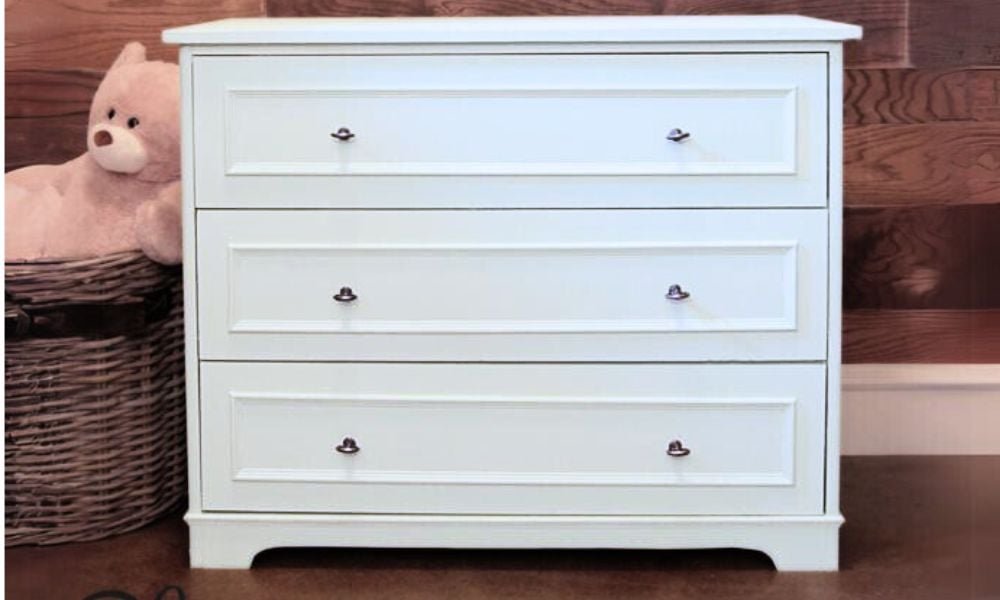
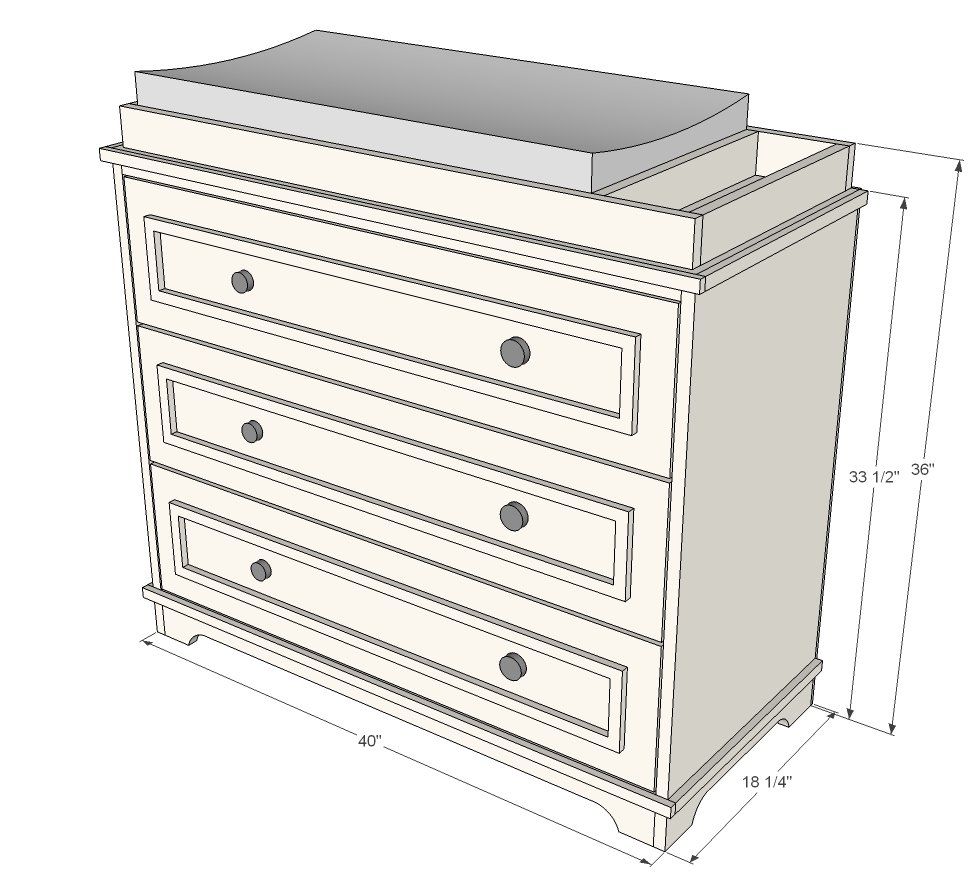
to build a dresser or changing table (with topper!) from - this beautiful little dresser is perfect as a changing table too. Step by step plans with diagrams, shopping list, cut list and lots of reader submitted photos.
Specifications
| Project type | Dresser Plans |
|---|---|
| Room | Bedroom |
| Style | Children's and Kid's Room Furniture and Toy Plans |
| Difficulty | Advanced |
| Estimated cost | $150 - $200 |
Dimensions
Use the size-specific shopping and cut lists below.
Shopping List
- 1 - 1x10 @ 10 feet long (for drawer faces)
- 26 feet (I'd buy a little more to be safe) of 1x6 for drawer boxes
- 1 - 1x4 @ 8 feet long
- 4 - 1x2 @ 8 feet long
- 2 - 1x3s @ 8 feet long (for topper - can also use 1x4s here)
- 1 sheet of 3/4" plywood
- 1 sheet of 1/4" plywood
- 36 feet of moudling for drawer faces/top edge and bottom edge
- 3 sets 16" euro style drawer slides
- 6 knobs
- 1-1/4" pocket hole screws
- 1" and 1-1/4" brad nails
- wood filler or edge banding to finish plywood edges
Cut List
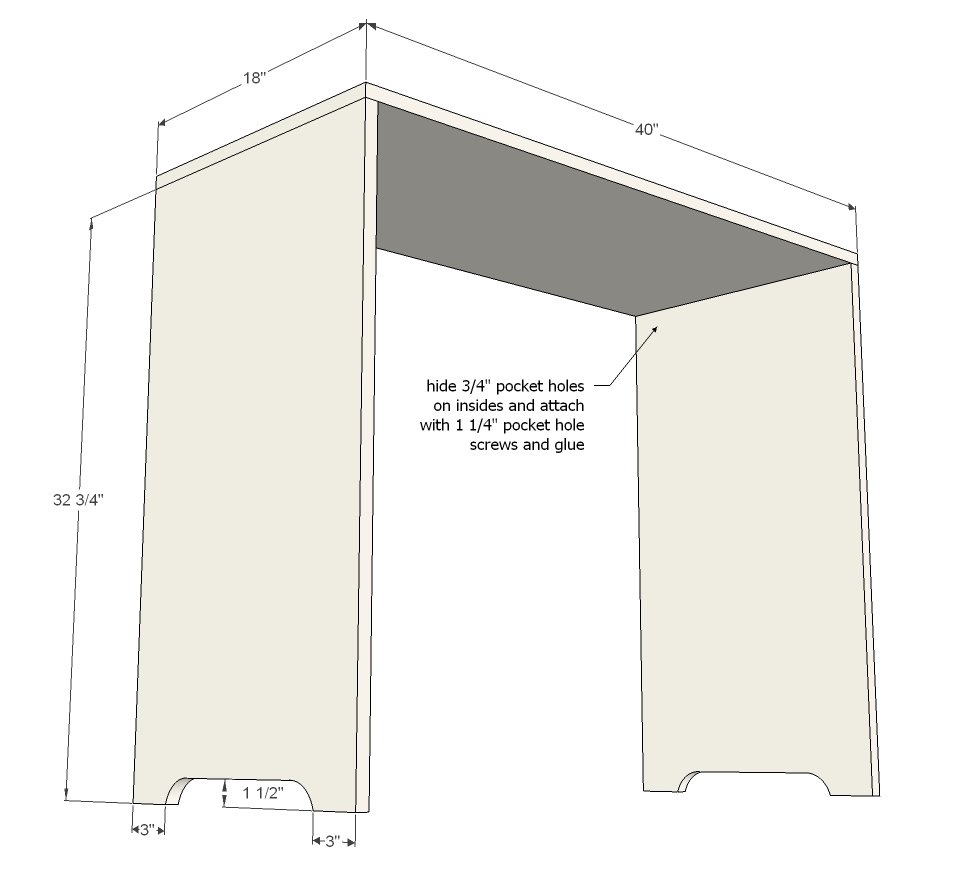
- 2 - 3/4" plywood 18" x 32 3/4" (sides)
- 1 - 3/4" plywood 18" x 40" (top)
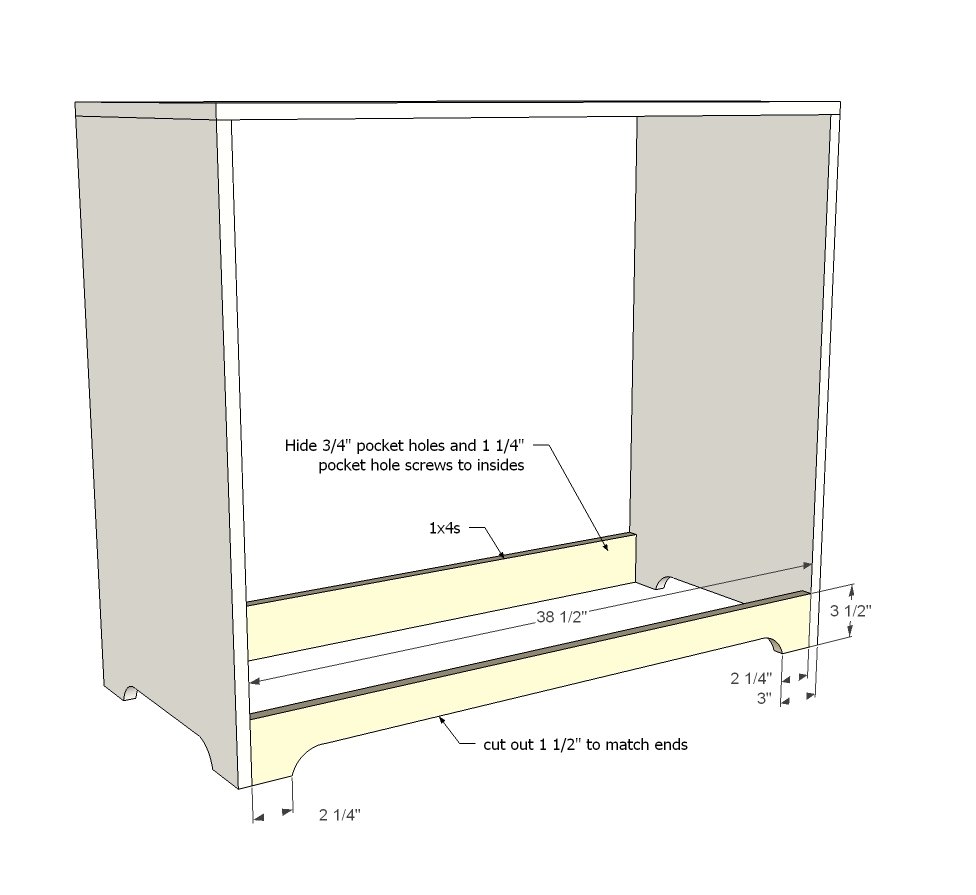
- 2 - 1x4 @ 38 1/2" (footers)
- 4 - 1x2 @ 38 1/2" (top supports and between drawer face supports)
- 1 - 1/4" plywood @ 40" x 33 1/2"
DRAWERS
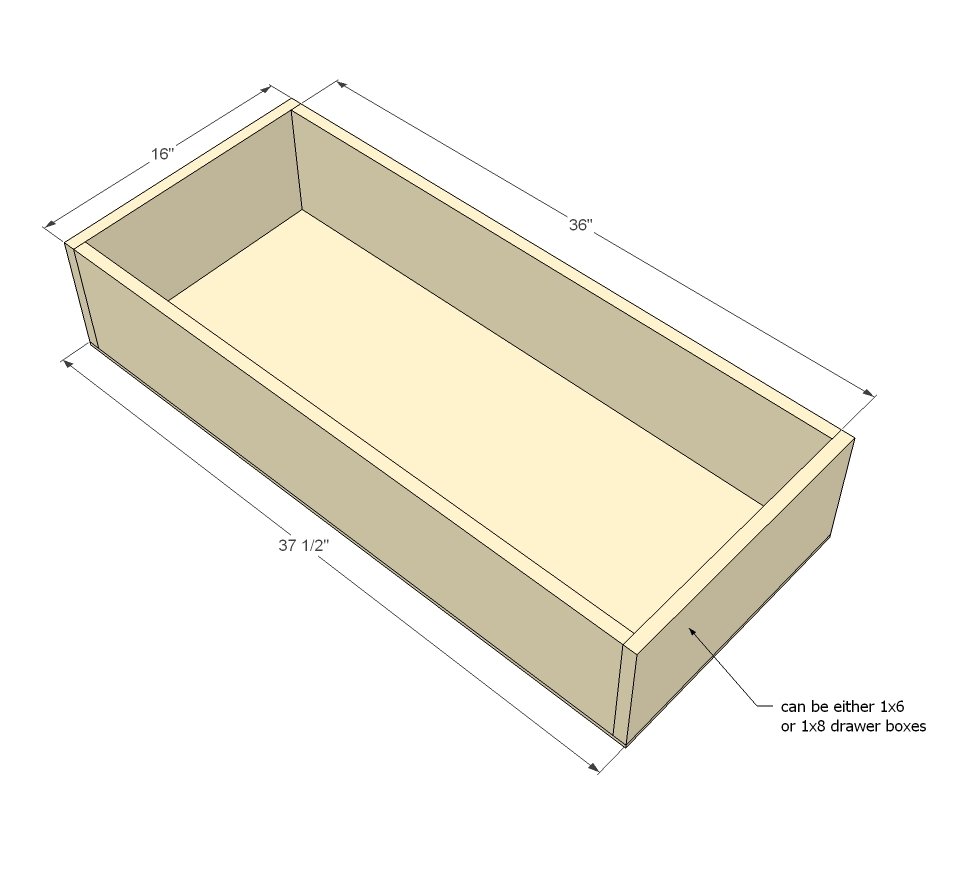
- 6 - 1x6 @ 16" (sides)
- 6 - 1x6 @ 36" (front/back)
- 3 - 1/4" plywood @ 16" x 37 1/2" (bottoms)
- 3 - 1x10 @ 38 1/4" (drawer faces)
TOPPER
- 3 - 1x3 @ 16"
- 2 - 1x3 @ 39"
Tools
- measuring tape
- square
- pencil
- safety glasses
- hearing protection
- kreg-jig
- drill
- circular saw
- jigsaw
- nailer
- sander
Step-by-step Instructions
Step 1
Start by attaching the sides to the top. I definitely recommend 3/4" pocket holes and 1-1/4" pocket hole screws here - the joint is just so much better and is hidden and so much easier to make - and since this project doesn't have a face frame, it will help keep the project square. If you are cutting out the base, take a second to jigsaw the sides out now. NOTE: For a stained finish, you will want to add edge banding to the front edges of the sides before assembly.
Step 2
Then add the front and back supports along the base. We could have done a bottom shelf instead, but that adds a ton of weight and extra material, so I went this route with the plans.
Step 3
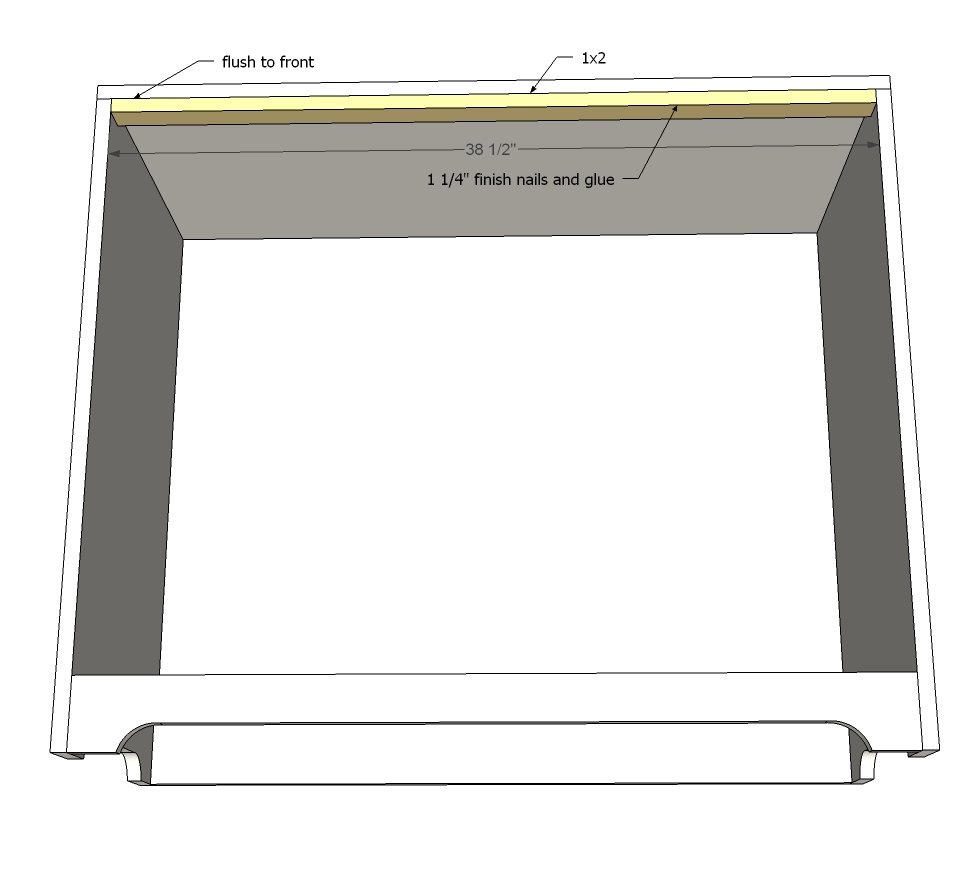
Now attach the top trim - this one just adds a little decoration and a little extra support on top.
Step 4
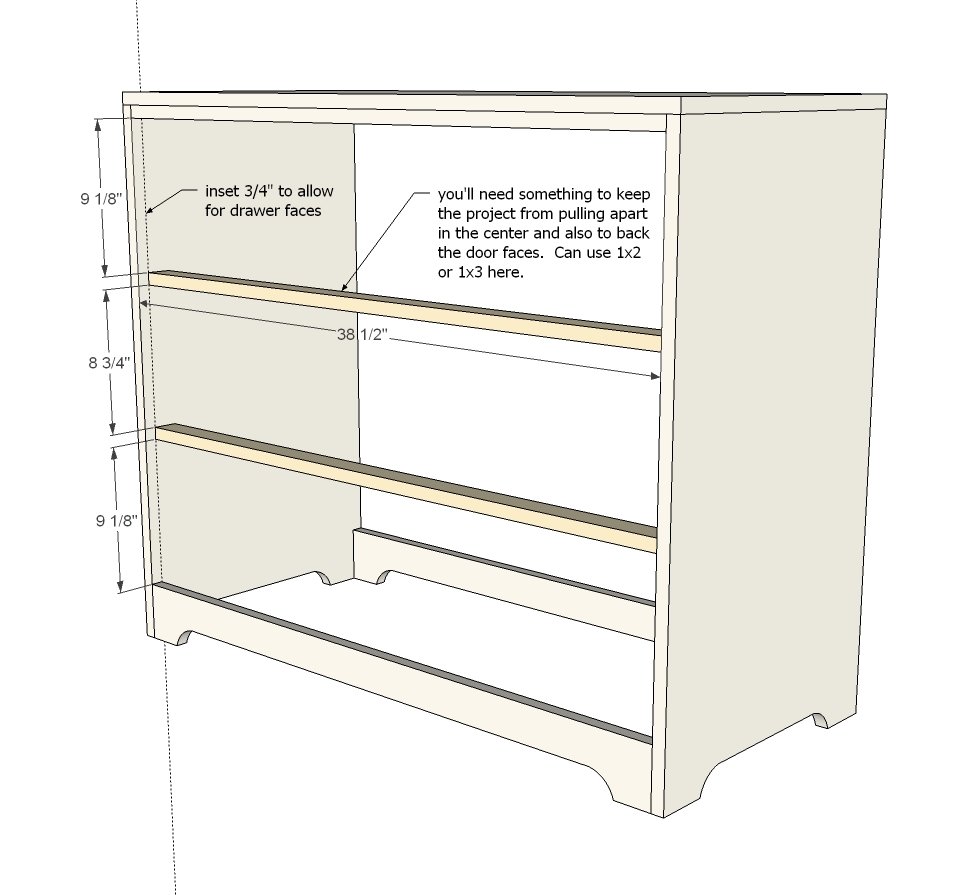
These guys go between the drawers so when you look at the project from the front, there's no air gaps in between. Also, they hold the drawers in place when installed.
Build the drawer boxes and install - here is a video tutorial showing how
Step 6
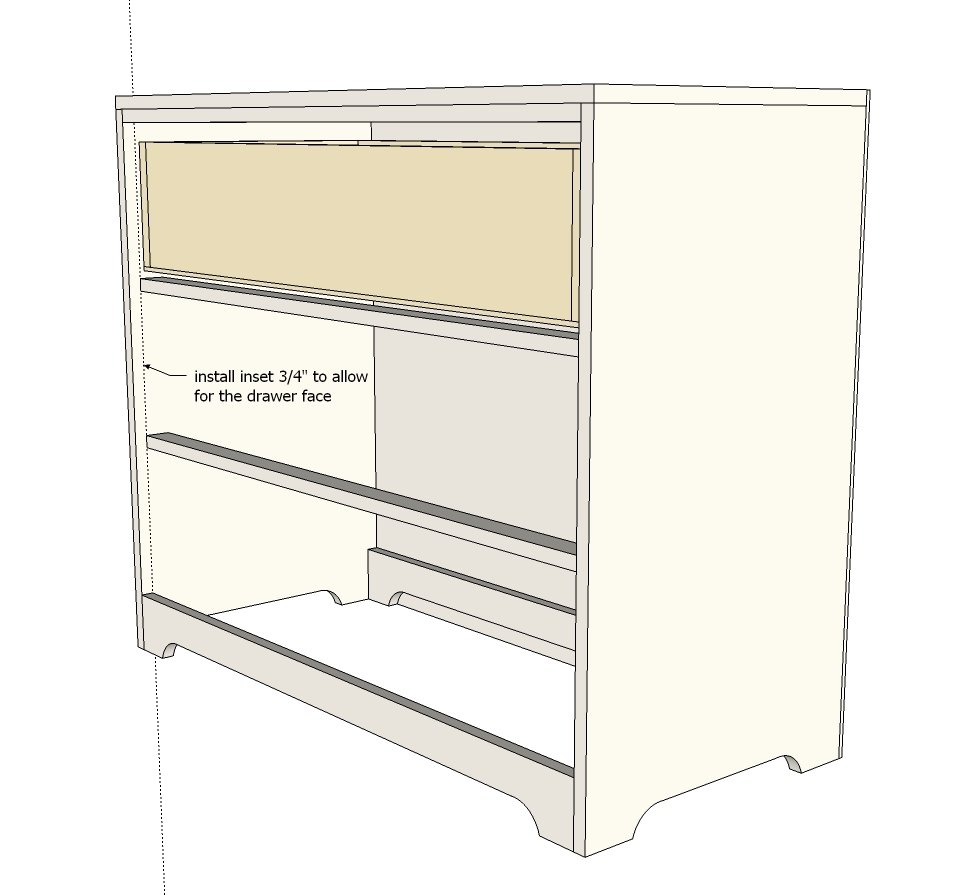
Drawers need to be installed inset 3/4" to allow for the drawer face, installed in the lowest possible position above the 1x2s. Use a square to help you install the cabinet members.
Step 7
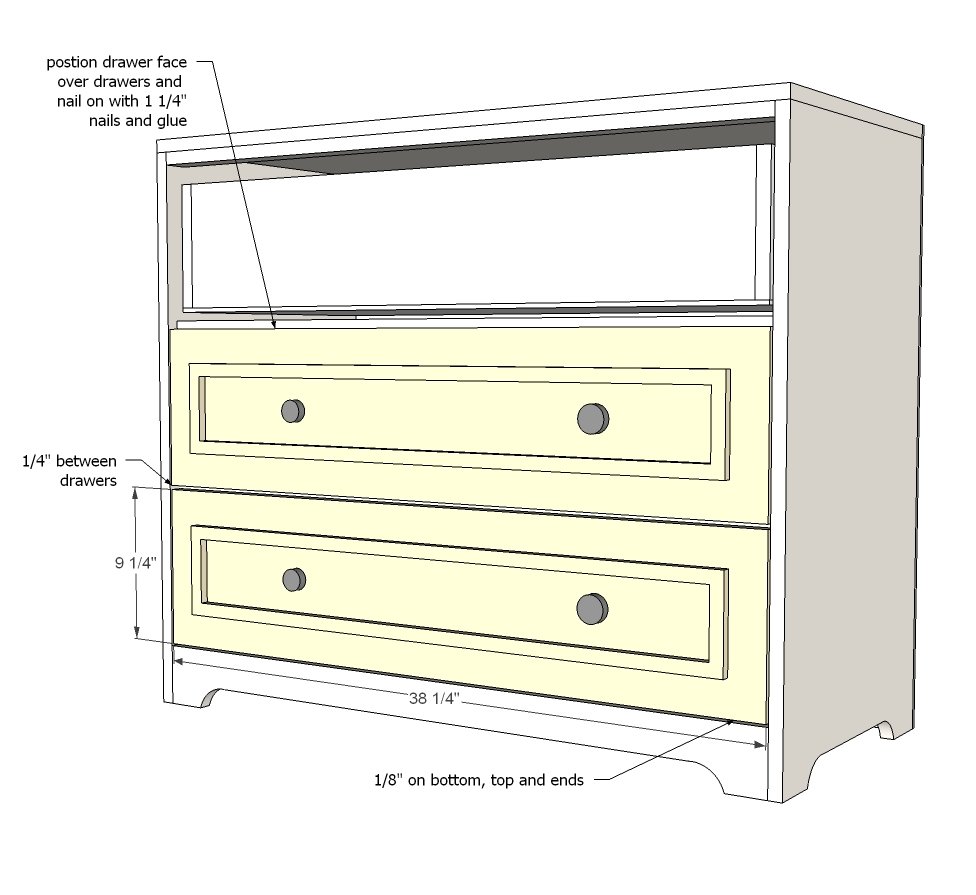
Attach drawer faced to fronts of drawers, allowing for a 1/4" gap in between drawers. You can use a nailer and 1-1/4" finish nails to attach, then open the drawer and add a few screws from the inside. Another tip is to install the knobs first so you don't have to drill through double thickness for the drawer fronts (as most knobs only have a bolt designed for 3/4" thick drawer faces). Dress the drawers up with trim or moulding if desired.
Step 8
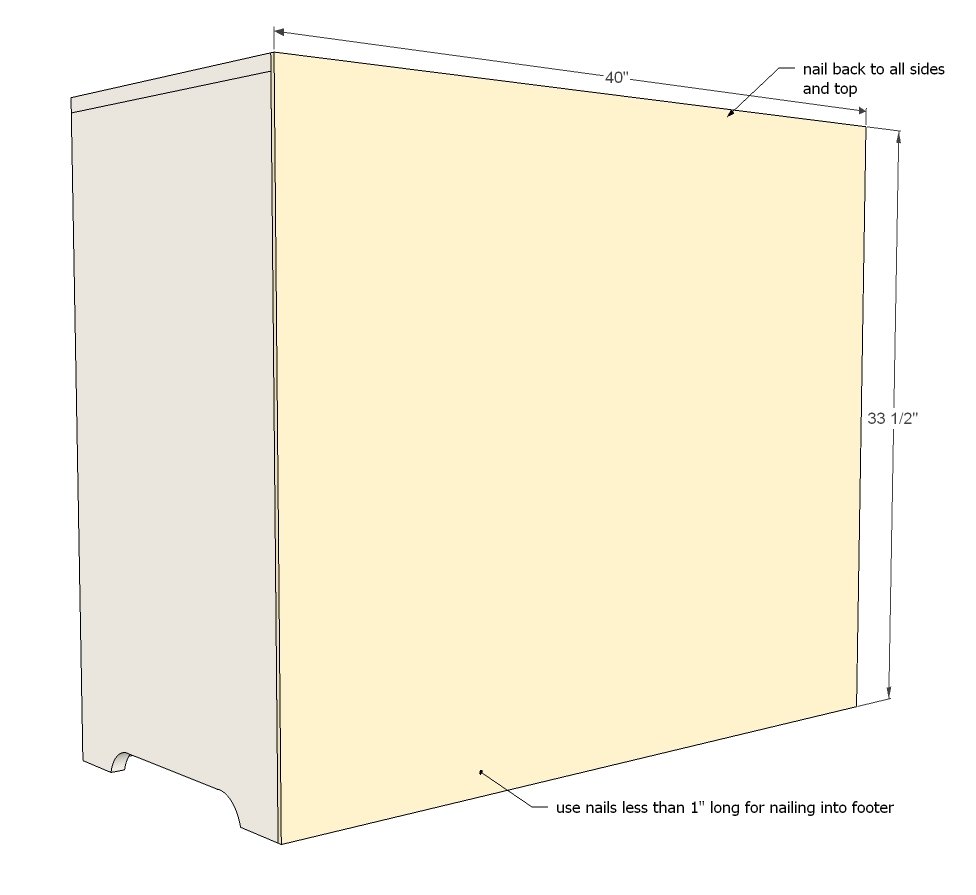
The back could have been installed at any time, but I like to leave it off until after the drawers are installed just to make reaching inside easier. The down side is the back does help keep the project square - so if your project is not square, it may make sense to put the back on earlier (around step 3).
Step 9
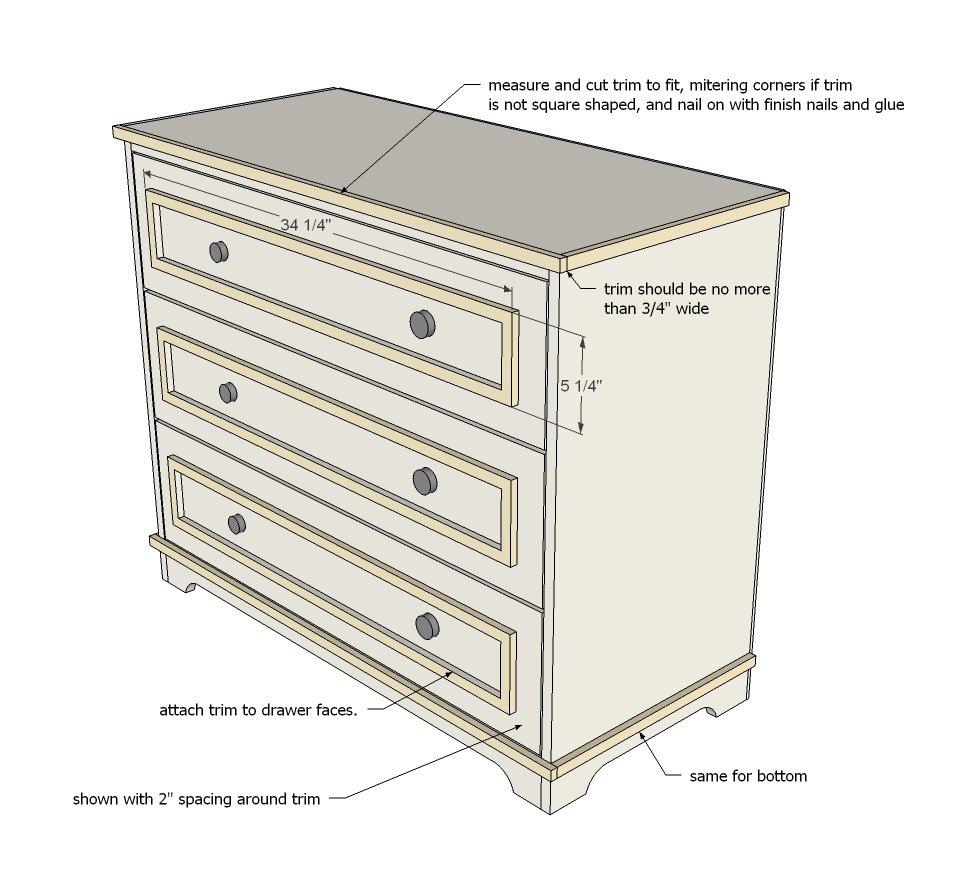
Trim the top and bottom edges out to add interest and cover exposed plywood edges on bottom. If you are using a shaped moulding, you will need miter the corners.
Step 10
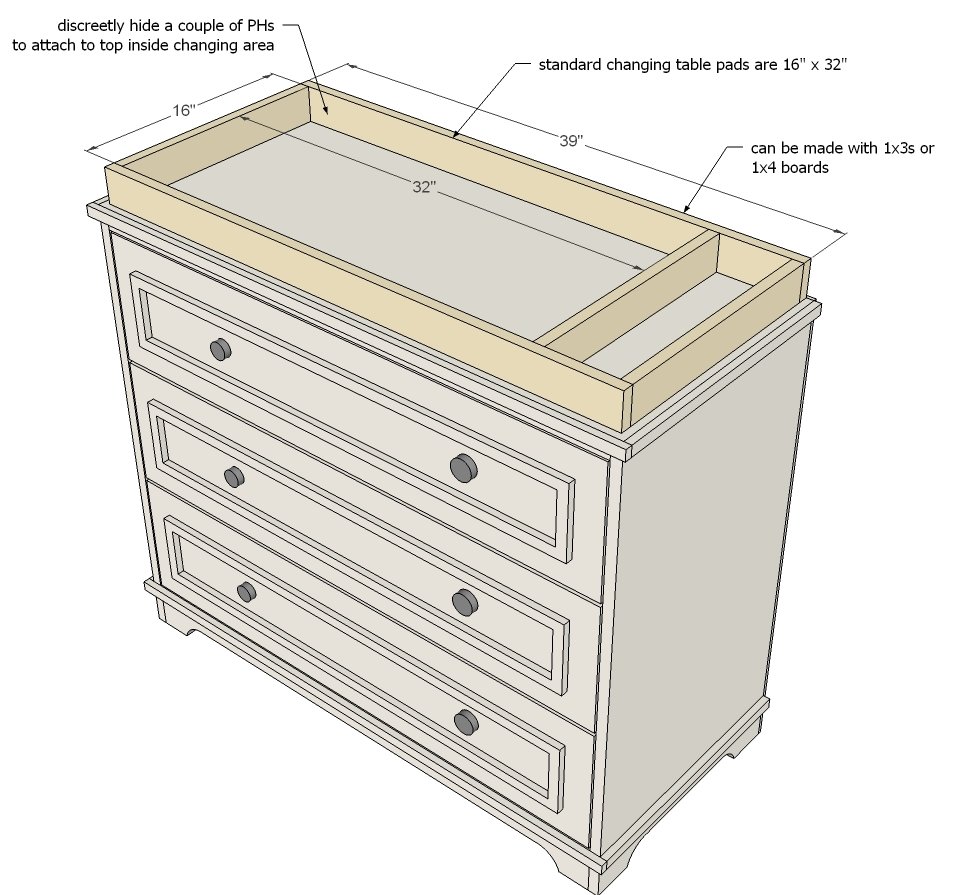
The topper is a piece of cake! Changing pads can vary in length, so make sure you build to suit your topper.
Finishing
Sand all surfaces, starting with a medium grit and finishing with fine. Wipe off the dust, fill any holes or gaps with wood filler, and sand smooth once dry. Apply primer if you're painting, then finish with your choice of paint or stain and seal with a durable clear topcoat. For outdoor projects, use exterior-rated primer, paint or stain, and sealer so the piece stands up to the weather.
Source (temporary): https://www.ana-white.com/woodworking-projects/3-drawer-dresser-or-baby-changing-table