3 Drawer Open Shelf Simple Entryway Console
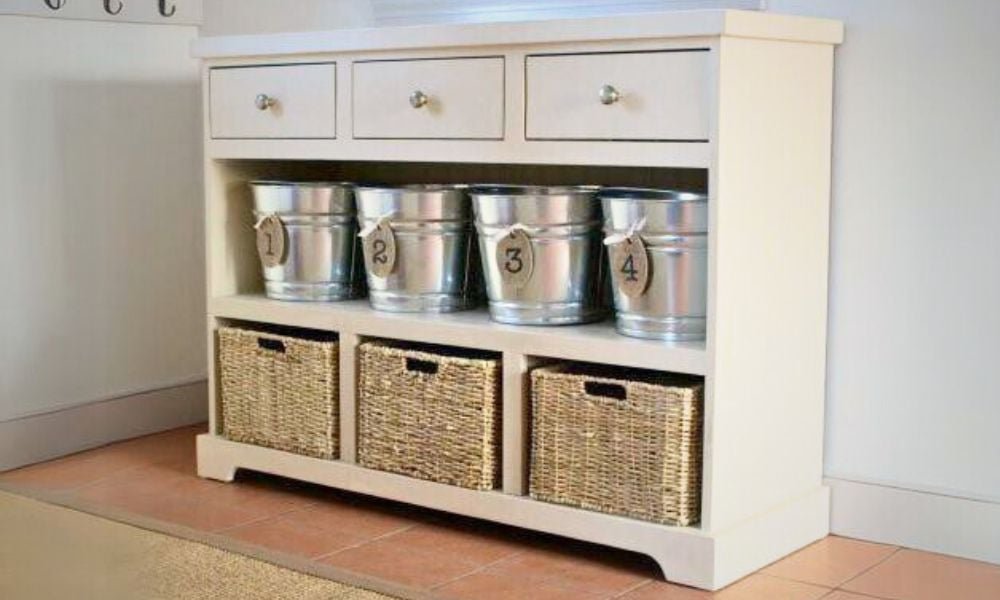
Build your own console table with great storage options! With drawers and baskets, the variety of storage options makes sorting easy. This is a free project plan with step by step directions, diagrams, and cut list from
Specifications
| Project type | Console Table Plans |
|---|---|
| Room | Storage Solutions |
| Difficulty | Intermediate |
| Estimated cost | $150 - $200 |
Dimensions
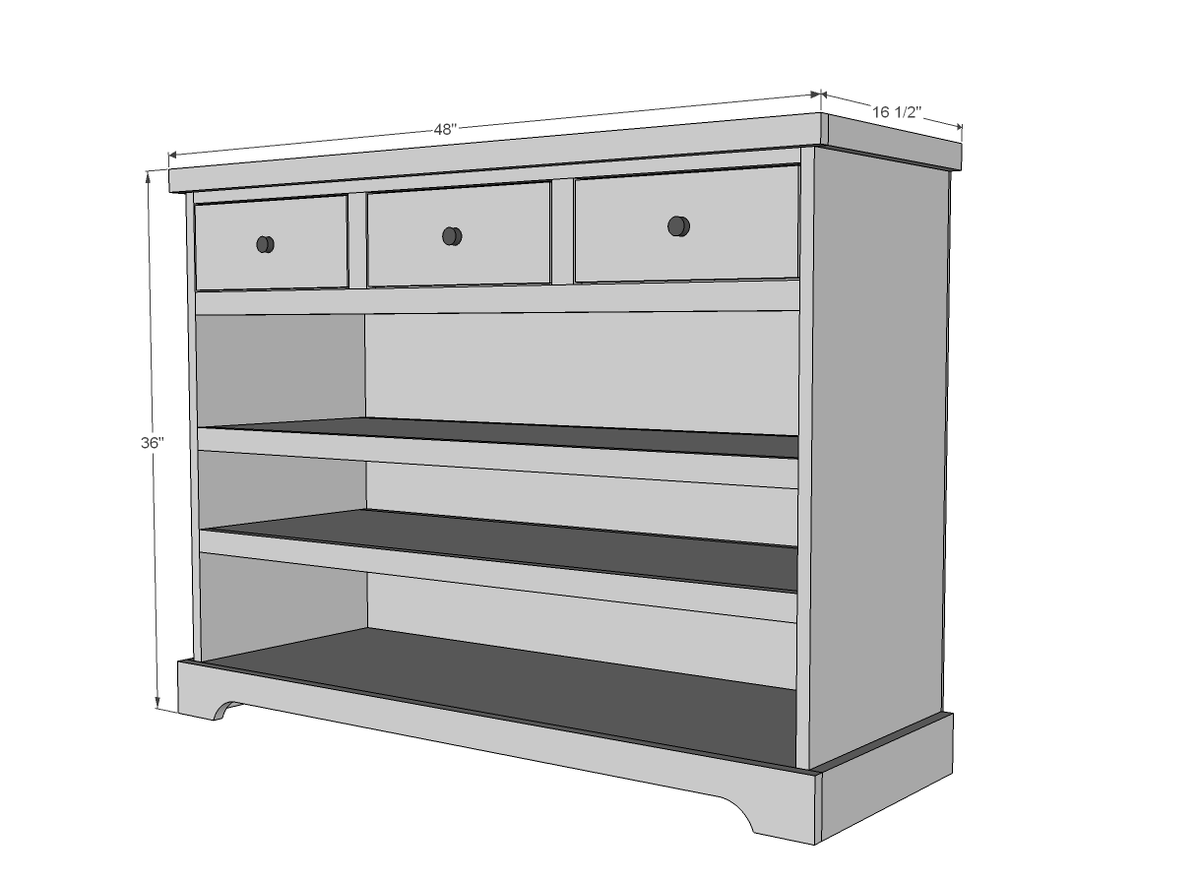
Use the size-specific shopping and cut lists below.
Shopping List
- 1 sheet of 3/4” plywood cut into 2 strips 8 feet long x 15-3/4” wide, and remaining strip is 14-1/4” wide (for shelves)
- 1 sheet (4’x8’)
- 1/4” plywood or paneling for back
- 5 - 1x2 @ 8 feet long
- 4 - 1x4 @ 8 feet long
- 1 - 1x6 @ 4 feet long
- Edge banding on front edge of plywood
- 1-1/4” pocket hole screws
- 1-1/4” and 3/4” brad nails
- 3 - 13” Bottom center mount drawer slides (these slides are recommended)
Cut List
- 1 - 3/4” plywood @ 15-3/4” x 46-1/2” (top)
- 2 - 3/4” plywood @ 15-3/4” x 35-1/4” (sides)
- 1 - 3/4” plywood @ 15-3/4” x 45” (bottom)
- 1 - 1x4 @ 45" (back support)
- 3 - 1x2 @ 45”
- 2 - 1x2 @ 5-3/4”
- 2 - 1x2 @ 15-3/4”
- 1 - 1x2 @ 48”
- 2 - 1x4 @ 15-3/4”
- 1 - 1x4 @ 48”
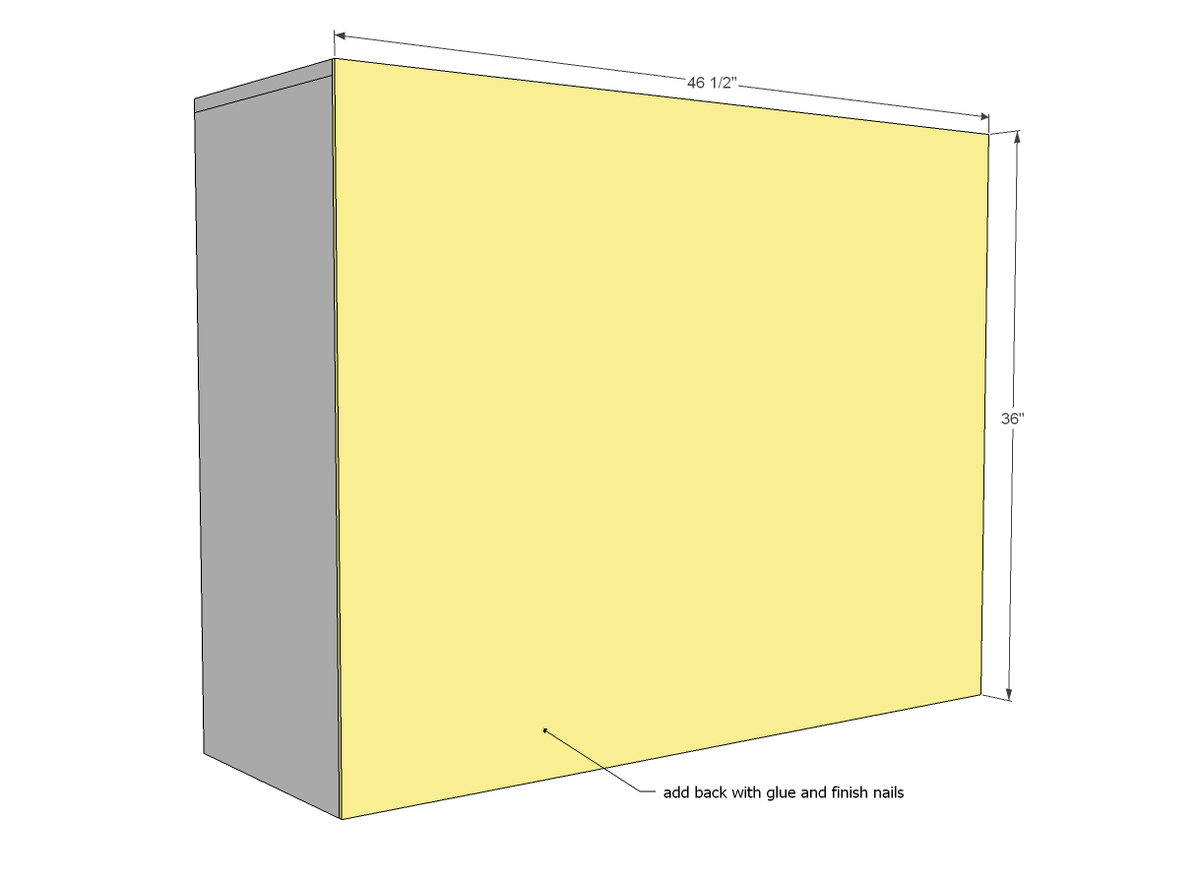
- 1 - 1/4” plywood @ 46-1/2” x 36”
DRAWER
- 6 - 1x4 @ 12”
- 6 - 1x4 @ 12-1/2”
- 3 - 1x6 @ 13-3/4” - cut to fit
- 3 - 1/4" plywood @ 13 1/2" x 12 1/2"
SHELVES
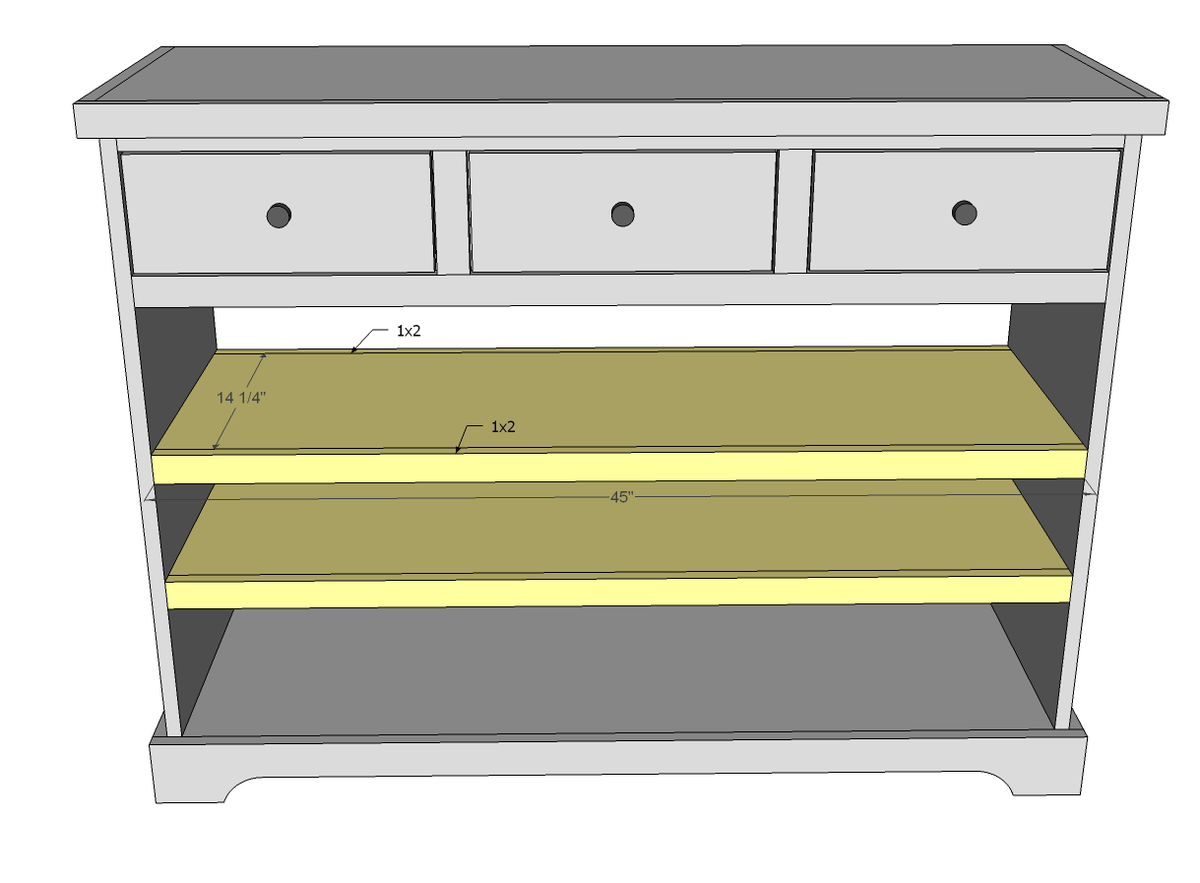
- 2 - 3/4” plywood @ 14-1/4” x 45” (cut 1/4” shorter if using shelf pins)
- 4 - 1x2 @ 45
Tools
- measuring tape
- square
- pencil
- safety glasses
- hearing protection
- kreg-jig
- drill
- circular saw
- jigsaw
- nailer
- sander
Step-by-step Instructions
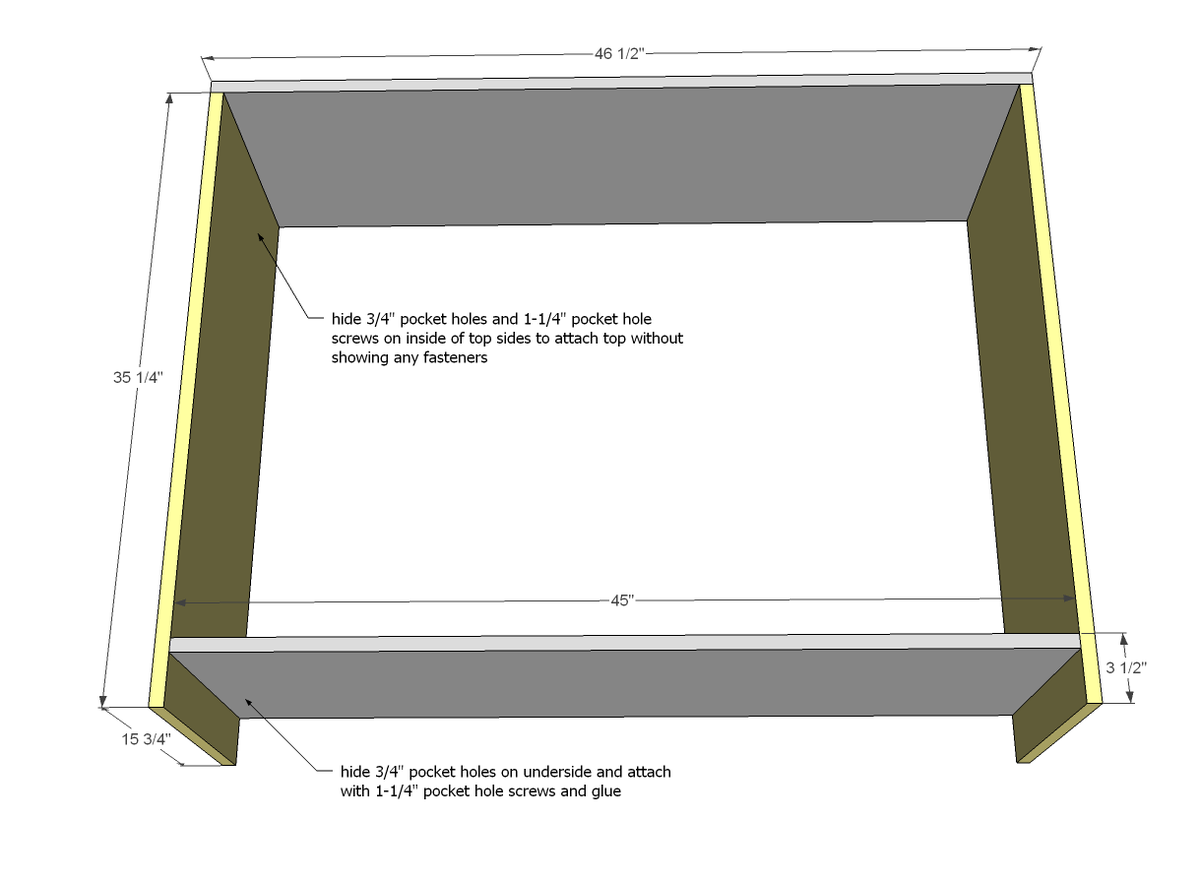
Start by building the main box for the console.
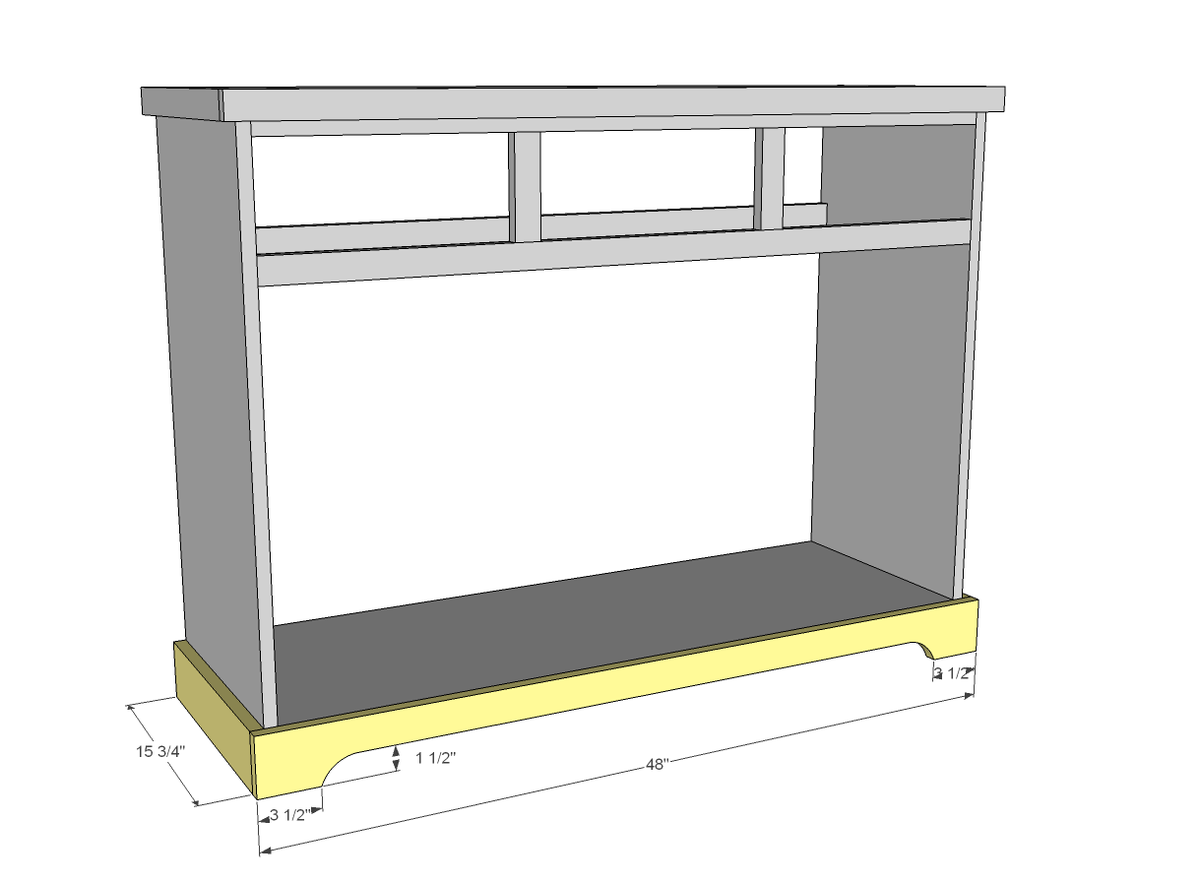
NOTE: It's a good idea to drill 3/4" pocket holes facing forward along underside of bottom shelf for attaching the front footer in later steps.
Step 2
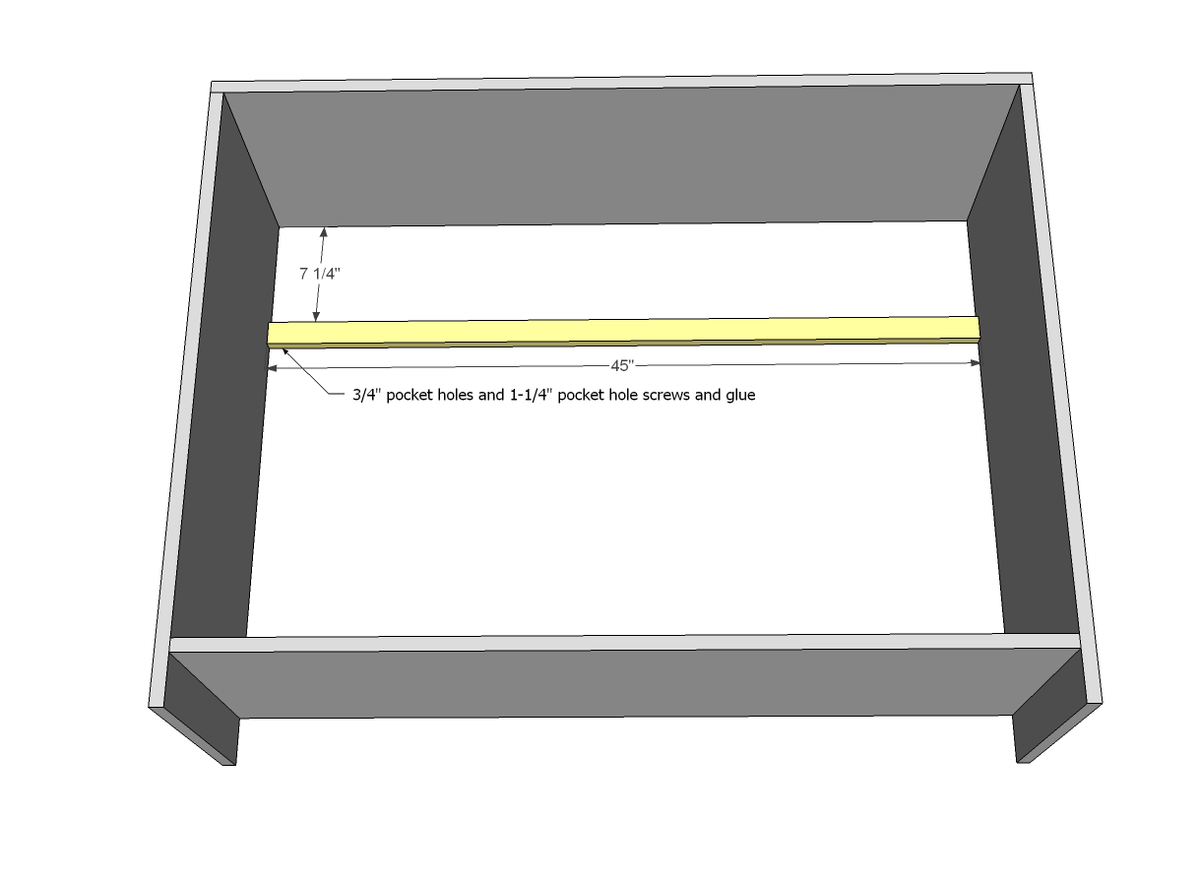
Attach back 1x4 (shown with 1x2 but Jaime recommends a 1x4 instead - this is updated in cut list) to give you something to attach drawer slides to.
Step 3
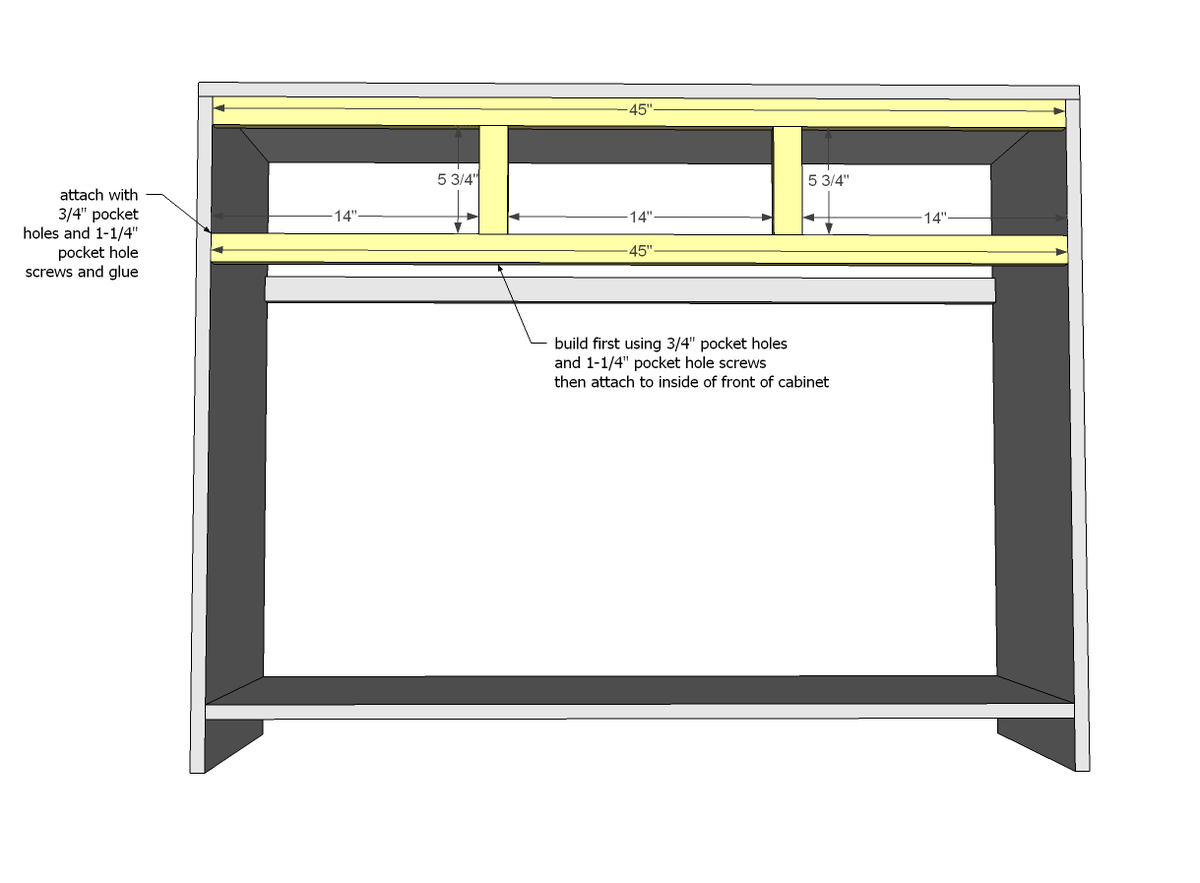
Build the front face frame and attach to front of console, inset and flush to front.
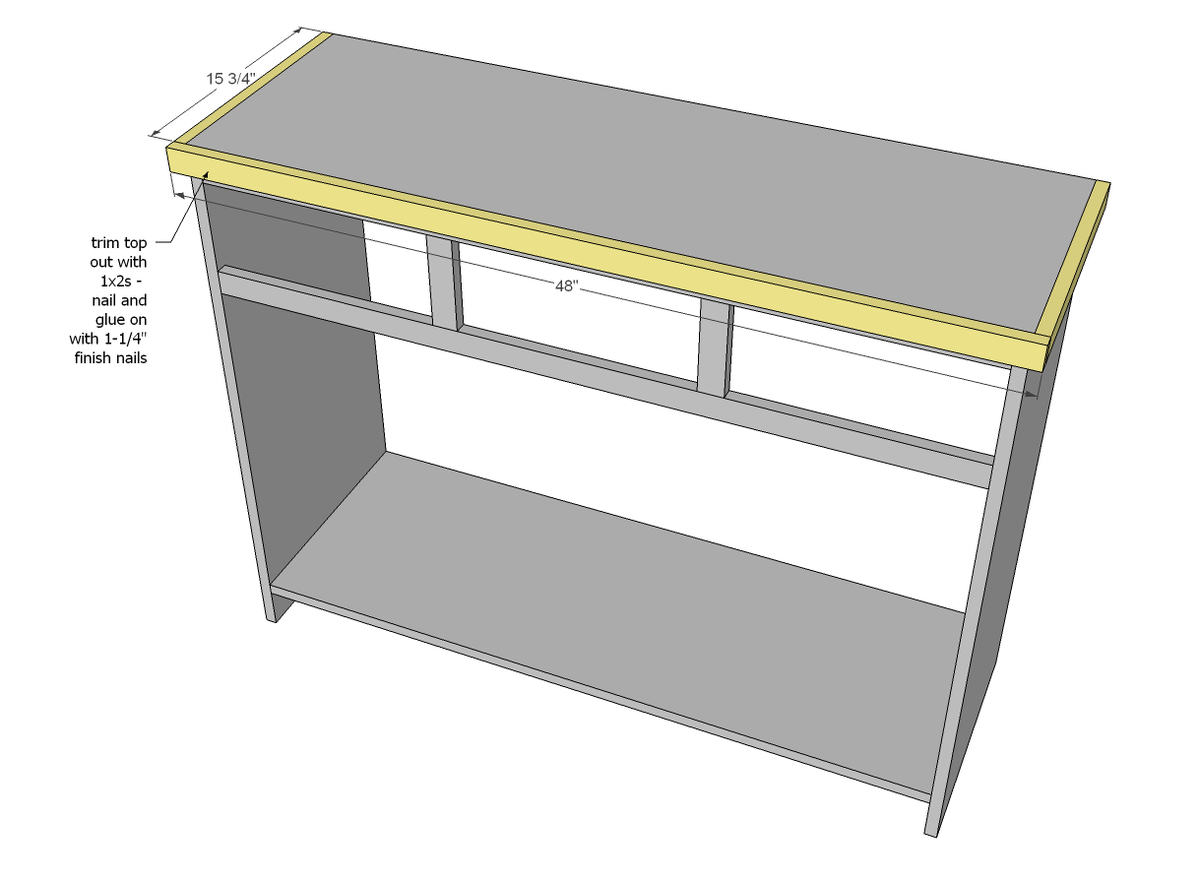
Trim out top edges of top with 1x2s - I recommend cutting these to fit.
TIP: For an even nicer finish, consider mitering corners at 45 degrees.
Step 5
Step 6
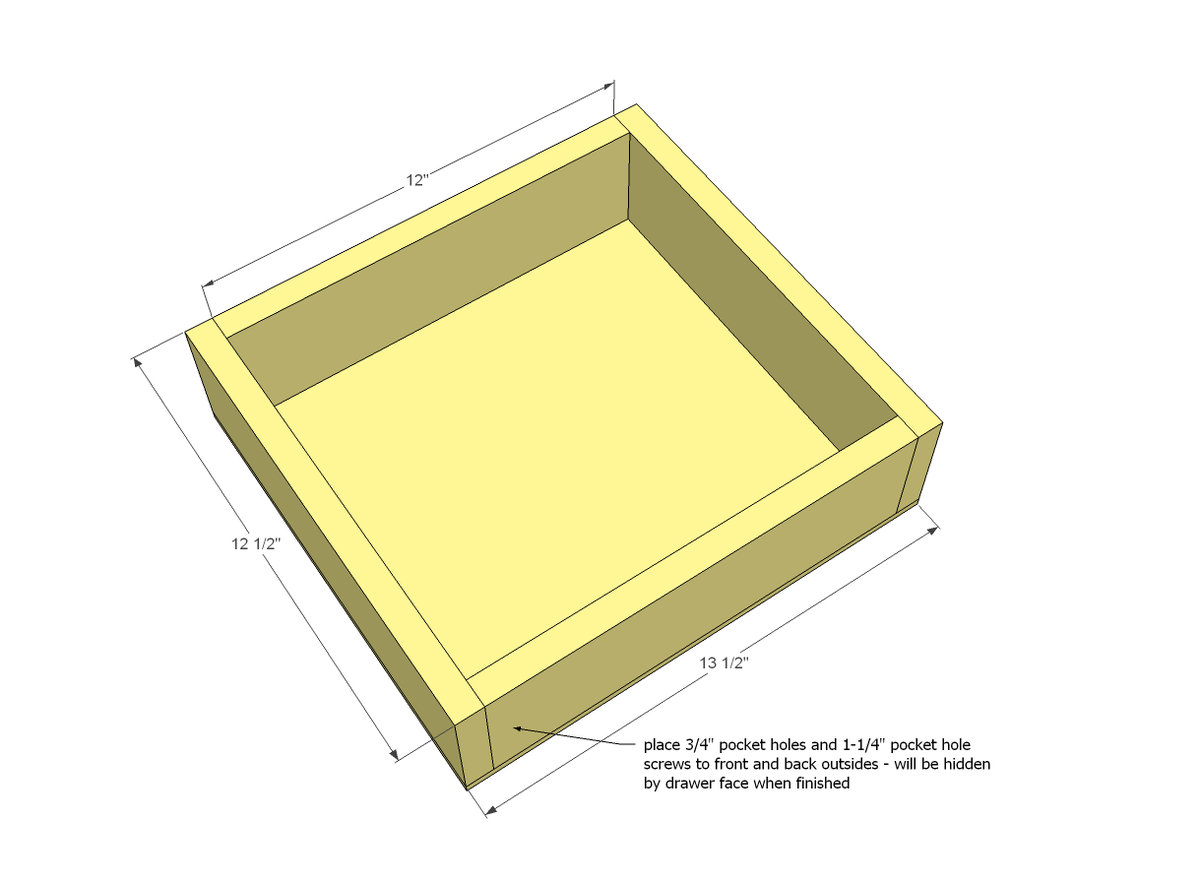
It's always a good idea to build drawer boxes to fit openings and spec with the drawer slides. Adjust to fit as necessary.
Step 7
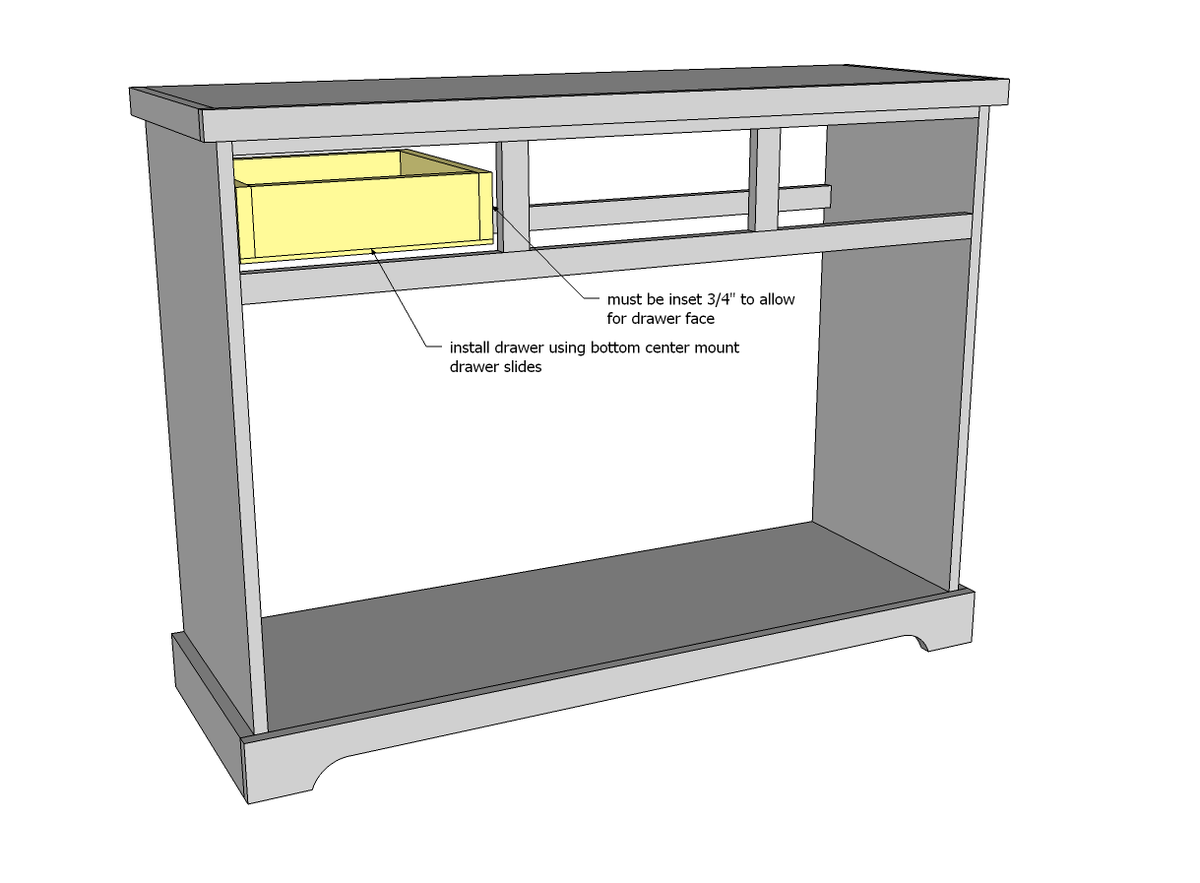
For bottom center mount drawer slides, Jaime recommends adding the last remaining 1x2 on the inside of the front, as shown below, to give you something to attach drawer slides to. Install drawer slides and drawer, with front inset 3/4" to allow for the drawer face to be inset. Jaime provides lots more details here on installing and adjusting bottom center mount drawer slides.
Step 8
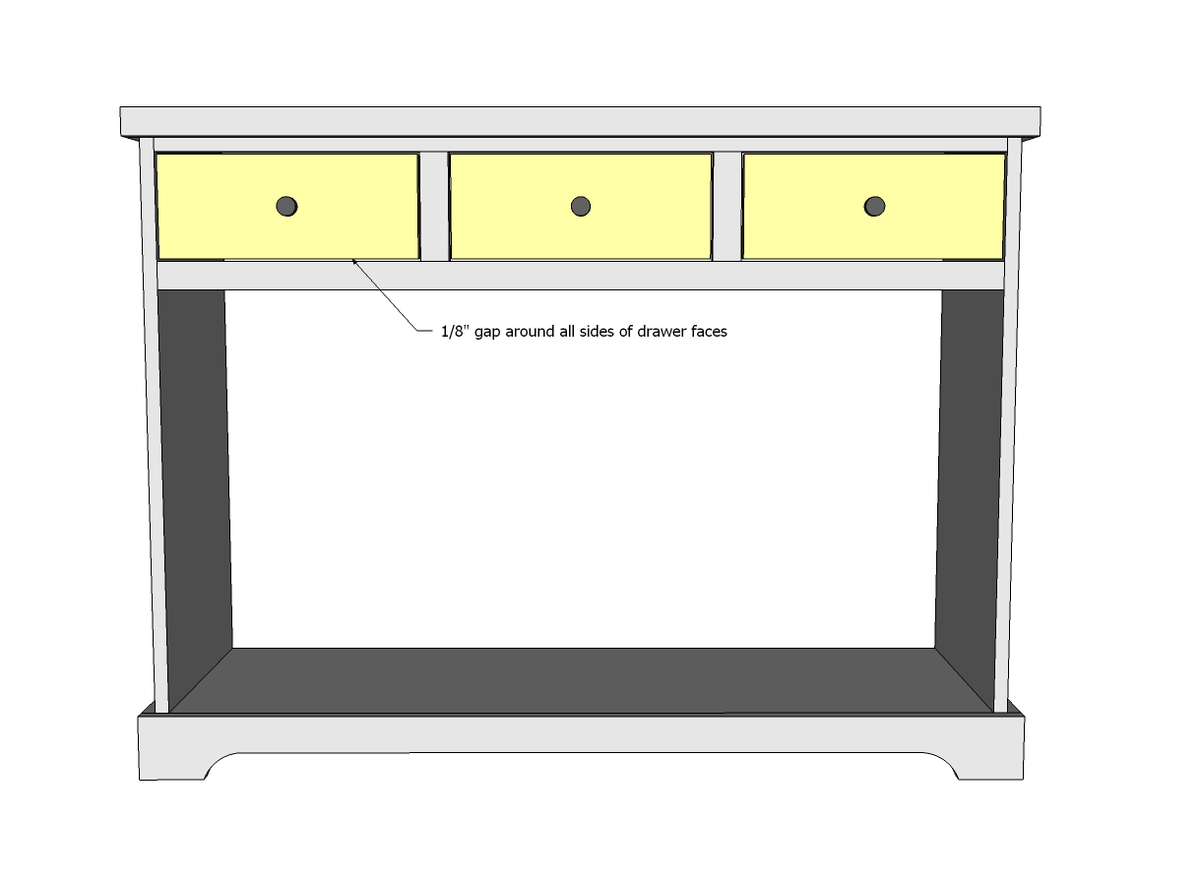
Attach the drawer faces with an 1/8" gap around all sides to the drawer boxes.
Step 9
Attach back with glue and finish nails or staples.
Step 10
Trim front of shelves with 1x2s (can be done with pocket holes) and add to inside of console. Shelves can be fixed or adjustable with shelf pin holes.
Step 11
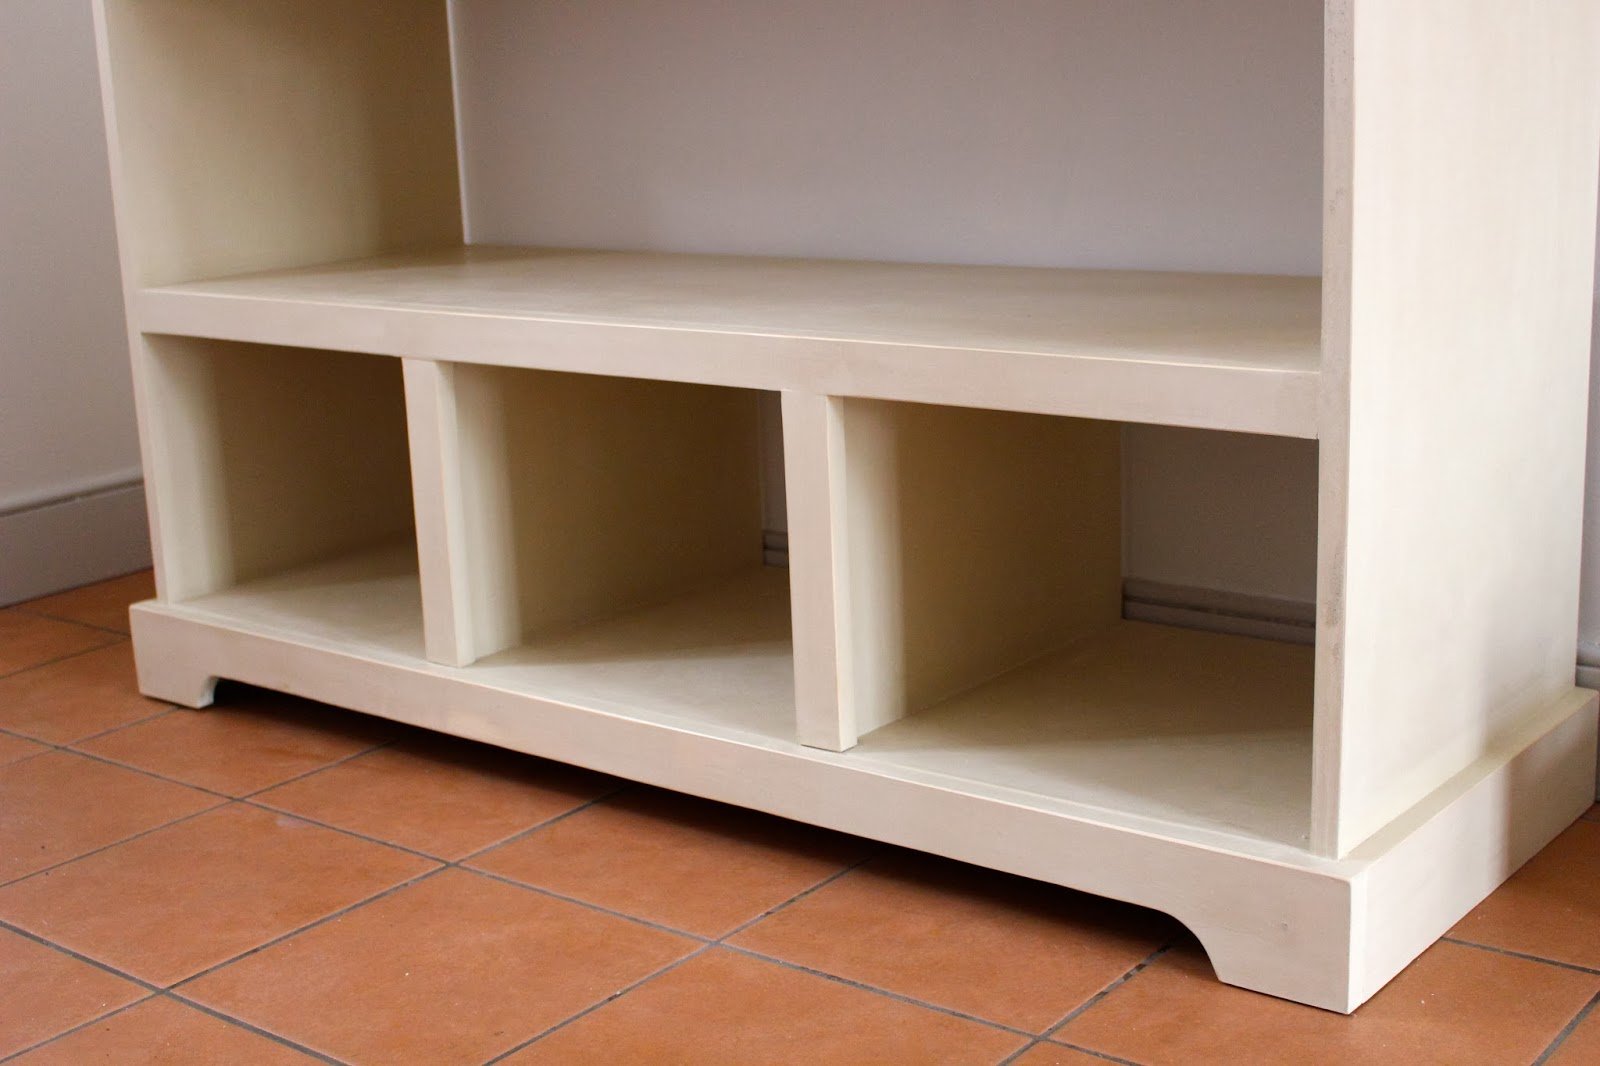
Jaime opted to frame out bottom with partitions to fit baskets - get more details here on how she did that.
Finishing
Sand all surfaces, starting with a medium grit and finishing with fine. Wipe off the dust, fill any holes or gaps with wood filler, and sand smooth once dry. Apply primer if you're painting, then finish with your choice of paint or stain and seal with a durable clear topcoat. For outdoor projects, use exterior-rated primer, paint or stain, and sealer so the piece stands up to the weather.
Source (temporary): https://www.ana-white.com/woodworking-projects/3-drawer-open-shelf-simple-entryway-console