$30 Industrial Bookshelf
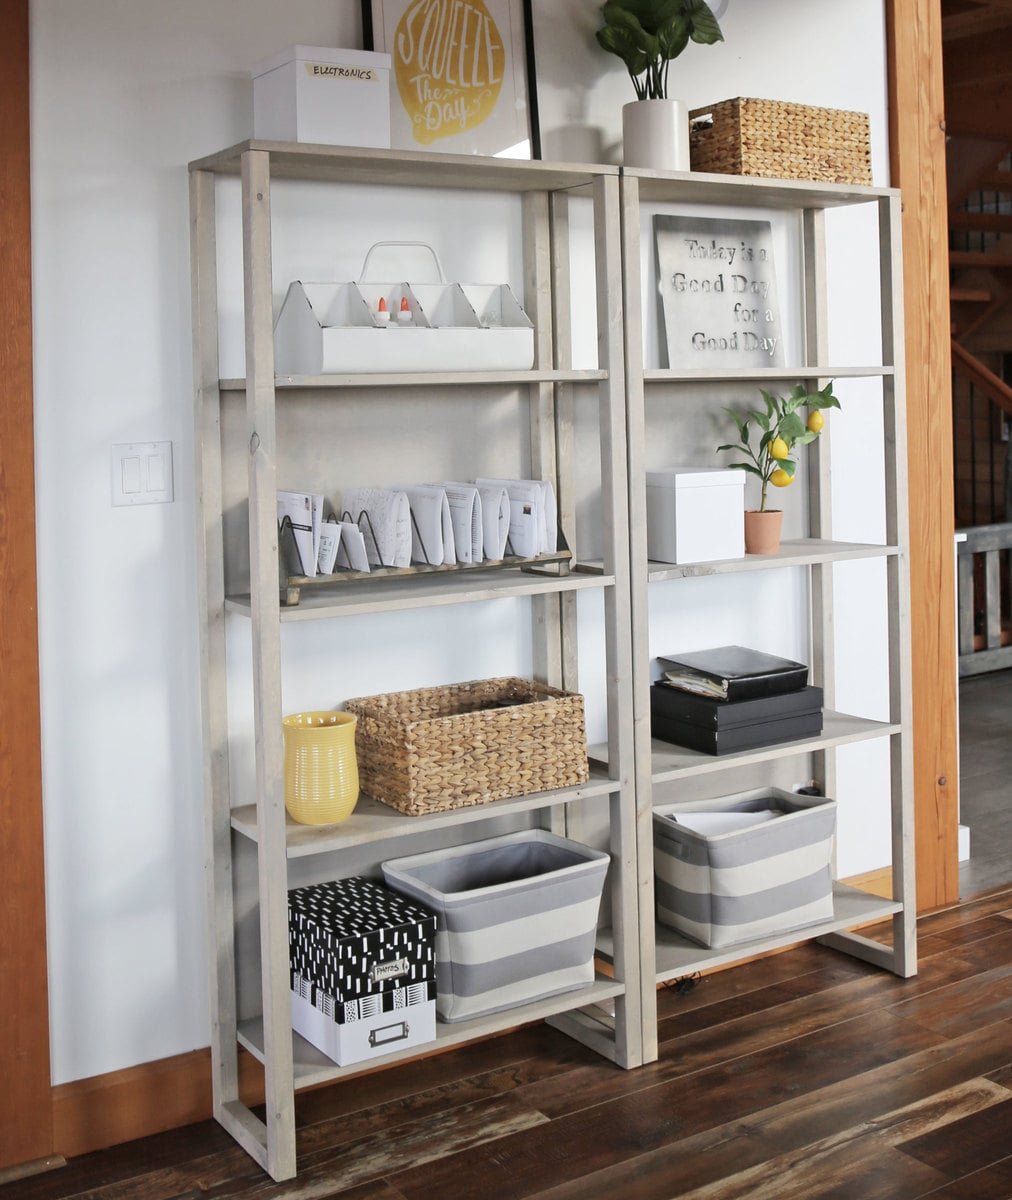
Build this gorgeous industrial bookshelf for just $30 a piece! Open bookshelf, narrow bookshelf. Beginner
Specifications
| Project type | Bookshelf and Bookcase Plans |
|---|---|
| Room | Storage Solutions |
| Style | Farmhouse Furniture |
| Difficulty | Beginner Projects |
| Estimated cost | $20 - $50 |
Dimensions
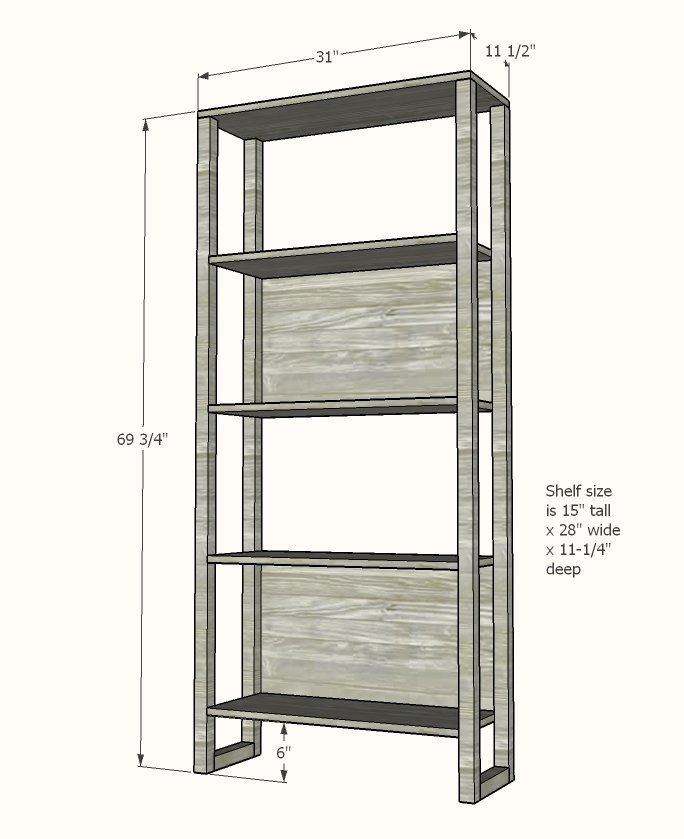
Use the size-specific shopping and cut lists below.
Shopping List
- 4 - 2x2 @ 8 feet long
- 1 - 1x12 @ 12 feet long - do not cut in half for transport - it is better to cut as listed in cut list for transport
- 1 - 1/4" plywood panel 48" x 48" (or two panels 24" x 48" if easier to transport)
Cut List
- 4 - 2x2 @ 69" - legs
- 2 - 2x2 @ 8-1/4" - bottom leg supports
- 1 - 1x12 @ 31" - top
- 4 - 1x12 @ 28" - shelves
- 2 - 1/4" plywood @ 16-1/2" x 30-1/2" - back
Tools
- measuring tape
- pencil
- safety glasses
- hearing protection
- kreg-jig
- drill
- circular saw
- nailer
- sander
Step-by-step Instructions
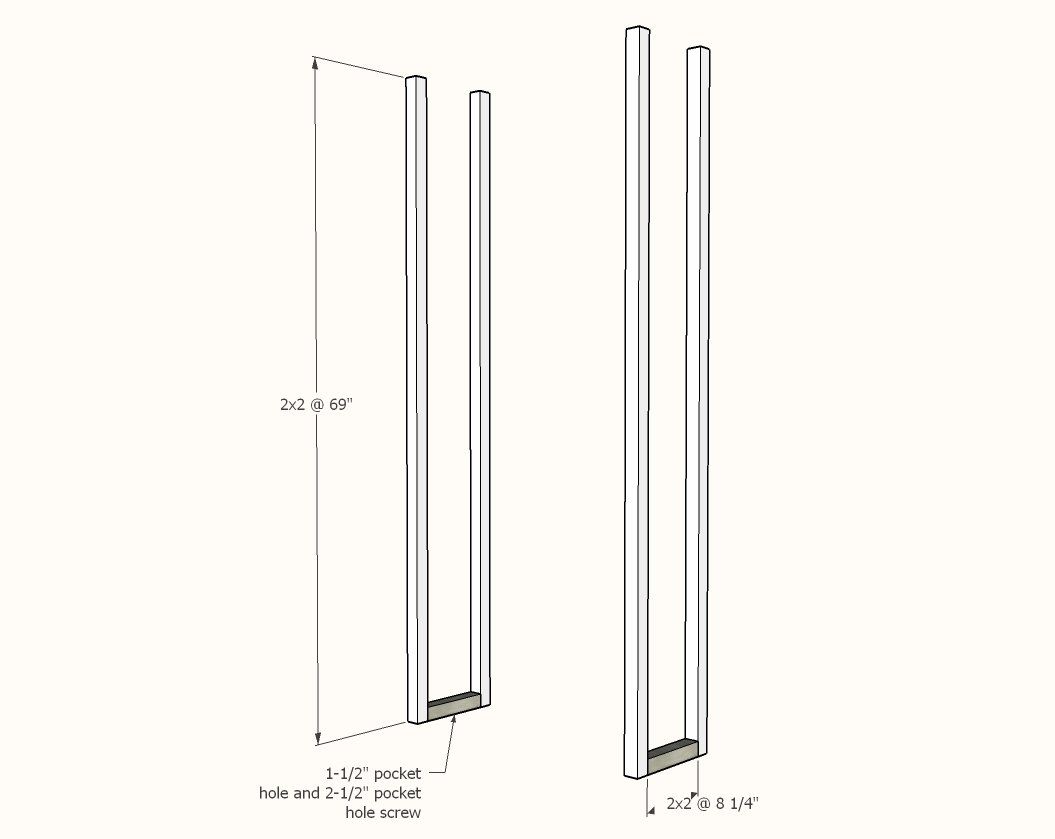
Set your Kreg Jig to the 1-1/2" setting.
Drill a single pocket hole on each end of the small 2x2 pieces. TIP: Before attaching legs, you may wish to drill a pocket hole for attaching the top on each leg (see next step). Also make sure you rotate legs so the pocket holes are placed on the back of the legs. Attach to the legs at the bottom with 2-1/2" pocket hole screws and glue.
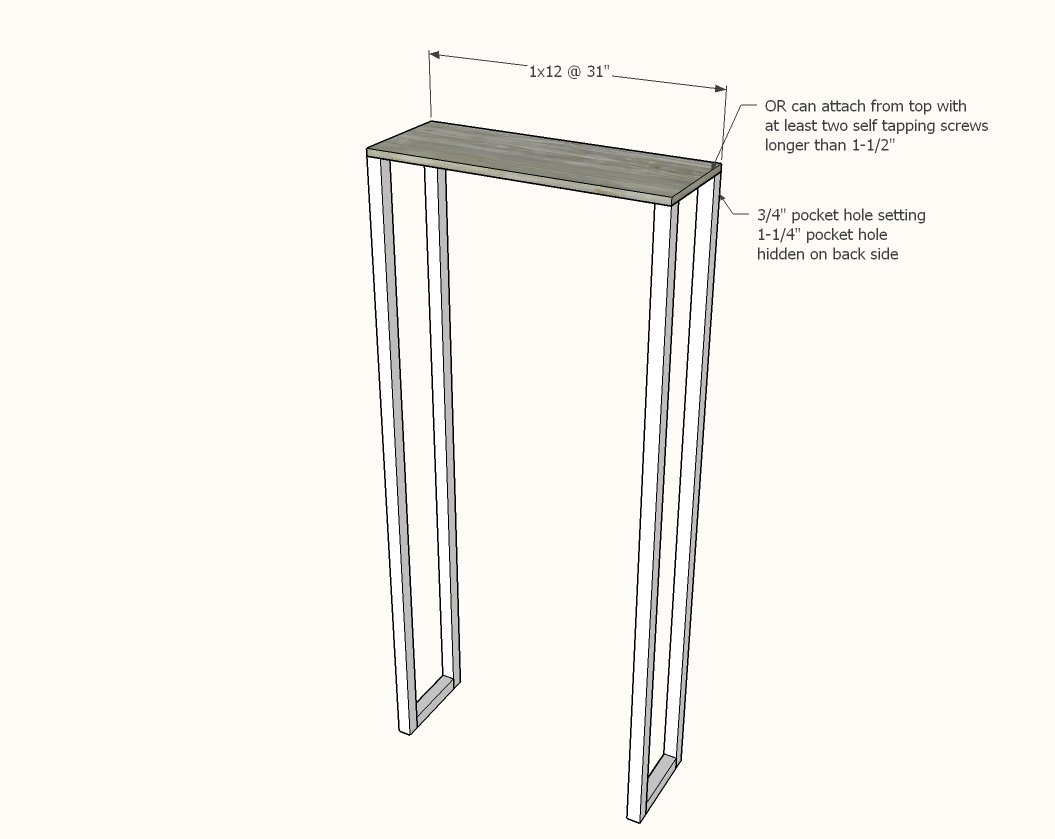
The top can be attached with screws from the top or pocket holes on the back side.
If using screws from the top, you'll need at least two screws per joint, small, self tapping screws are best. If using pocket holes, set the Kreg Jig to 3/4" setting (but the clamp set for 1-1/2" thick wood). Drill a single pocket hole on backs of legs. Attach with 1-1/4" pocket hole screws to top.
Set the Kreg Jig to the 3/4" setting.
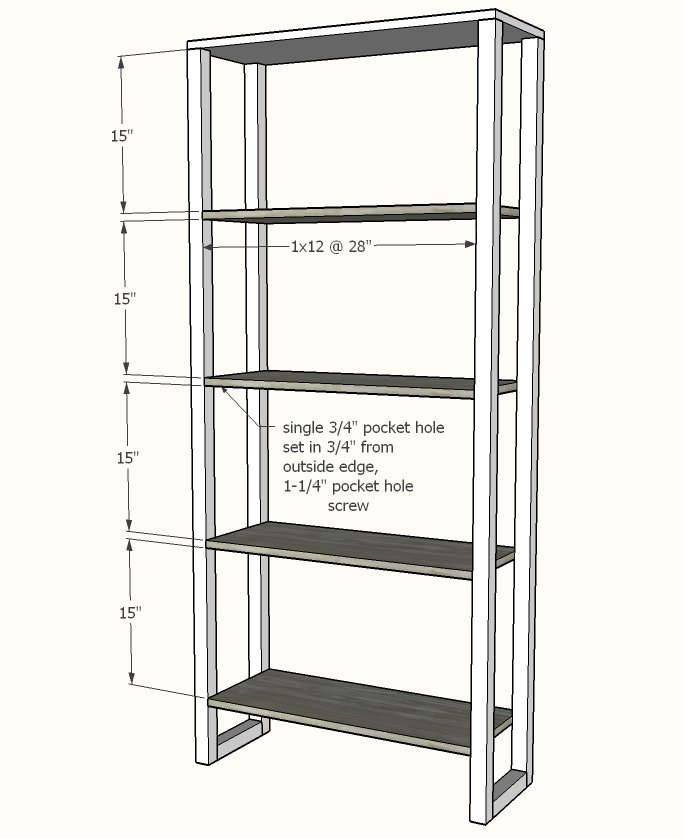
On each end of the shelves, drill a pocket hole 3/4" in from the outside edge. Attach to 2x2 legs with 1-1/4" pocket hole screws and glue.
Step 4
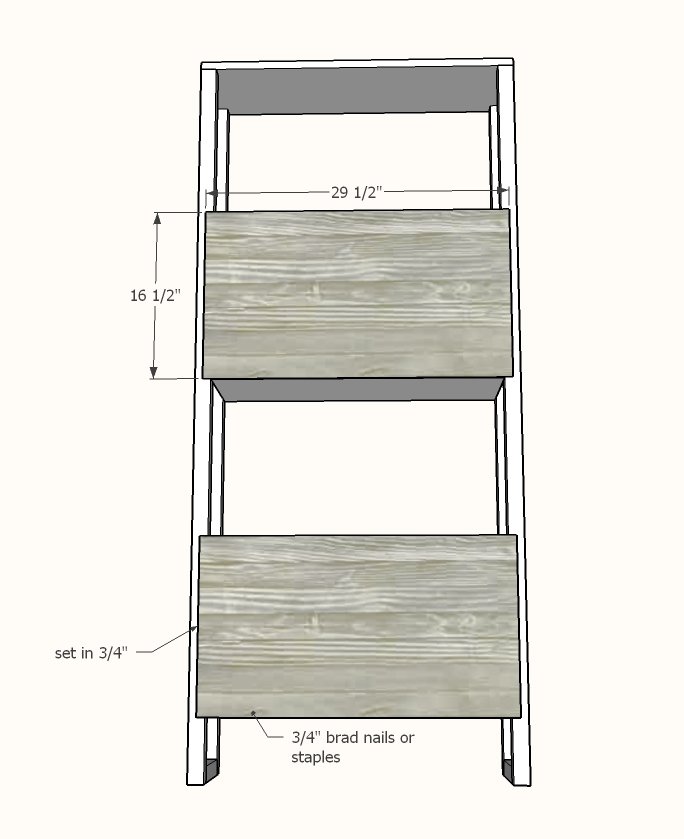
Make sure the project is square by taking diagonals of the outside corners, and making sure the diagonals match. If they don't match, adjust until they do by pushing the long diagonal corners together. On back of project attach the 1/4" plywood panels with 3/4" brad nails or staples and glue, attaching to shelves and legs. To prevent forward tipping hazard, attach to stud in wall on final installation with screws.
Finishing
Sand all surfaces, starting with a medium grit and finishing with fine. Wipe off the dust, fill any holes or gaps with wood filler, and sand smooth once dry. Apply primer if you're painting, then finish with your choice of paint or stain and seal with a durable clear topcoat. For outdoor projects, use exterior-rated primer, paint or stain, and sealer so the piece stands up to the weather.
Source (temporary): https://www.ana-white.com/woodworking-projects/30-industrial-bookshelf