30" Sink Base
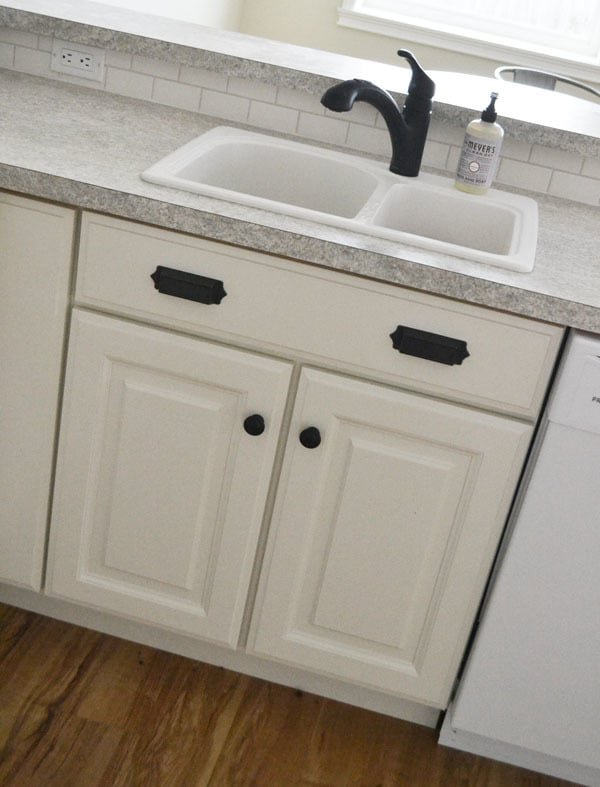
How to build a sink base cabinet - from Part of the Momplex Vanilla Kitchen Plans.
Specifications
| Project type | Kitchen Cabinet Plan, Accessories and Serving |
|---|---|
| Room | kitchen |
| Difficulty | Intermediate |
| Estimated cost | $100-$150 |
Dimensions
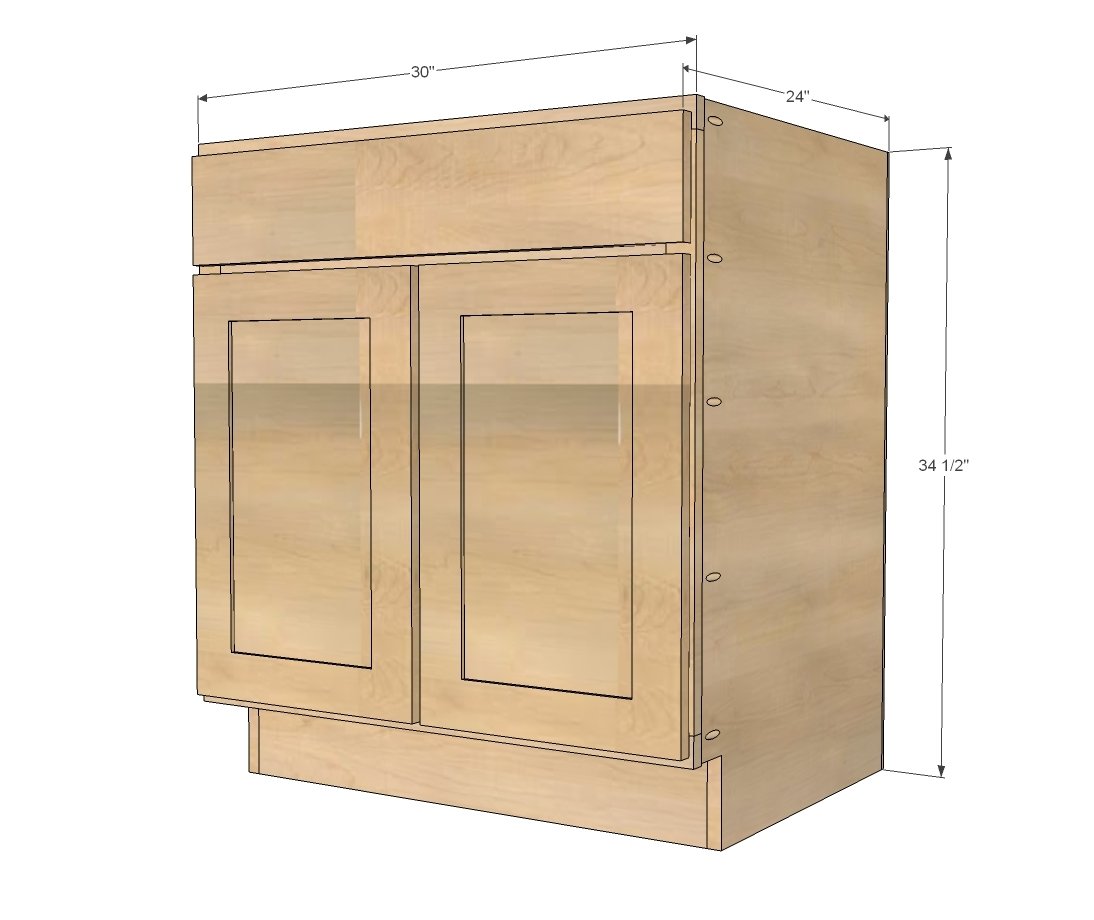
Use the size-specific shopping and cut lists below.
Shopping List
3/4" plywood ripped into strips 22 1/4" long (for sides and shelves)
3/4" plywood scrap from ripping sides and shelves (for top supports)
3/4" plywood ripped into strips 5" long (for base supports - we used cheaper plywood here)
1x2s for face frames
1/4" plywood (for backs)
1-1/4" pocket hole screws
3/4" finish nails
edge banding for shelves
Cut List
CARCASS
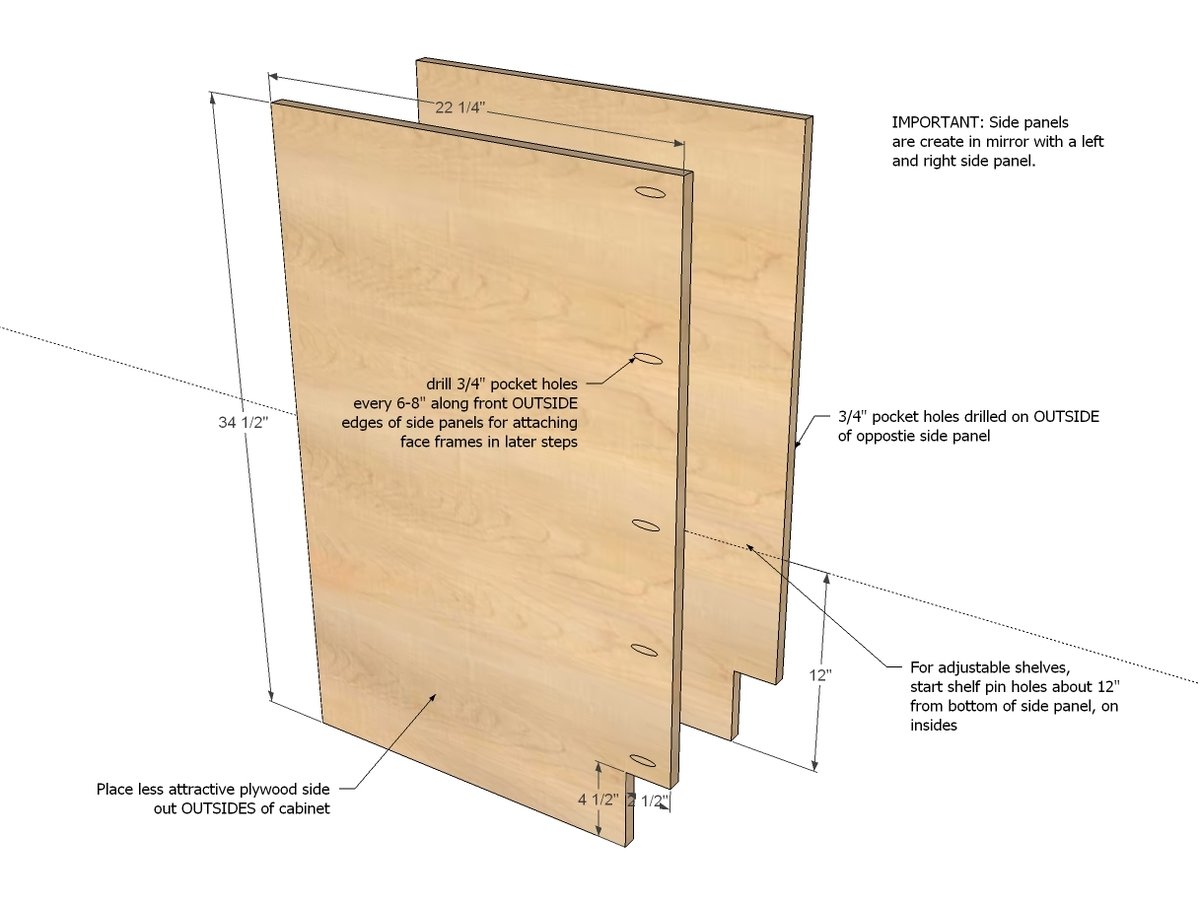
2 - 3/4" plywood @ 22-1/4" x 34-1/2" (side panels)
1 - 3/4" plywood @ 22-1/4" x 28" (bottom shelf)
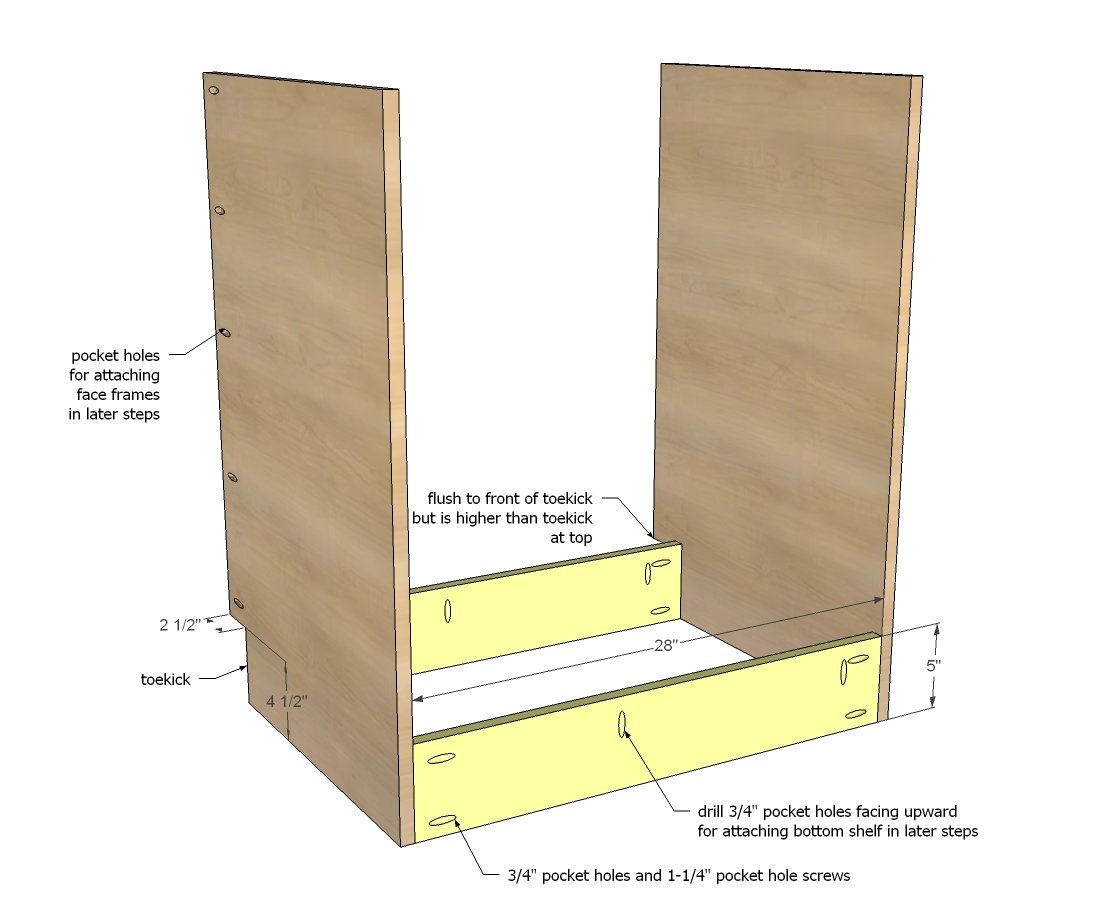
2 - 3/4" plywood @ 5" x 28" (bottom supports)
2 - 3/4" plywood @ 3-1/2" (can vary) x 28" (top supports)
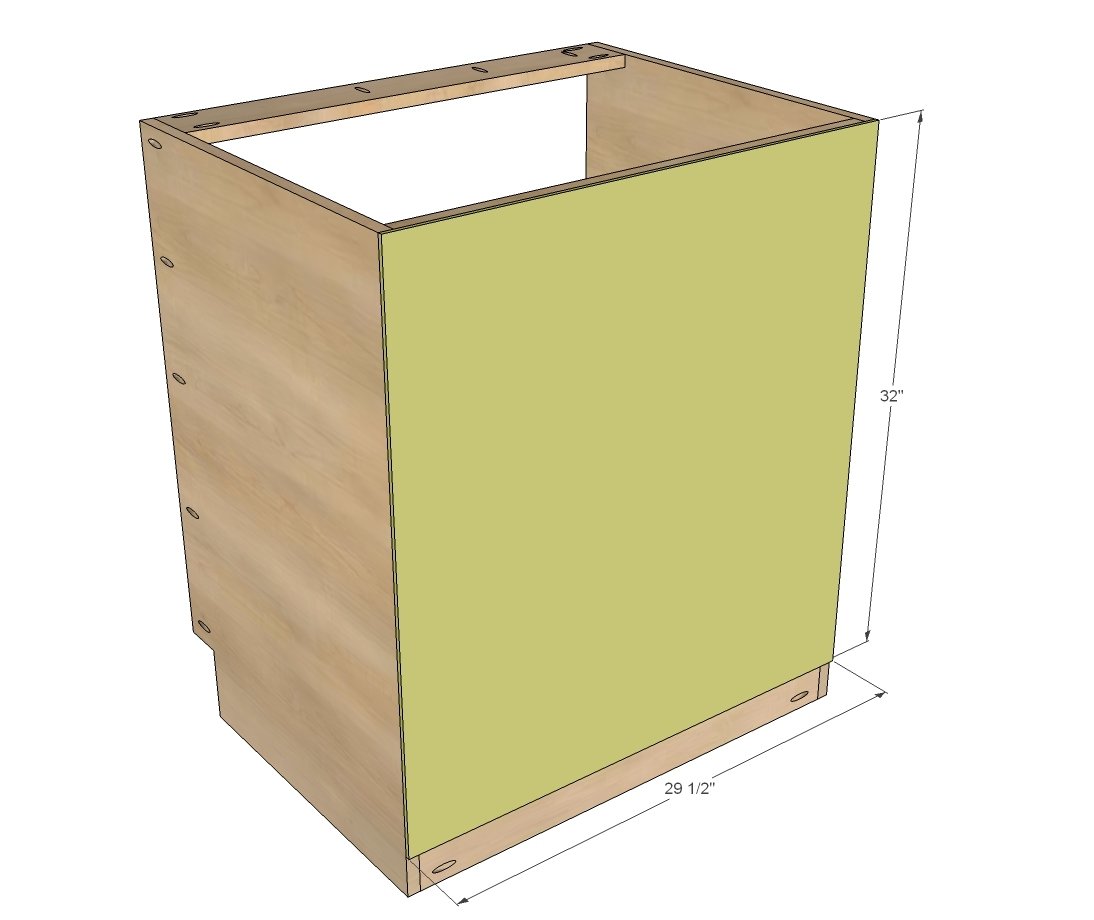
1 - 1/4" plywood @ 32" x 29-1/2" (back)
FACE FRAME
3 - 1x2 @ 27"
2 - 1x2 @ 30"
1 - 1x2 @ 21"
SHELVES
3/4" plywood @ 22" x 27-3/4" (measure and adjust to fit shelf pins/edge banding)
DOOR/DRAWER FACE for FULL OVERLAY (1-1/4")
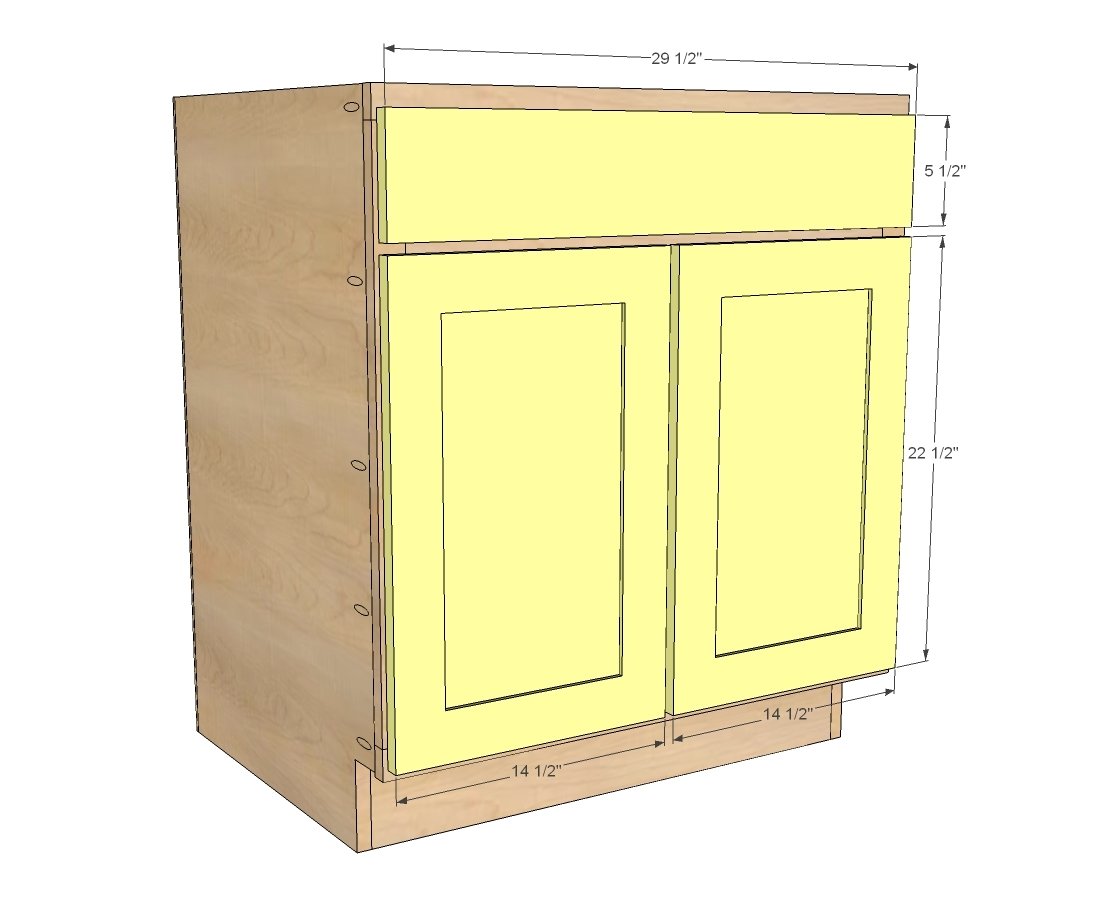
5 1/2" x 29-1/2" (drawer face)
2 - 22-1/2" x 14-1/2" (door)
Tools
- measuring tape
- square
- pencil
- safety glasses
- hearing protection
- kreg-jig
- drill
- jigsaw
- compound miter saw
- table saw
- nailer
- sander
Step-by-step Instructions
Step 1
Start with the SAME side panels that you use on all of the base cabinets. But remember that the side panels should be made up in mirror - meaning you will place 3/4" pocket holes on outsides (for attaching face frames in later steps) and shelf pin holes (for adjustable shelves) on insides, with the toekick at the bottom front.
Step 2
Attach the two bottom supports to the side panels, using the 5" wide strips of plywood. These guys will get covered up with toekick material or hidden under cabinet, so don't worry about using cheaper plywood or placing pocket holes hidden. Remember to drill 3/4" pocket holes facing upward for attaching bottom shelf, about every 6-8 inches.
Step 3
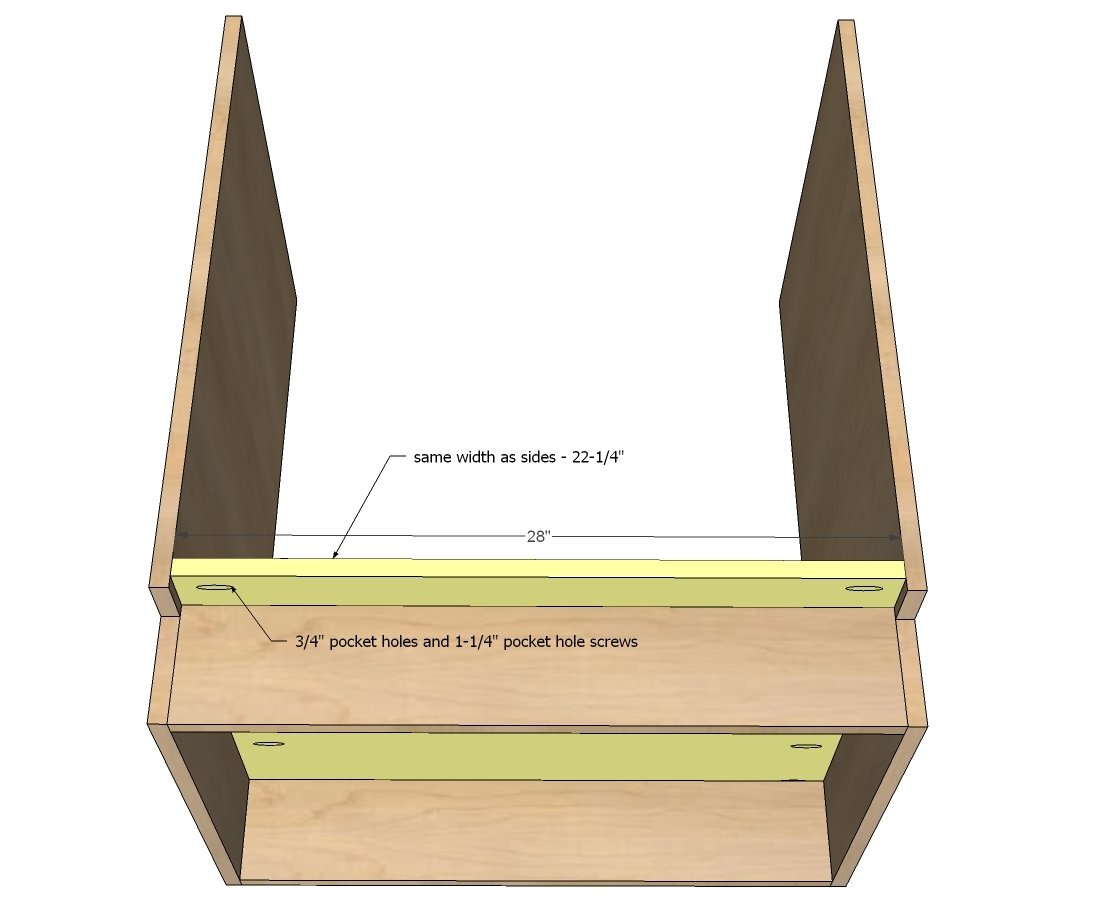
Next, add your bottom shelf. Attach bottom shelf to the sides with 3/4" pocket holes and 1-1/4" pocket hole screws, and attach bottom supports to the bottom shelf.
Step 4
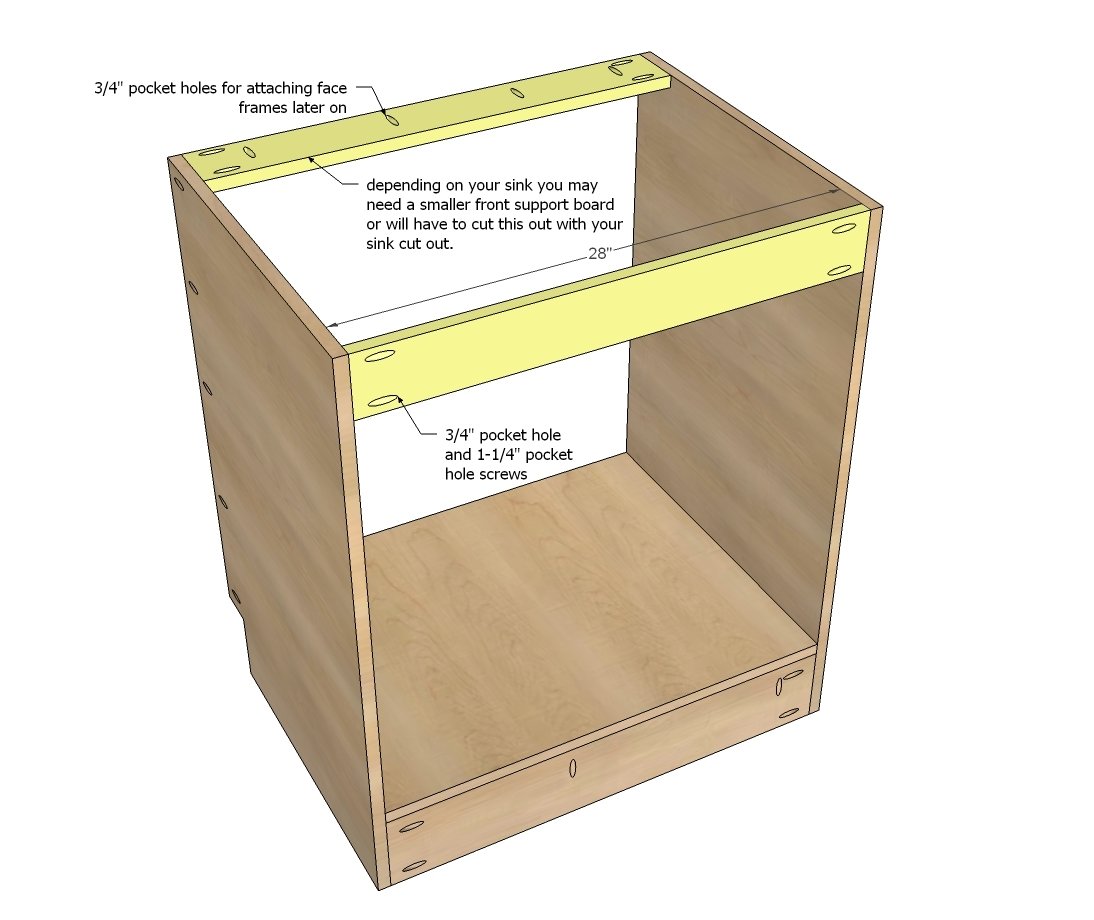
Top supports are attached as shown. You may wish to use a smaller board at the top front support depending on your sink type/size - or when you cut out for your sink, just plan on cutting through that top support. You could also just leave out the top front support, but you will need to be extra careful when attach the face frame in later steps to make sure the sides are still 28" appart.
Step 5
Step 6
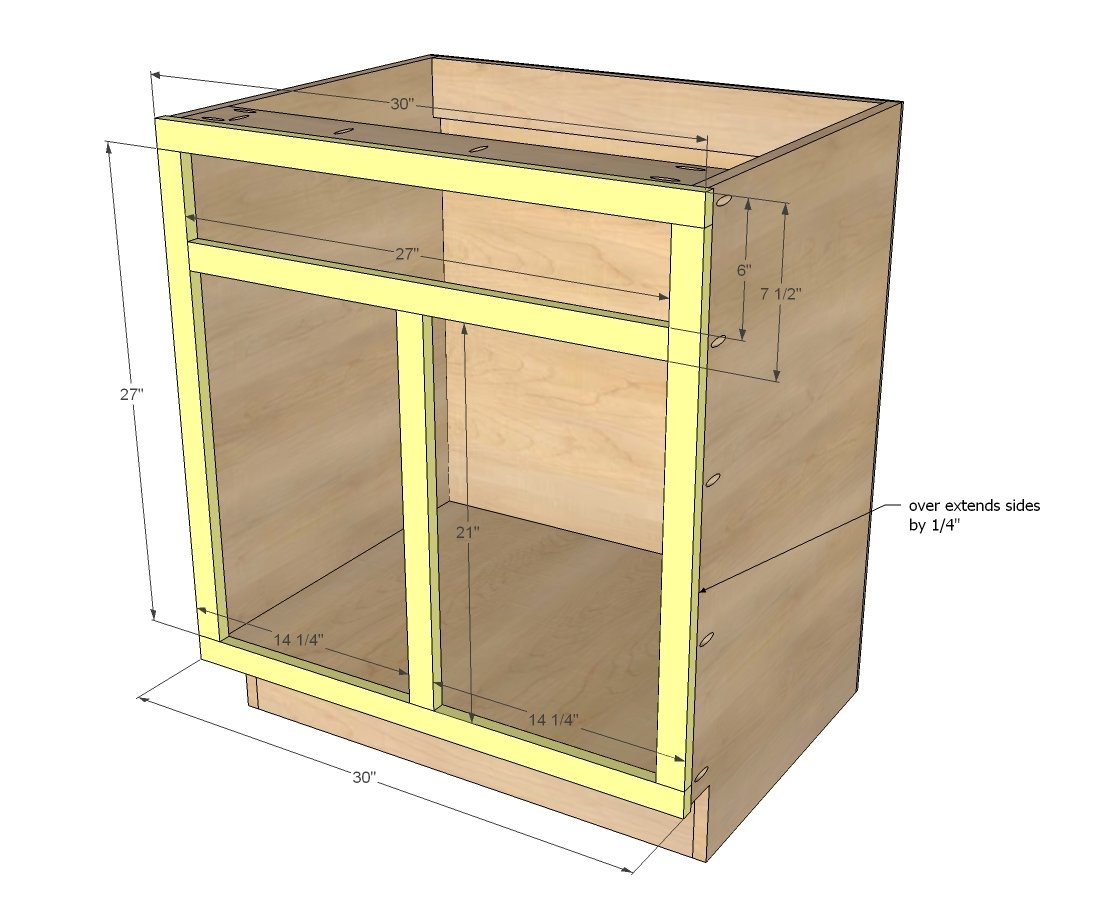
Build the face frame seperately, using 3/4" pocket holes and 1-1/4" pocket hole screws. Then attach to front of cabinet through the predrilled pocket holes on sides and top using 1-1/4" pocket hole screws and glue. The bottom won't have enough room to fit a drill in, so we nailed and glued along the bottom.
Step 7
We used full overlay doors (purchased from Cabinet Now) in the above sizes. When cabinets are assembled, this leaves a 1/2" reveal of face frame between all doors and drawers. For these door sizes you will need 1-1/4" Concealed Euro Hinges, 2 per door. For the false drawer front on the sink, simply nail and glue in place from back.
Finishing
Sand all surfaces, starting with a medium grit and finishing with fine. Wipe off the dust, fill any holes or gaps with wood filler, and sand smooth once dry. Apply primer if you're painting, then finish with your choice of paint or stain and seal with a durable clear topcoat. For outdoor projects, use exterior-rated primer, paint or stain, and sealer so the piece stands up to the weather.
Source (temporary): https://www.ana-white.com/woodworking-projects/30-sink-base-momplex-vanilla-kitchen