36" Corner Base Pie Cut Kitchen Cabinet
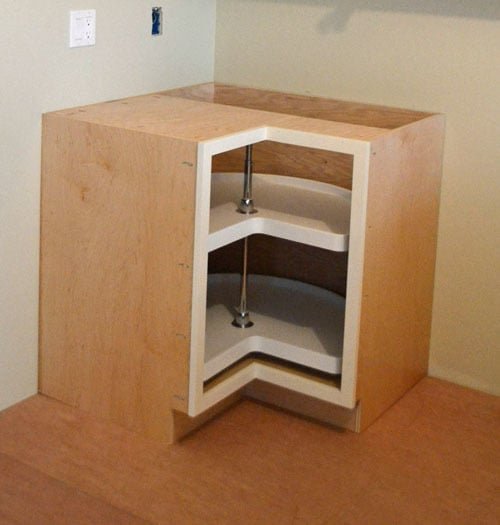
36" Lazy Susan Corner Base Cabinet – Maximize your kitchen storage with this 36" Lazy Susan corner base cabinet plan, perfect for pie-cut cabinet configurations. Designed to make the most of every inch in your kitchen corner, this cabinet rotates smoothly and is ideal for storing pots, pans, small appliances, or pantry goods. include: • Full cut list and materials • Step-by-step build photos for guidance • Instructions for installing pie-cut style lazy Susan hinges • Face frame and frameless options • Sized for standard 36" x 36" corner footprint Build with plywood or MDF and finish with your favorite paint or stain to match your kitchen. Whether you're updating your existing cabinets or building from scratch, this plan delivers a durable, functional solution for that tricky corner space. Free PDF download—includes hinge recommendations and installation tips!
Specifications
| Project type | Kitchen Cabinet Plan, Accessories and Serving |
|---|---|
| Room | kitchen |
| Style | Cottage Style Furniture Plans |
| Difficulty | Advanced |
| Estimated cost | $150 - $200 |
Dimensions
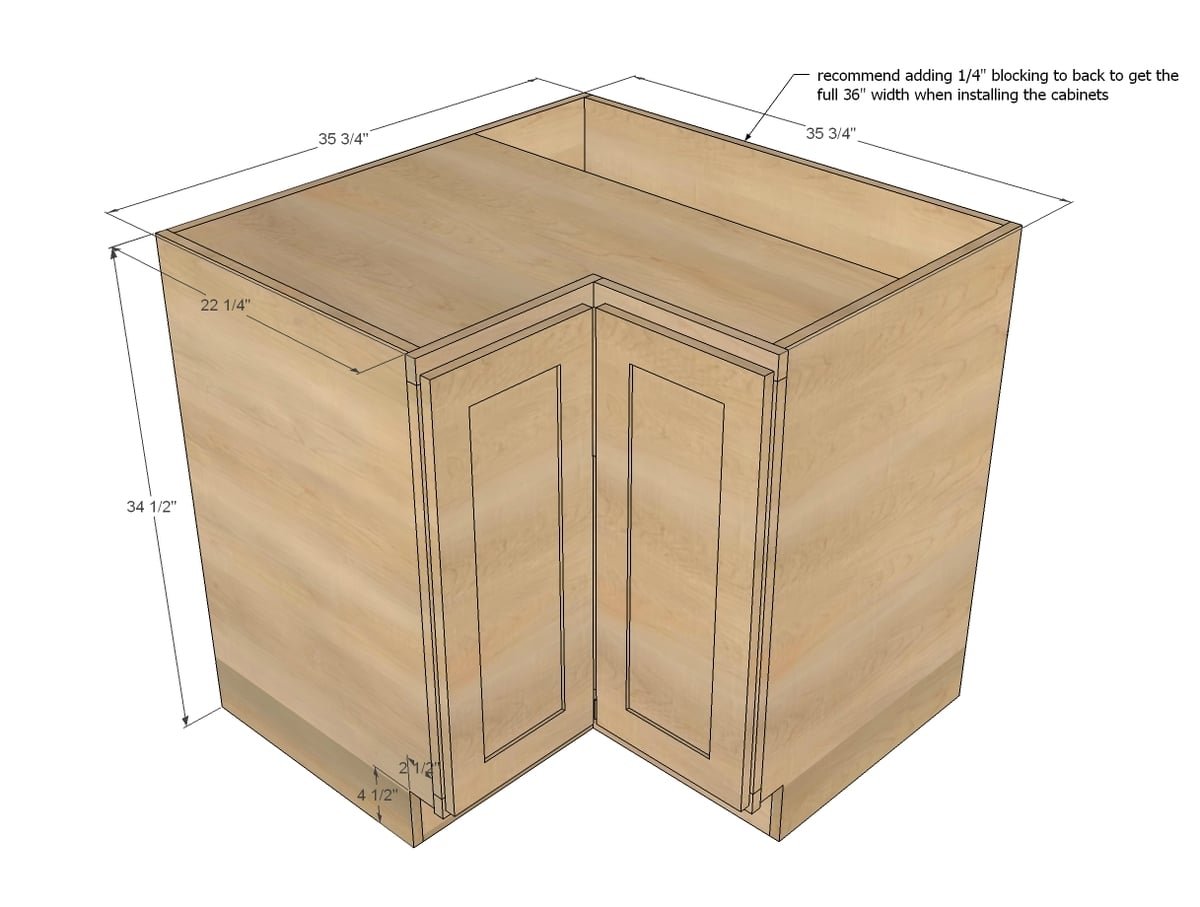
Use the size-specific shopping and cut lists below.
Shopping List
- 2 sheets of 3/4" plywood (we used one sheet of prefinished plywood and one sheet of cheaper hardwood plywood in oak)
- 10 feet of hardwood 1x2s for the face frames
Cut List
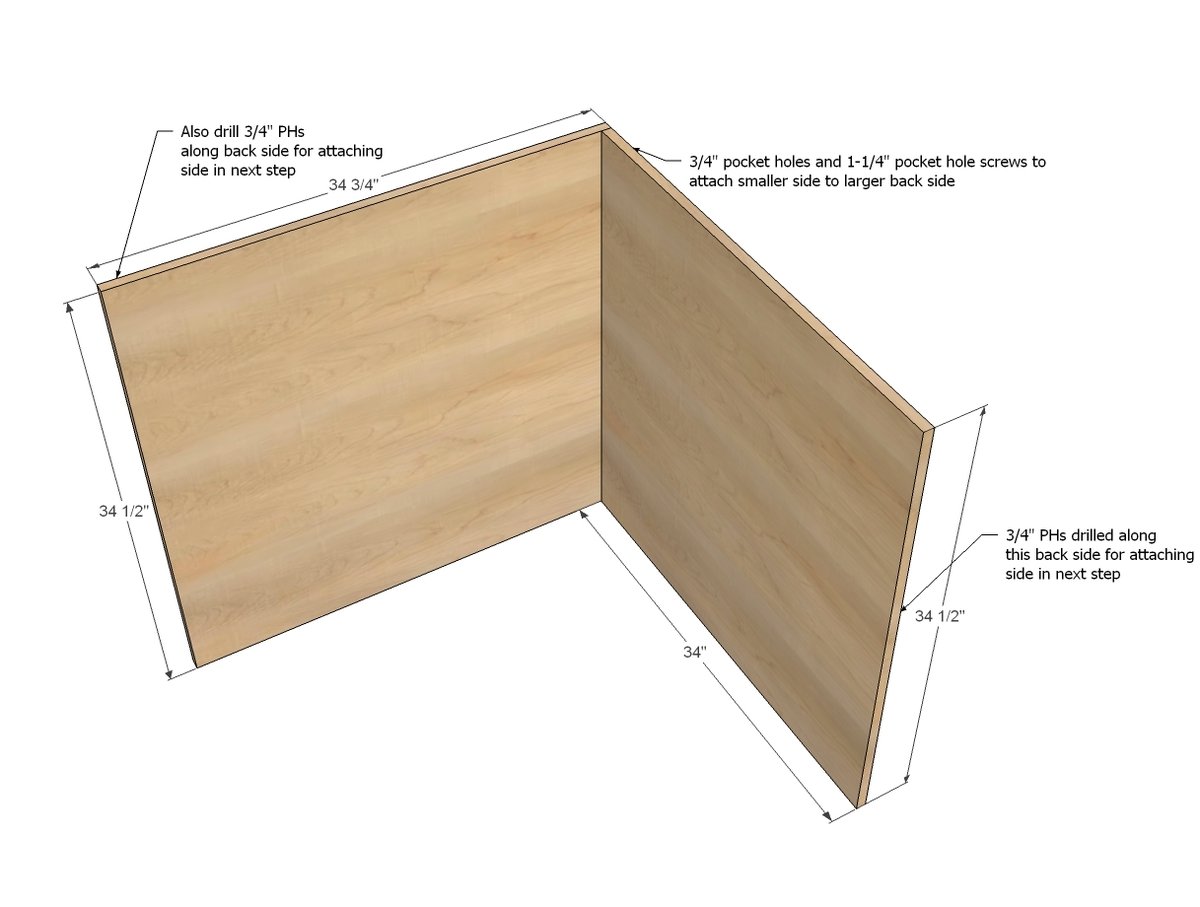
- 1 - 3/4" plywood @ 34-1/2" x 34-3/4" (larger back piece) (we used cheaper plywood here)
- 1 - 3/4" plywood @ 34 1/2" x 34" (smaller back piece) (we used cheaper plywood here)
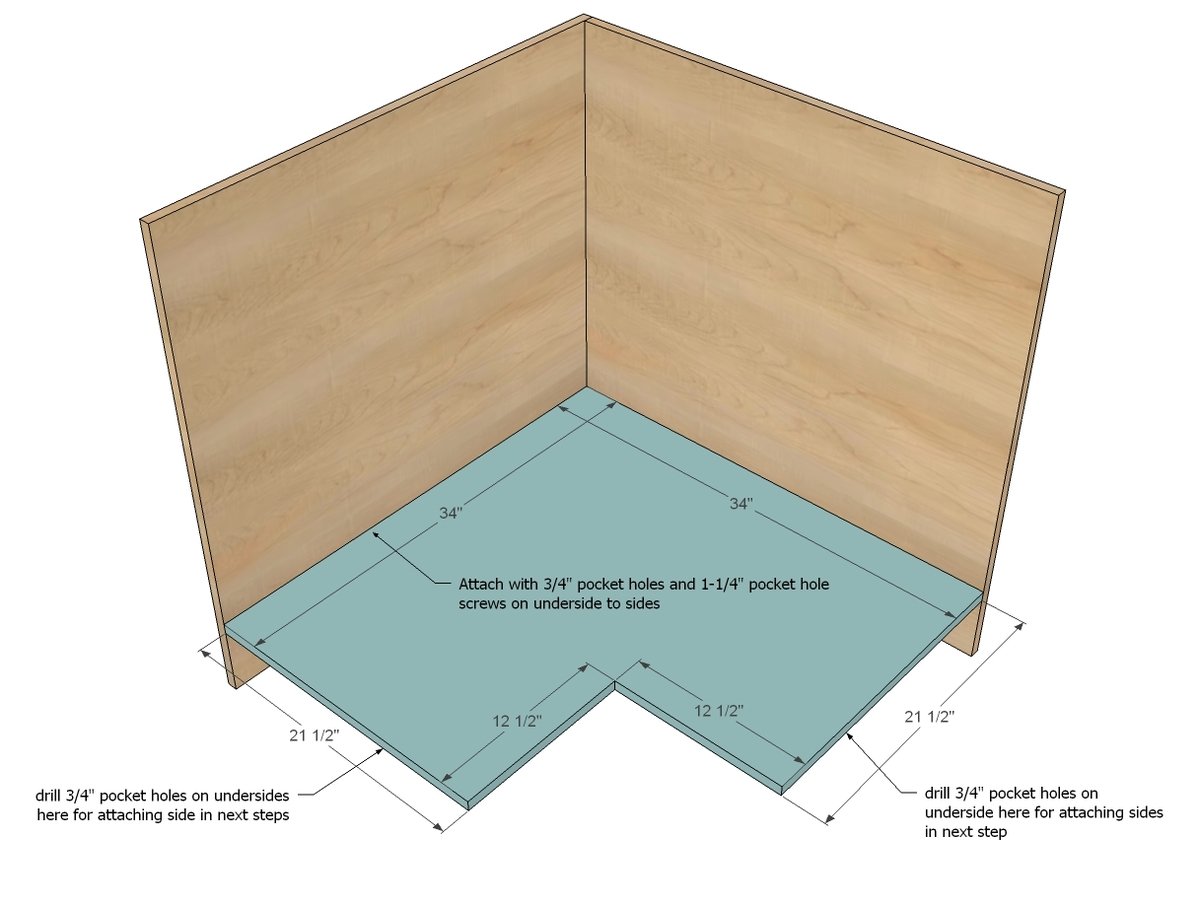
- 1 - 3/4" plywood @ 34" x 34" (bottom shelf)
- 2 - 3/4" plywood @ 34 1/2" x 22 1/4" (sides - must match other base cabinets)
- 1 - 3/4" plywood @ 34" x 20" or more (top - we used cheaper plywood here)
- 1 - 3/4" plywood @ 34" x 5" (base support, longer piece - we used cheaper plywood here)
- 1 - 3/4" plywood @ 15" x 5" (base support, longer piece - we used cheaper plywood here)
FACE FRAME
- 2 - 1x2 @ 27" (should match face frame stiles from other base cabinets)
- 2 - 1x2 @ 13 1/2"
- 2 - 1x2 @ 12 3/4"
Tools
- measuring tape
- square
- pencil
- safety glasses
- hearing protection
- kreg-jig
- drill
- circular saw
- table saw
- nailer
- sander
- level
Step-by-step Instructions
Step 1
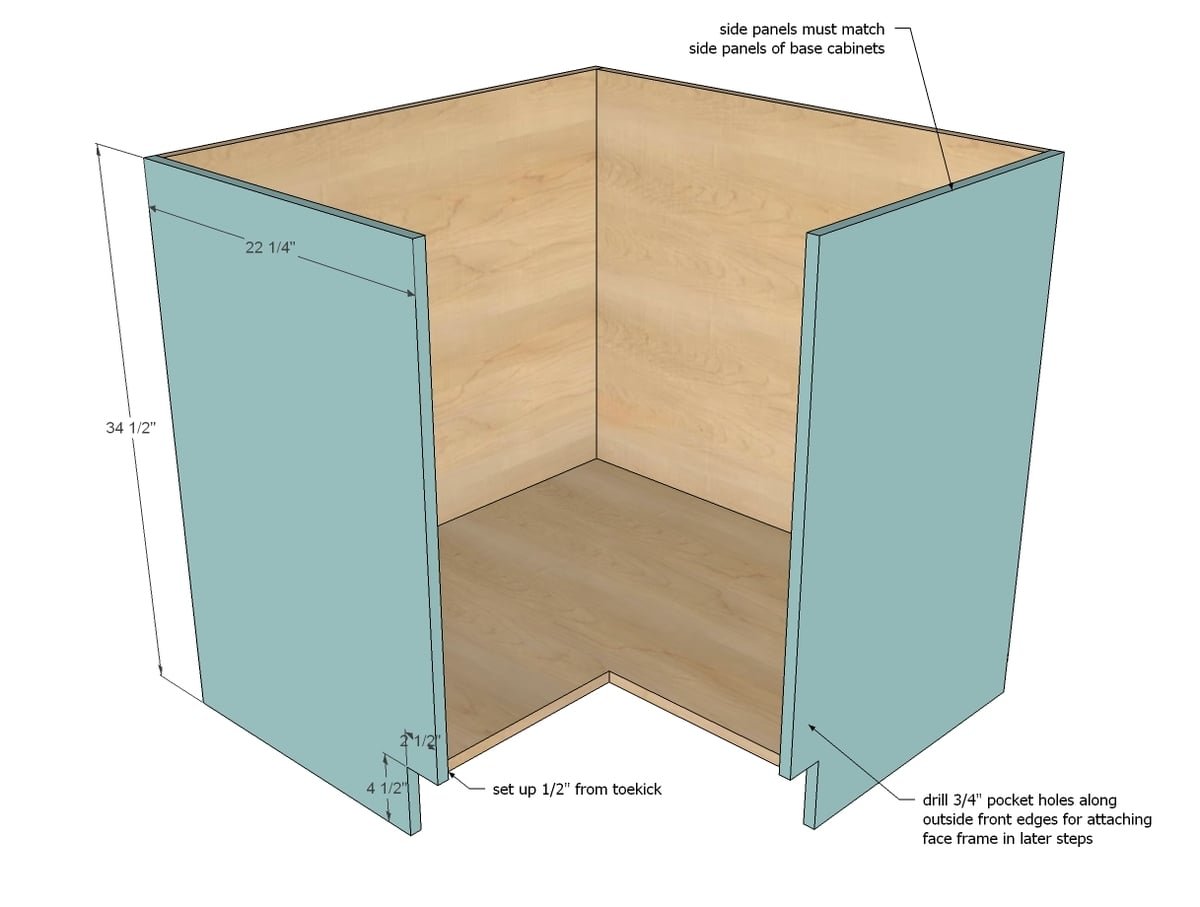
IMPORTANT!!!! There are many different kitchen cabinet plans on this site. This base cabinet is designed to work with the base cabinets built for the White Momplex Kitchen (Sewing Mom) with a side panel overall measurment of 34-1/2" tall by 22-1/4" wide, with a 4-1/2" x 2-1/2" toekick. So this is the overkill part....... I put 3/4" plywood on the two back sides. We did use a cheaper plywood for the backs because it's not every going to be seen. Make sure you drill 3/4" pocket holes along the back side edges so you can attach the sides in later steps.
Step 2
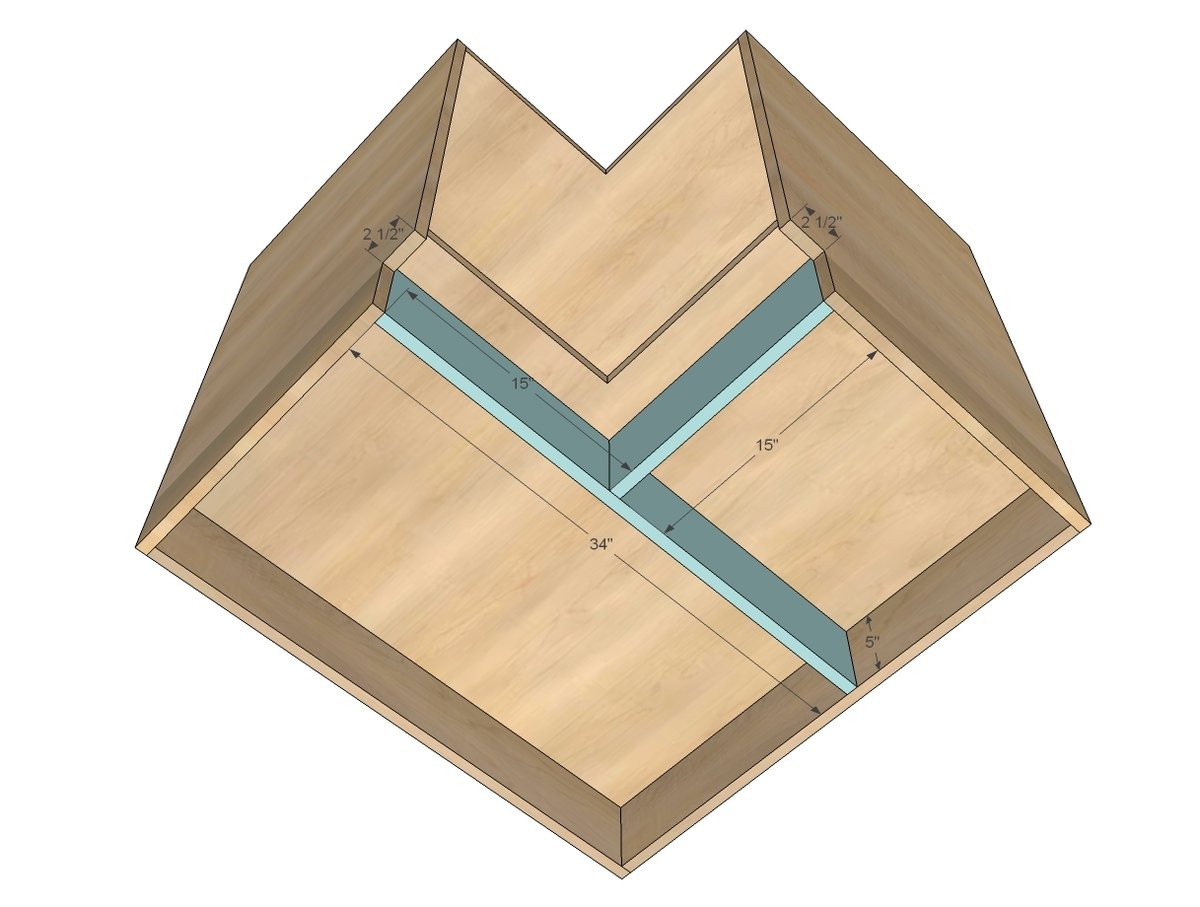
The bottom gets attached with a 5" space under the bottom shelf. Use the 5" wide plywood pieces as a spacer to help you line it up. Remember to drill 3/4" pocket holes along the underside of the side edges for attaching the sides in the next step.
Step 3
The sides are attached to the back and bottom. Make sure there is a 5" gap under the bottom shelf on the sides. Again, remember to drill 3/4" pocket holes along the sides for attaching the face frame in later steps.
Step 4
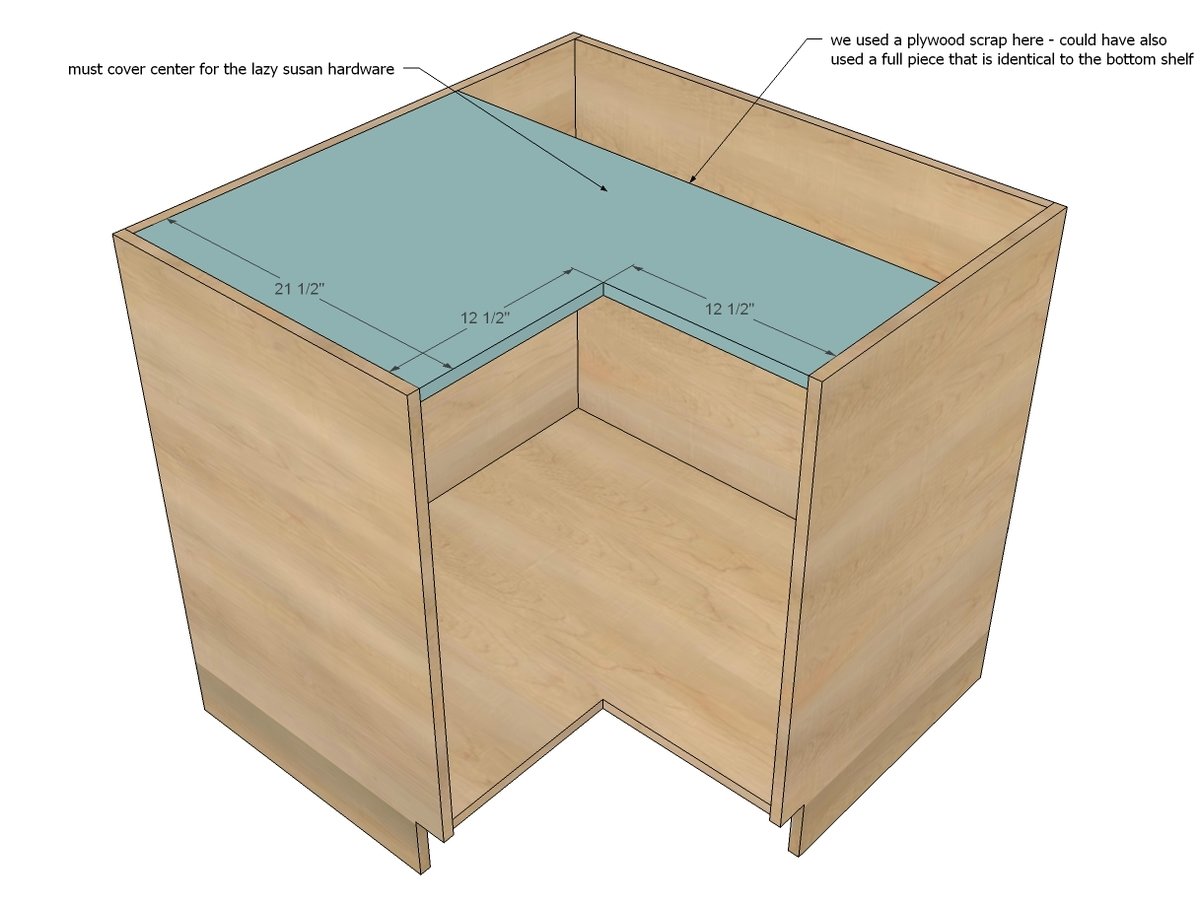
Instead of buying another sheet of plywood for the top, we used a scrap from the back to make up the top, cutting out the pie cut front from it. The plywood must be at least 34" x 20" to start with. NOTE: Also drill 3/4" pocket holes facing forward on the front pie cut edges on top for attaching the face frame in later steps.
Step 5
Step 6
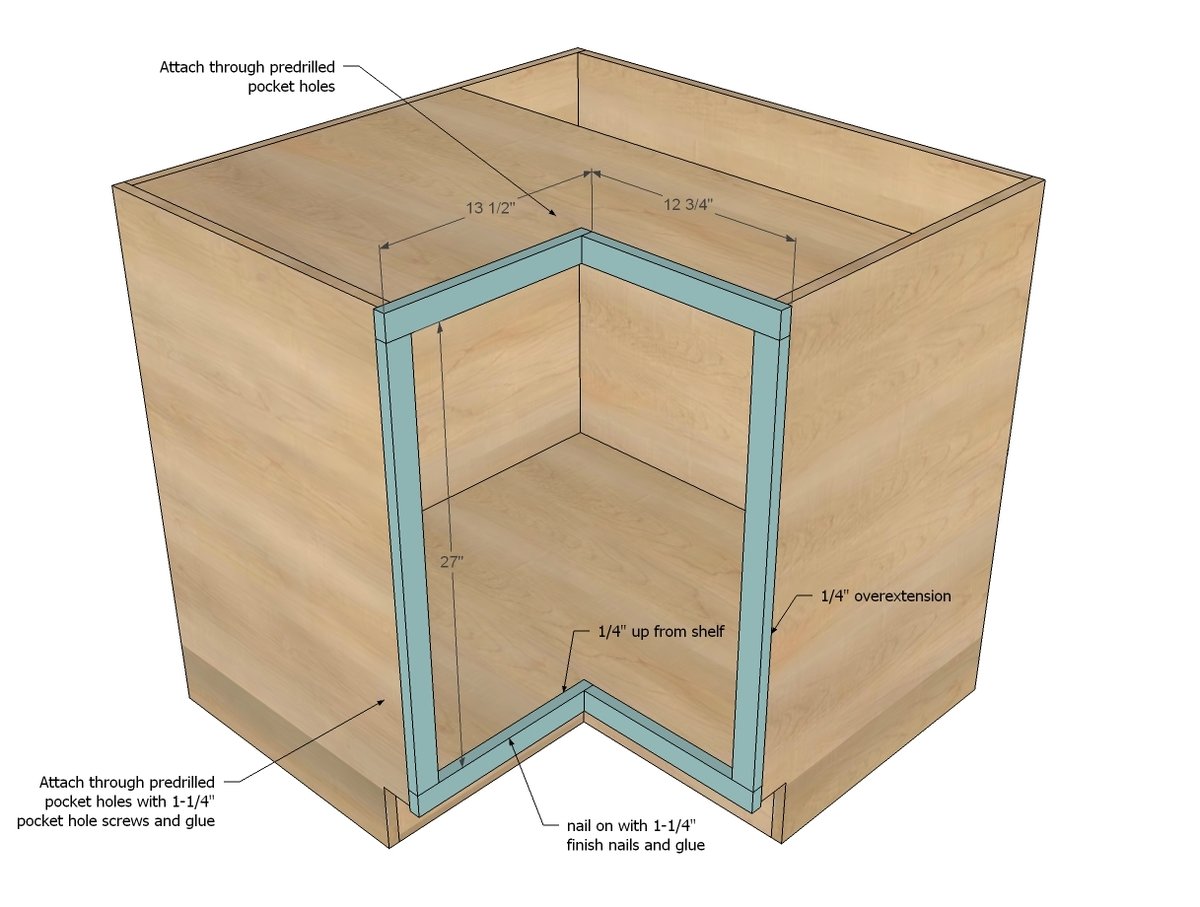
We built the face frames seperately with 3/4" pocket holes and 1-1/4" pocket hole screws and glue, and then attached though the predrilled pocket holes with 1-1/4" pocket hole screws. Face frames overextends the sides by 1/4".
Step 7
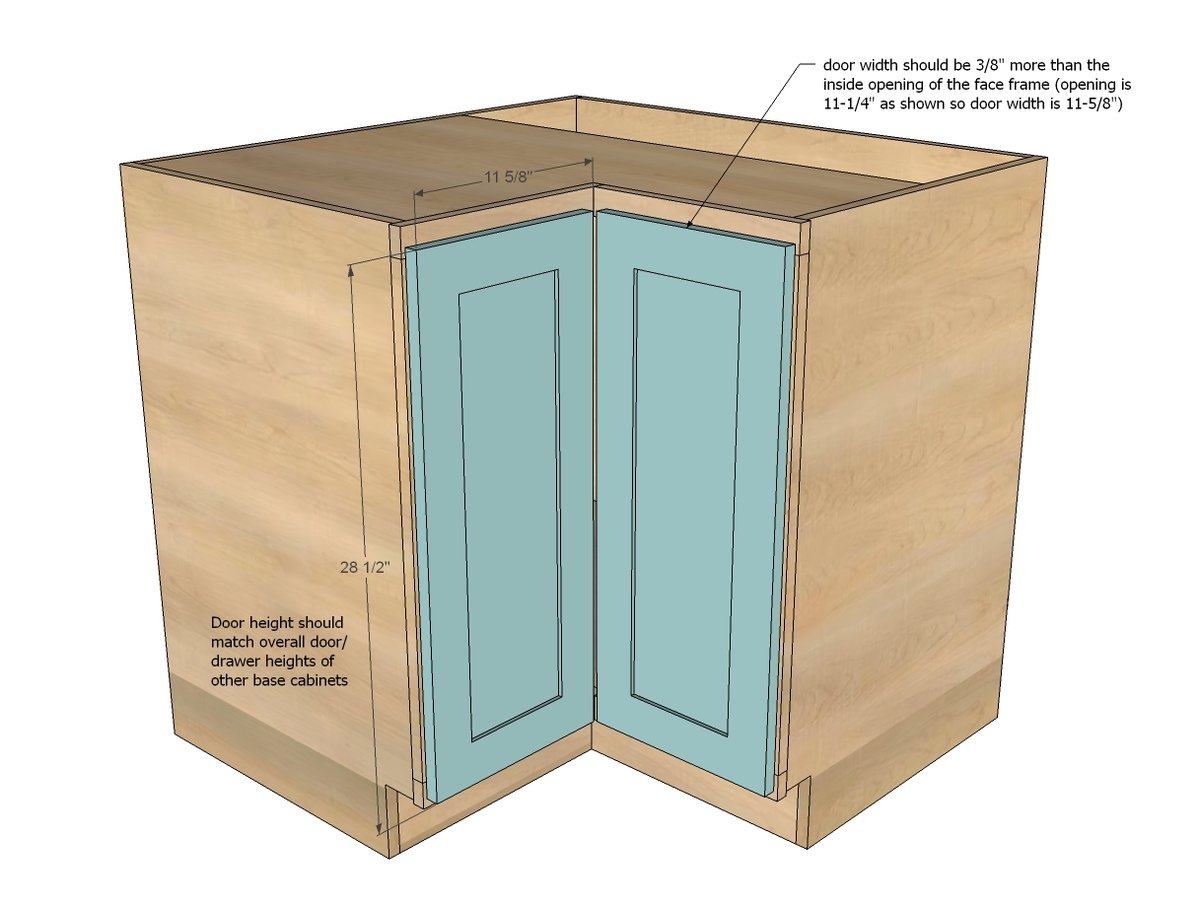
I'll be adding a post shortly on hanging doors with concealed euro style hinges. Doors should match the height of other overall base cabinets, and should be in width 3/8" wider than the inside opening of the face frame.
Step 8
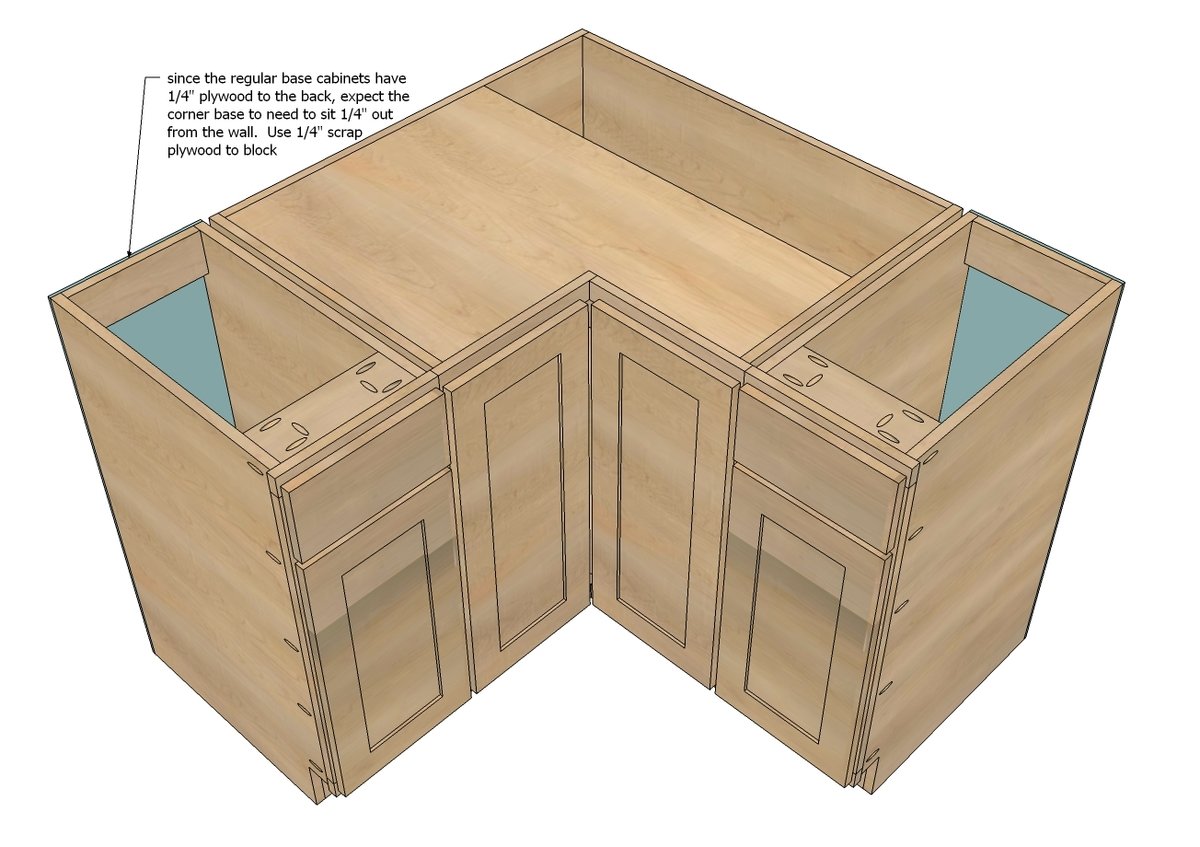
When you go to install your base cabinets, this corner does not have the same 1/4" plywood tacked to the back as the other base cabinets that we built for the Momplex white kitchen. Easy fix is to use scrap plywood to block where you attach the base cabinet to the wall.
Finishing
Sand all surfaces, starting with a medium grit and finishing with fine. Wipe off the dust, fill any holes or gaps with wood filler, and sand smooth once dry. Apply primer if you're painting, then finish with your choice of paint or stain and seal with a durable clear topcoat. For outdoor projects, use exterior-rated primer, paint or stain, and sealer so the piece stands up to the weather.
Source (temporary): https://www.ana-white.com/woodworking-projects/36-corner-base-pie-cut-kitchen-cabinet-free-woodworking-plans