48" Open Shelf Center Bathroom Vanity
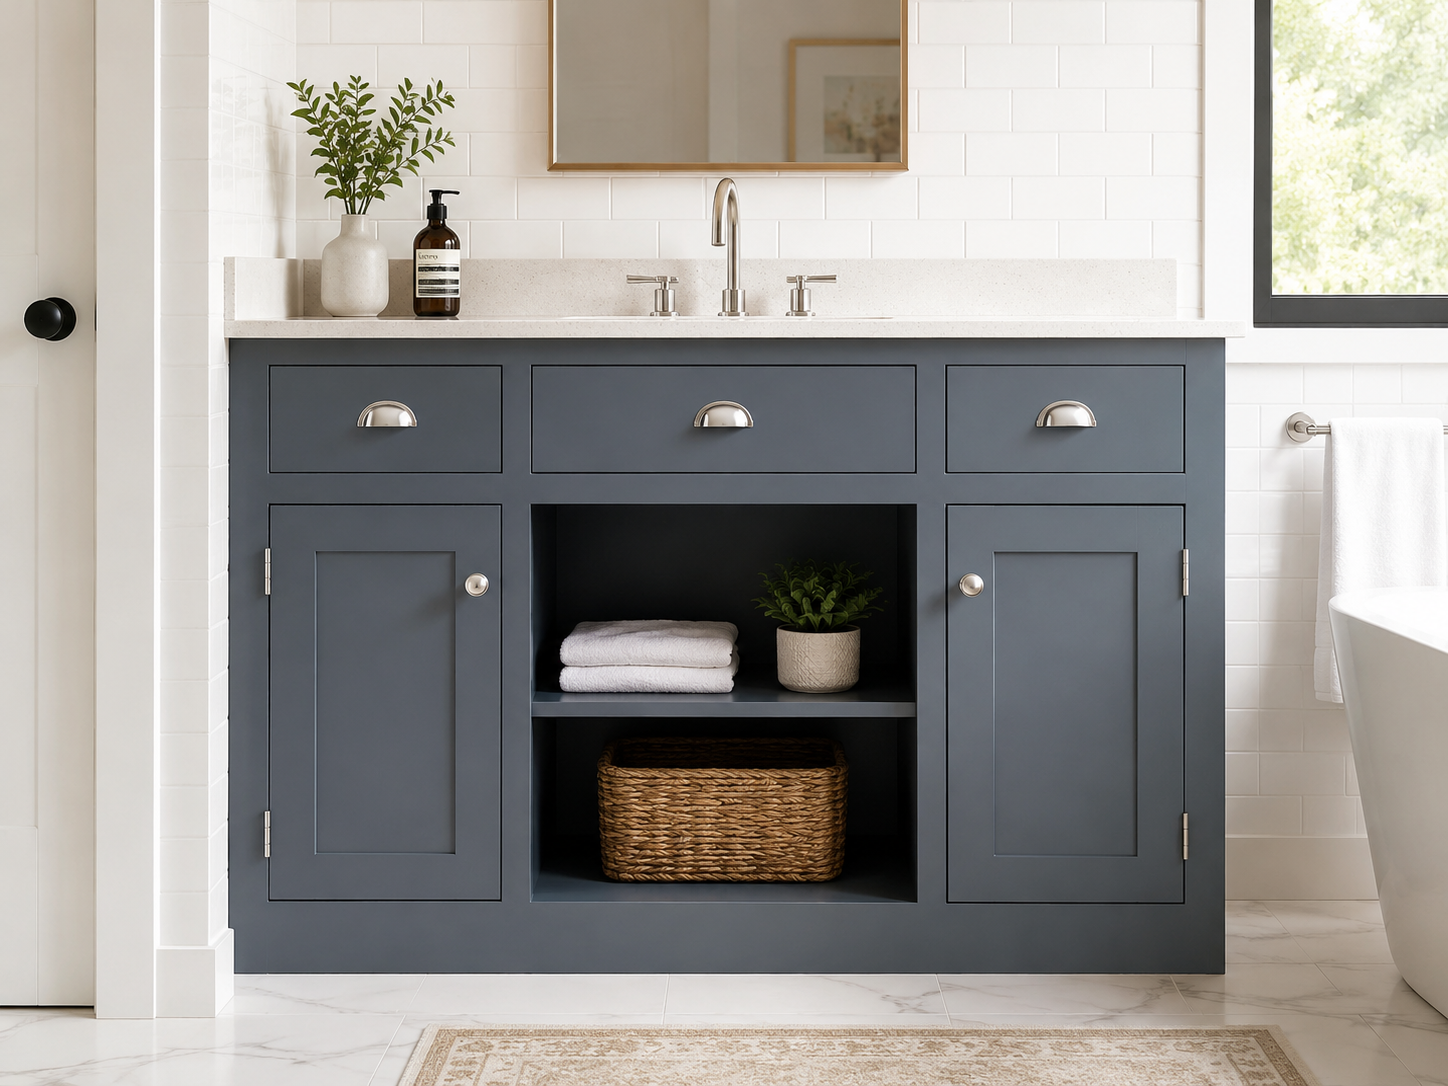
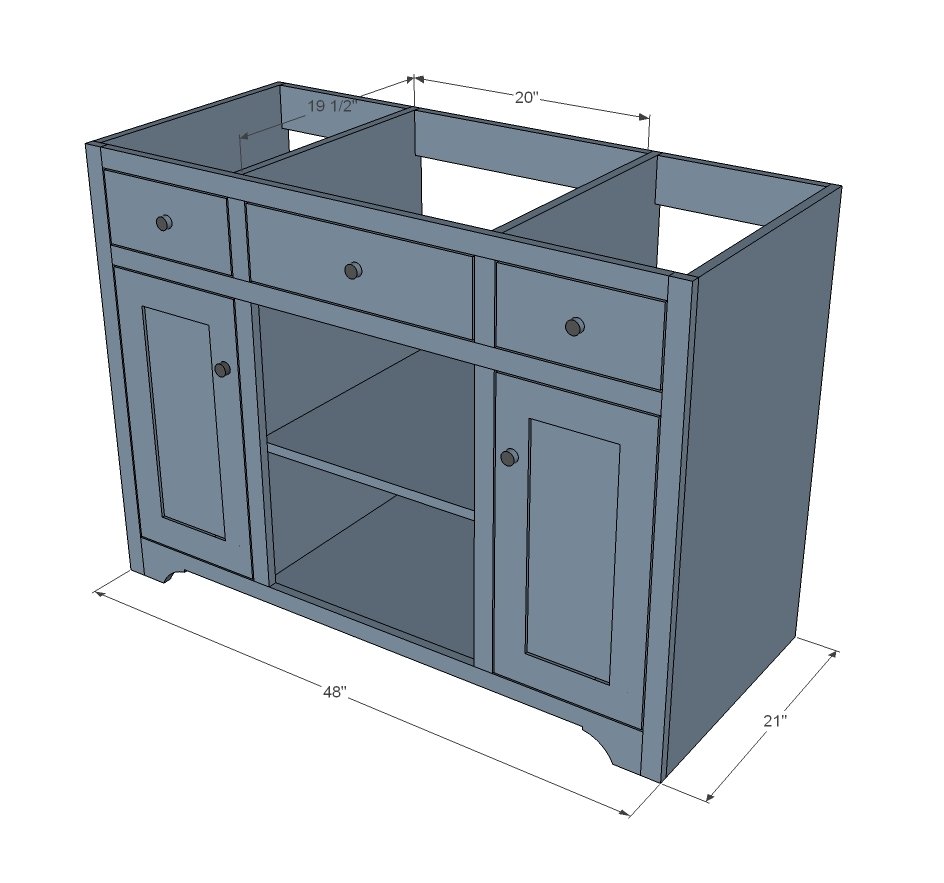
Free bathroom vanity plans features two large cabinet doors, two drawers, and an open storage area under the sink. We love the simple exterior that is easy to wipe down and keep clean. This vanity works with a standard off the shelf vanity top. The include step by step diagrams, cut list and materials list. UPDATE: We built this project about 10 years ago and it's still going strong! The drawer slides we used weren't the best and we are fixing them with the euro side mount ones, but other than that, great project. Great way to STORE TOWELS in a vanity - super useful if you have a smaller bathroom and no where else to store towels.
Specifications
| Project type | Built-In Woodworking Plans |
|---|---|
| Room | Bathroom |
| Difficulty | Intermediate |
| Estimated cost | $50 - $100 |
Dimensions
Use the size-specific shopping and cut lists below.
Shopping List
- 1 - sheet 3/4" plywood ripped into 20-1/4" wide strips
- 1 - 1x4 @ 8 feet long
- 3 - 1x2 @ 8 feet long
- 1 - 1x6 @ 4 feet long
- 1 - 1x3 @ 12 feet long (for doors)
- 1/4 sheet of 1/2" thick plywood (for centers of doors)
- 9 feet of 1/2" thick x 3-1/2" tall boards (for drawer boxes)
- 1/4 sheet of 1/4" plywood for drawer bottoms
- 4 - Non Mortise Hinges
- 1-1/4" and 1" pocket hole screws
- 1-1/4" brad nails
- knobs and pulls
- 2 - 16" euro drawer slides
Cut List
CARCASS
- 2 - 3/4" plywood @ 20-1/4" x 35"
- 1 - 3/4" plywood @ 20-1/4" x 46-1/2"
- 2 - 3/4" plywood @ 20-1/4" x 31-1/2"
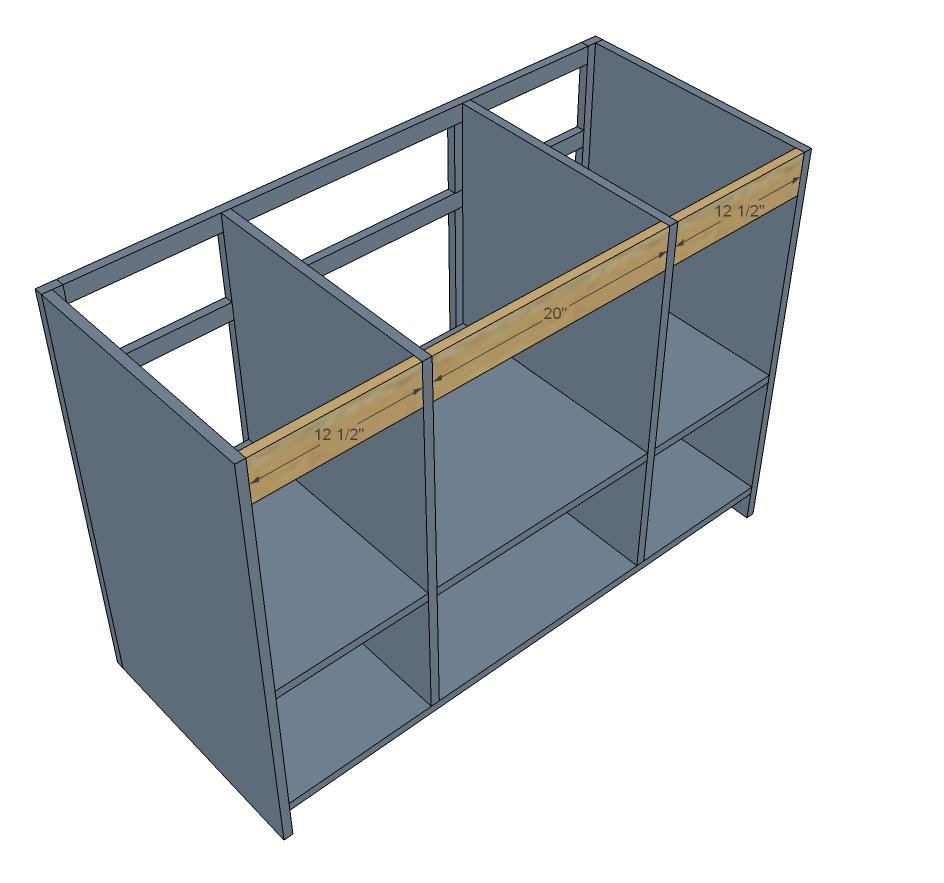
- 2 - 3/4" plywood @ 20-1/4" x 12-1/2"
- 1 - 3/4" plywood @ 20-1/4" x 20"
- 2 - 1x4 @ 12-1/2"
- 1 - 1x4 @ 20"
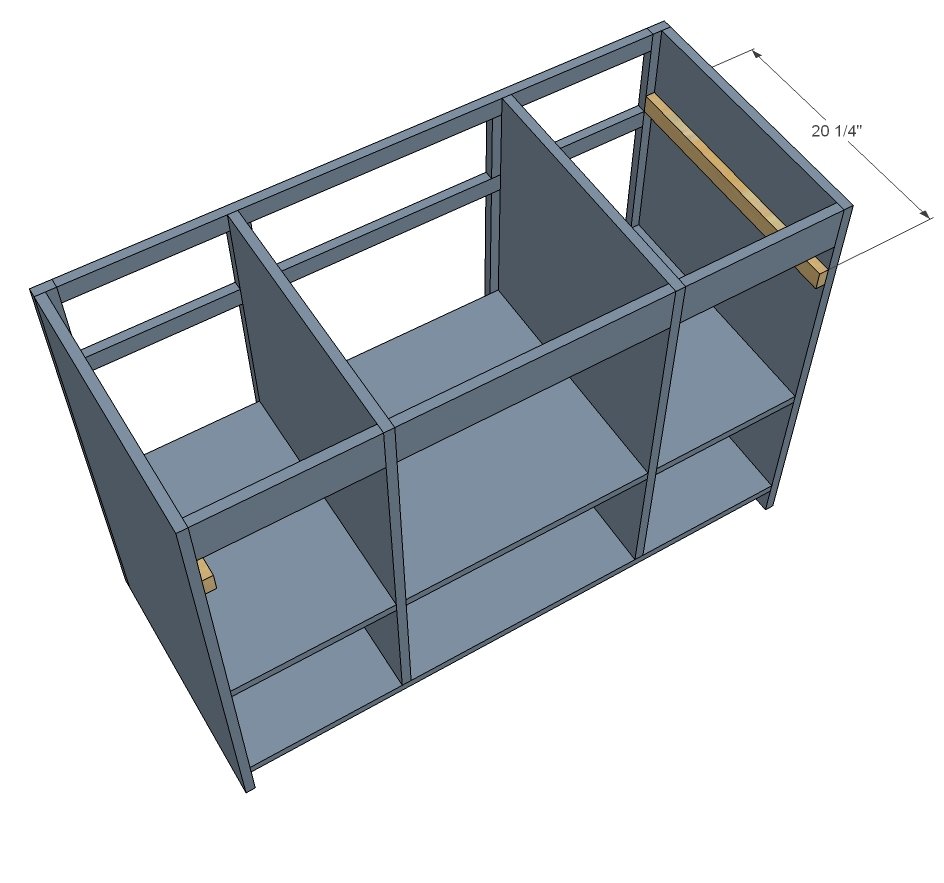
- 2 - 1x2 @ 20-1/4"
FACE FRAME
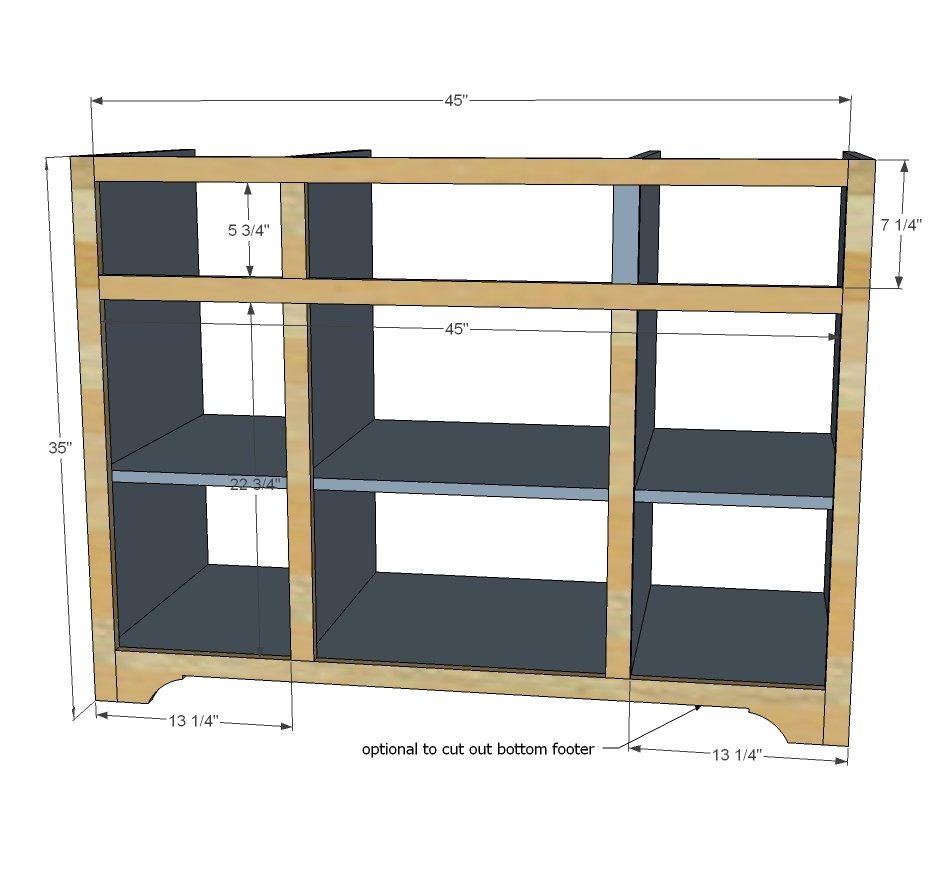
- 2 - 1x2 @ 35"
- 2 - 1x2 @ 45"
- 2 - 1x2 @ 5-3/4"
- 2 - 1x2 @ 22-3/4"
- 1 - 1x4 @ 45"
DOORS/DRAWERS
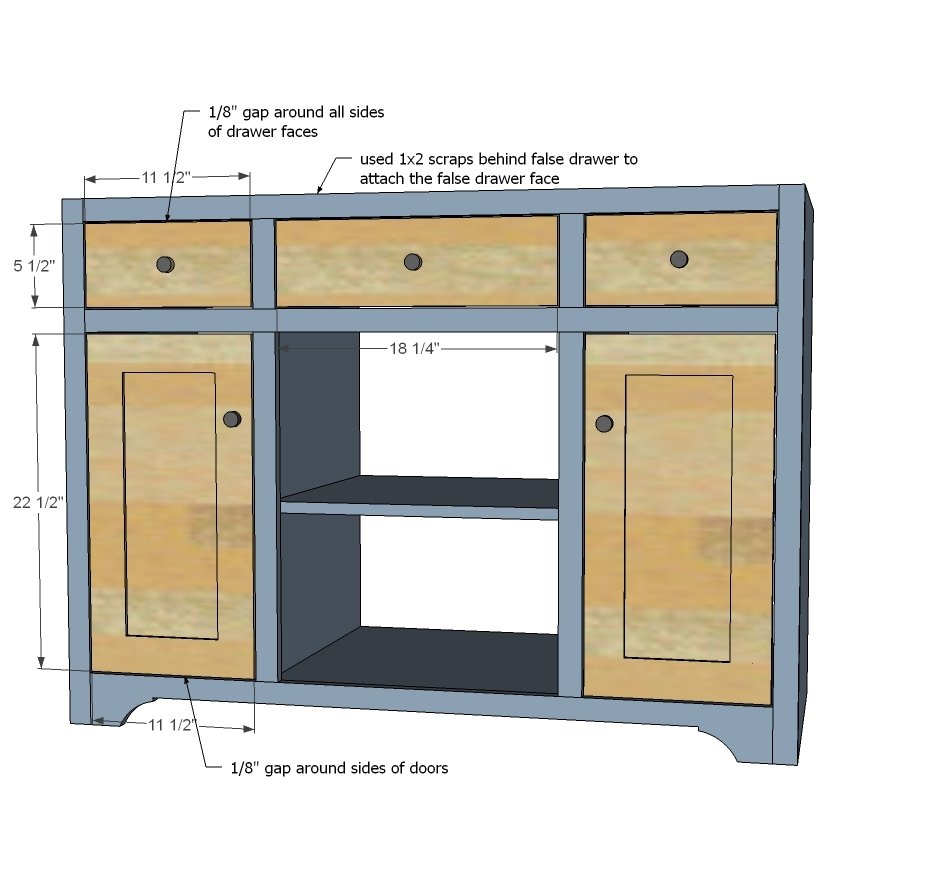
- 2 - 1x6 @ 5-1/2"
- 1 - 1x6 @ 18-1/4"
DOORS -
- 22-1/2" x 11-1/2"
DOORS - 1/2" THICK BOARDS
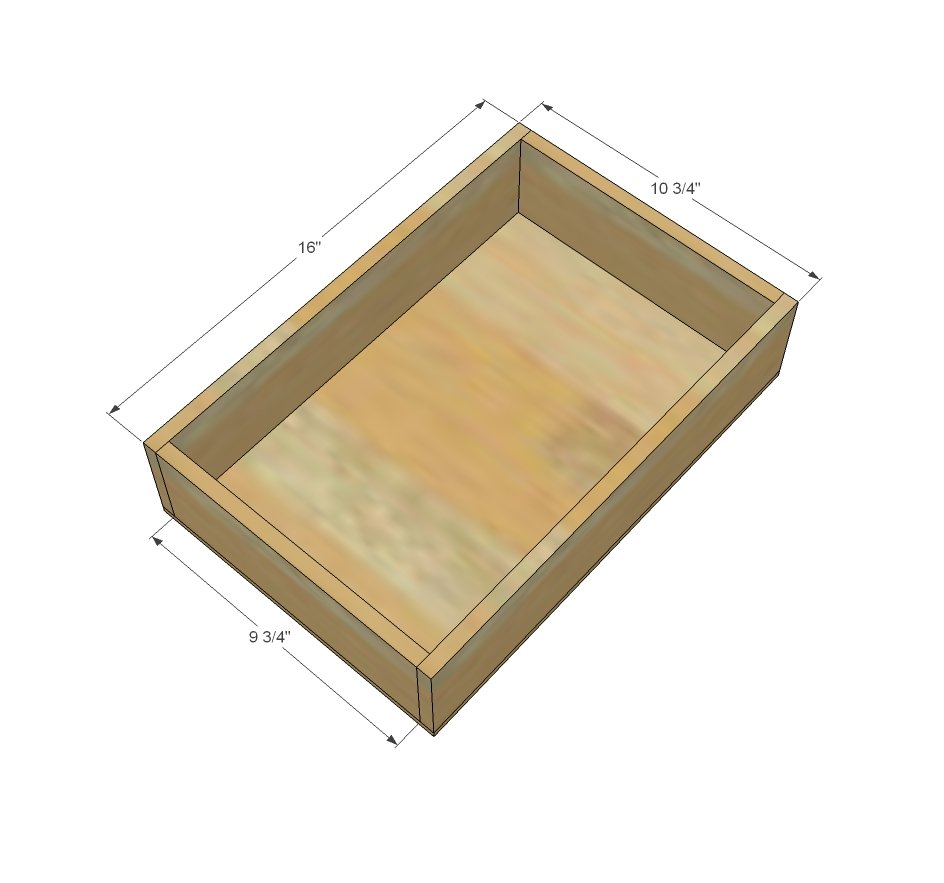
- 4 @ 16"
- 4 @ 9-3/4"
- 2 - 1/4" plywood @ 10-3/4" x 16"
Tools
- measuring tape
- square
- pencil
- safety glasses
- hearing protection
- kreg-jig
- drill
- circular saw
- compound miter saw
- nailer
- sander
Step-by-step Instructions
Step 1
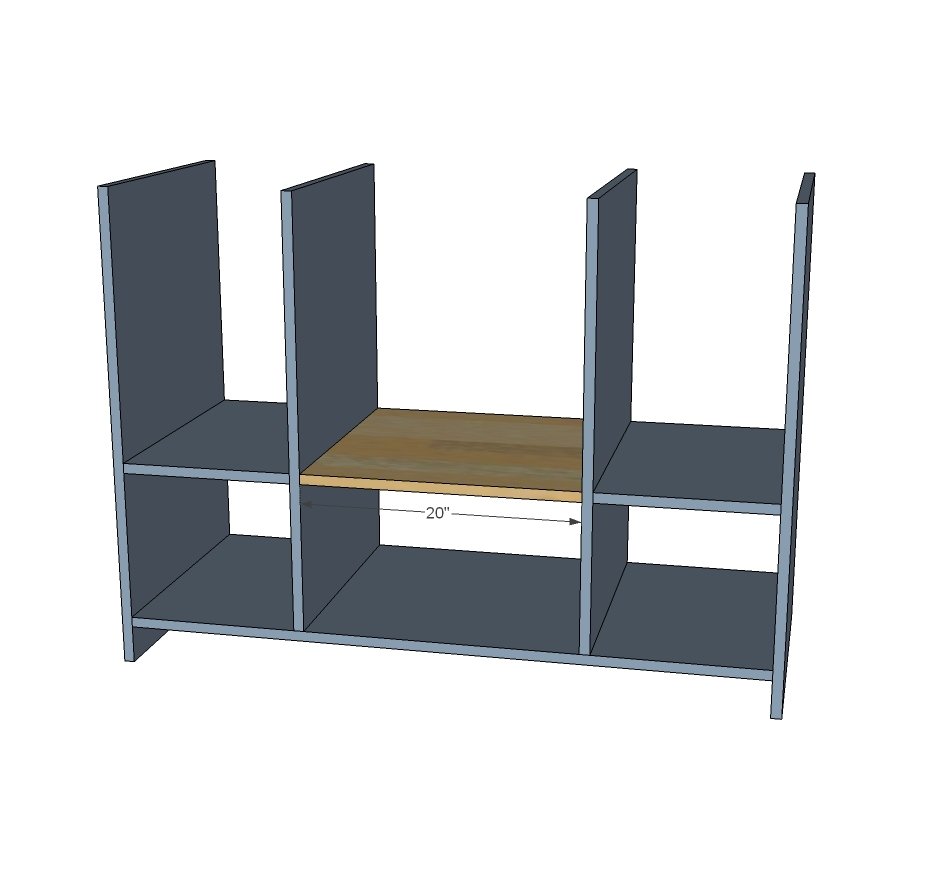
Start by building the basic box for the vanity. We used 3/4" pocket holes and 1-1/4" pocket hole screws.
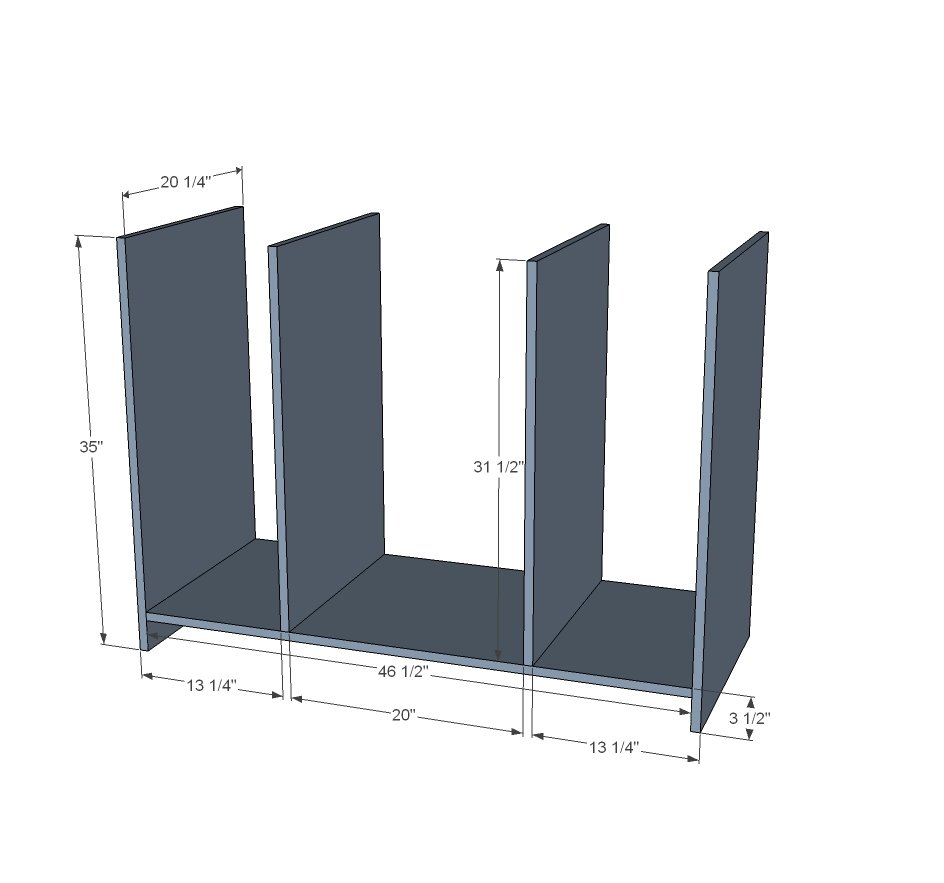
We attached the shelves fixed but you could also make them adjustable with shelf pin holes.
TIP: If you are applying edge banding to front, cut this shelf smaller by 1/8" at front.
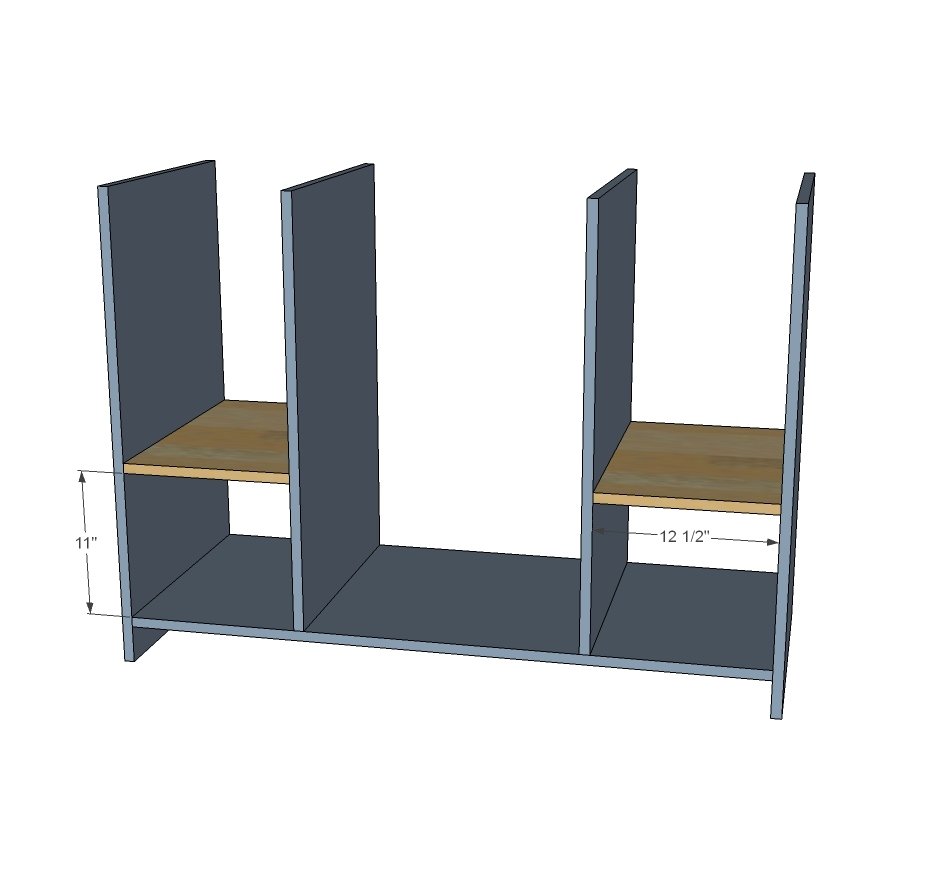
Step 3
We made the middle shelf adjustable, cutting it down in size. We will have to cut out the center to allow for plumbing.
Step 4
We built the face frame separately with 3/4" pocket holes and 1-1/4" pocket hole screws. Then we attached the face frame with 1-1/4" finish nails and glue.
Step 5
Add the back supports as shown using pocket holes on the back side.
Step 6
These are for the drawer slides. Attach with nails and glue.
BUILD YOUR DRAWERS TO YOUR OPENINGS AND SLIDES
We built drawers out of 1/2" thick stock using 1/2" pocket holes and 1" pocket hole screws. We attached 1/4' plywood to bottom with finish nails glue.
Step 8
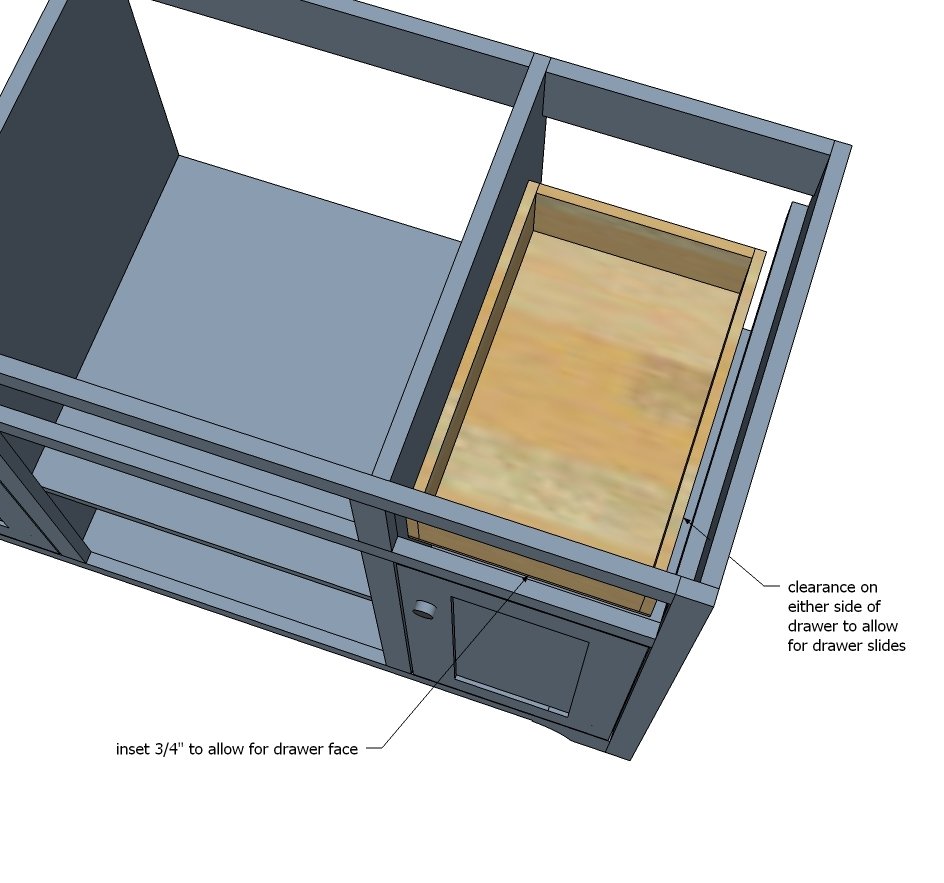
The drawer boxes are installed inset 3/4" to allow for the drawer face.
Step 9
Cut and build our doors/drawer faces to fit your openings. We used this plan for the doors.
Finishing
Sand all surfaces, starting with a medium grit and finishing with fine. Wipe off the dust, fill any holes or gaps with wood filler, and sand smooth once dry. Apply primer if you're painting, then finish with your choice of paint or stain and seal with a durable clear topcoat. For outdoor projects, use exterior-rated primer, paint or stain, and sealer so the piece stands up to the weather.
Source (temporary): https://www.ana-white.com/woodworking-projects/48-open-shelf-center-bathroom-vanity-free-plans