48" Wide Closet Units from HGTV Show
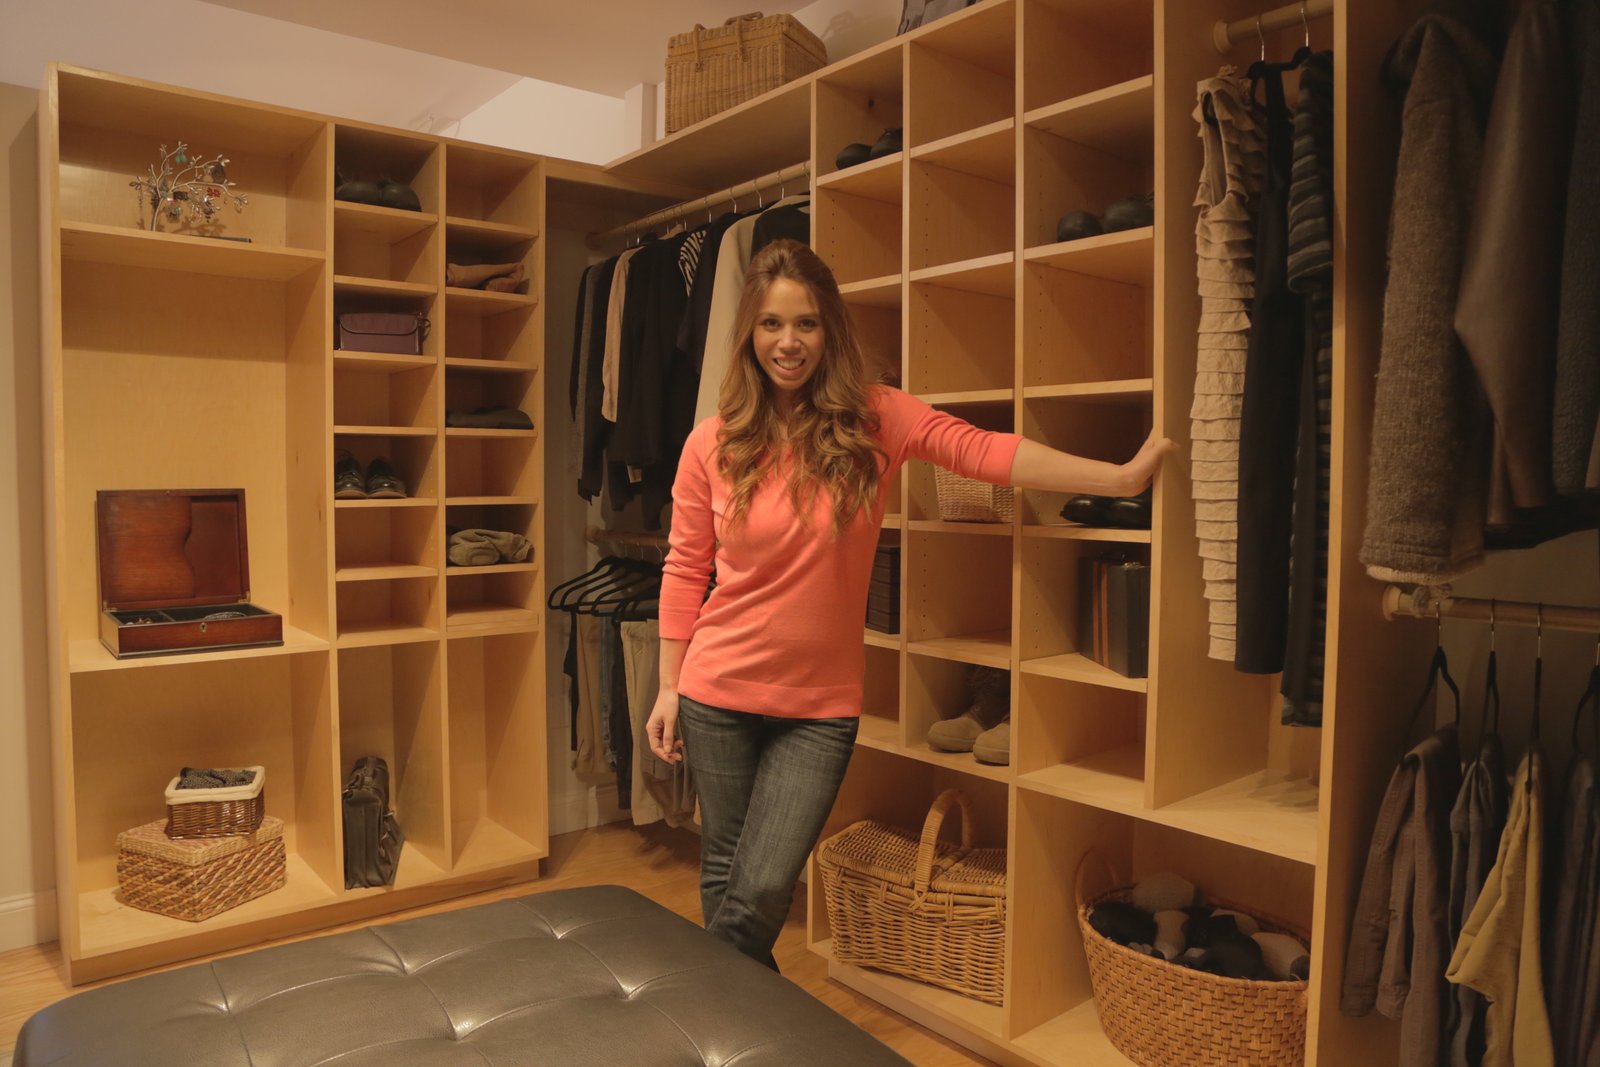
I built a giant closet system for HGTV show using plywood. This closet was absolutely massive. The homeowner wanted alot of shelving for sweaters and shoes. We ended up building three of these 48" wide units, and then adding hanging in between the units. This turned out so great and was an inexpensive DIY solution for such a huge space. I am happy to share the plan that I used to build this closet system below.
Specifications
| Project type | Built-In Woodworking Plans |
|---|---|
| Room | Closets |
| Style | Tradditional Style Furniture Plans |
| Difficulty | Intermediate |
| Estimated cost | $150 - $200 |
Dimensions
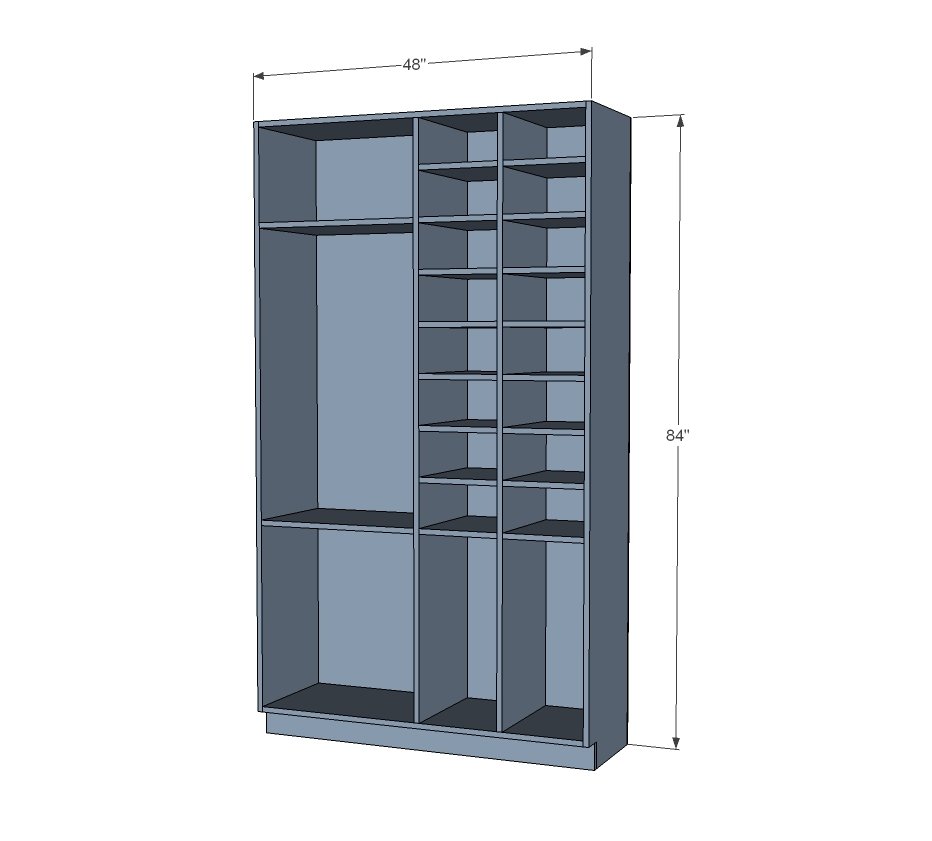
Use the size-specific shopping and cut lists below.
Shopping List
- 3/4" plywood cut into strips 15-3/4" wide x 8 feet long, edge banded on front side (if planned well, two sheets of plywood per organizer)
- 1/4" plywood in matching species for backs (one full sheet)
- 1x4x4' boards in matching wood species for toekick
- 1x4x8' pine boards for underneath supports (cheaper than the matching wood species boards)
- 3/4" brad nails for attaching backs
- 1-1/4" pocket hole screws
*NOTE: For paint grade, you can use birch plywood or MDF and pine or poplar for the toekicks.
Cut List
For closet shown in dimension diagram - see later steps for alternative configurations
- 2 - 3/4" plywood @ 15-3/4" x 84" (sides)
- 2 - 3/4" plywood @ 15-3/4" x 46-1/2" (top and bottom)
- 1 - 1x4 matching wood species @ 48" (toekick)
- 1 - 1x4 pine or whitewood @ 46-1/2" (support)
- 2 - 3/4" plywood @ 15-3/4" x 79" (dividers)
- 1 - 1/4" plywood @ 48" x 84" (back)
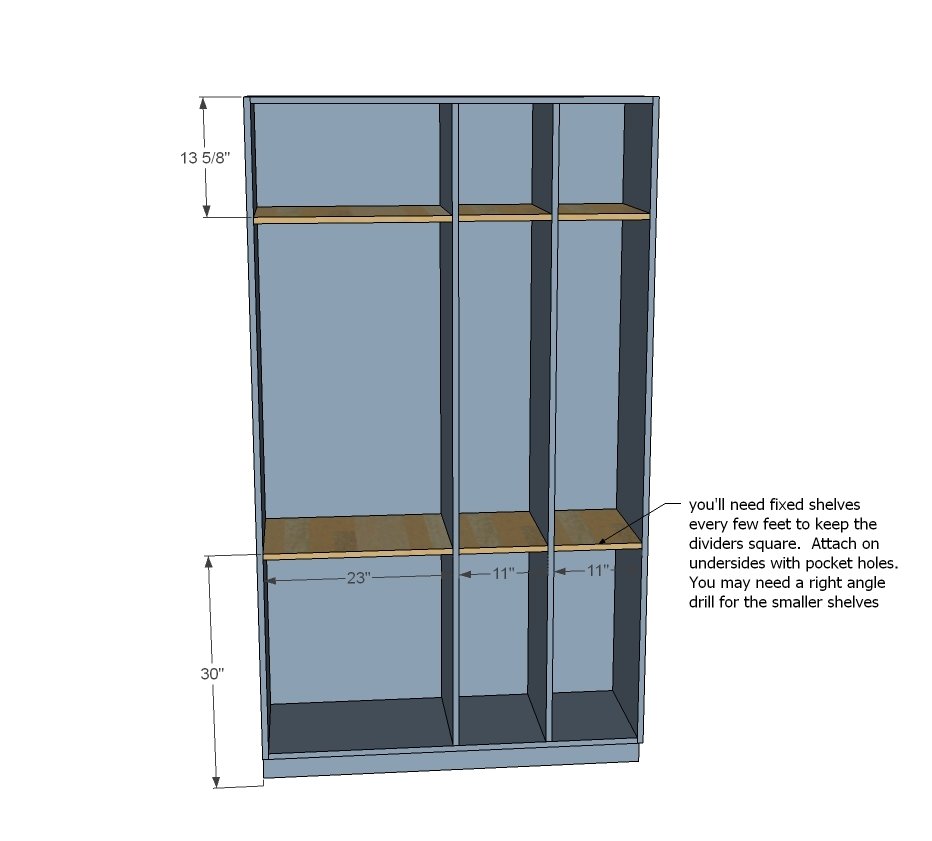
- 2 - 3/4" plywood @ 15-3/4" x 23" (large fixed shelves)
- 4 - 3/4" plywood @ 15-3/4" x 11" (small fixed shelves)
- 12 - 3/4" plywood @ 15-3/4" x 10-3/4" (adjustable shelves)
Tools
- measuring tape
- square
- pencil
- safety glasses
- hearing protection
- kreg-jig
- drill
- circular saw
- compound miter saw
- table saw
- nailer
Step-by-step Instructions
Step 1
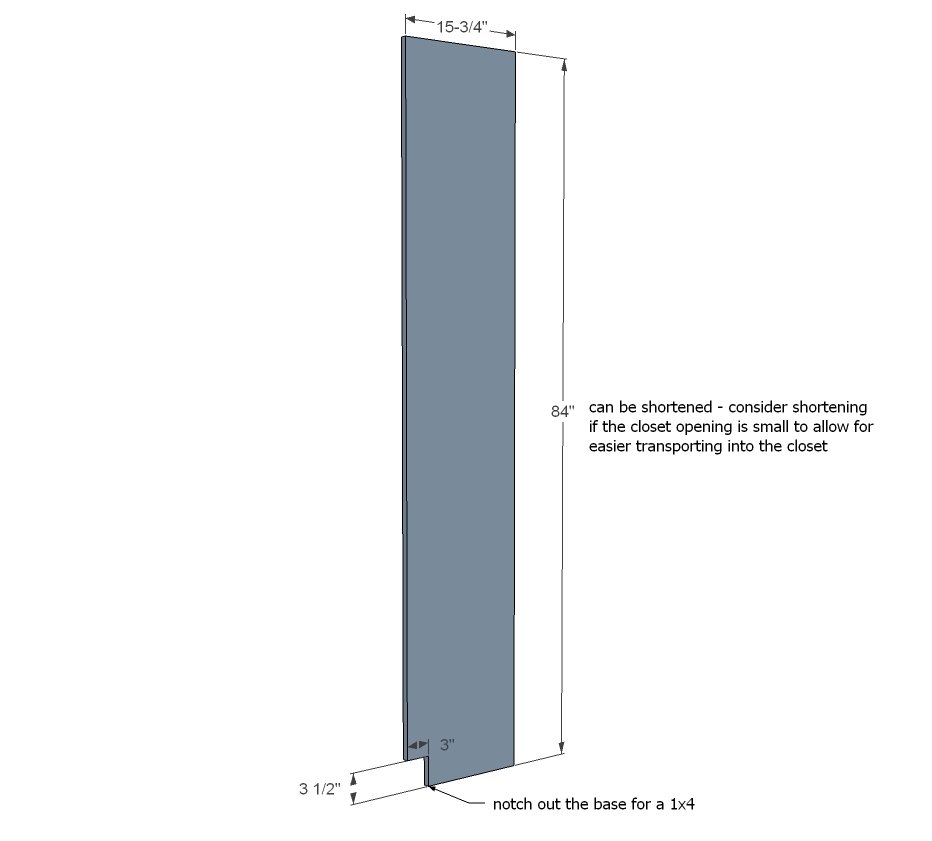
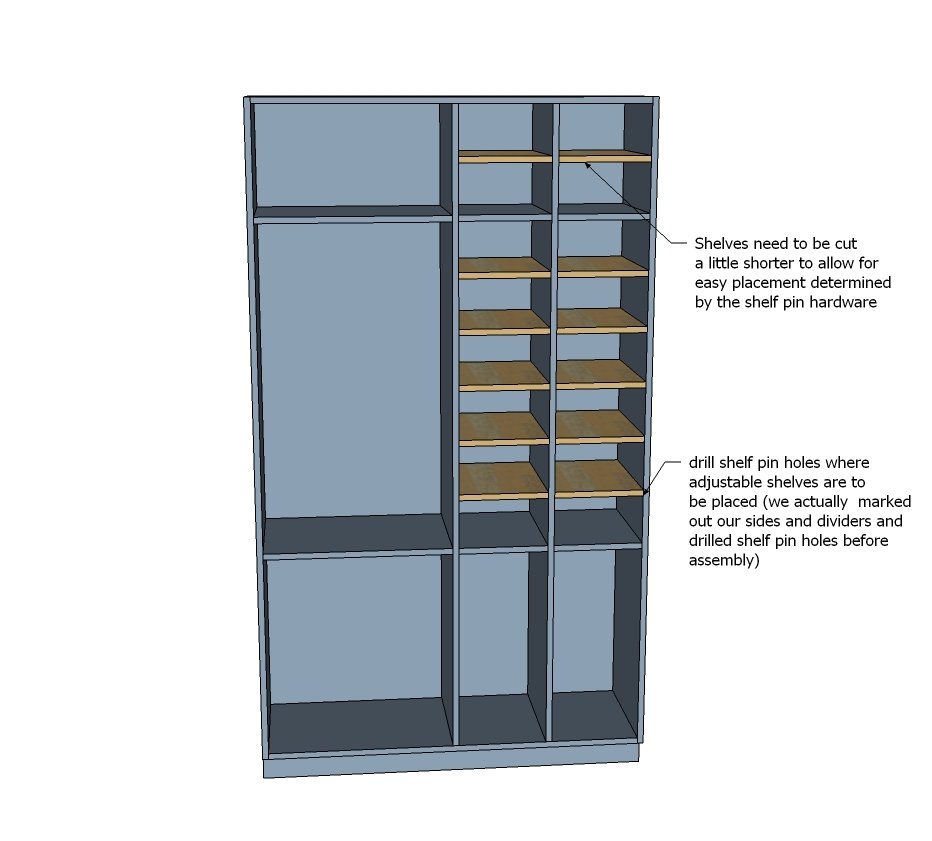
Notch out bottom of the sides to allow for a toekick. Also, we marked the location of shelf pins and carefully drilled them (be VERY careful doing this, if you are off even the tinest bit your shelves will wobble).
Step 2
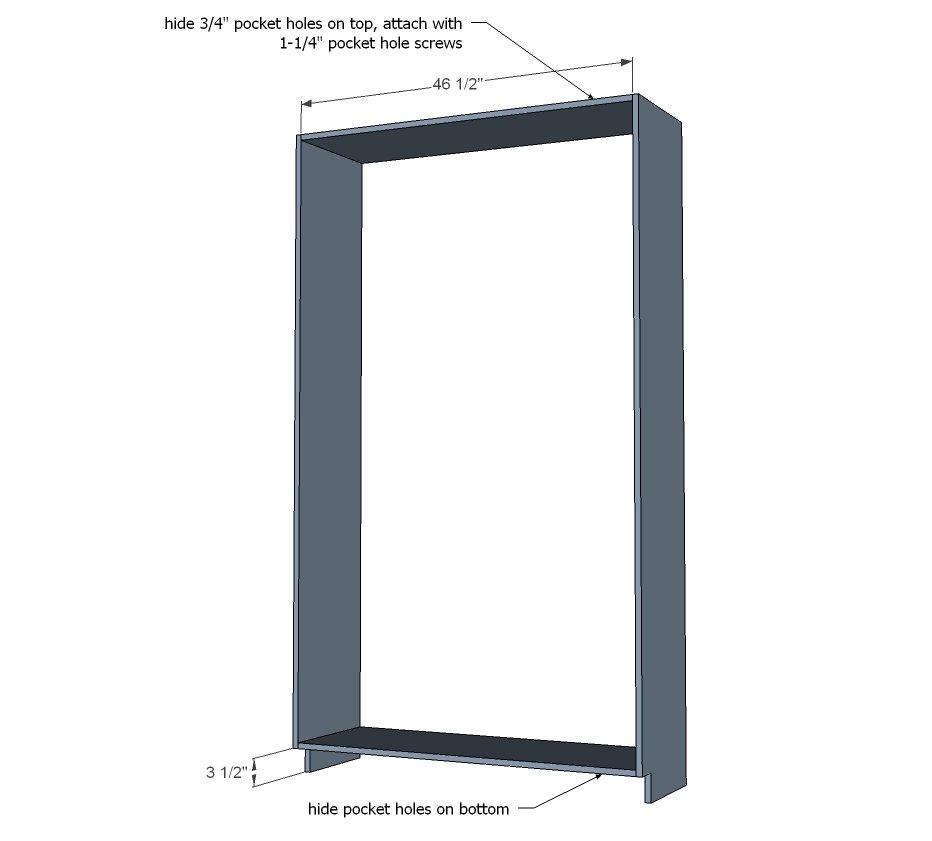
Attach top and bottom to the sides with 3/4" pocket holes and 1-1/4" pocket hole screws.
Step 3
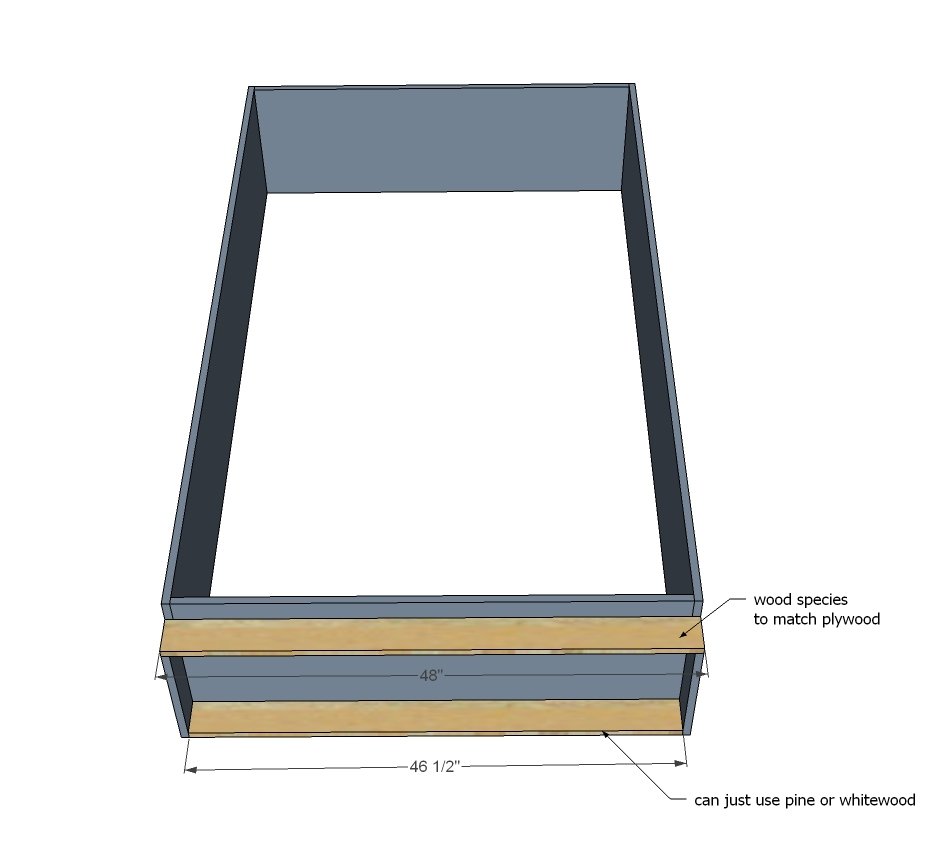
Attach bottom support and toekick to the base. We drilled pocket holes on insides facing upward to attach to the bottom shelf (since we are using prefinished every single screw hole had to be hidden, but if you are painting you could just nail or screws from the top).
Step 4
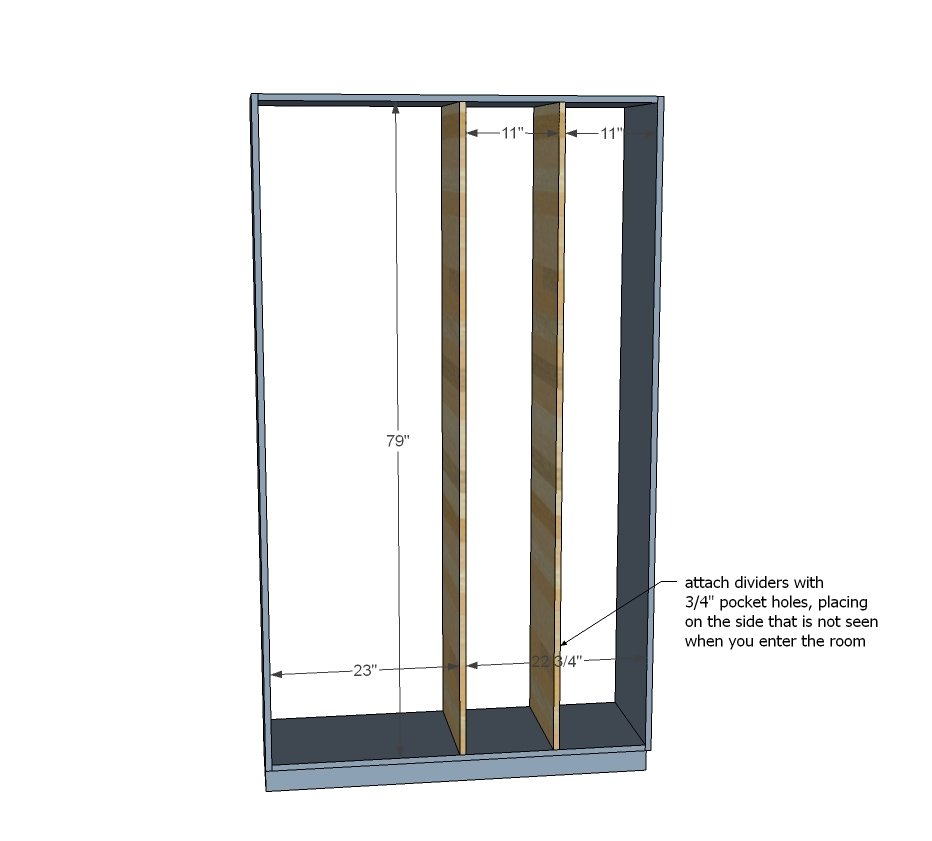
Attach dividers to top and bottom.
Step 5
Step 6
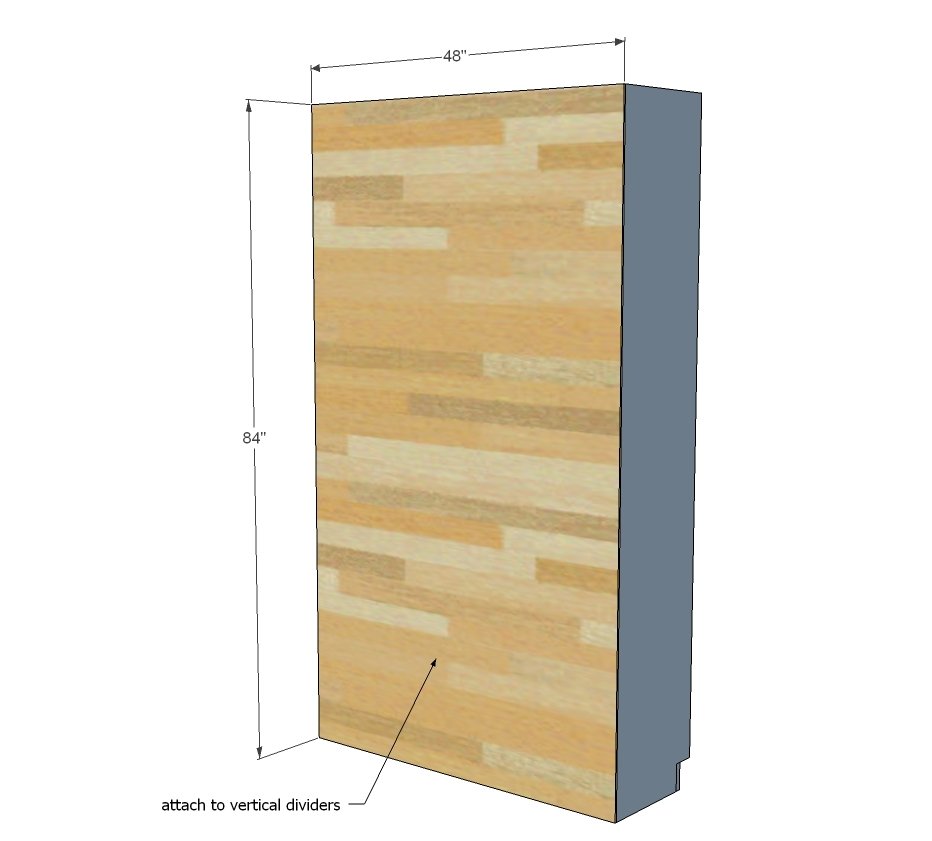
Nail or staple the back to all dividers and fixed shelves and outside edges.
Step 7
Cut the adjustable shelves and drill shelf pin holes (if you haven't already).
Step 8
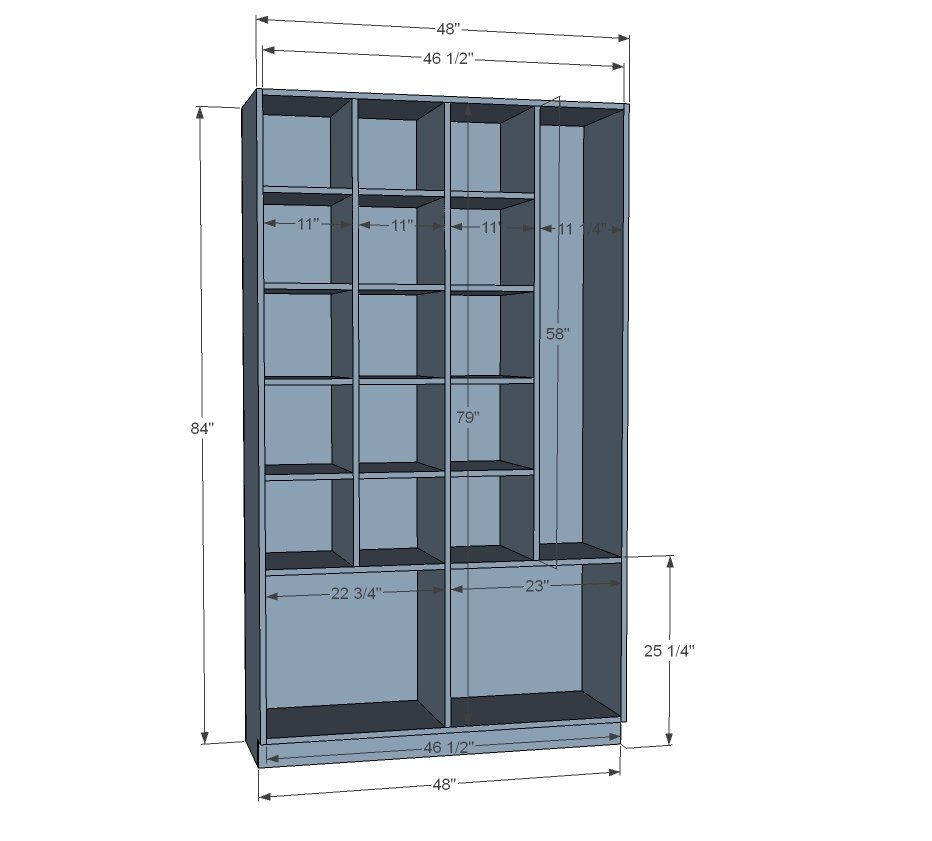
Here's an alternative configuration that I also loved - perfect for sweaters and larger items.
Step 9
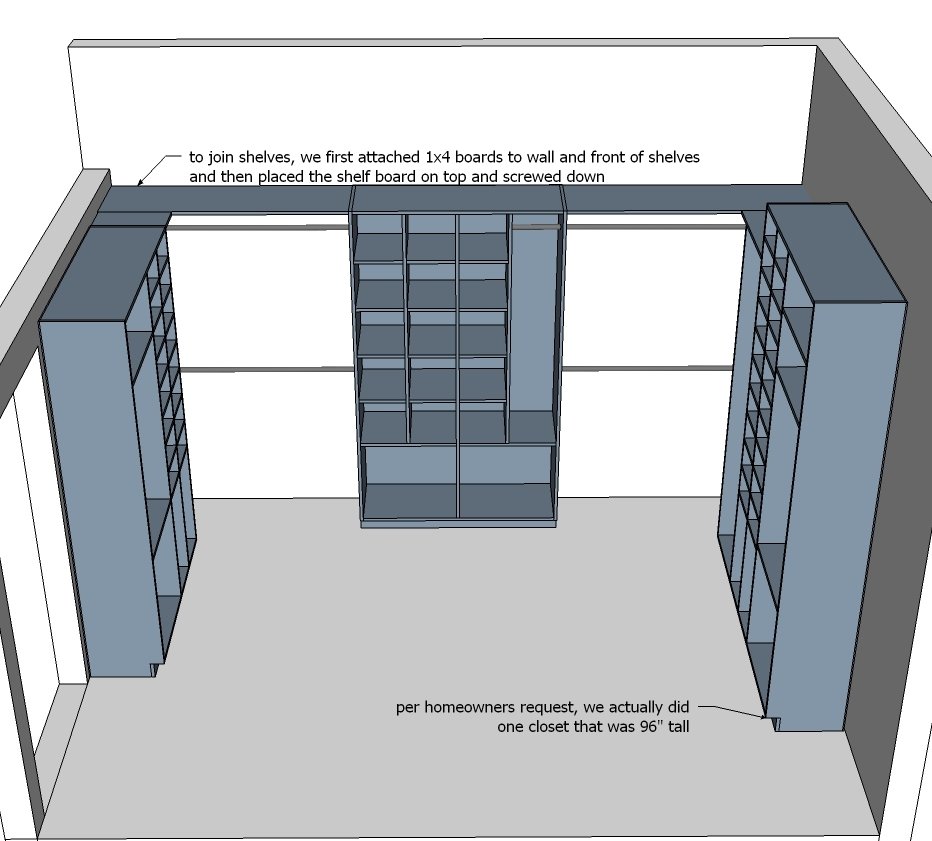
To attach the towers together we used hardwood boards in maple (to match the prefinished plywood but if you are painting you could use pine, whitewood boards, MDF or poplar) attached to the wall underneath the shelf. We also added 1x2s under the shelves on the front. Then we just set the shelves on top and screwed down. This is something you'll want to do in place, as walls are rarely perfectly square.
Finishing
Sand all surfaces, starting with a medium grit and finishing with fine. Wipe off the dust, fill any holes or gaps with wood filler, and sand smooth once dry. Apply primer if you're painting, then finish with your choice of paint or stain and seal with a durable clear topcoat. For outdoor projects, use exterior-rated primer, paint or stain, and sealer so the piece stands up to the weather.
Source (temporary): https://www.ana-white.com/woodworking-projects/48-wide-closet-units-hgtv-show