4x4 Rolling Cube Shelf
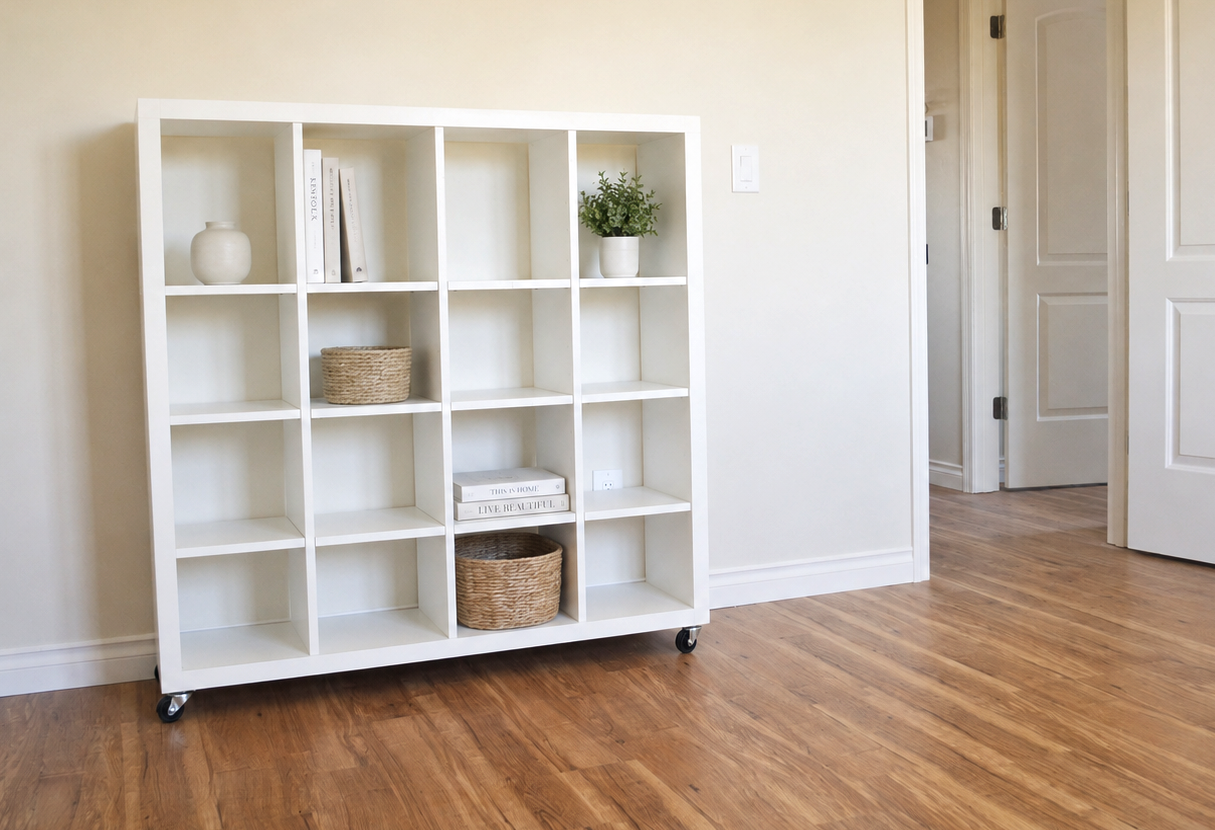
Build this DIY rolling cubby shelf for stylish, flexible storage in any room. With a clean white finish, roomy open cubbies, and easy-to-move casters, this storage bookcase is perfect for organizing books, baskets, toys, or decor in a playroom, classroom, office, or bedroom. Simple, functional, and customizable, it’s a practical storage solution with a modern look.
Specifications
| Project type | Bookshelf and Bookcase Plans |
|---|---|
| Room | Storage Solutions |
| Style | Modern Style Furniture Plans |
| Difficulty | Intermediate |
| Estimated cost | $50 - $100 |
Dimensions
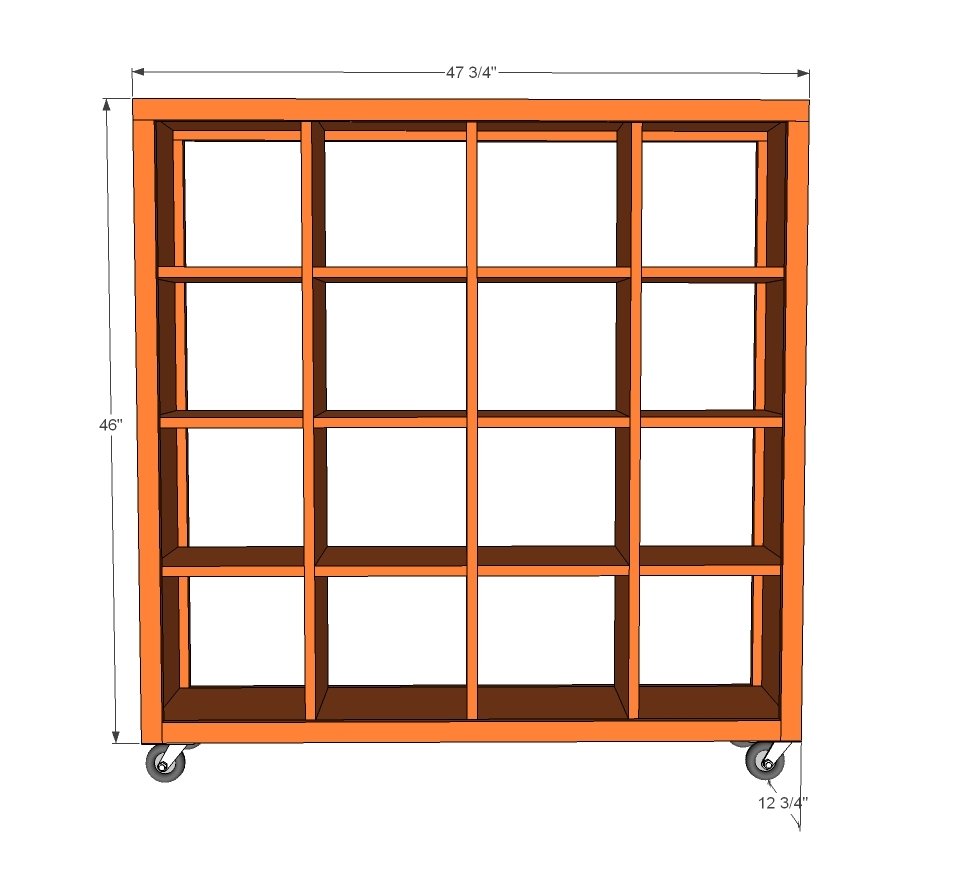
Use the size-specific shopping and cut lists below.
Shopping List
- 5 - 1x12 @ 8 feet long
- 4 - 1x2 @ 8 feet long
- 4 caster wheels and screws for attaching recommend
- 1 1/4" pocket hole screws
- 1 1/4" brad nails
- 48 shelf pins to match shelf pin hole size (optional)
Cut List
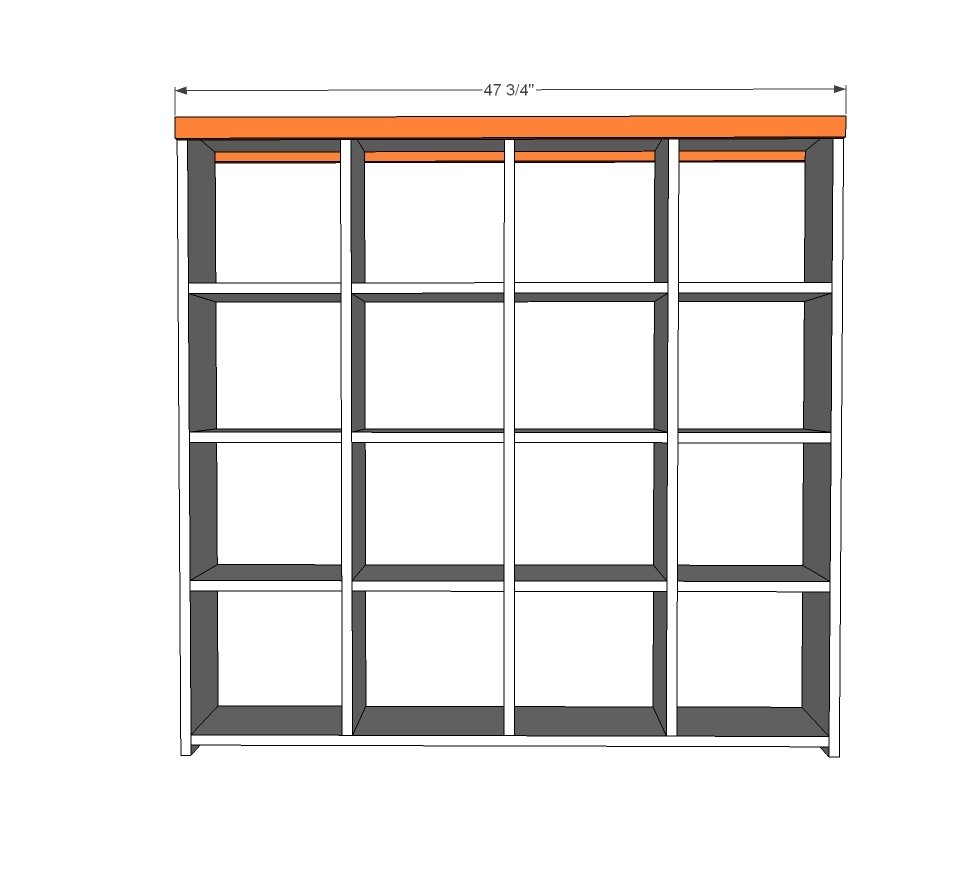
- 1 - 1x12 @ 47 3/4" (top)
- 2 - 1x12 @ 45 1/4" (sides)
- 1 - 1x12 @ 46 1/4" (bottom)
- 3 - 1x12 @ 43 3/4" (dividers)
- 12 - 1x12s @ 11" (shelves) - For adjustable shelves, cut to fit shelf pins
- 2 - 1x2 @ 47 3/4" (top trim)
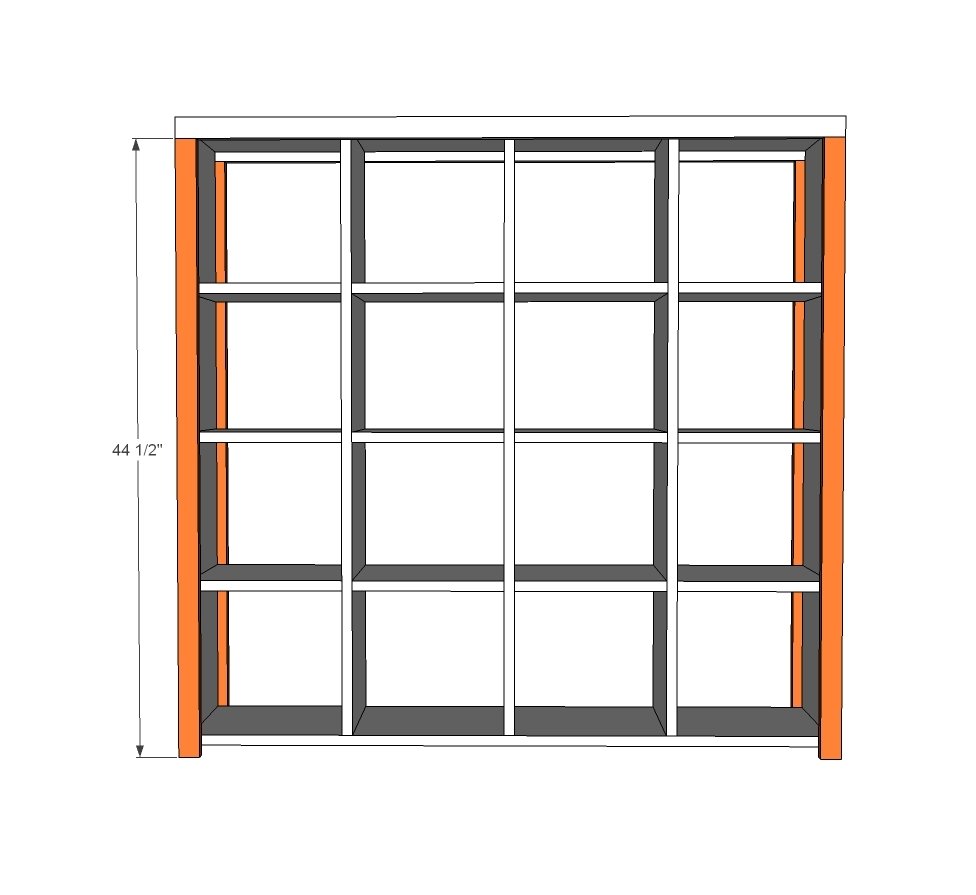
- 4 - 1x2 @ 44 1/2" (side trim)
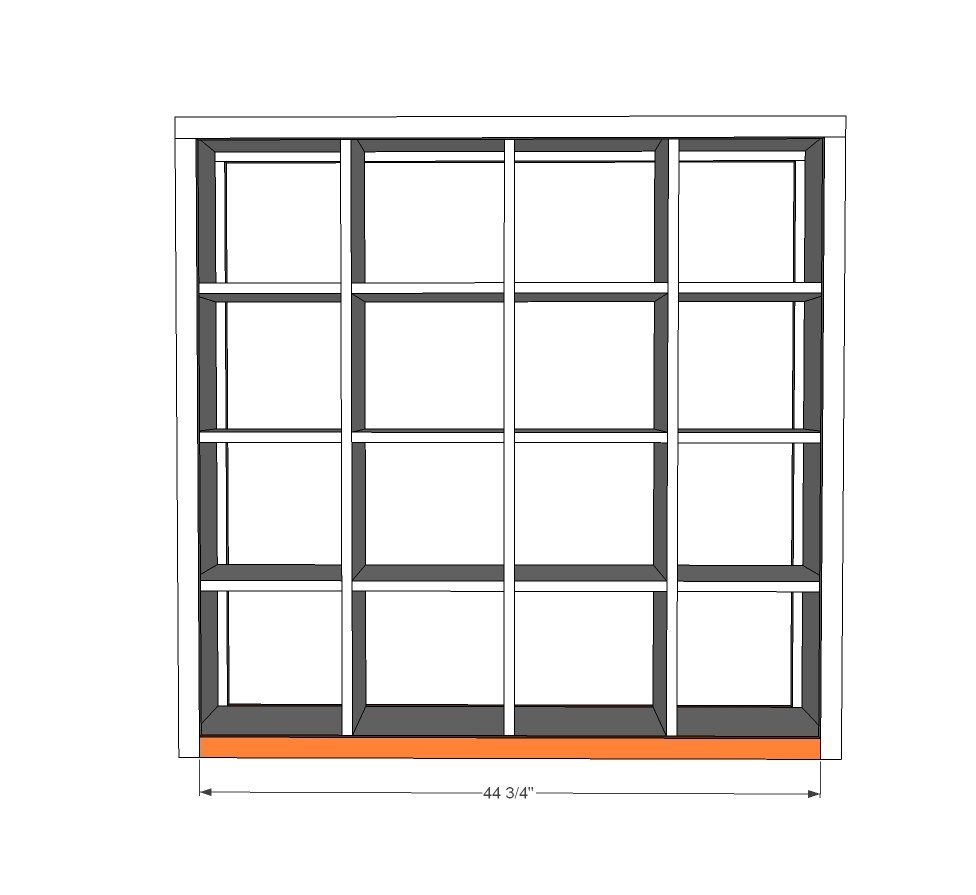
- 2 - 1x2 @ 44 3/4" (bottom trim)
Tools
- measuring tape
- square
- pencil
- safety glasses
- hearing protection
- kreg-jig
- drill
- circular saw
- nailer
- sander
Step-by-step Instructions
Step 1
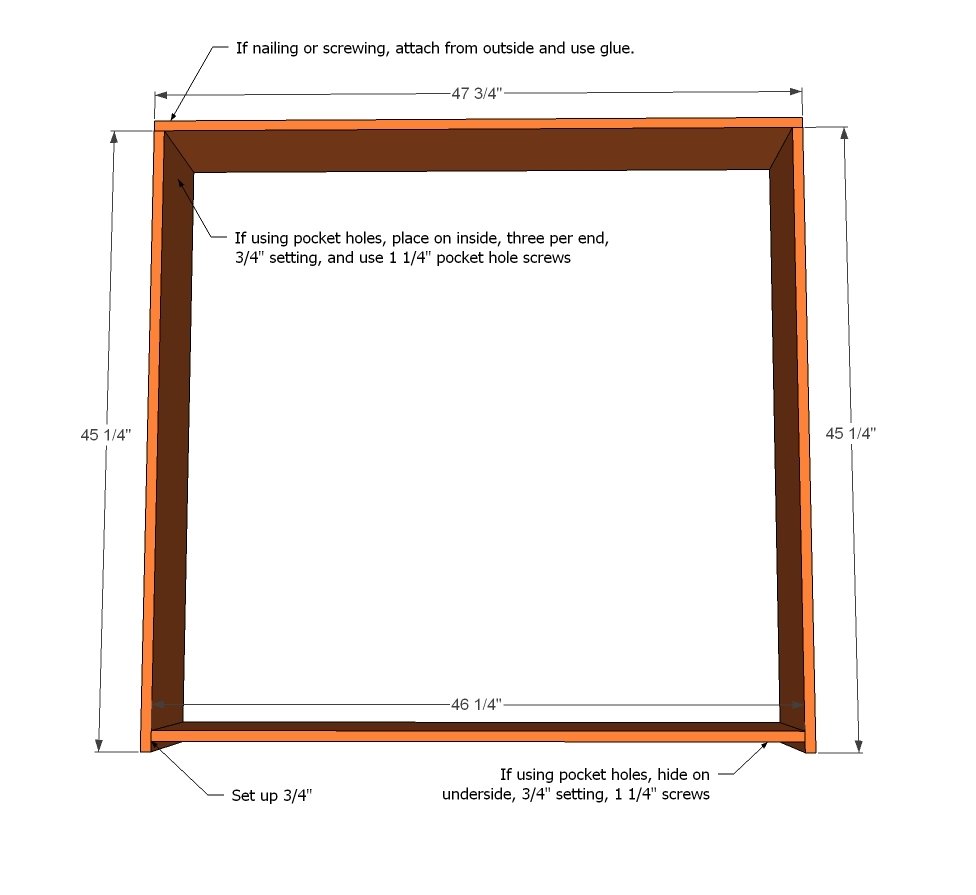
Start by building the outer box. We used pocket holes to build the project shown, but you can also use screws or even nails (it's fully face framed) but don't forget glue and make sure you predrill all holes.
Step 2
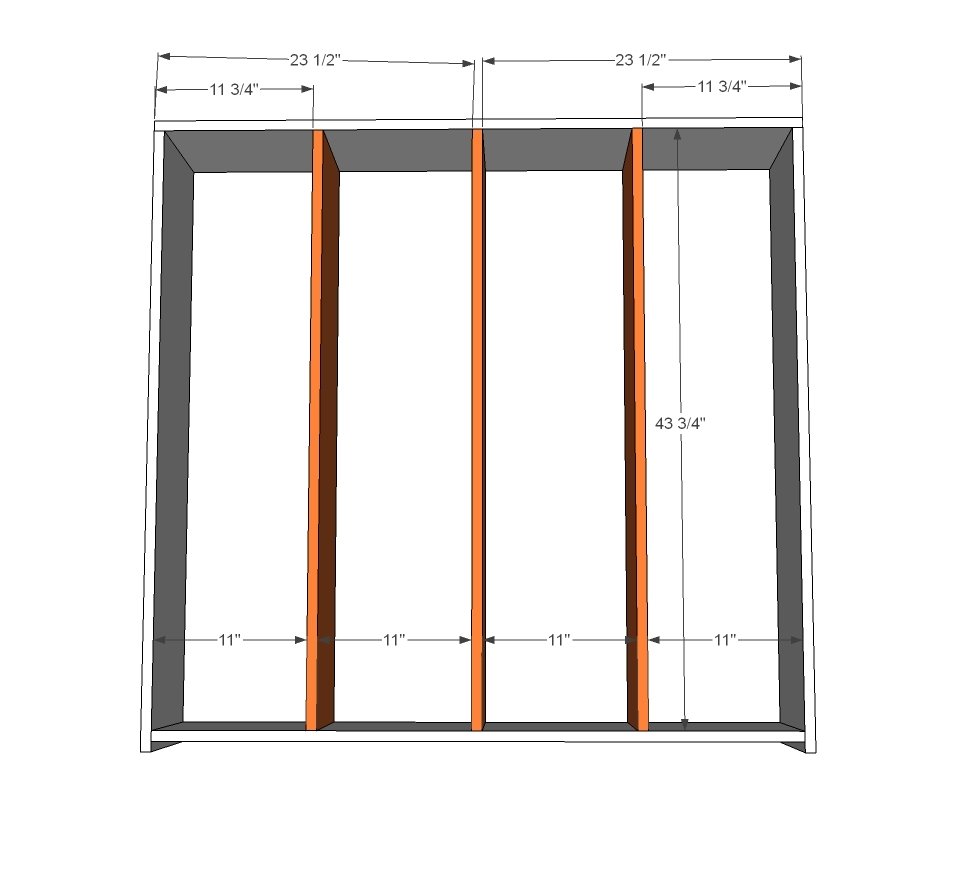
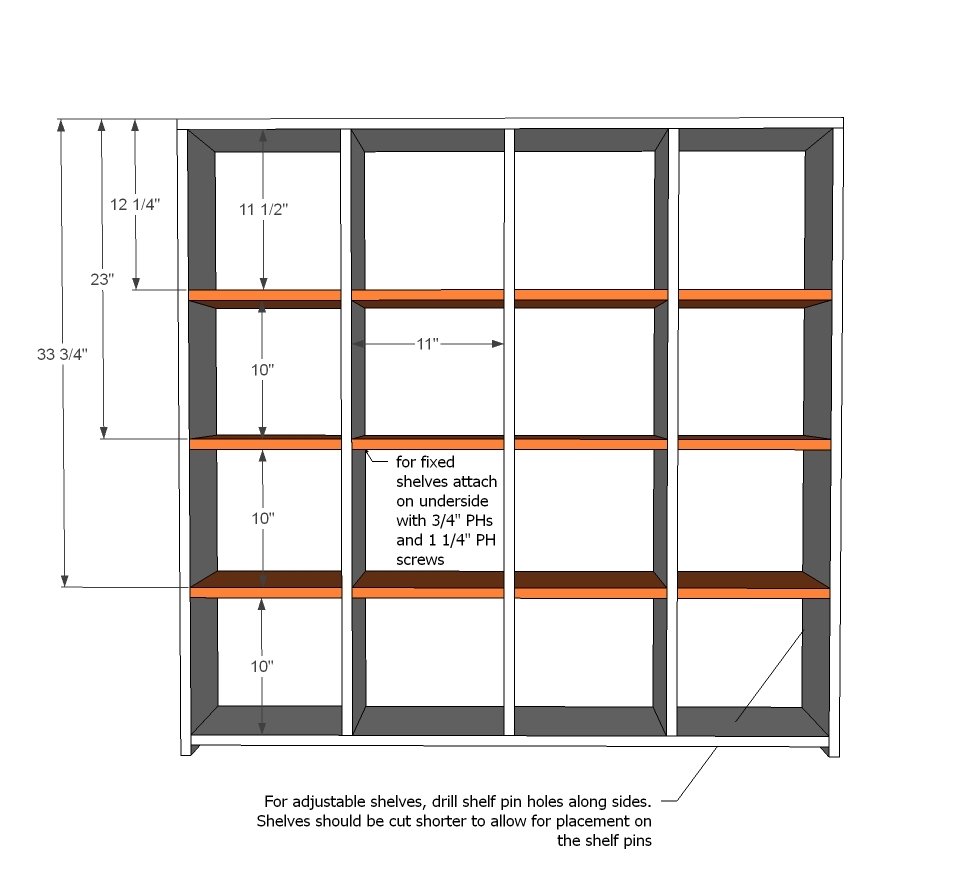
Carefully add the dividers so the distance between the dividers is all the same - 11".
For the shelves, you can either add them in now or drill shelf pins for adding them in later on.
Here's a quick video of the shelf pin jig we used and how it works:
Time to work on the face frame!
Pocket hole users will want to build the entire face frame first, then nail the face frame on with 1 1/4" nails and glue. If you are nailing board by board, glue and nail the top board on first. Nail to the dividers too.
Step 5
Step 6
And then cut and fit the bottom board and nail it on - nailing to dividers too.
Step 7
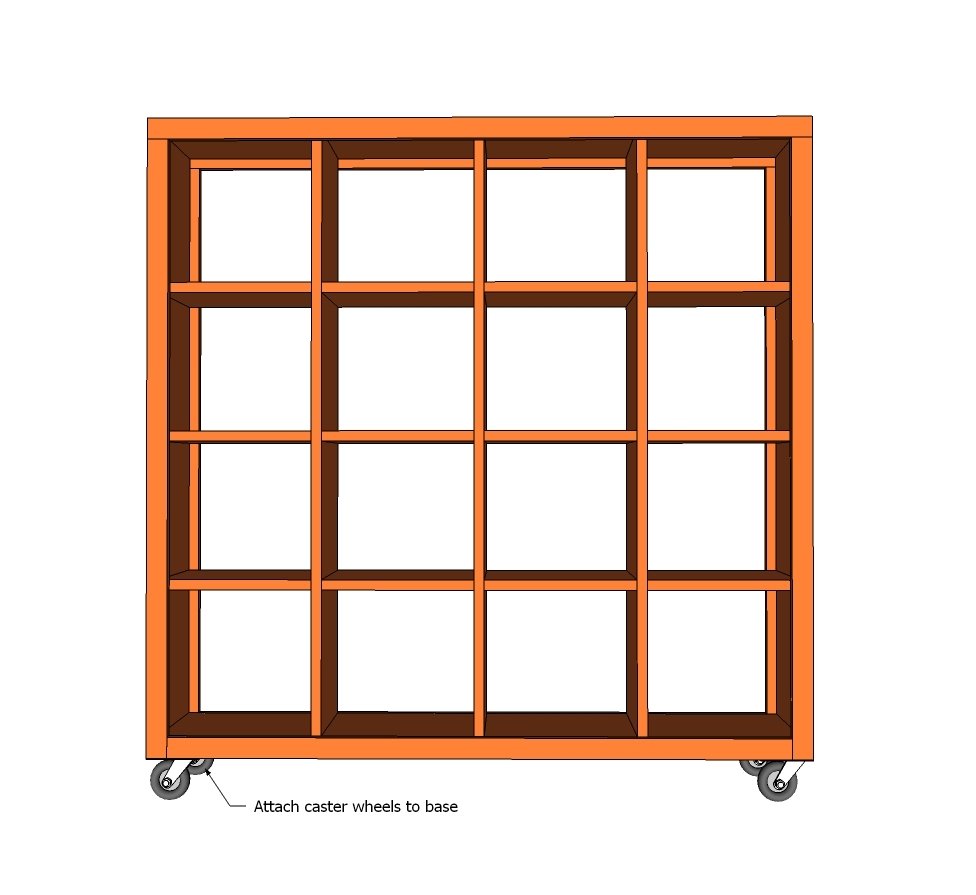
Finally, attach caster wheels and you are done!
Finishing
Sand all surfaces, starting with a medium grit and finishing with fine. Wipe off the dust, fill any holes or gaps with wood filler, and sand smooth once dry. Apply primer if you're painting, then finish with your choice of paint or stain and seal with a durable clear topcoat. For outdoor projects, use exterior-rated primer, paint or stain, and sealer so the piece stands up to the weather.
Source (temporary): https://www.ana-white.com/woodworking-projects/4x4-rolling-cube-shelf-adjustable-shelves