4x4 Truss Beam Bench
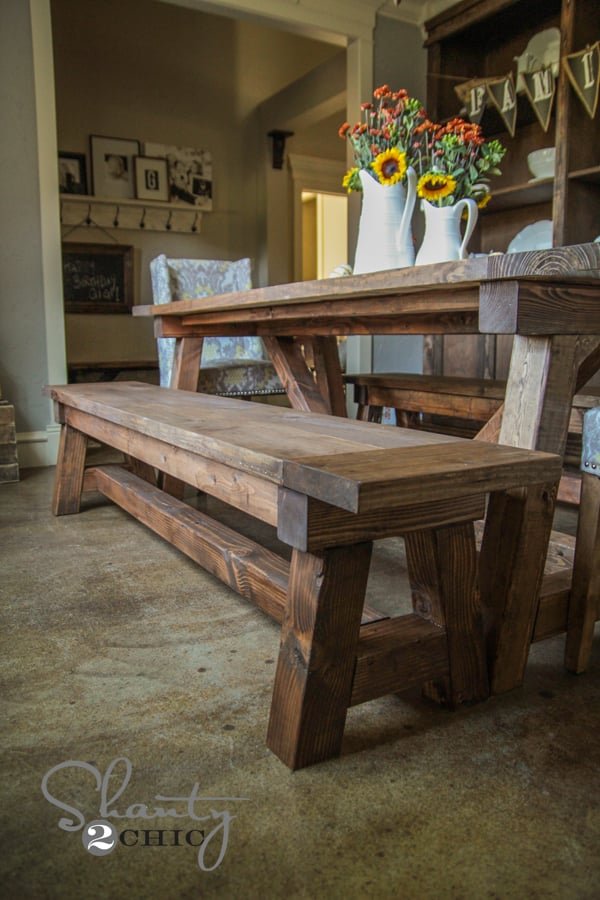
Complete your dining set with these sturdy, rustic benches designed to match our popular 4x4 Truss Beam Table. Featuring chunky 4x4 framing and classic truss detailing, these benches offer both style and durability. • Budget-Friendly: Construct both benches for under $80 in materials. • Beginner-Friendly: Clear, step-by-step instructions with diagrams. • Versatile Design: Suitable for indoor or outdoor use. • Customizable Finish: Easily adapt the finish to match your decor. These benches are a perfect complement to your truss beam table, providing ample seating and a cohesive look. Built by Whitney from Shanty2Chic, they showcase a simple yet solid design that accommodates the whole family.
Specifications
| Project type | Bench |
|---|---|
| Room | dining room |
| Style | Farmhouse Furniture |
| Difficulty | Intermediate |
| Estimated cost | $50 - $100 |
Dimensions
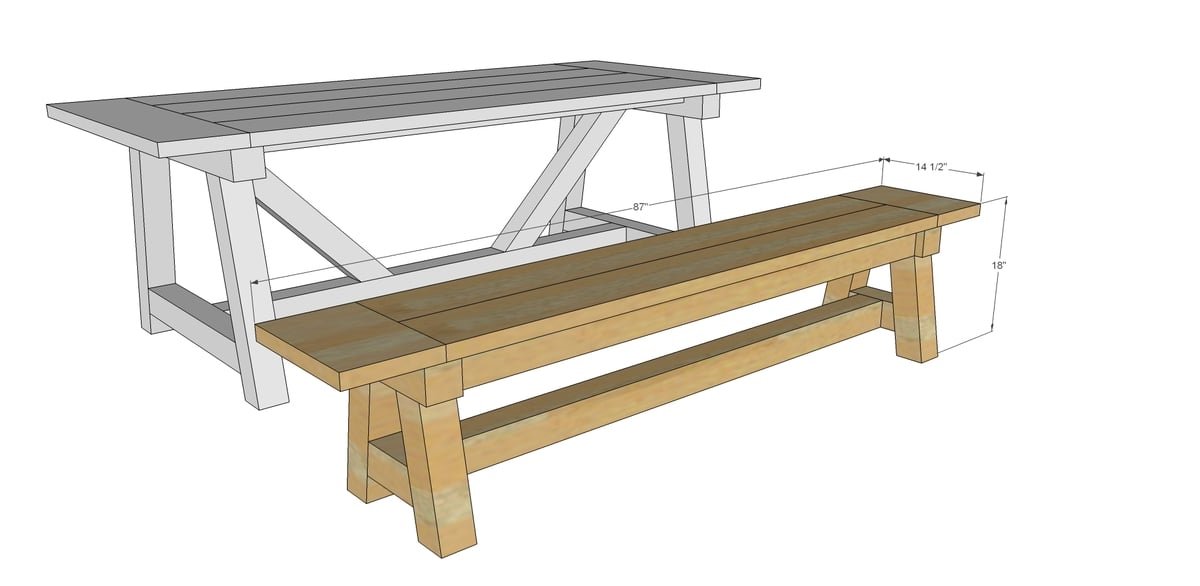
Use the size-specific shopping and cut lists below.
Shopping List
- 2 - 4x4 @ 8 feet long
- 2 - 2x4 @ 6 feet long (or a 12 footer)
- 2 - 2x8 @ 6 feet long (or a 12 footer)
- 1 - 2x10 @ 3 feet long (for the breadboard ends - you can also use 2x8 scraps here instead of buying a 2x10)
- 2 1/2" pocket hole screws
Cut List
- 2 - 4x4 @ 13 1/2" - leg top
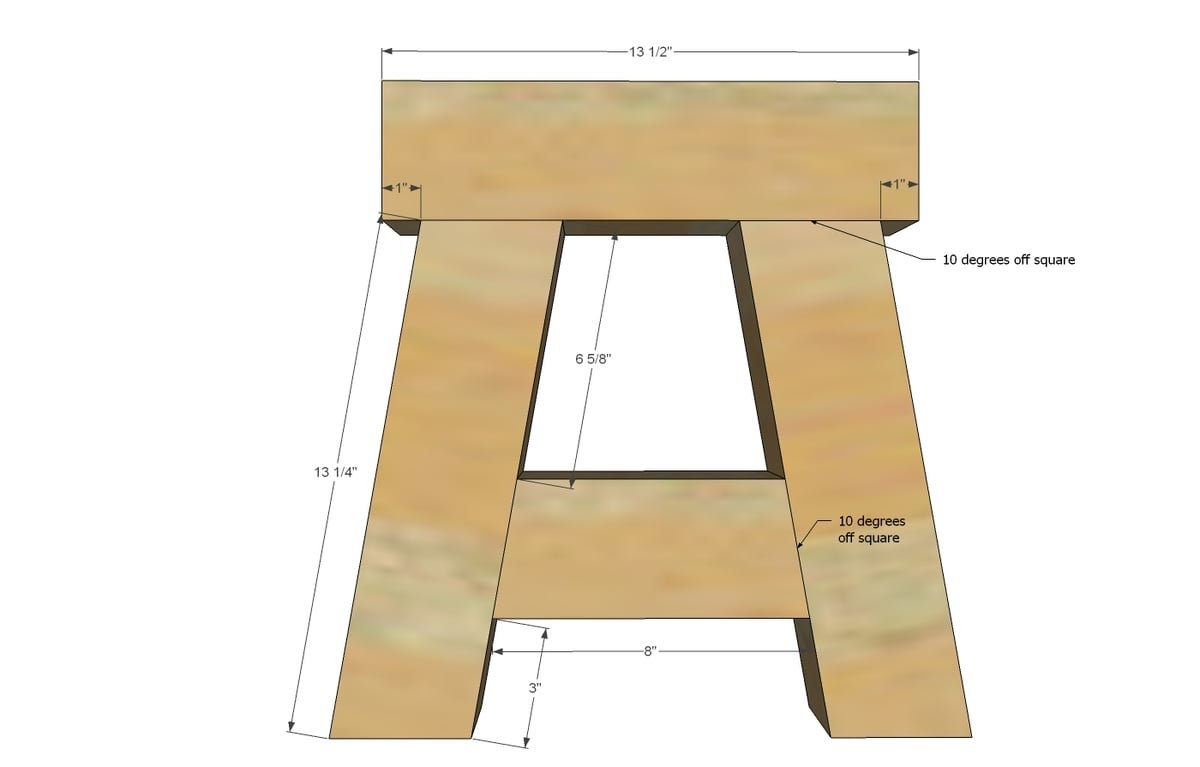
- 4 - 4x4 @ 13 1/4" (long point to short point, both ends cut at 10 degrees off square, parallel) - legs
- 2 - 4x4 @ 8" (long point to long point, both ends cut at 10 degrees off square NOT parallel) - leg stretcher
- 1 - 4x4 @ 65" - base stretcher
- 2 - 2x4 @ 65" - side aprons
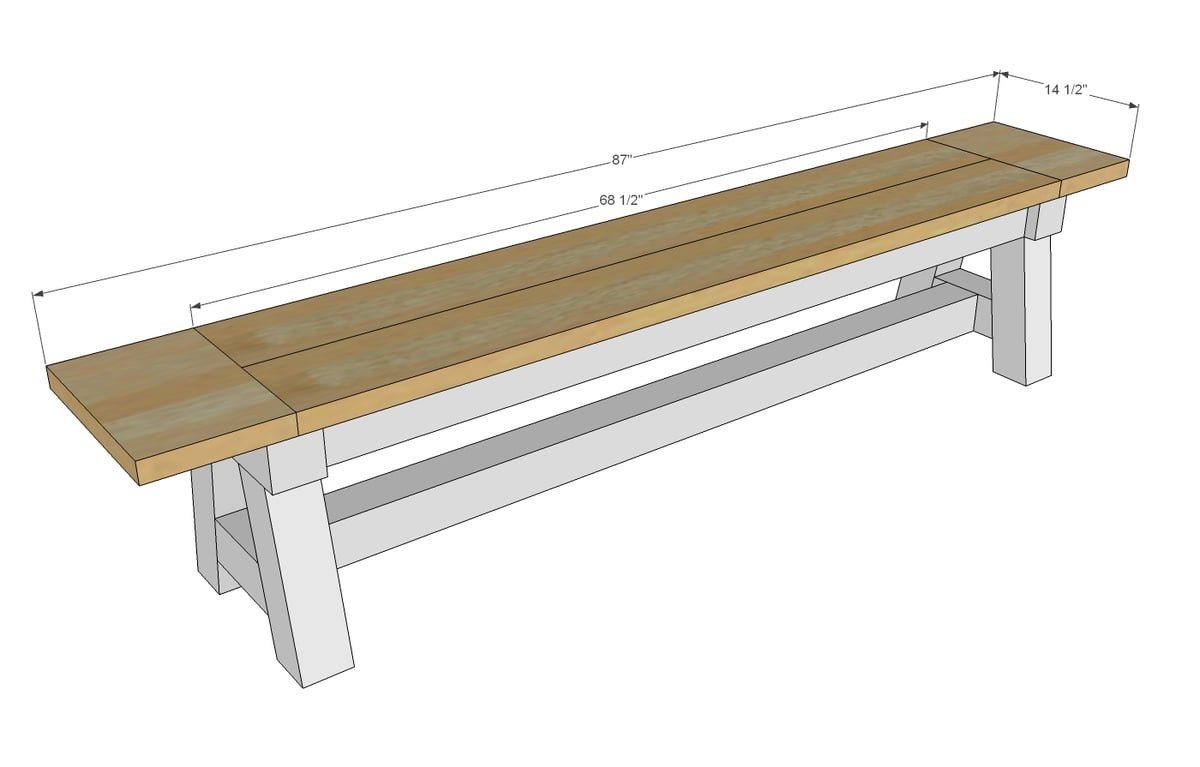
- 2 - 2x8 @ 68 1/2" - top
- 2 - 2x8 or 2x10 (for exact match to table) @ 14 1/2" - ends
Tools
- measuring tape
- square
- pencil
- safety glasses
- hearing protection
- drill
- compound miter saw
- sander
Step-by-step Instructions
Step 1
Build two of the leg ends as shown above. There's a ton of different ways to join 4x4s - I really like how Whitney used a Kreg Jig to hide the joints underneath - check that out here.
Step 2
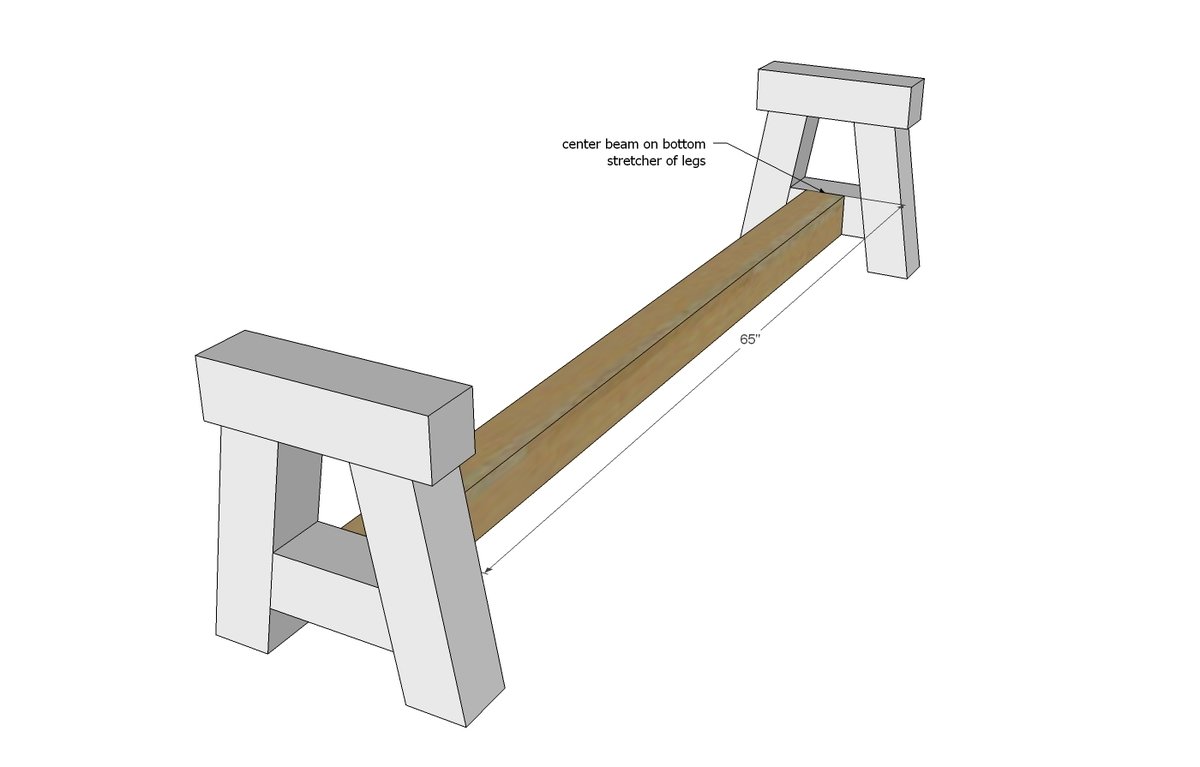
Then attach the bottom stretcher to the two legs...
Step 3
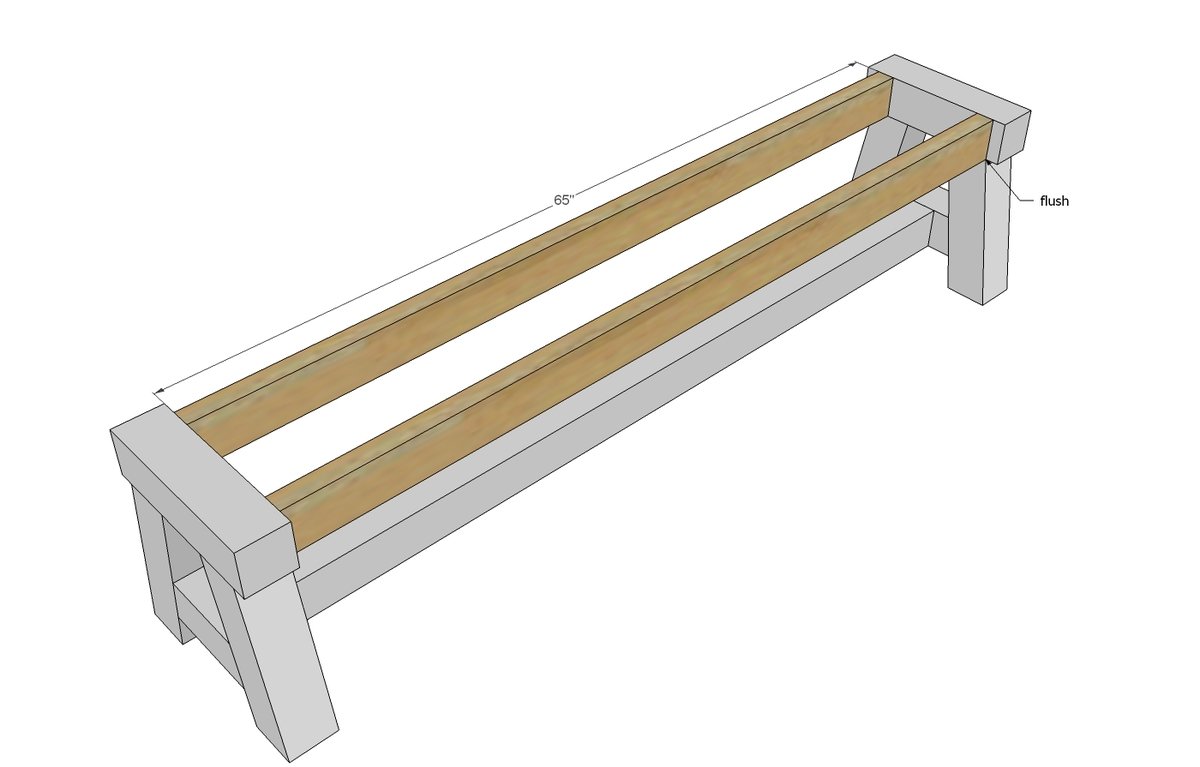
Next, add the two side aprons - these will give structure to the seat and look like 4x4s from the outside. TIP: Drill 1 1/2" pocket holes facing upward on the inside of the aprons before attaching for attaching the bench top in the next step.
Step 4
Finally, build your bench top first (I recommend building with 1 1/2" pocket holes and 2 1/2" pocket hole screws first) and then attach to the bench.
Finishing
Sand all surfaces, starting with a medium grit and finishing with fine. Wipe off the dust, fill any holes or gaps with wood filler, and sand smooth once dry. Apply primer if you're painting, then finish with your choice of paint or stain and seal with a durable clear topcoat. For outdoor projects, use exterior-rated primer, paint or stain, and sealer so the piece stands up to the weather.
Source (temporary): https://www.ana-white.com/woodworking-projects/4x4-truss-beam-bench-plans