4x4 X Base Pedestal Dining Table with Planked Wood Top
Build your own farmhouse style pedestal table with for under $100 in materials. This table features a farmhouse style 4x4 base, with a planked wood top. You can easily cut the top into a circle, or keep it square. We love this table in a breakfast nook, or as a family dining table.
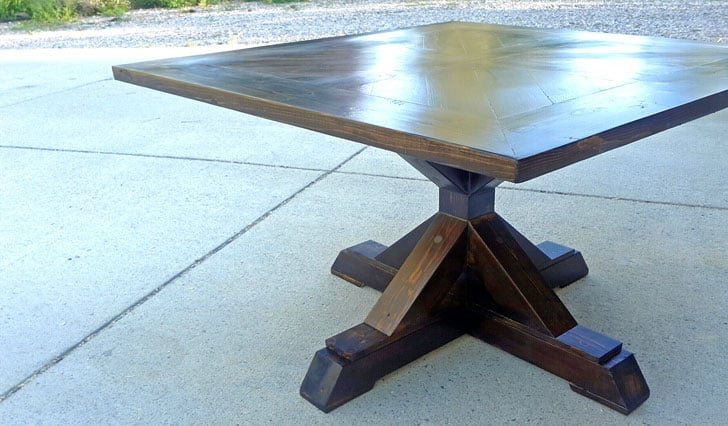
Specifications
| Project type | Dining Table Plans |
|---|---|
| Room | dining room |
| Style | Farmhouse Furniture |
| Difficulty | Advanced |
| Estimated cost | $50 - $100 |
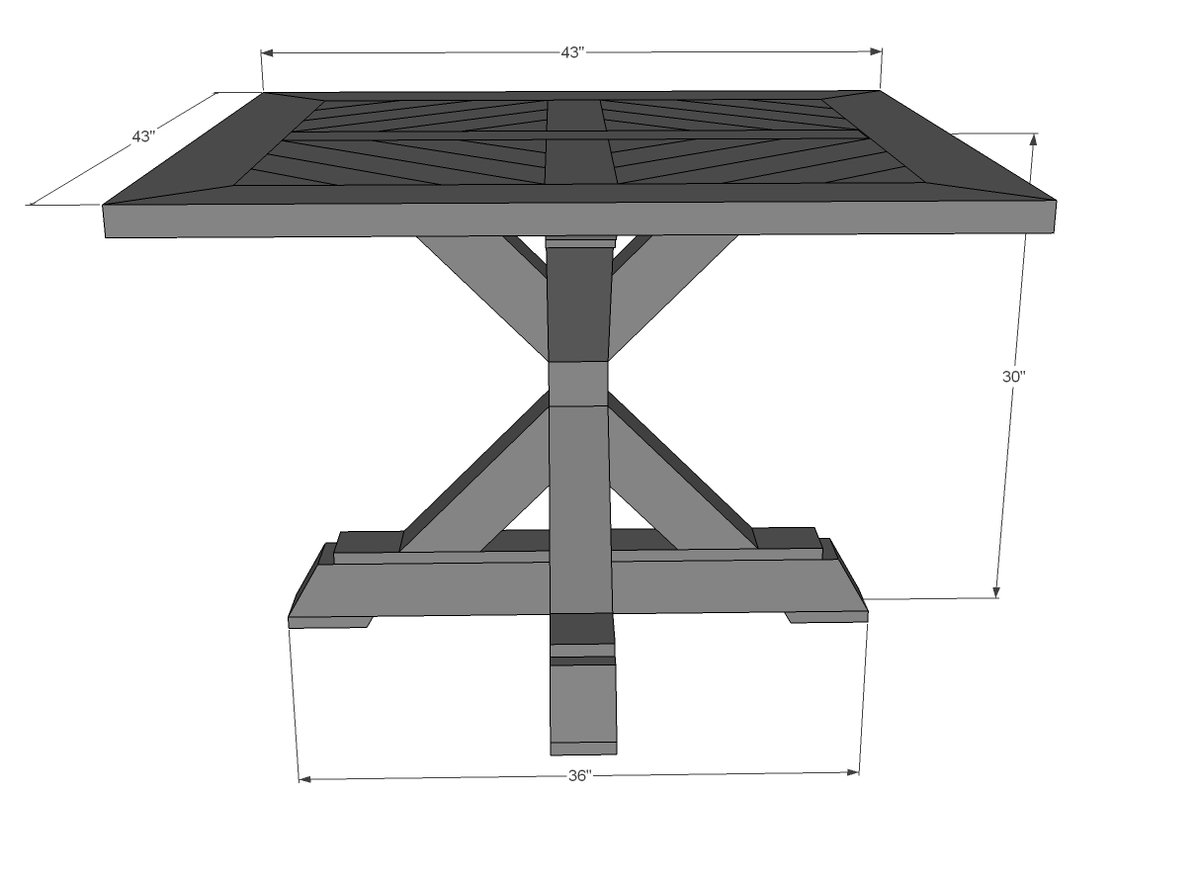
Dimensions
Use the size-specific shopping and cut lists below.
Shopping List
- 5 - 1x4 @ 8 feet long
- 2 - 4x4 @ 8 feet long
- 2 - 2x4 @ 8 feet long
- 2 - 2x6 @ 8 feet long (for framing out top)
- 1 1/4” and 2 1/2” pocket hole screws
- 4” or longer lag screws
- 2” or longer wood screws
Cut List
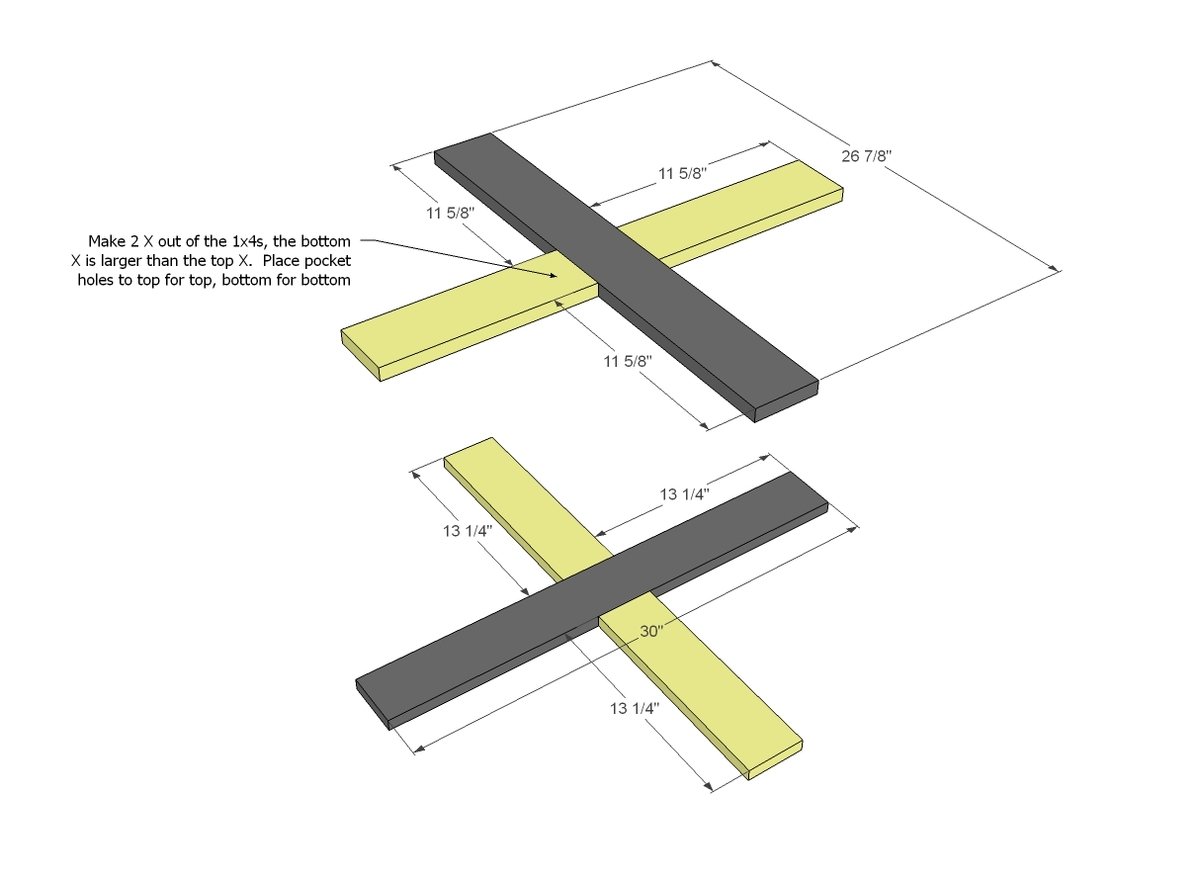
- 2 - 1x4 @ 11 5/8”
- 1 - 1x4 @ 26 7/8”
- 2 - 1x4 @ 13 1/4”
- 1 - 1x4 @ 30”
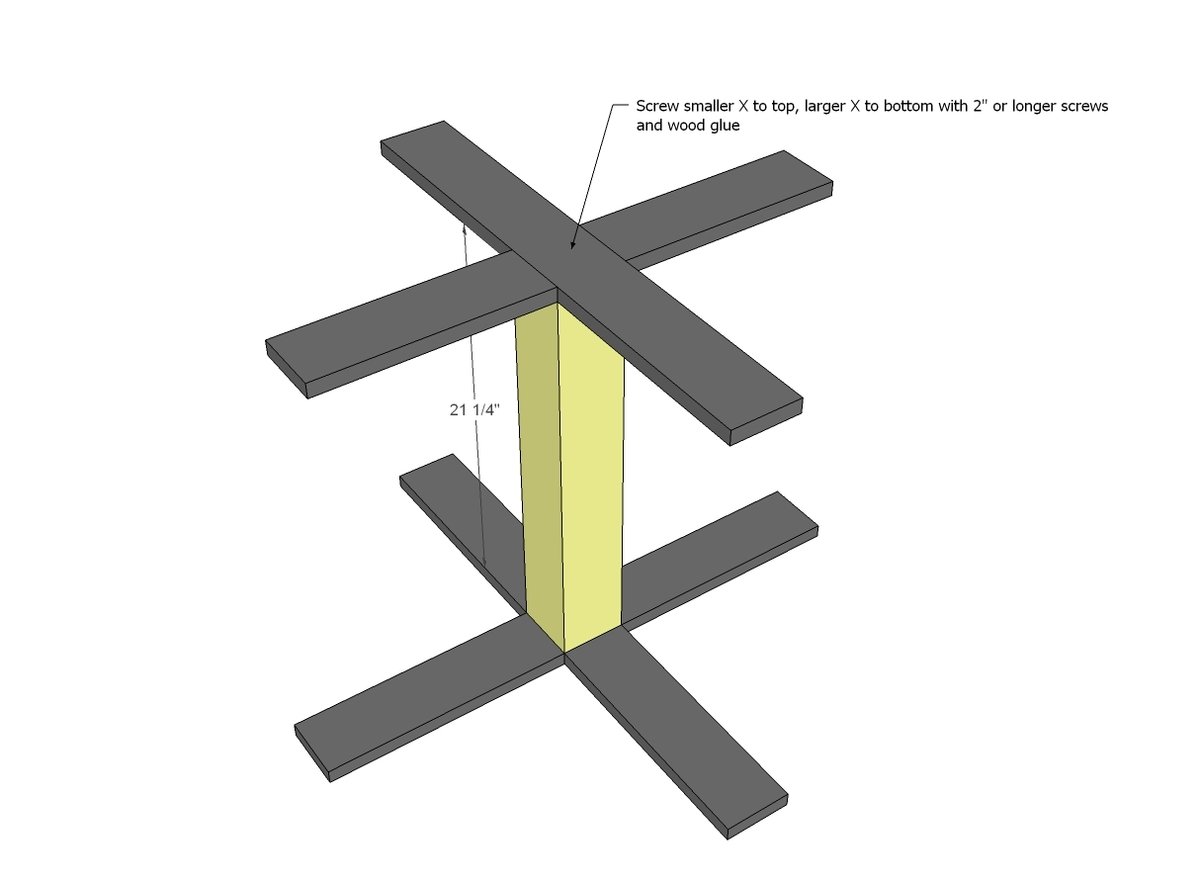
- 1 - 4x4 @ 21 1/4”
- 8 - 4x4 @ 13” (longest point measurement, both ends cut at 45 degrees off square not parallel)
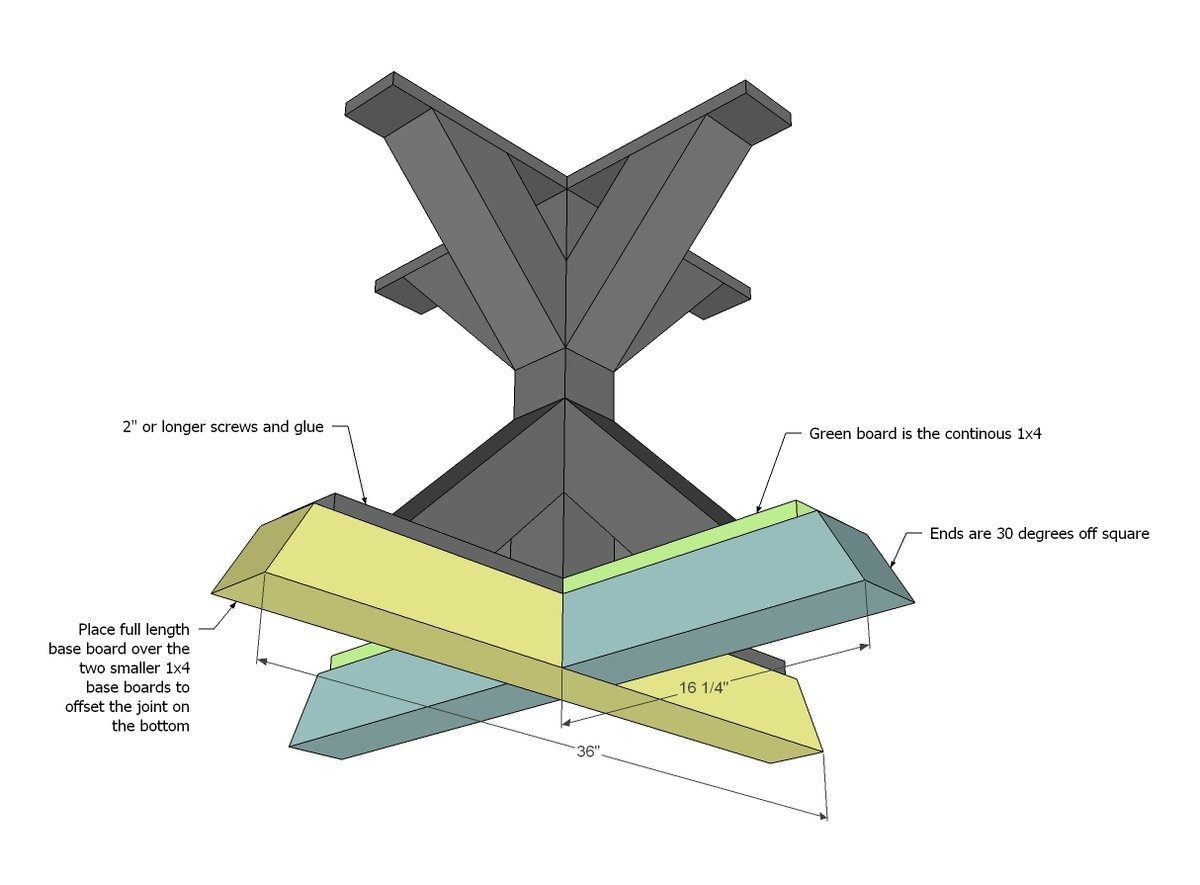
- 1 - 4x4 @ 36” (longest point measurement, both ends cut at 30 degrees off square not parallel)
- 2 - 4x4 @ 16 1/4” (longest point measurement, one end cut at 30 degrees off)
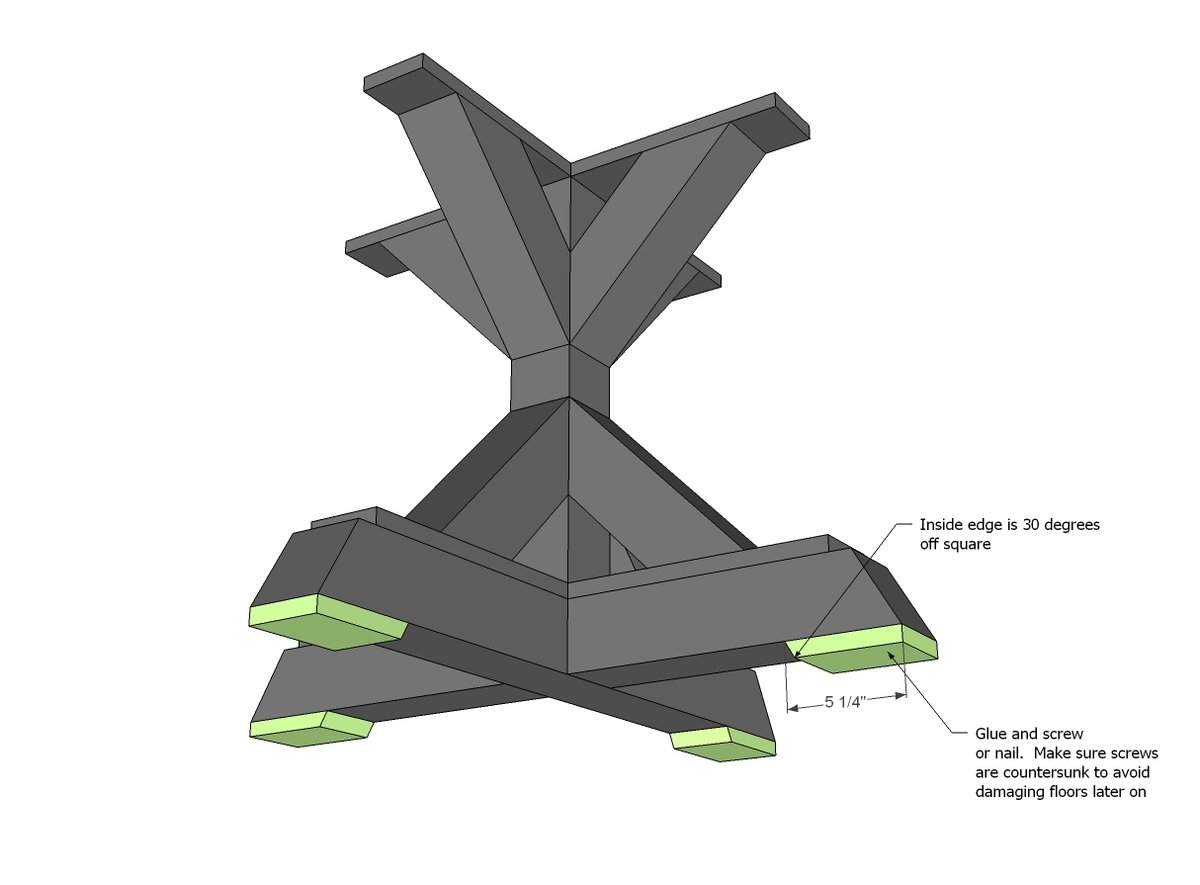
- 4 - 1x4 @ 5 1/4” (one end cut at 30 degrees off square, longest point measurement)
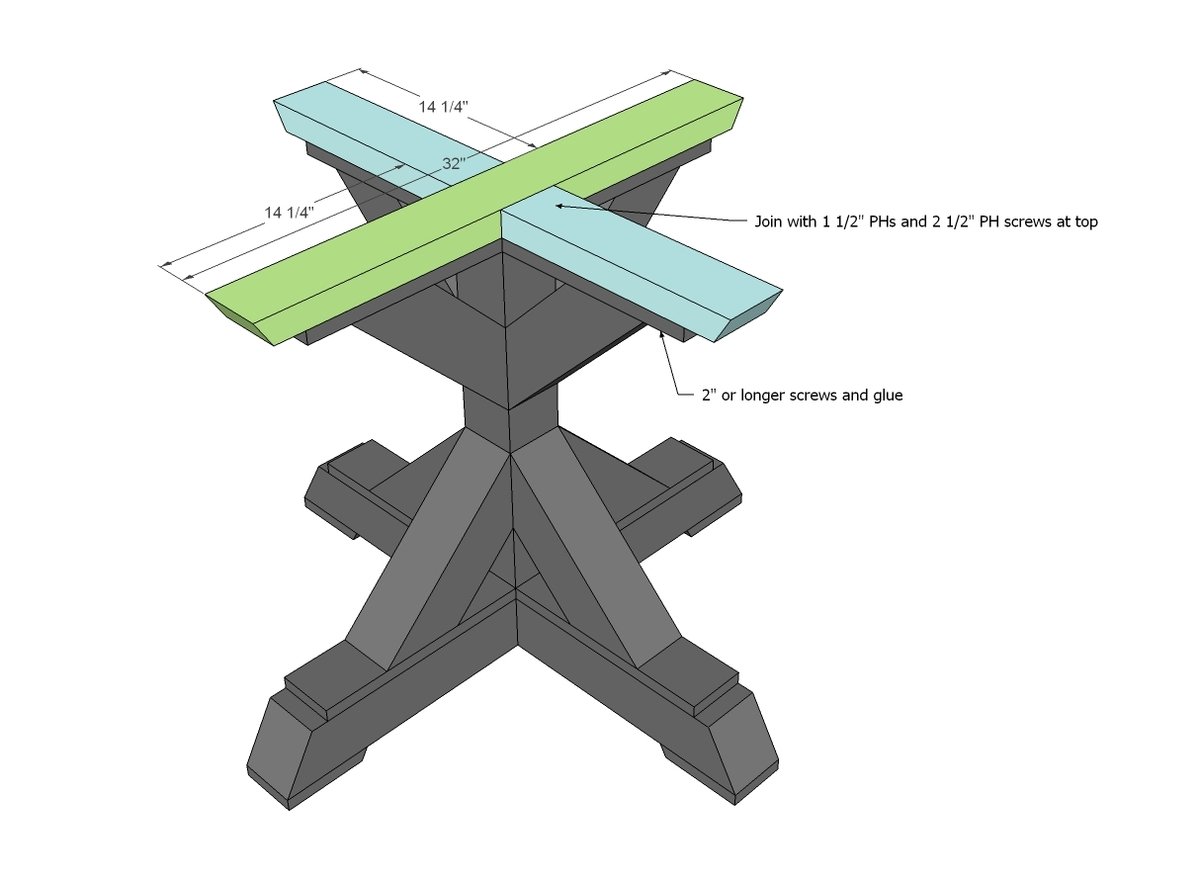
- 2 - 2x4 @ 14 1/4” (one end cut at 30 degrees off square, longest point measurement)
- 1 - 2x4 @ 32” (both ends cut at 30 degrees off square, longest point measurement, ends NOT parallel)
- TOP is cut to fit
Tools
- measuring tape
- square
- pencil
- safety glasses
- hearing protection
- kreg-jig
- drill
- compound miter saw
- sander
- countersink drill bit
Step-by-step Instructions
Step 1
Start by building two Xs with your Kreg Jig
Step 2
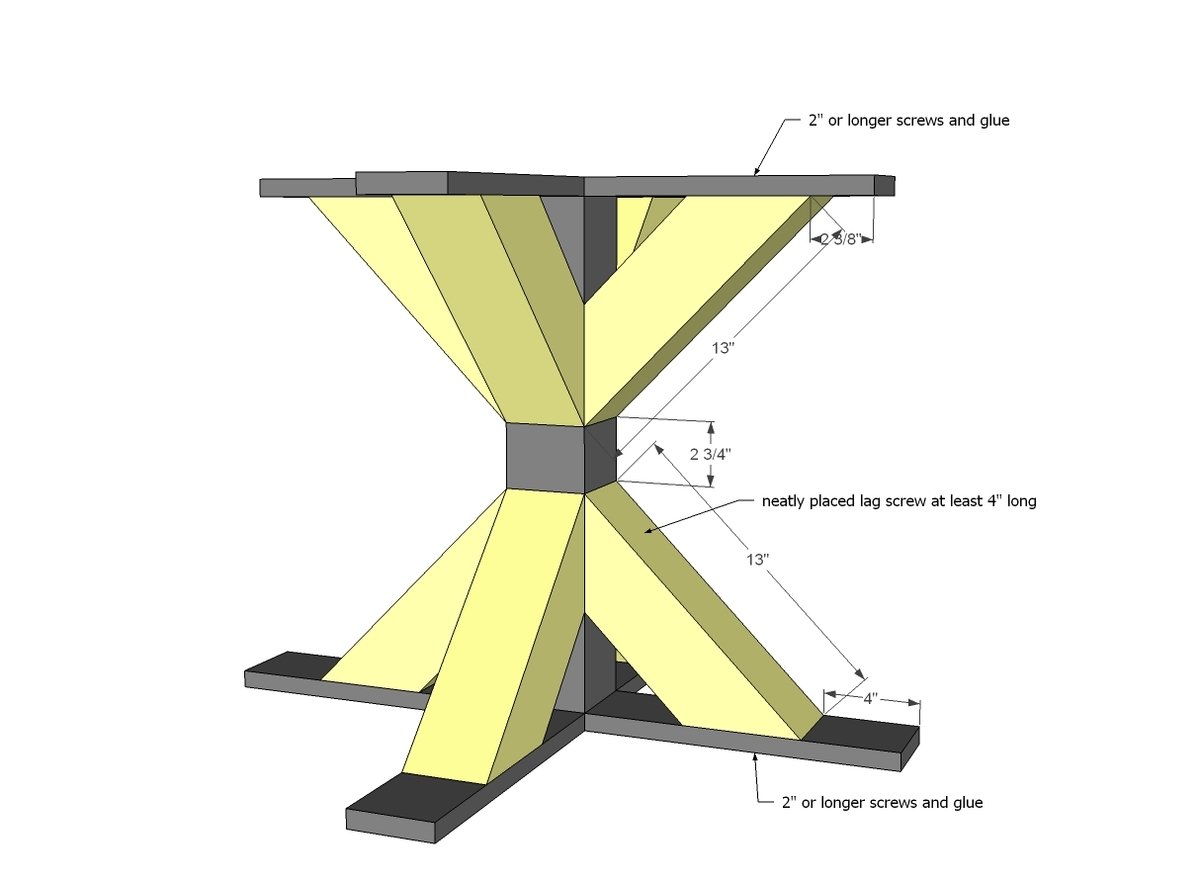
Then attach the Xs to the middle post - don't worry if things feel a little wobbly here, the X bracing will take care of that.
Step 3
Add the X bracing.
To the base, add the 4x4s.
If you feel the base of this X isn't stable enough, you can throw a few countersunk screws in on the underside, or even a metal mending plate and screws - it'll be hidden.
Step 5
The feet on the bottom of the table help the table rest on points (so it doesn't rock). Attach with brad nails and glue. We also recommend felt pads to prevent floors from scratching.
Step 6
Now back to the top, add the 2x4 X and that's the base done!
Step 7
For the top you could simply place a premade tabletop on or just a square one, but we decided to try something a little different. Definitely cut these pieces as you go!
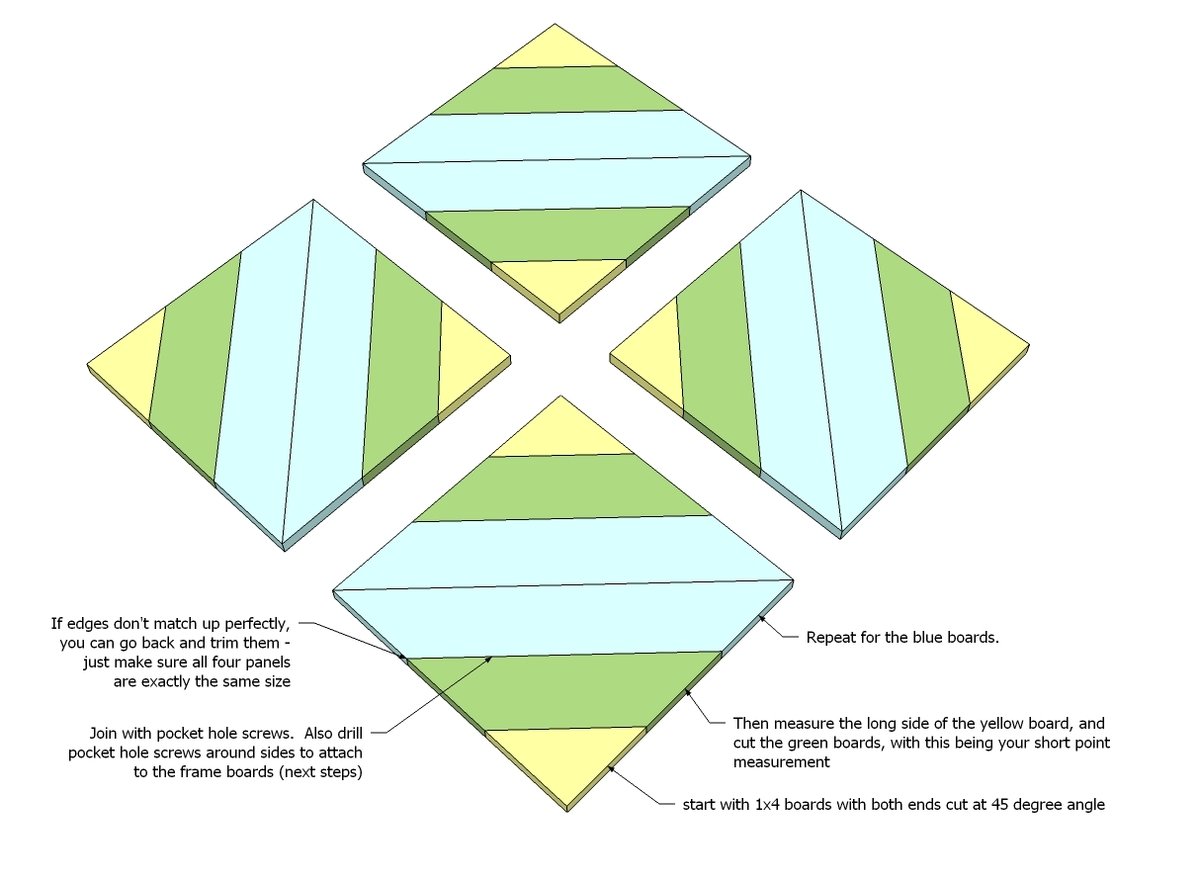
Step 8
Then attach two portions to center 2x4s - measure and cut to fit
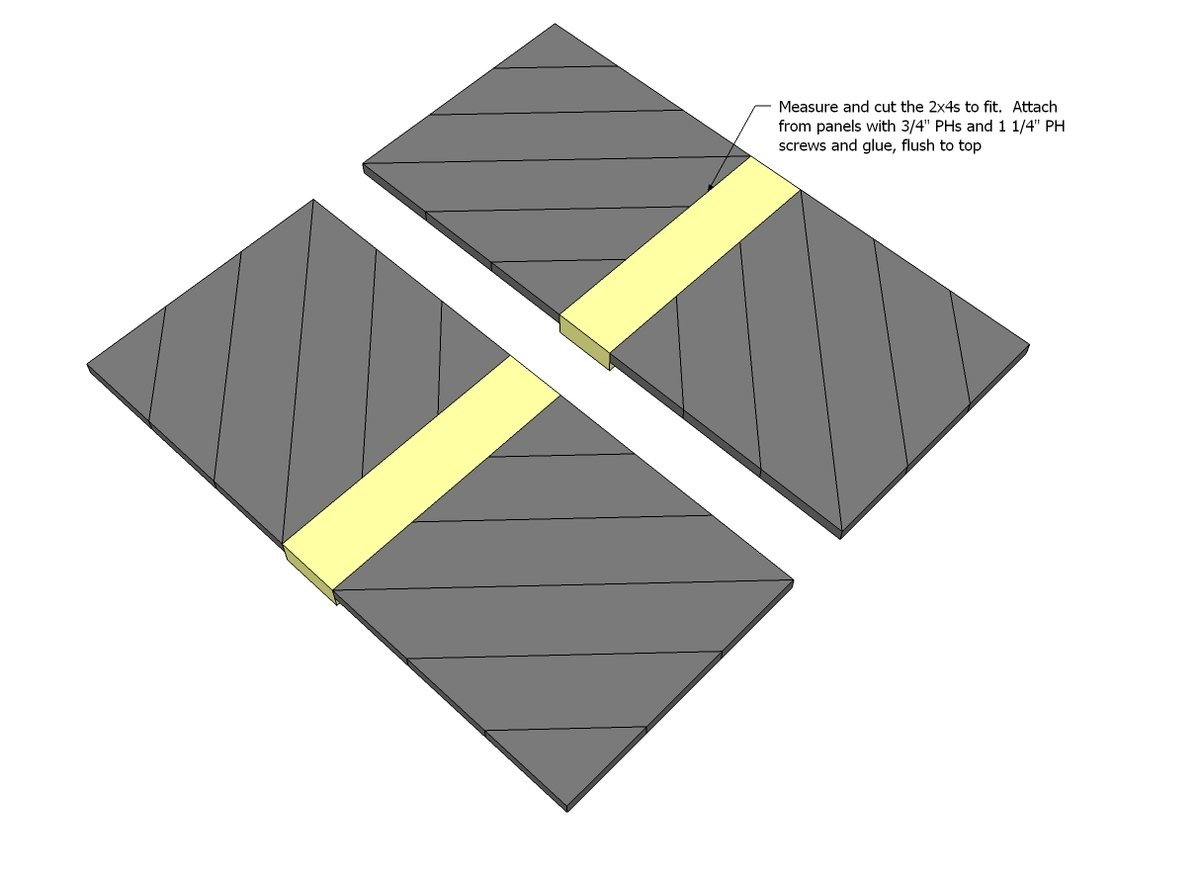
Step 9
then measure and cut to fit the last 2x4 and add to center
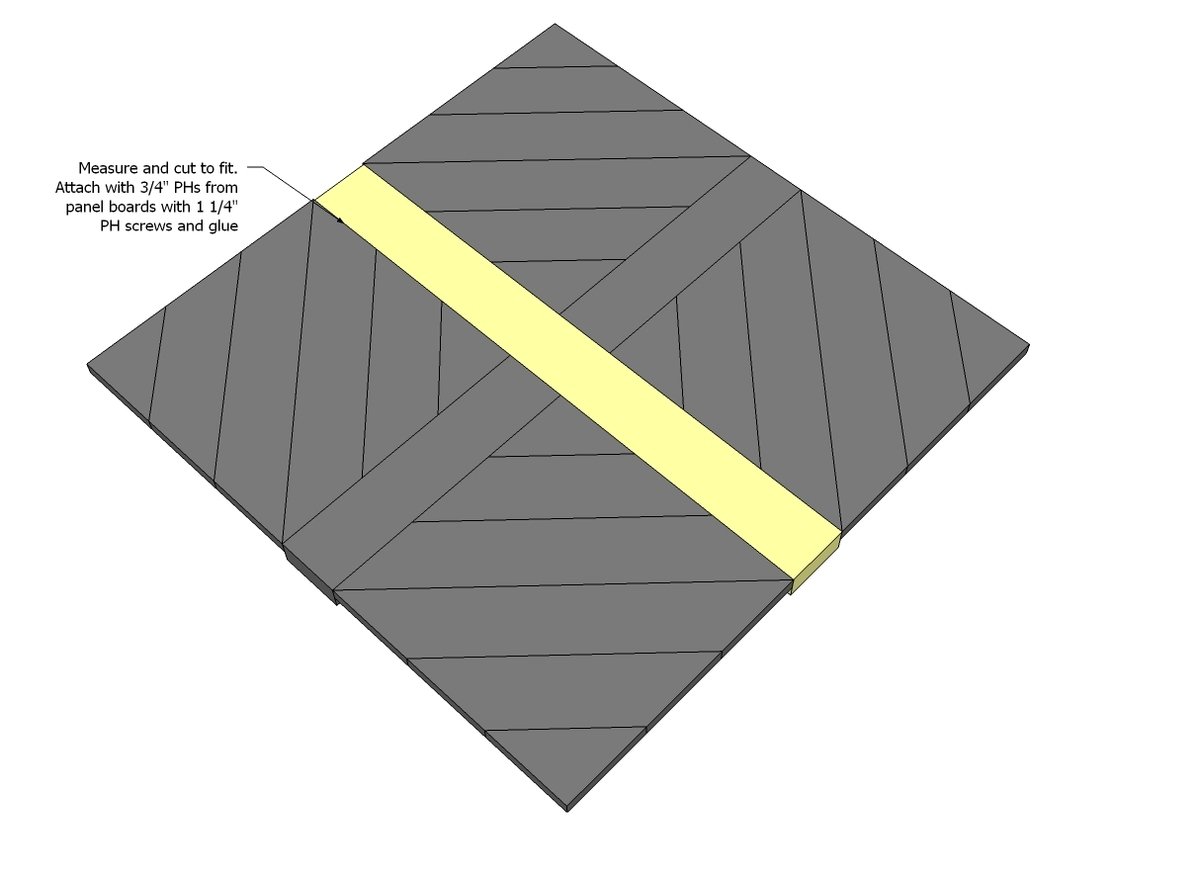
Step 10
Outside boards are 2x6 - frame with mitered corners.
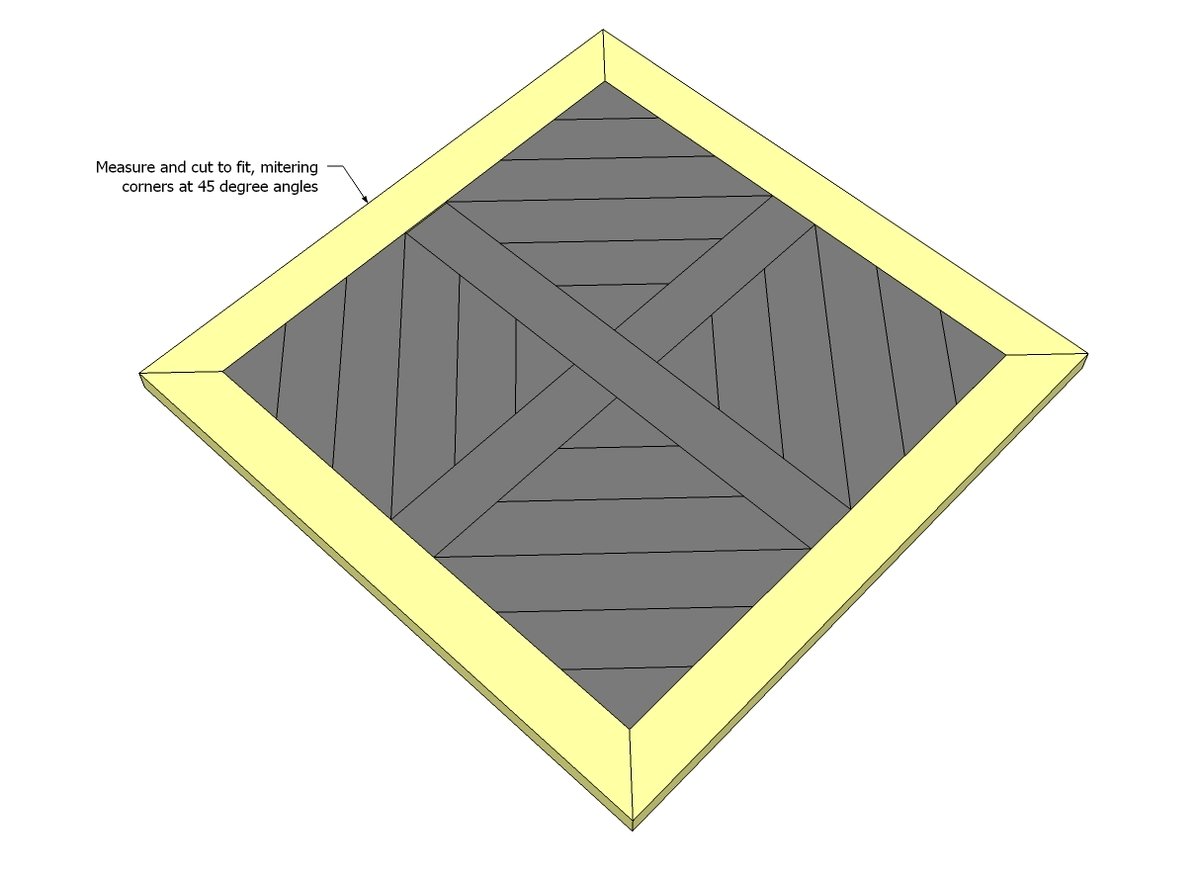
Step 11
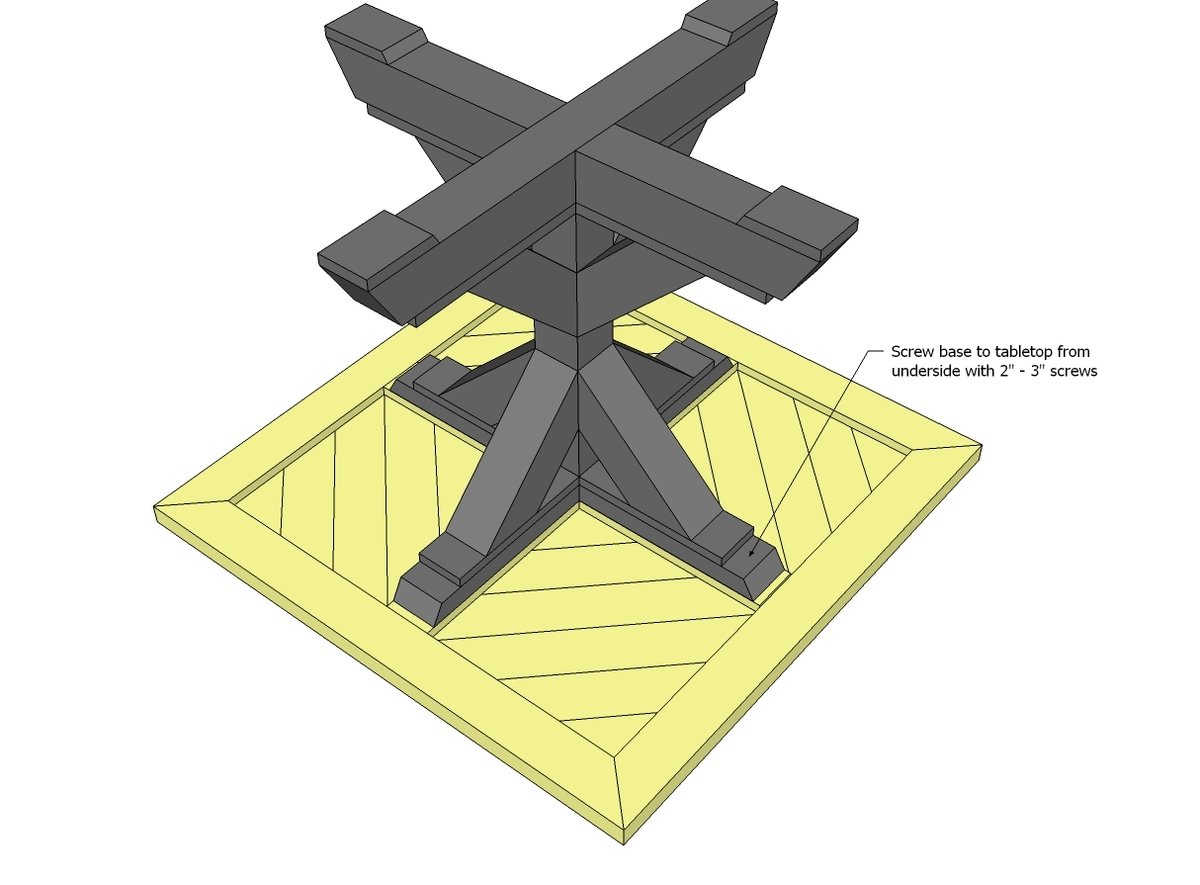
Attach tabletop to base with screws
Finishing
Sand all surfaces, starting with a medium grit and finishing with fine. Wipe off the dust, fill any holes or gaps with wood filler, and sand smooth once dry. Apply primer if you're painting, then finish with your choice of paint or stain and seal with a durable clear topcoat. For outdoor projects, use exterior-rated primer, paint or stain, and sealer so the piece stands up to the weather.
Source (temporary): https://www.ana-white.com/woodworking-projects/4x4-x-base-pedestal-dining-table-planked-wood-top