5x5 Storage Cubbies
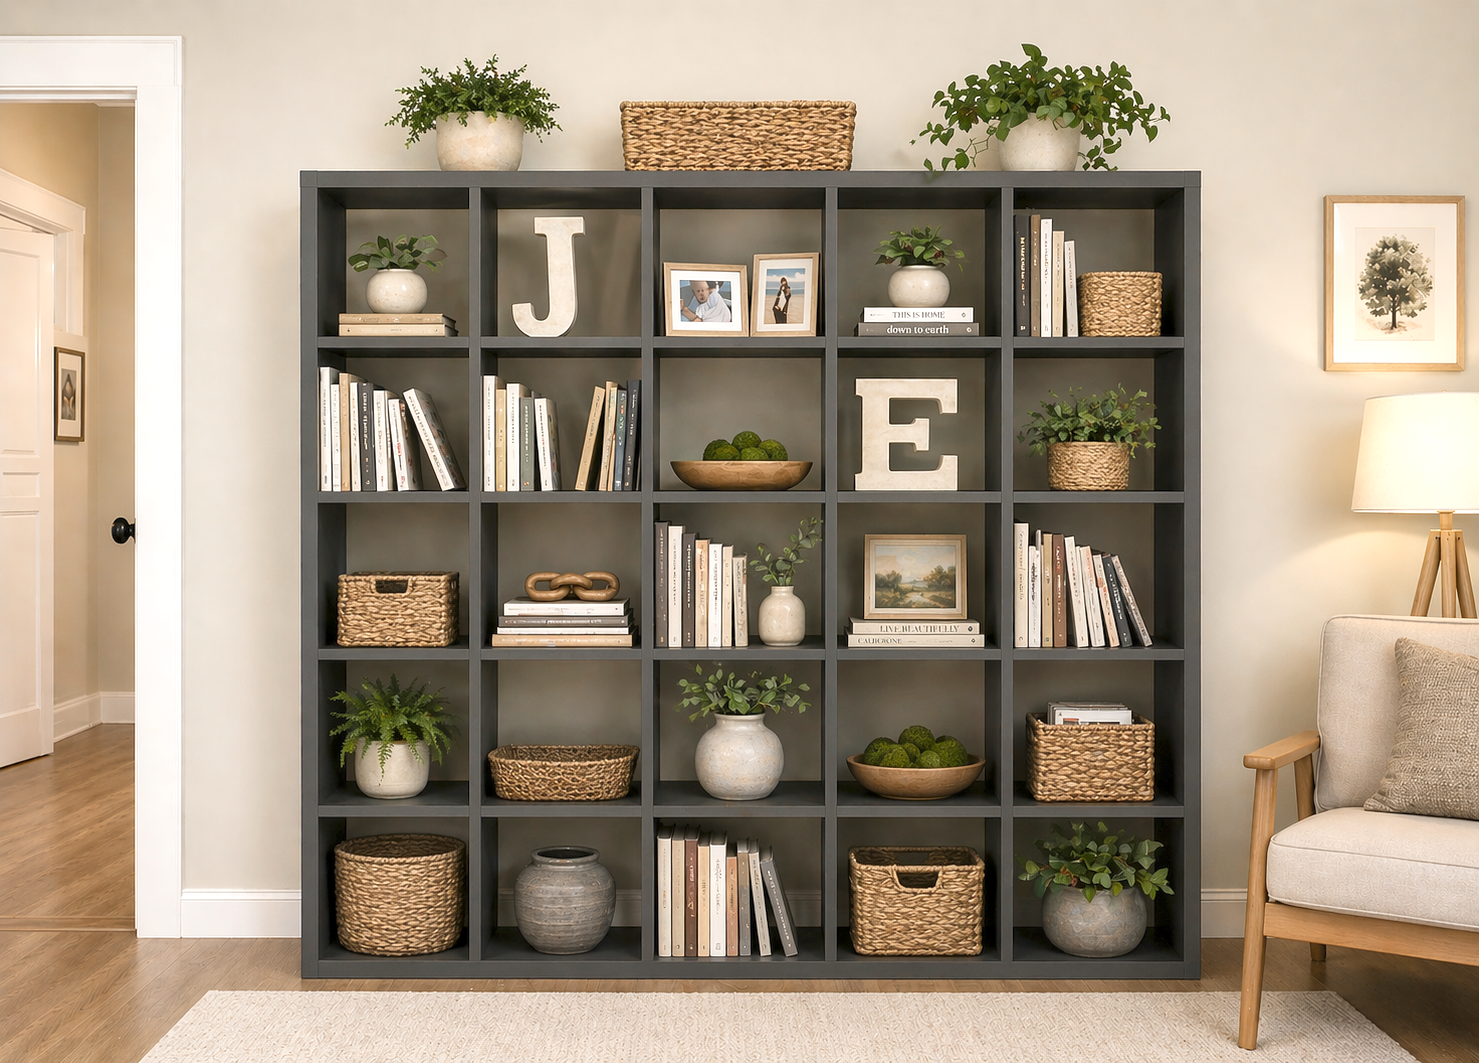
Build your own giant cube organizer from.
Specifications
| Project type | Bookshelf and Bookcase Plans |
|---|---|
| Room | Storage Solutions |
| Style | Modern Style Furniture Plans |
| Difficulty | Intermediate |
| Estimated cost | $150 - $200 |
Dimensions
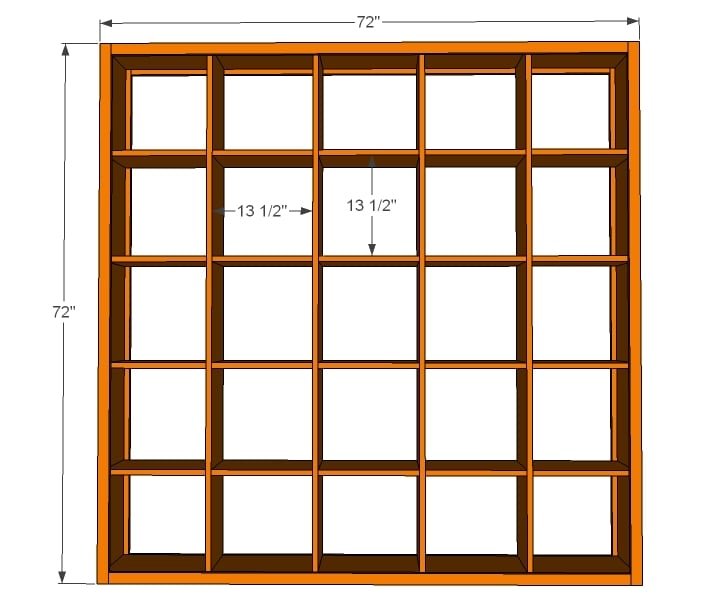
Use the size-specific shopping and cut lists below.
Shopping List
- 12 – 1x12 @ 6 feet long OR 8 1x12 @ 10 feet long
- 10 – 1x2 @ 6 feet long
- 100 - 1 1/4” pocket hole screws
- 1 1/4” brad nails
- Wood glue
Cut List
- 2 – 1x12 @ 70 1/2”
- 4 – 1x12 @ 69 3/4”
- 2 – 1x12 @ 72”
- 2 – 1x2 @ 70 1/2”
- 20 - 1x12 @ 13 1/2”
- 4 – 1x2 @ 69”
- 4 – 1x2 @ 72”- cut to fit
Tools
- measuring tape
- square
- pencil
- safety glasses
- hearing protection
- kreg-jig
- drill
- circular saw
- nailer
- sander
Step-by-step Instructions
Step 1
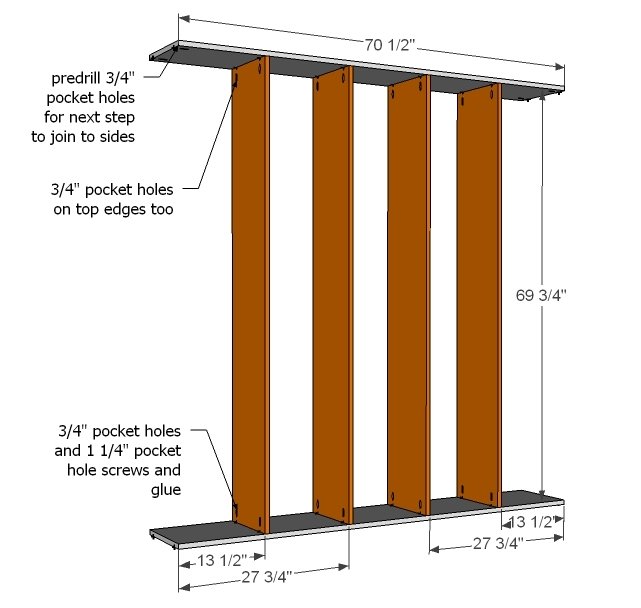
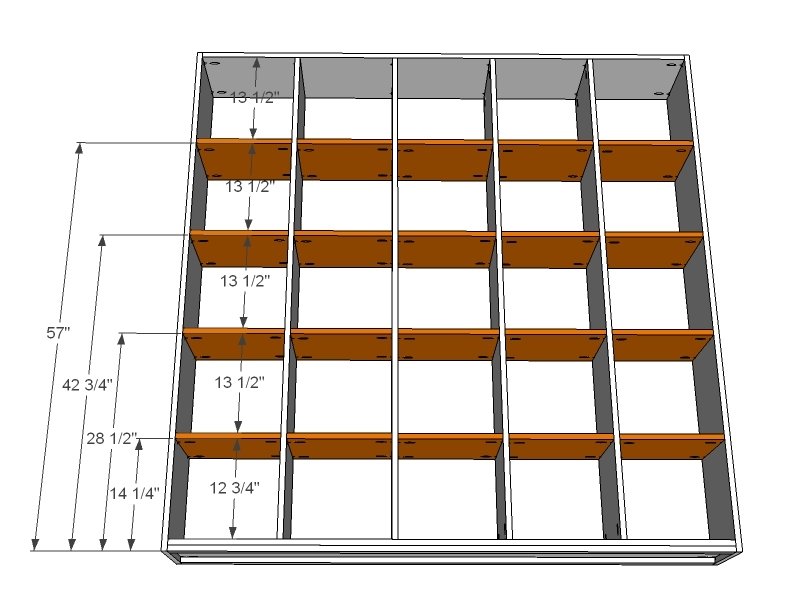
Make sure you have a flat workspace at least six feet by six feet for building this bookshelf. Make all large cuts first, followed by smaller cuts. Drill all pocket holes prior to assembly. Use glue on all joints. Mark top and bottom boards as shown in diagram, carefully measuring to make sure there is a 13 ½” gap between all shelves. Also drill pocket holes on both ends of top and bottom prior to assembly. It will be difficult to drill pocket holes once attached to the project.
Step 2
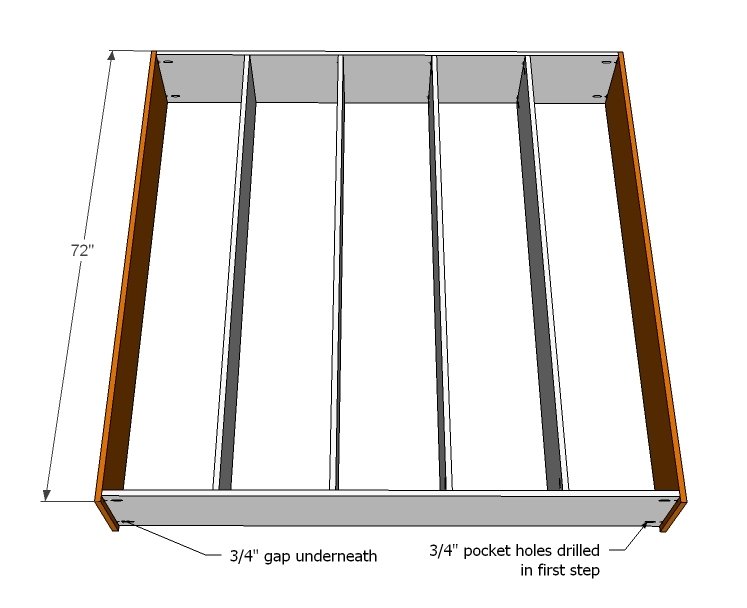
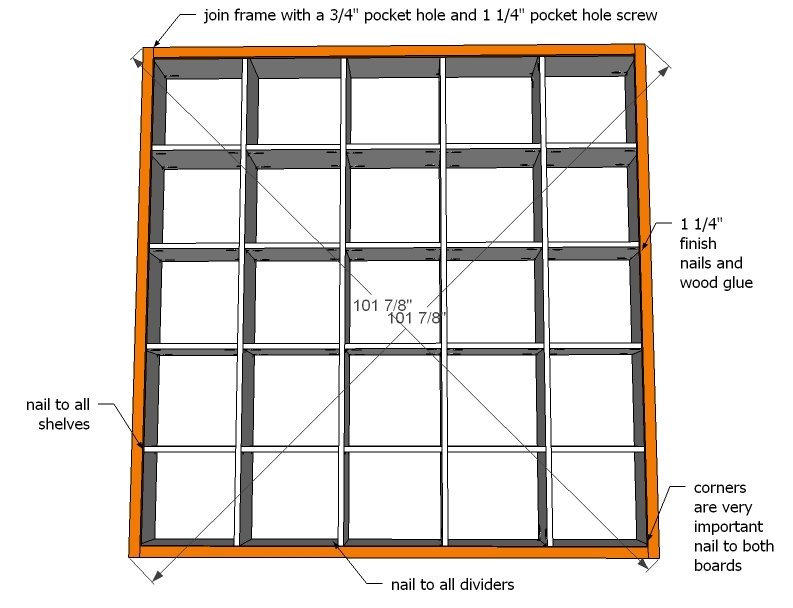
Attach sides to the sides, using 1 1/4” pocket holes and glue. Adjust the entire project for square by taking a diagonal from opposite outside corners, ensuring both diagonals match in length (see last step).
Step 3
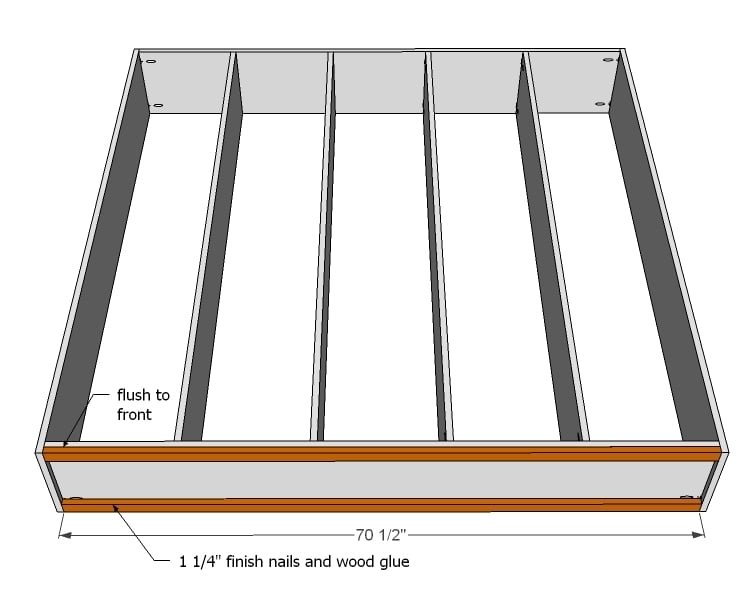
Use 1 1/4” finish nails and glue to attach bottom support trim to bottom. Also nail through the sides into ends for additional support.
Step 4
Drill 3/4” pocket holes on each end of each shelf. Mark shelf locations on all sides and upright boards. Attach shelves with 1 1/4” pocket hole screws and wood glue. TIP: Alternate drilling pocket holes offset on each end so screws do not line up exactly when you go to place shelves. IF you do have a situation where screws bump into each other, just drill another pocket hole offset.
Step 5
Finishing
Sand all surfaces, starting with a medium grit and finishing with fine. Wipe off the dust, fill any holes or gaps with wood filler, and sand smooth once dry. Apply primer if you're painting, then finish with your choice of paint or stain and seal with a durable clear topcoat. For outdoor projects, use exterior-rated primer, paint or stain, and sealer so the piece stands up to the weather.
Source (temporary): https://www.ana-white.com/woodworking-projects/5x5-storage-cubbies