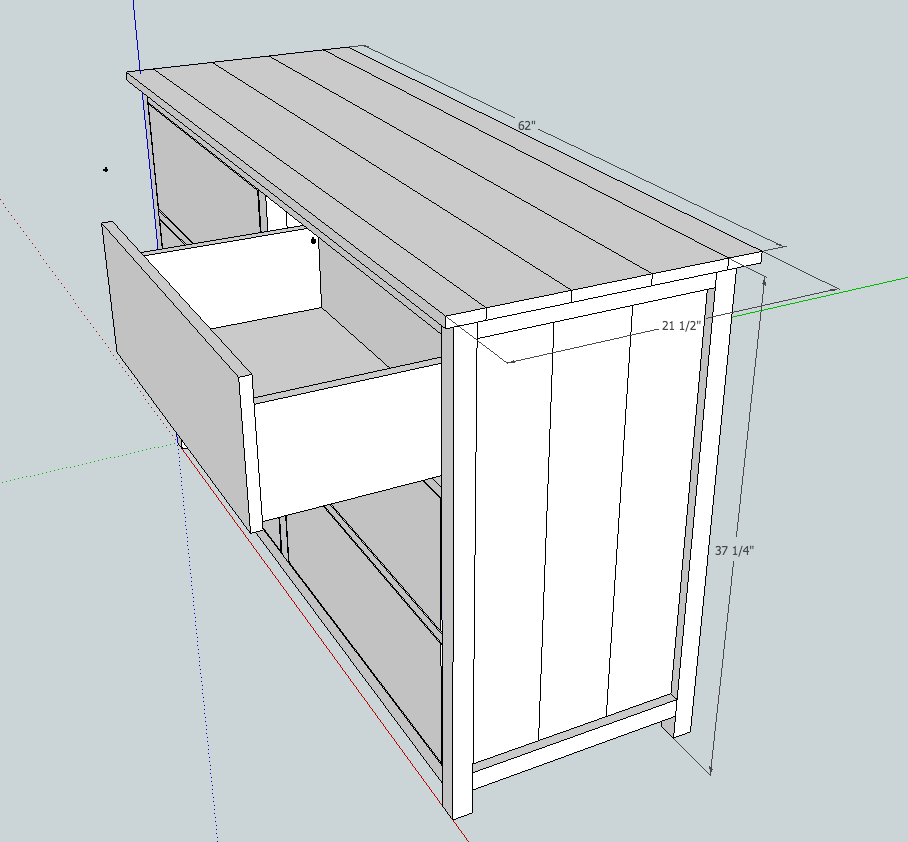
6 Drawer Bedroom Dresser
This dresser was inspired by the bedside table I loved the table but wanted to have a couple of dressers to fill in my bedroom. So I went on to create my own plan to complement the design and look of the night table.
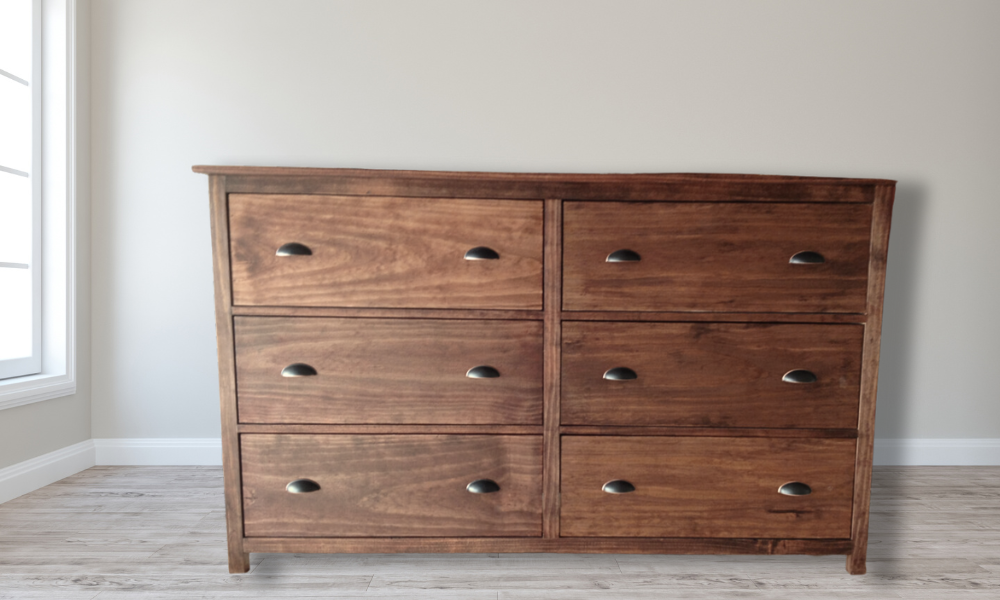
Specifications
| Project type | Dresser Plans |
|---|---|
| Room | Bedroom |
| Difficulty | Advanced |
| Estimated cost | $150 - $200 |
Tools
- measuring tape
- square
- pencil
- safety glasses
- kreg-jig
- drill
- table saw
- staple gun
- Iron
Step-by-step Instructions
Step 1
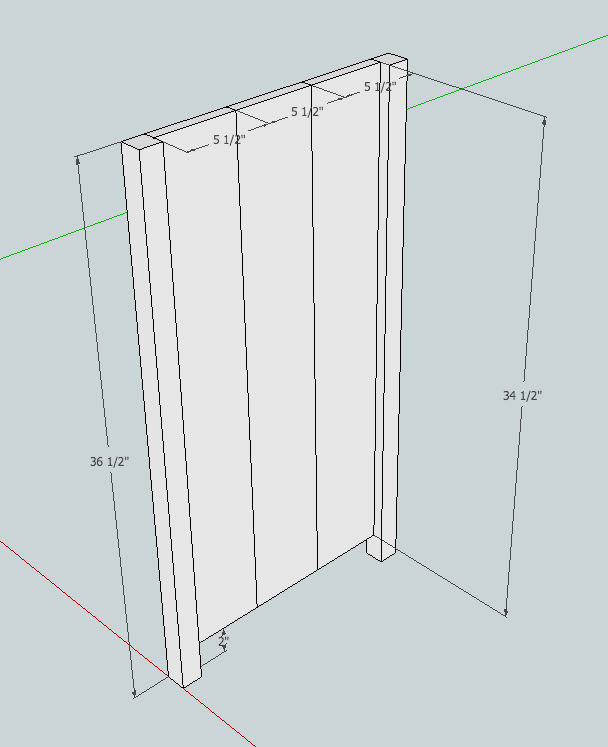
Side panel(s)
Step 2
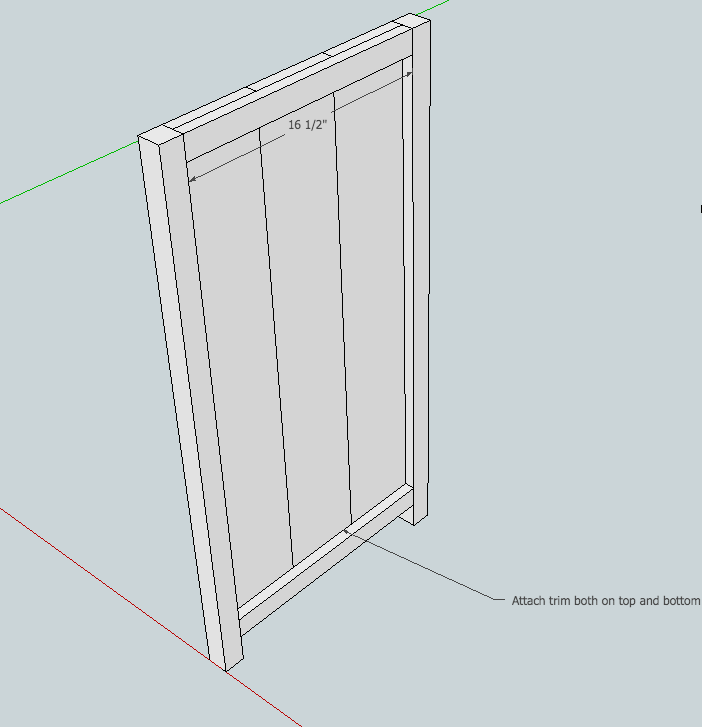
Trim for side panel(s)
Step 3
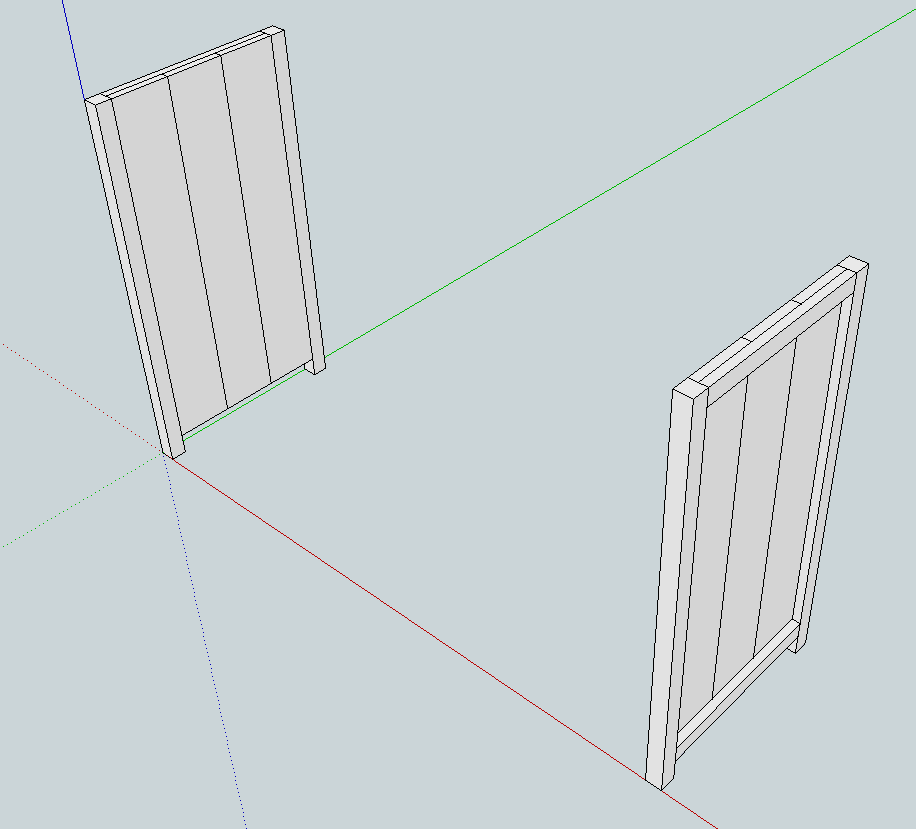
Both panels
Step 4
Attaching frame to panels
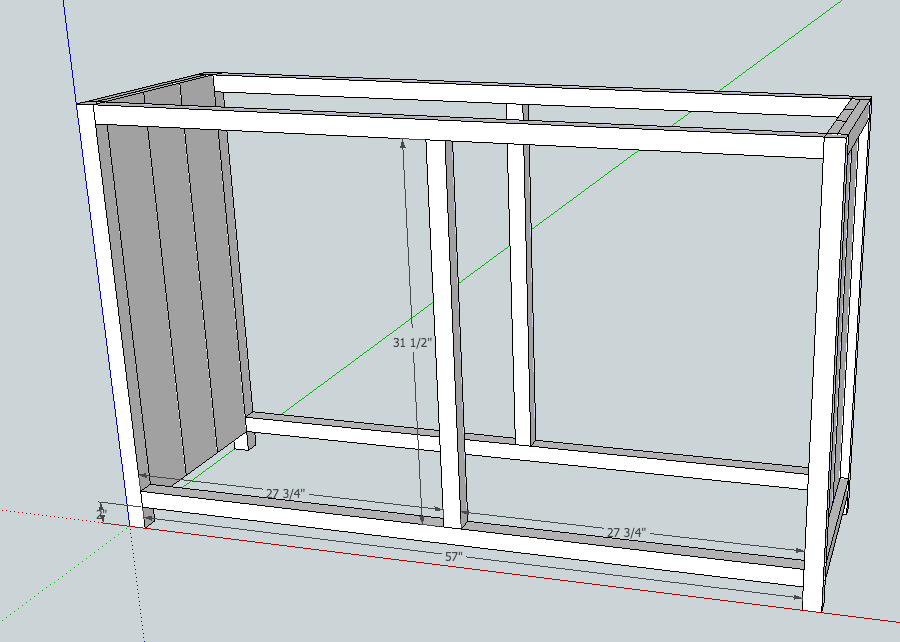
Step 5
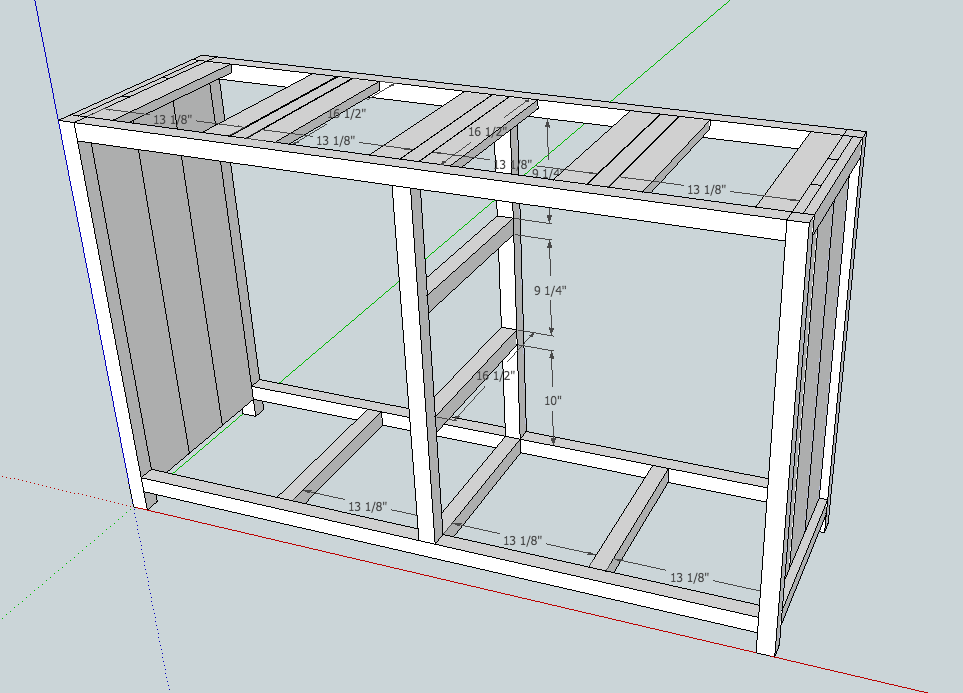
Step 6
Drawer front dividers
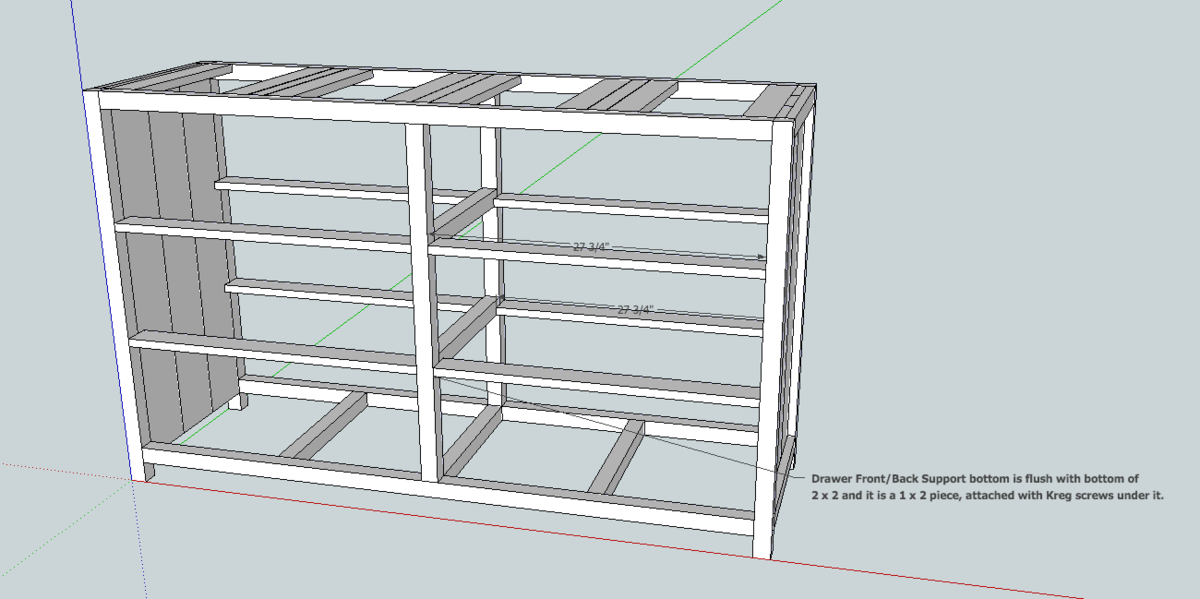
Step 7
Top view (no extra step)
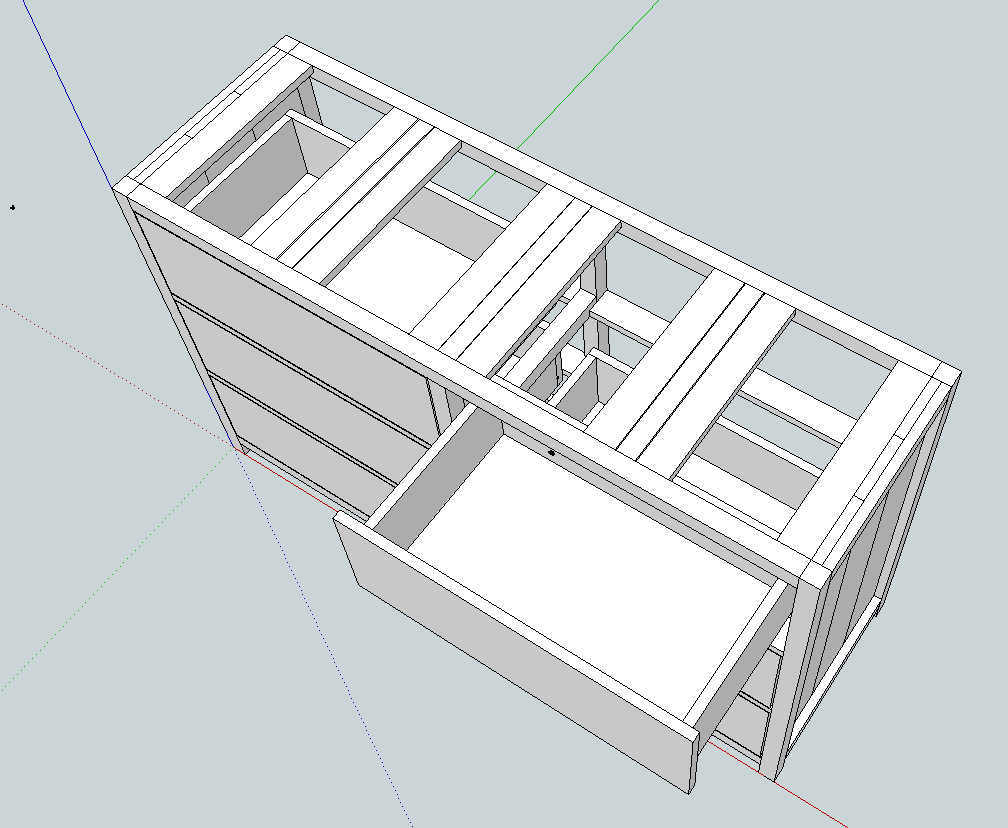
Step 8
Top plank attachment
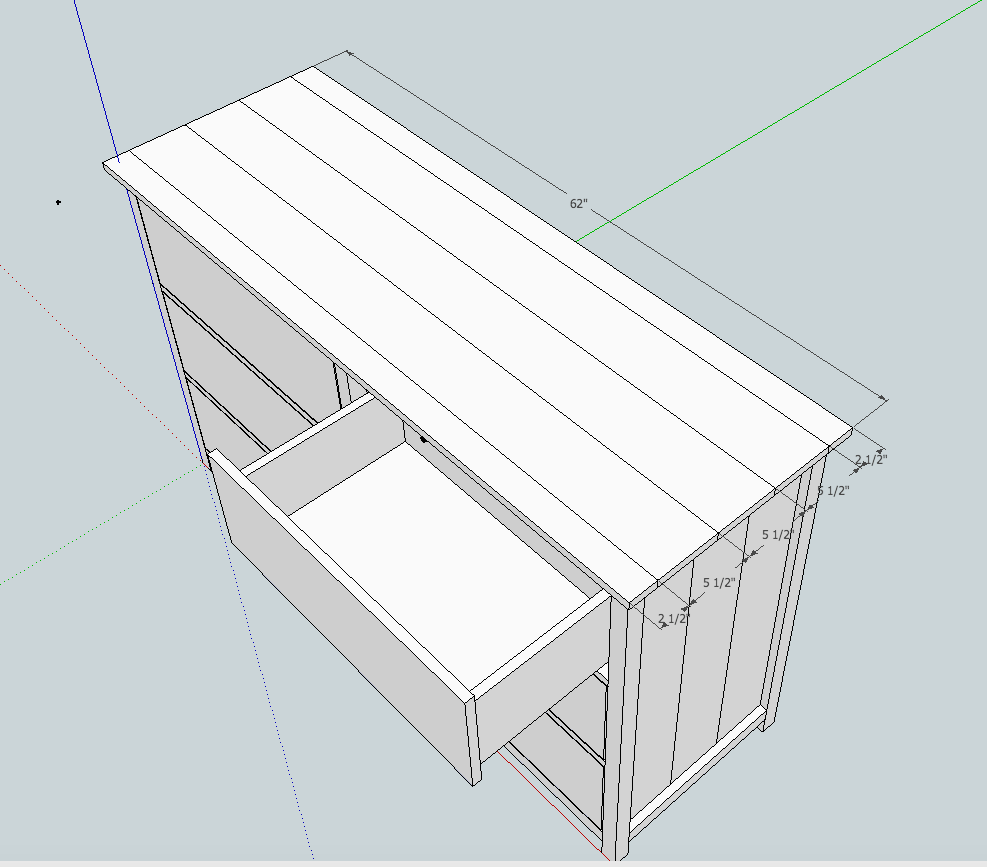
Step 9
Back panel
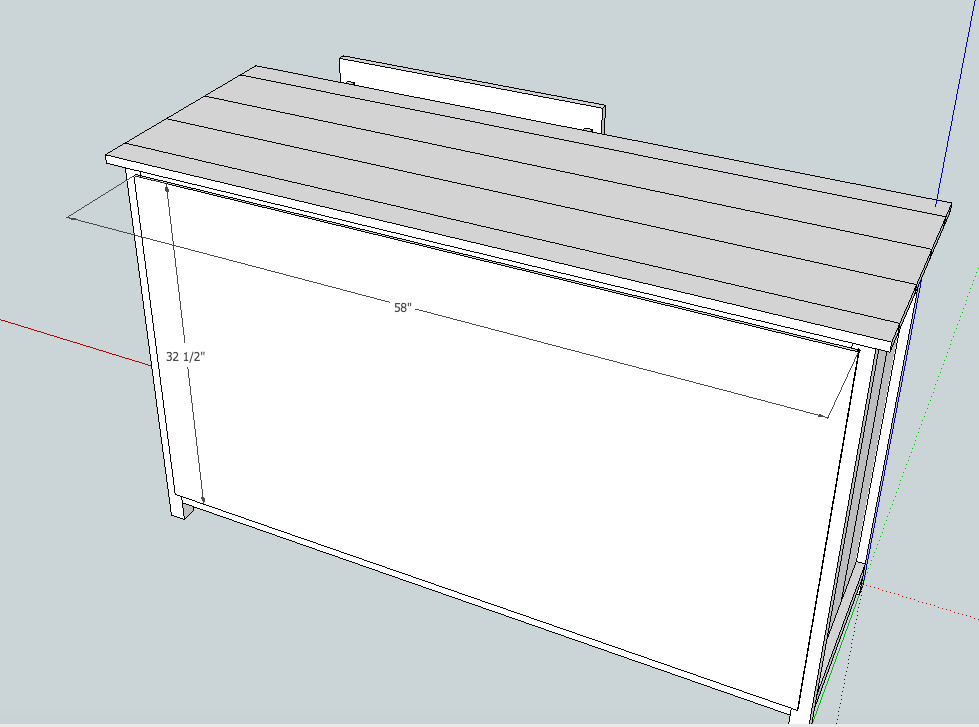
Step 10
Drawer construction. I used birch tape to finish the narrow edges of each drawer, which makes it look more professional.
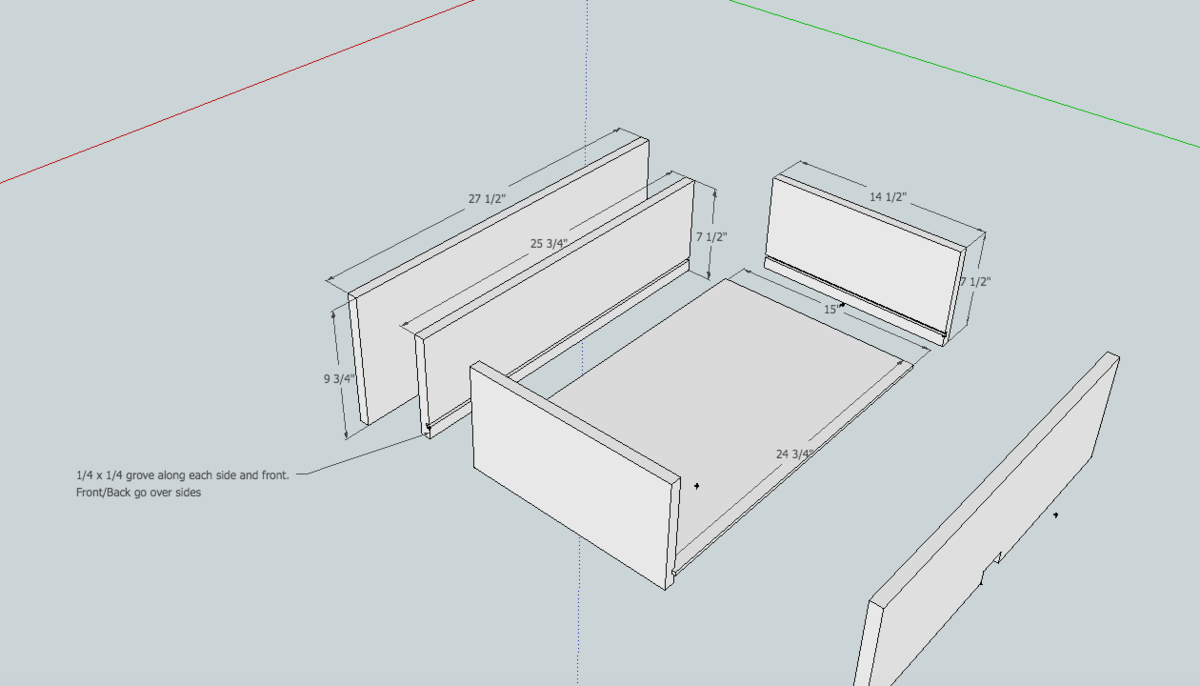
Step 11
Finished drawer assembly
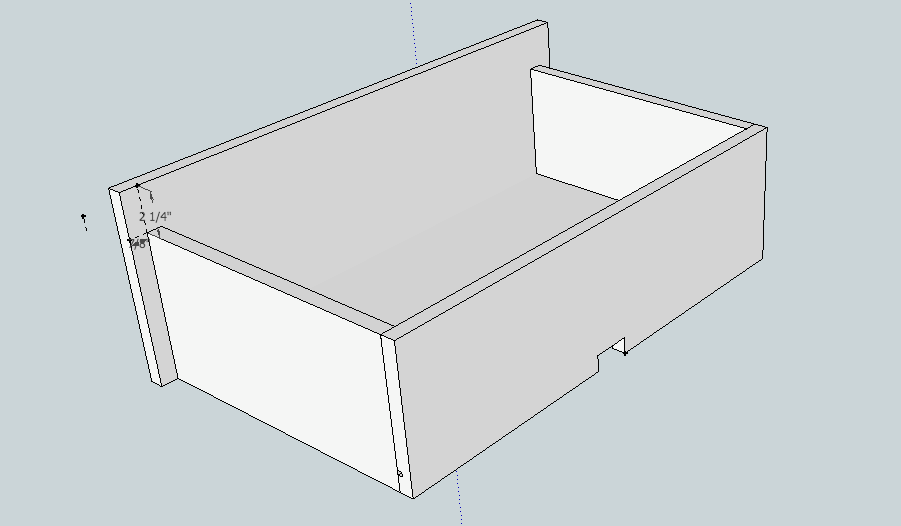
Step 12
Finished product
Finishing
Sand all surfaces, starting with a medium grit and finishing with fine. Wipe off the dust, fill any holes or gaps with wood filler, and sand smooth once dry. Apply primer if you're painting, then finish with your choice of paint or stain and seal with a durable clear topcoat. For outdoor projects, use exterior-rated primer, paint or stain, and sealer so the piece stands up to the weather.
Source (temporary): https://www.ana-white.com/woodworking-projects/6-drawer-bedroom-dresser