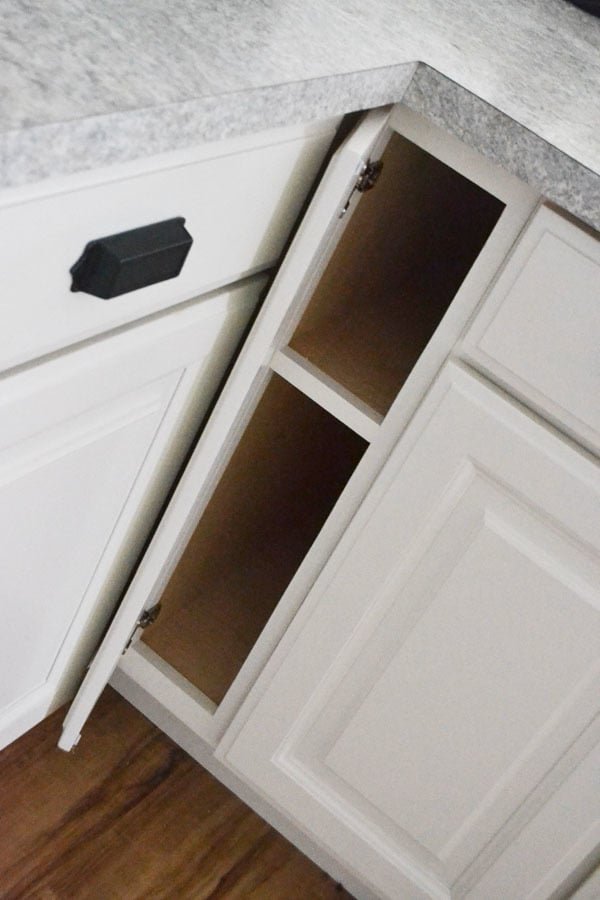
6" Filler Tray Base Cabinet
How to build a 6" filler base cabinet for tray storage - step by step plans from
Specifications
| Project type | Kitchen Cabinet Plan, Accessories and Serving |
|---|---|
| Room | kitchen |
| Difficulty | Intermediate |
| Estimated cost | $20 - $50 |
Dimensions
Use the size-specific shopping and cut lists below.
Shopping List
3/4" plywood ripped into strips 22 1/4" long (for sides and shelves)
3/4" plywood scrap from ripping sides and shelves (for top supports)
3/4" plywood ripped into strips 5" long (for base supports - use cheaper plywood here)
1x2s for face frames (only need about 1 foot)
6 feet of 1x1 hardwood in matching species (we ripped ours on the table saw)
1/4" plywood (for backs)
1-1/4" pocket hole screws
2" wood screws for attaching shelves
3/4" finish nails
edge banding for shelves
2 - 1/2" Overlay Frameless Concealed Hinges
NOTE: We used PureBond Formaldehyde Free Plywood in Prefinished Maple for the interiors of these cabinets and built face frames out of poplar. Then all we had to do was paint the face frame and attach and the enitre cabinet was finished.
Cut List
CARCASS
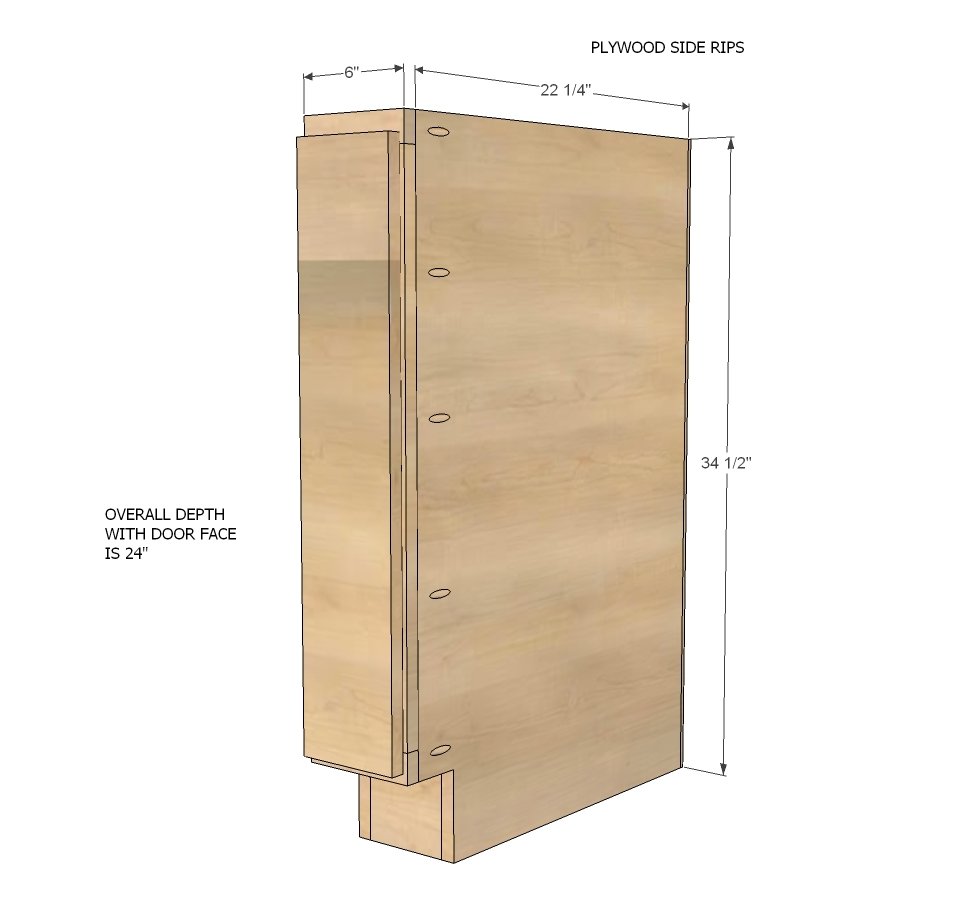
2 - 3/4" plywood @ 22 1/4" x 34 1/2" (side panels)
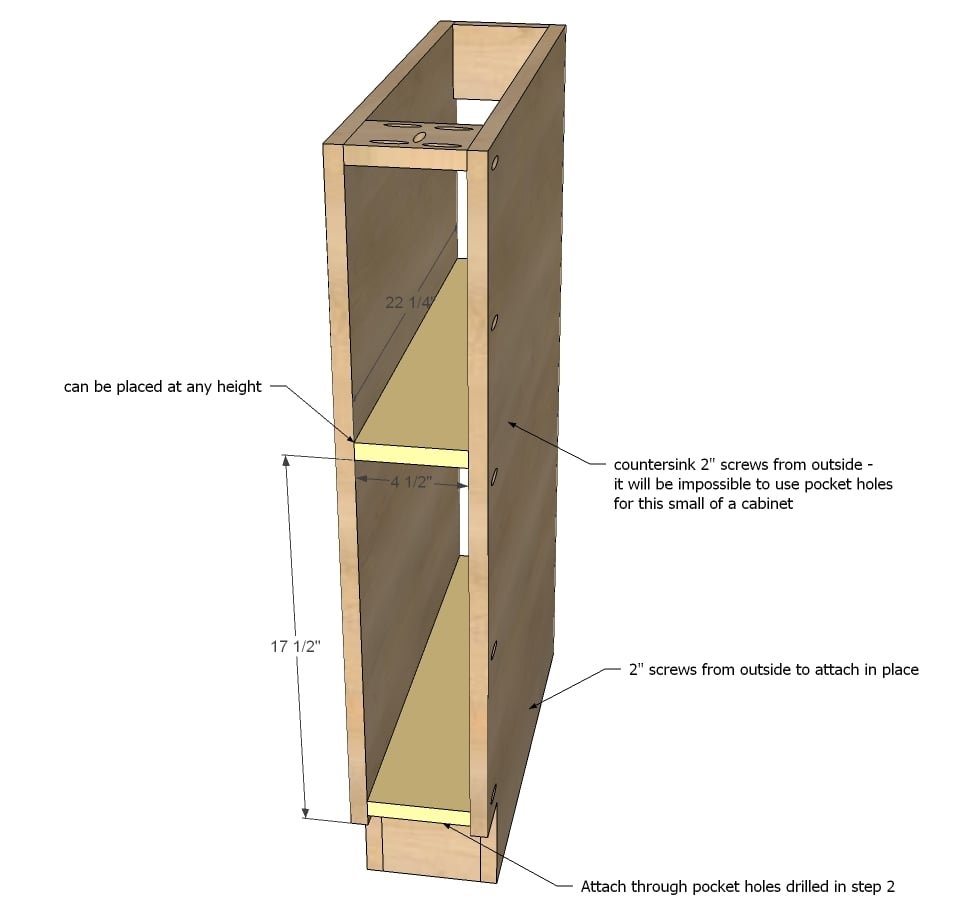
2 - 3/4" plywood @ 22 1/4" x 4-1/2" (bottom shelf and optional center shelf)
2 - 3/4" plywood @ 5" x 4-1/2" (bottom supports)
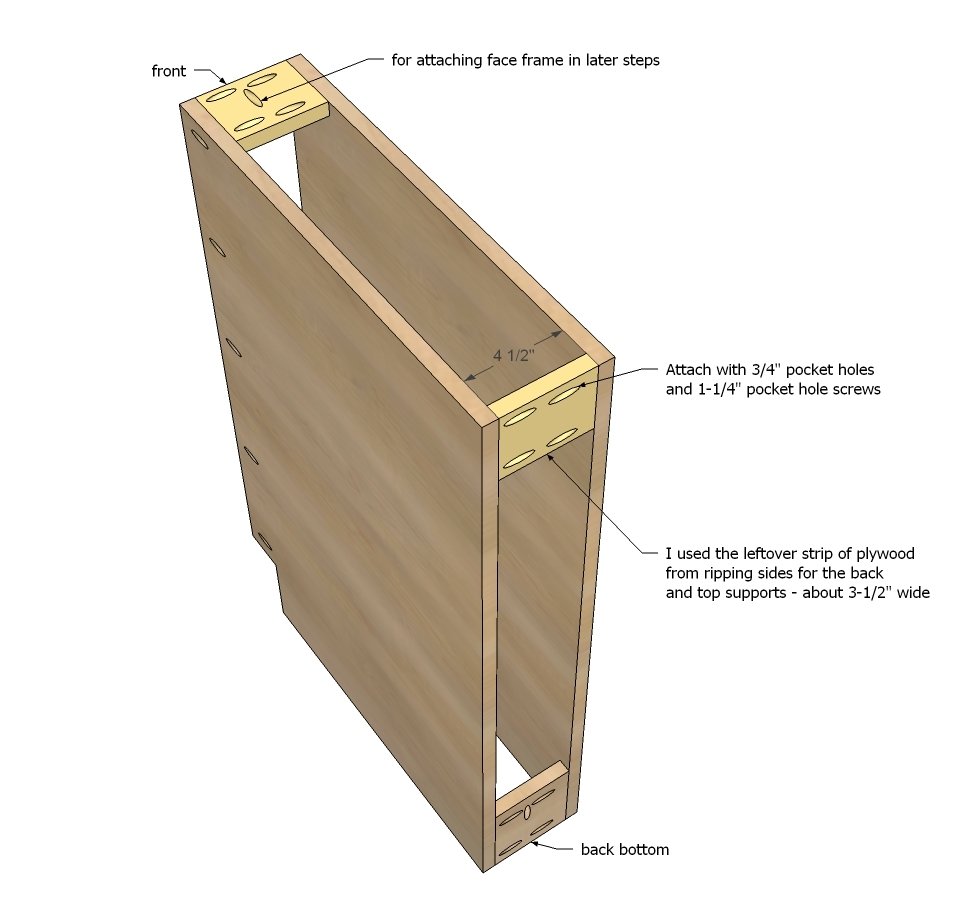
2 - 3/4" plywood @ 3 1/2" (can vary) x 4-1/2" (top supports)
1 - 1/4" plywood @ 32" x 6" (back)
FACE FRAME
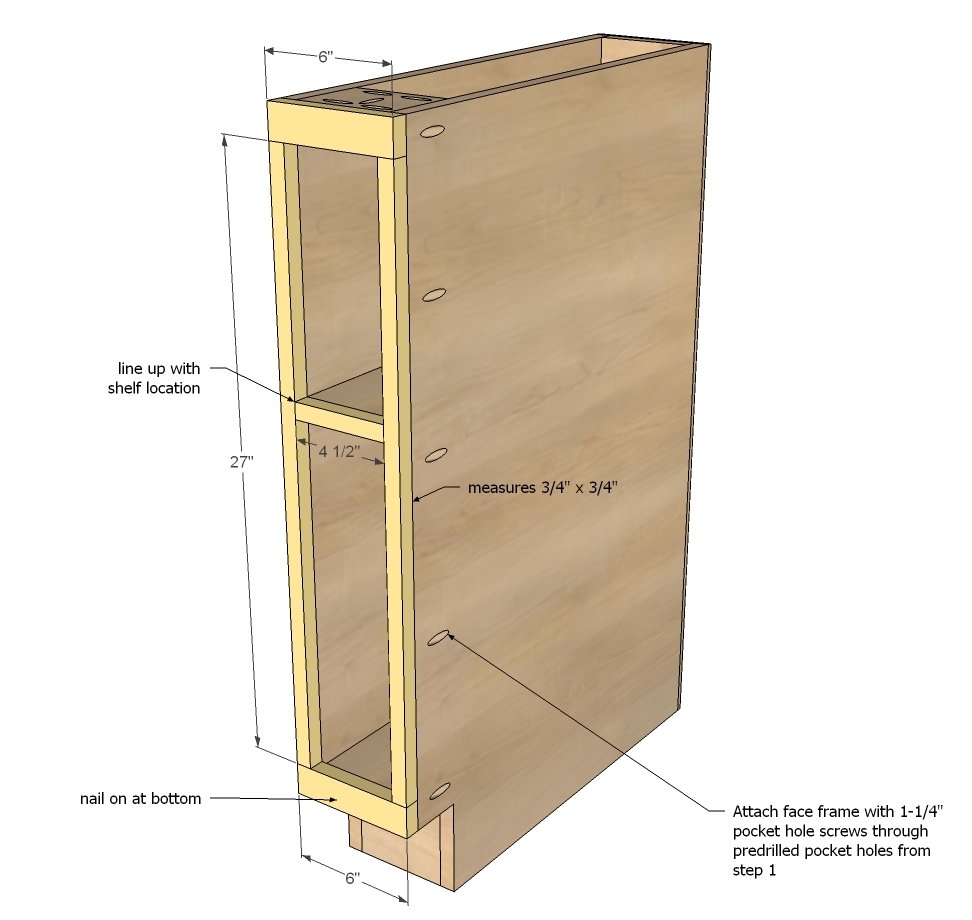
2 - 1x1 @ 27"
2 - 1x2 @ 6"
1 - 1x1 @ 4-1/2"
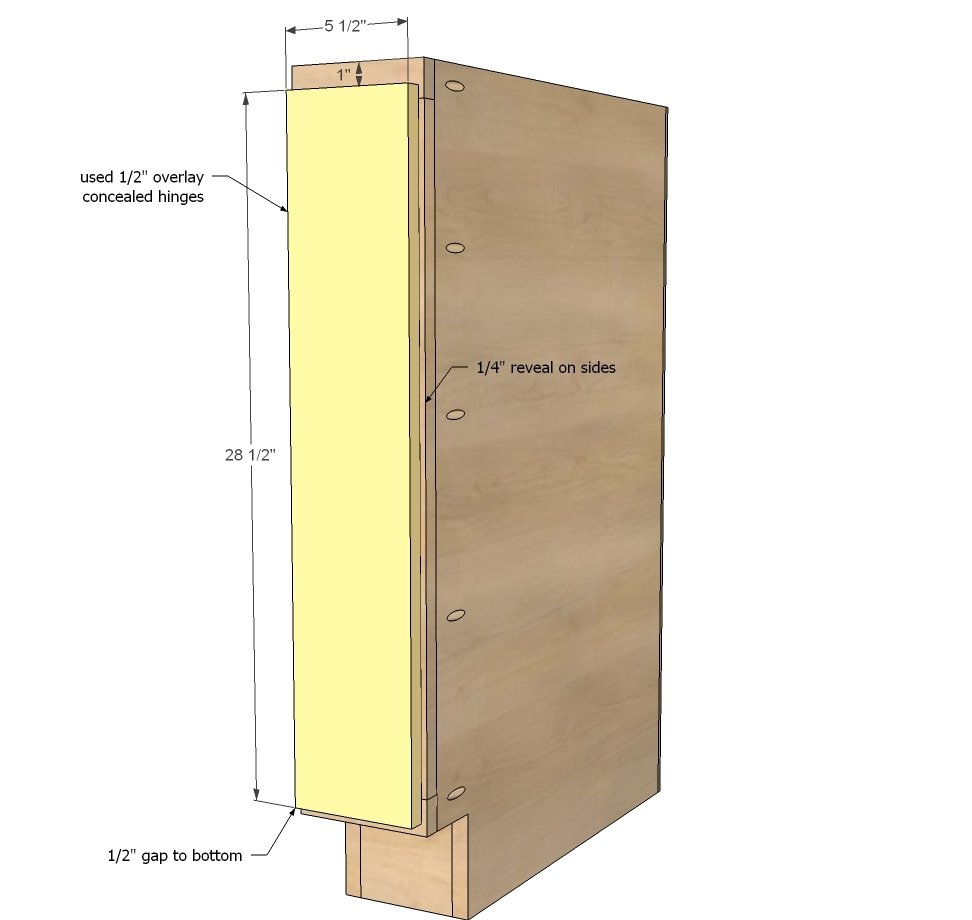
DOOR/DRAWER FACE for 1/2" but appears as FULL OVERLAY (1/2" for this cabinet because the stiles are only 3/4" wide)
5 1/2" x 28 1/2" (drawer face)
NOTE: When ordering doors/drawers, make sure the overall height matches the rest of your cabinets. The goal is 1/2" reveal between all doors/drawer faces with full overlay doors/drawers. On the sides, 1/4" is revealed per cabinet, adding to the total 1/2" reveal.
Tools
- measuring tape
- square
- pencil
- safety glasses
- hearing protection
- kreg-jig
- drill
- jigsaw
- compound miter saw
- table saw
- nailer
- sander
- countersink drill bit
Step-by-step Instructions
Step 1
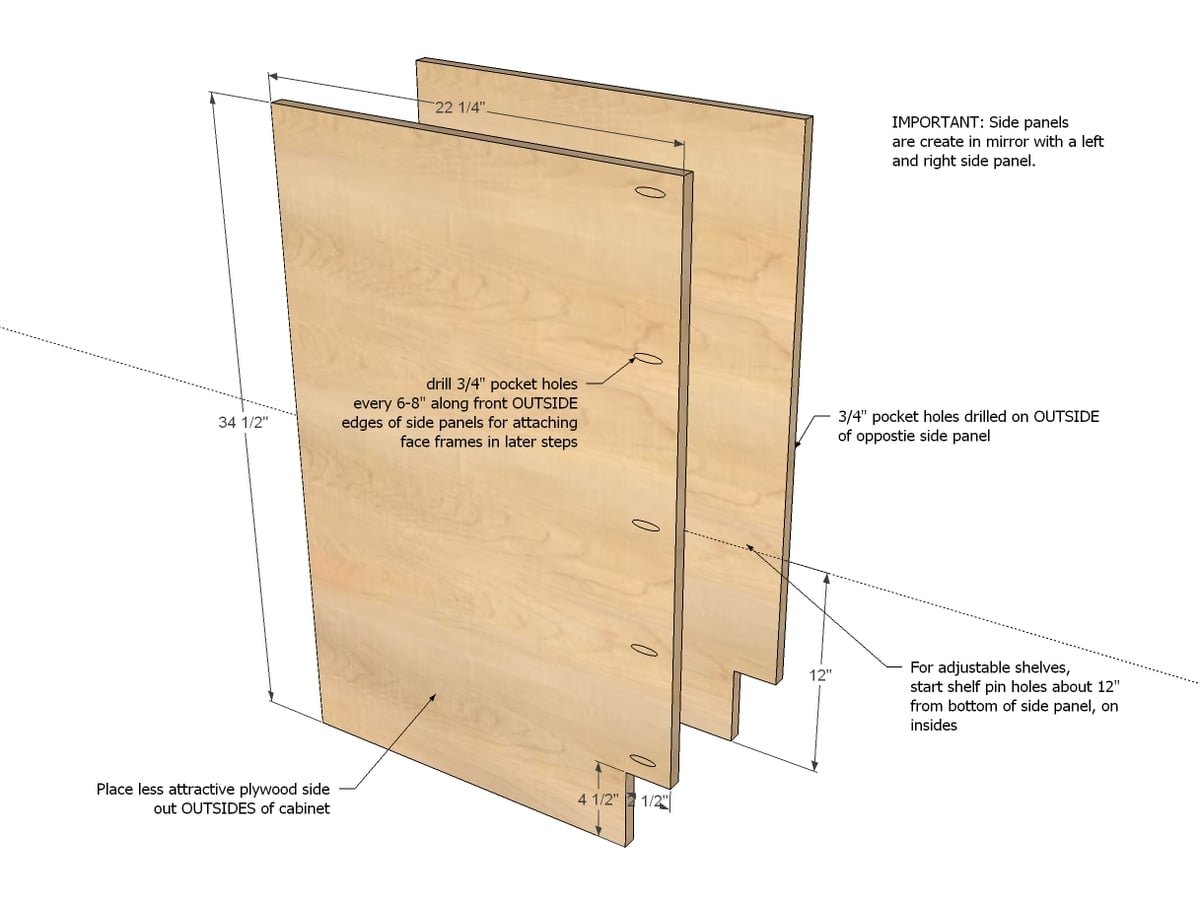
IMPORTANT: There are lots of different cabinet plans on this site - if you are building a full kitchen, make sure you use the same collection of plans throughout - where the sides of each base match exactly. This plan belongs with the Momplex Vanilla Kitchen collection of plans. Start with the sides - they must be indential to all the sides in your base cabinets for the cabinets to line up. However, this cabinet is designed without adjustable shelves, so no need for shelf pins. Remember that the two sides are made in mirror, with the pocket holes on the outsides of the sides for attaching the face frame in later steps. Make sure your toekicks are all cut consistently.
Step 2
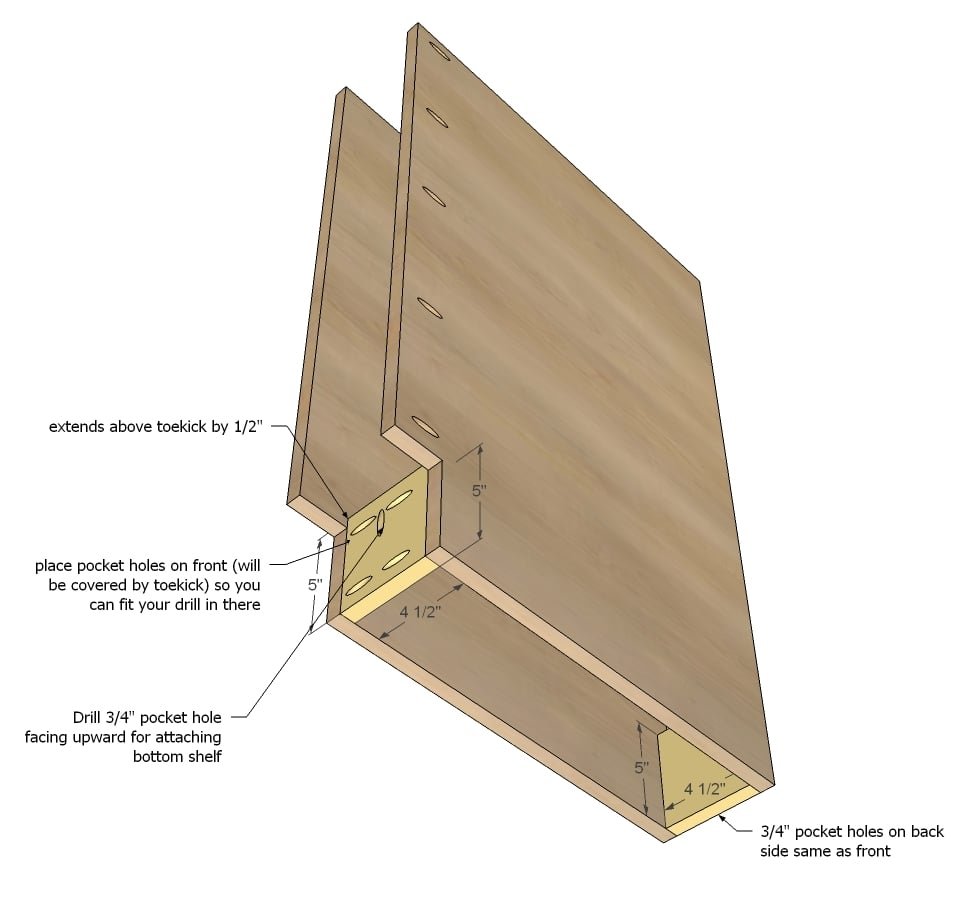
We used cheaper plywood for the bottom bases just because it all gets covered up. We ripped strips 5" wide, and then cut those down to the needed lengths per cabinet. Place 3/4" pocket holes on the outsides so it's easy to get your drill in there. Also, drill 3/4" pocket holes facing upward for attaching bottom shelf. Attach through 3/4" pocket holes with 1-1/4" pocket hole screws.
Step 3
Because you may be able to see the top support boards, we used the excess strip of 3/4" finished plywodo for the top supports. It ended up being about 3-1/2" wide. You could also use 1x boards - the width can really vary here.
Step 4
The shelves have to be attached from the outside - we countersunk 2" wood trim screws.
Step 5
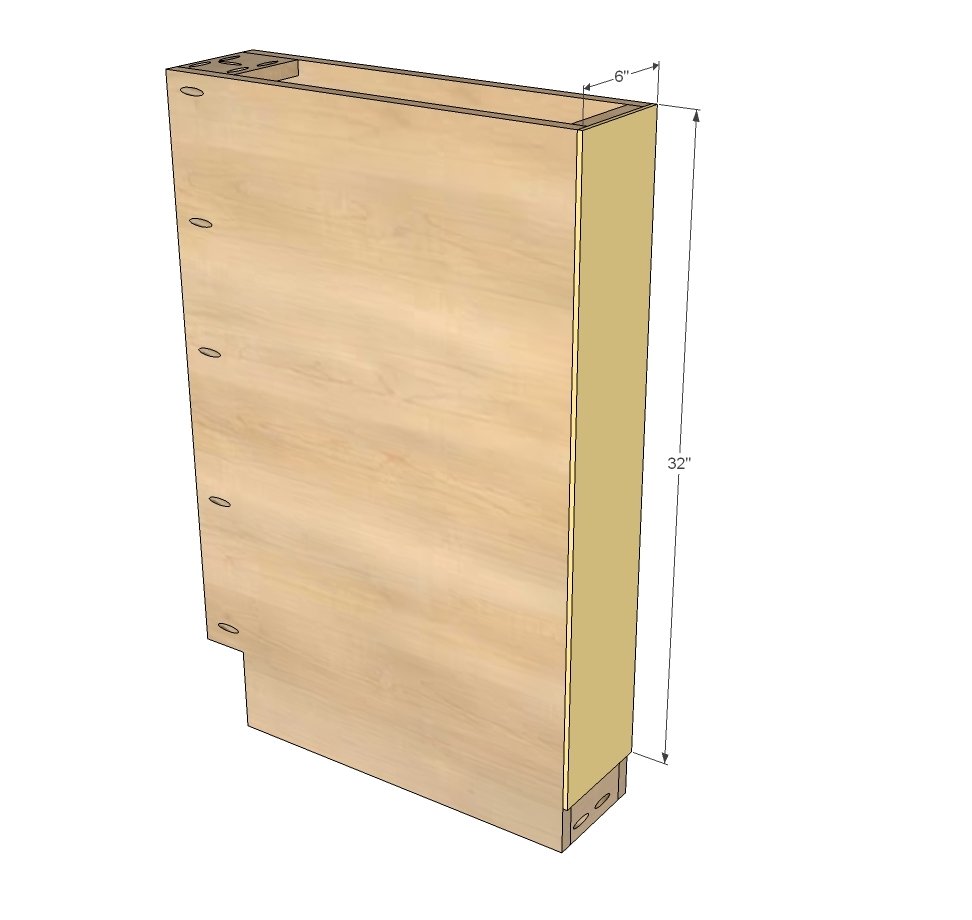
Step 6
Because this cabinet is so narrow, we did not want to loose valueable storage space with a face frame that overextends the sides (as the other bases do) and inside of cabinet. Instead, we ripped poplar down to 1x1 sizes (3/4" x 3/4") and used the 1x1s as stiles and trim for the shelf. The top and bottom are consistently 1x2s to match the rest of the cabinets. We built the face frame first using 3/4" pocket holes (just one per end of each 1x1) and 1-1/4" pocket hole screws and glue. The face frame then gets attached through the pocket holes drilled in step 1 in the sides and step 3 in the top support.
Step 7
Because the face frame changed on this cabinet, we then had to use a 1/2" overlay on the door (as opposed to standard 1-1/4" overlay for face frame cabinets). The hinge also should be for frameless cabinets as the cabinet mounting bracket will differ - specifically a 1/2" Overlay Frameless Concealed Hinge.
Finishing
Sand all surfaces, starting with a medium grit and finishing with fine. Wipe off the dust, fill any holes or gaps with wood filler, and sand smooth once dry. Apply primer if you're painting, then finish with your choice of paint or stain and seal with a durable clear topcoat. For outdoor projects, use exterior-rated primer, paint or stain, and sealer so the piece stands up to the weather.
Source (temporary): https://www.ana-white.com/woodworking-projects/6-filler-tray-base-cabinet-momplex-vanilla-kitchen