Adirondack Stool or End Table
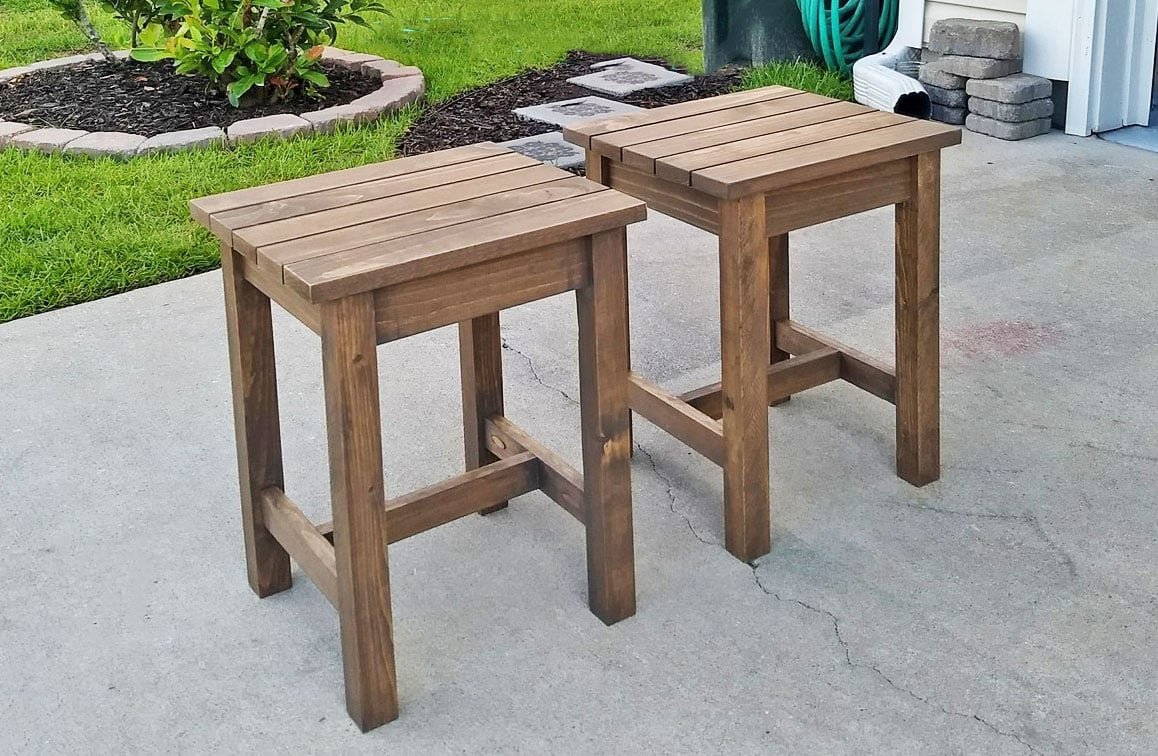
This simple Adirondack side table can also be used as a stool. It's perfect for any outdoor space. include step by step diagrams and shopping lists and cut list. We also have Adirondack Chair plans and lots more outdoor furniture plans. Make sure you read our outdoor furniture finishing secrets here. Photo
Specifications
| Project type | Outdoor Seating, Lounging and Accents |
|---|---|
| Room | Outdoor |
| Style | Cottage Style Furniture Plans |
| Difficulty | Beginner Projects |
| Estimated cost | Under $20 |
Dimensions
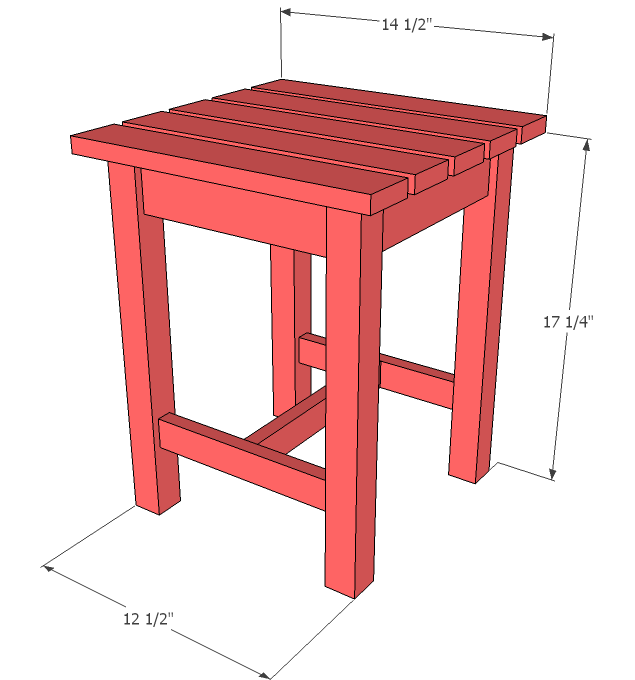
Use the size-specific shopping and cut lists below.
Shopping List
2 - 1x3 @ 8 feet long
1- 2x2 @ 8 feet long
1 - 1x2 @ 4 feet long
Cut List
4 - 2x2 @ 17 1/4" (Legs)
4 - 1x3 @ 9 1/2" (Aprons)
2 - 1x2 @ 9 1/2" (Side Supports)
1 - 1x2 @ 10 1/4" (Stretcher)
5 - 1x3 @ 14 1/2" (Top)
Tools
- measuring tape
- square
- pencil
- safety glasses
- hearing protection
- kreg-jig
- drill
- circular saw
- nailer
- sander
Step-by-step Instructions
Step 1
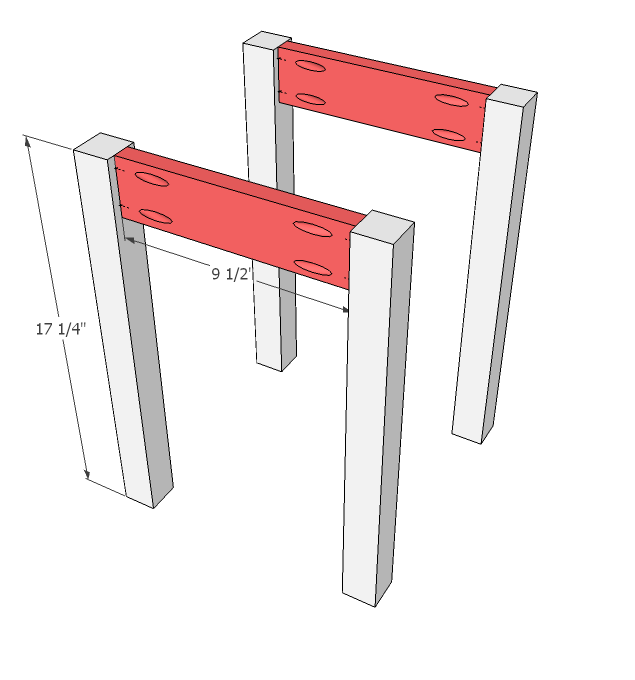
Build two legs sets as shown above drilling Kreg Jig pocket holes for 3/4" stock, and using 1 1/4" pocket hole screws and glue.
Step 2
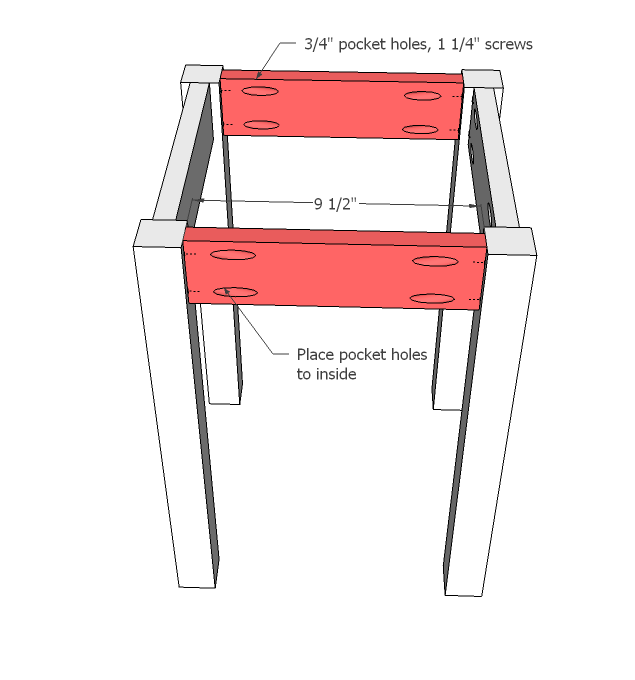
With the remaining 2 aprons, drill Kreg Jig pocket holes on ends and attach to leg sets as shown above. Place pocket holes to insides.
Step 3
Measure up 3 1/2" on all legs and mark. Attach side supports with glue and 1 1/4" pocket hole screws centered on legs.
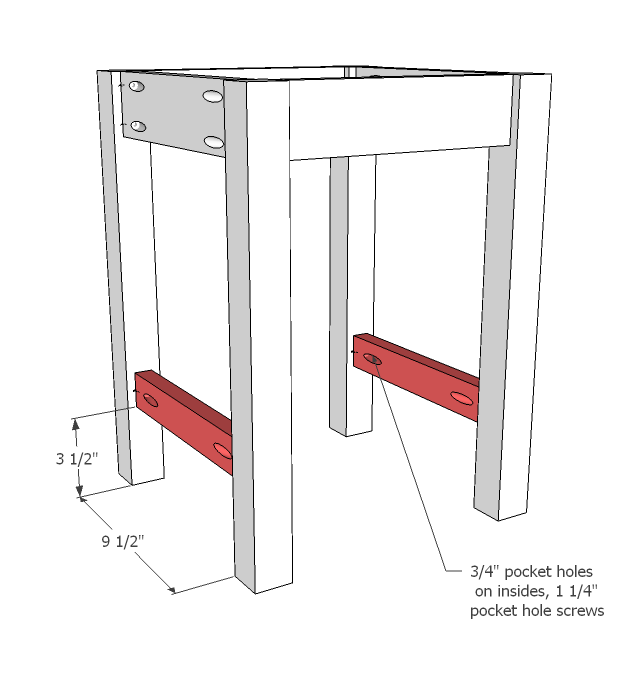
Step 4
Follow with stretcher, attached with 3/4" Kreg Jig pocket holes and 1 1/4" pocket hole screws and glue.
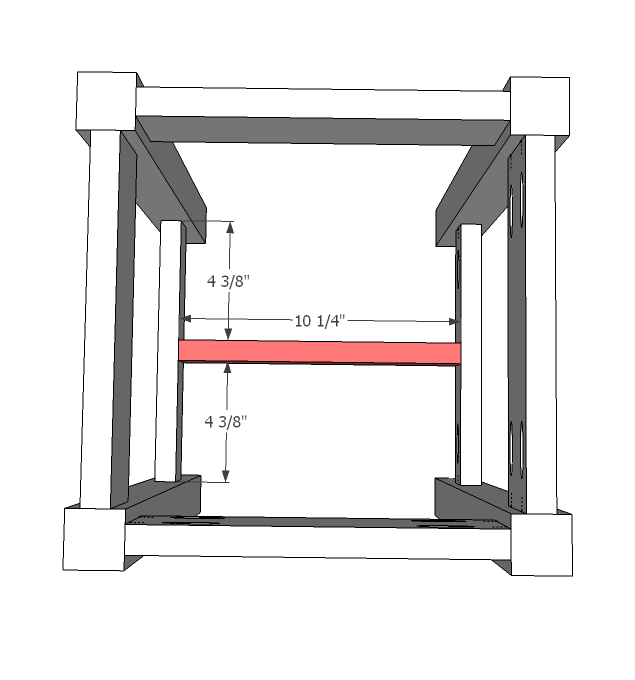
Step 5
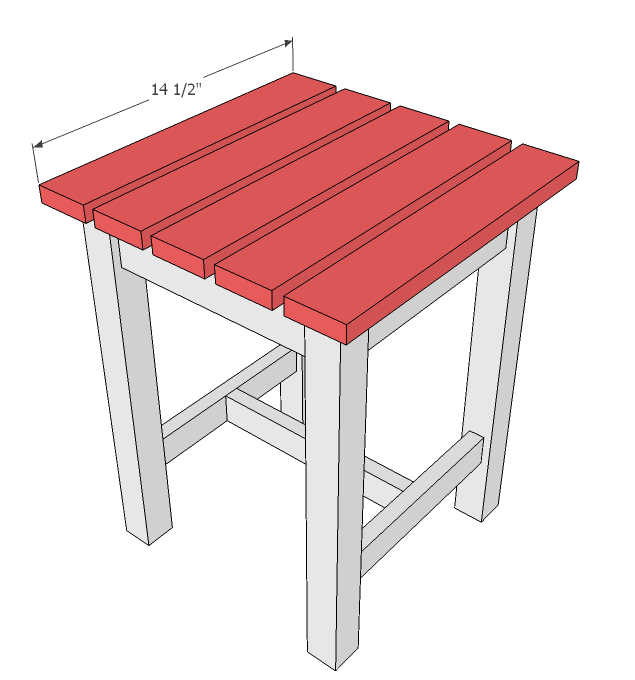
Finishing
Sand all surfaces, starting with a medium grit and finishing with fine. Wipe off the dust, fill any holes or gaps with wood filler, and sand smooth once dry. Apply primer if you're painting, then finish with your choice of paint or stain and seal with a durable clear topcoat. For outdoor projects, use exterior-rated primer, paint or stain, and sealer so the piece stands up to the weather.
Source (temporary): https://www.ana-white.com/woodworking-projects/adirondack-stool-or-end-table