Adjustable Height Sawhorses for Desks
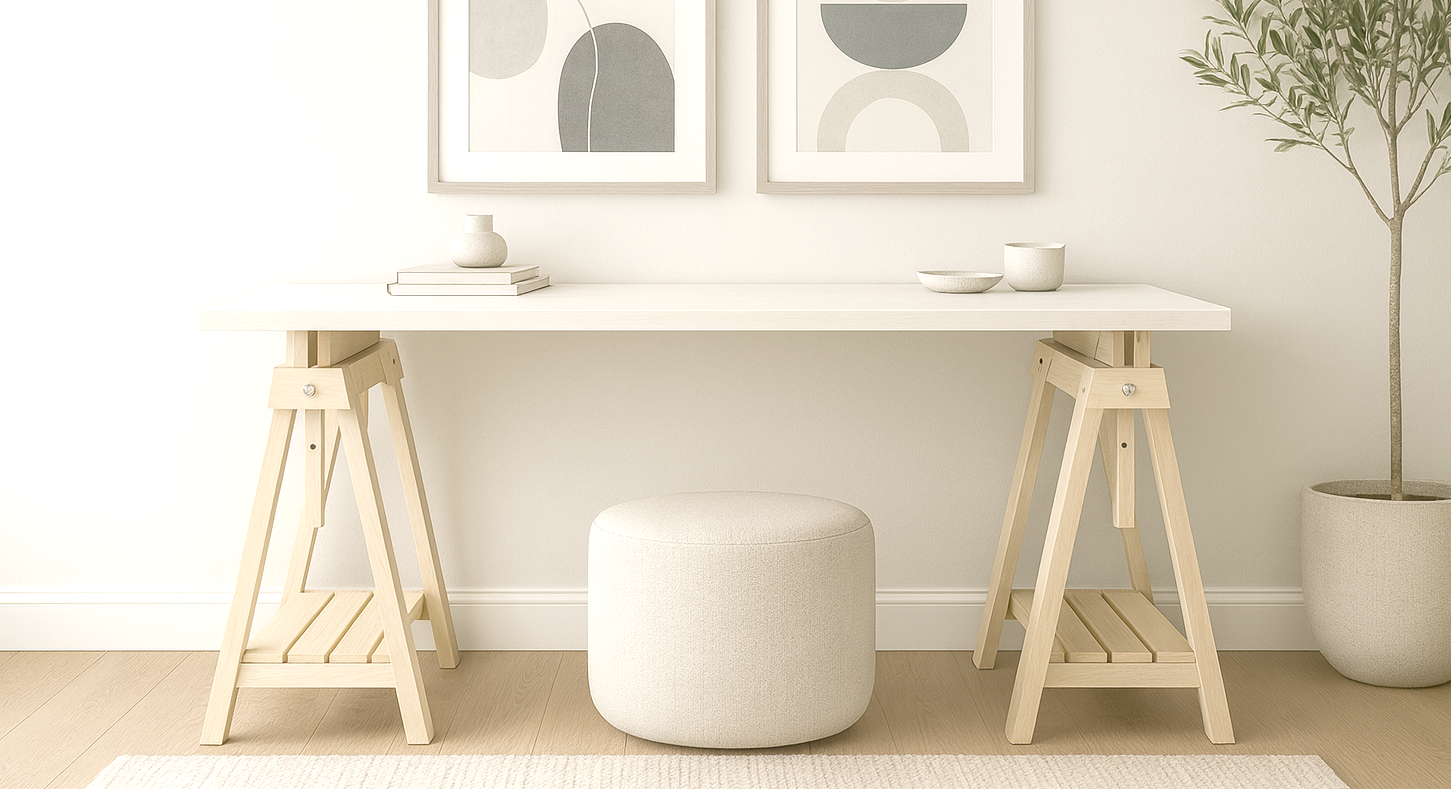
Adjustable Height Sawhorses for Desk — Build a stylish, functional desk with this Sawhorse Desk woodworking plan. Featuring sturdy A-frame trestle legs and a spacious work surface, this design blends modern simplicity with classic workshop inspiration. The is perfect for creating a home office, craft station, or study space that’s both durable and beautiful. This desk is supported by two adjustable sawhorse-style bases, each with an integrated lower shelf for extra storage. The design’s clean lines and open frame make it easy to adapt to any style — from modern Scandinavian to farmhouse rustic — with just a change in paint or stain. Features • Sturdy sawhorse-style trestle legs for maximum stability • Large, flat work surface for office work, crafting, or studying (depending on your tabletop) • Integrated lower shelves for books, storage bins, or décor • Beginner-friendly construction using basic tools • Fully customizable height, width, and finish • with diagrams and cut list Plan Includes • Printable PDF with cut list and materials list • Step-by-step written instructions with assembly diagrams • Joinery tips for a rock-solid build • Finishing guide to achieve a professional look Whether you need a clean, minimalist desk for a home office or a stylish table for a creative studio, this Sawhorse Desk is an easy weekend project with professional results.
Specifications
| Project type | Desk, Desk Systems and Project Table Plans |
|---|---|
| Room | Craftroom |
| Style | Industrial Style Furniture Plans |
| Difficulty | Intermediate |
Dimensions
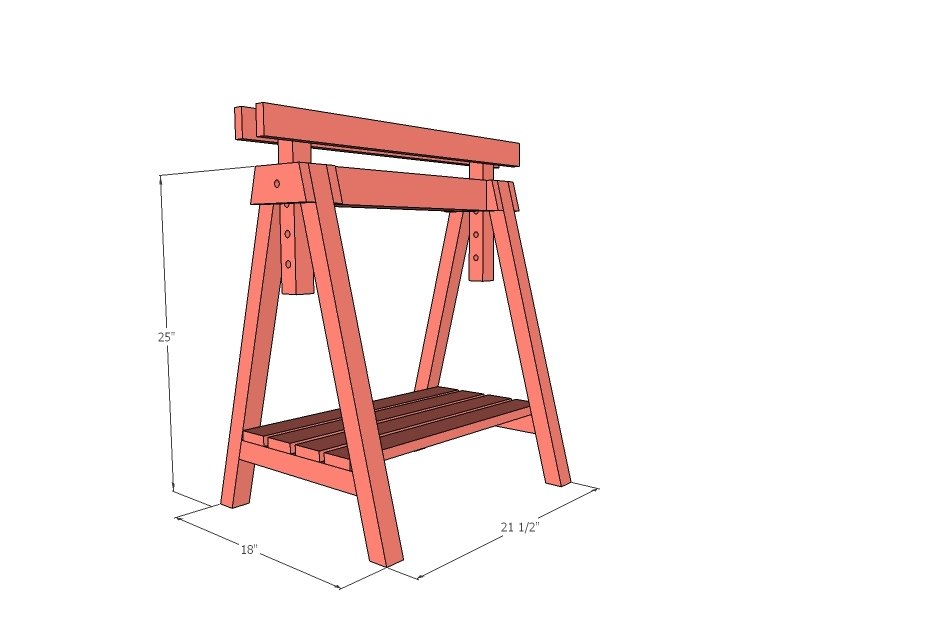
Use the size-specific shopping and cut lists below.
Shopping List
For TWO Sawhorses
- 4 - 2x2s
- 4 - 1x3s
Cut List
CUT LIST - 2 Sawhorses
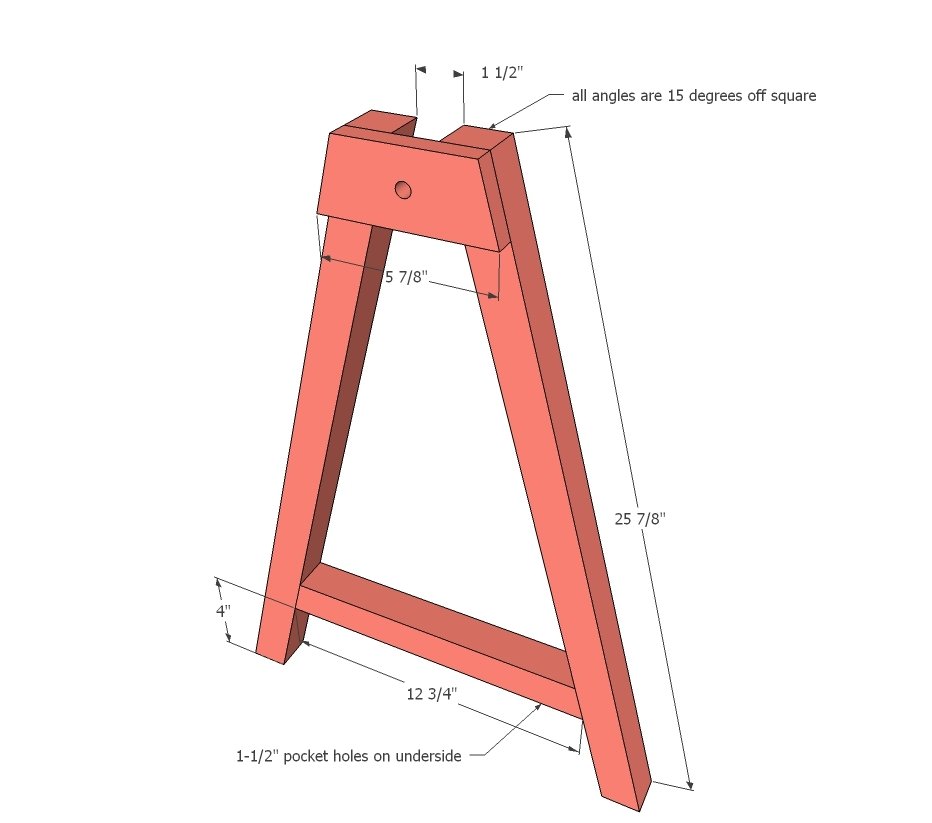
- 8 - 2x2 @ 25-7/8" long, both ends cut PARALLEL at 15 degrees off square
- 4 - 2x2 @ 12-3/4" long, both ends cut NOT PARALLEL at 15 degrees off square, longest point measurement
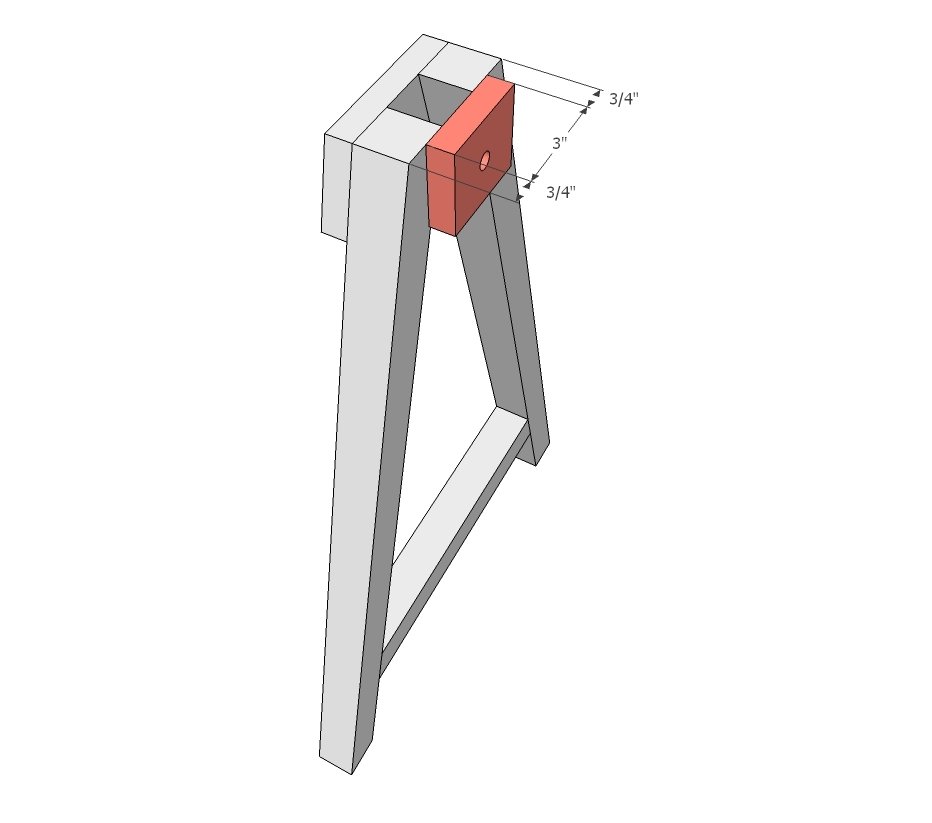
- 4 - 1x3 @ 5 7/8" long, both ends cut NOT PARALLEL at 15 degrees off square, longest point measurement
- 4 - 1x3 @ 3" long
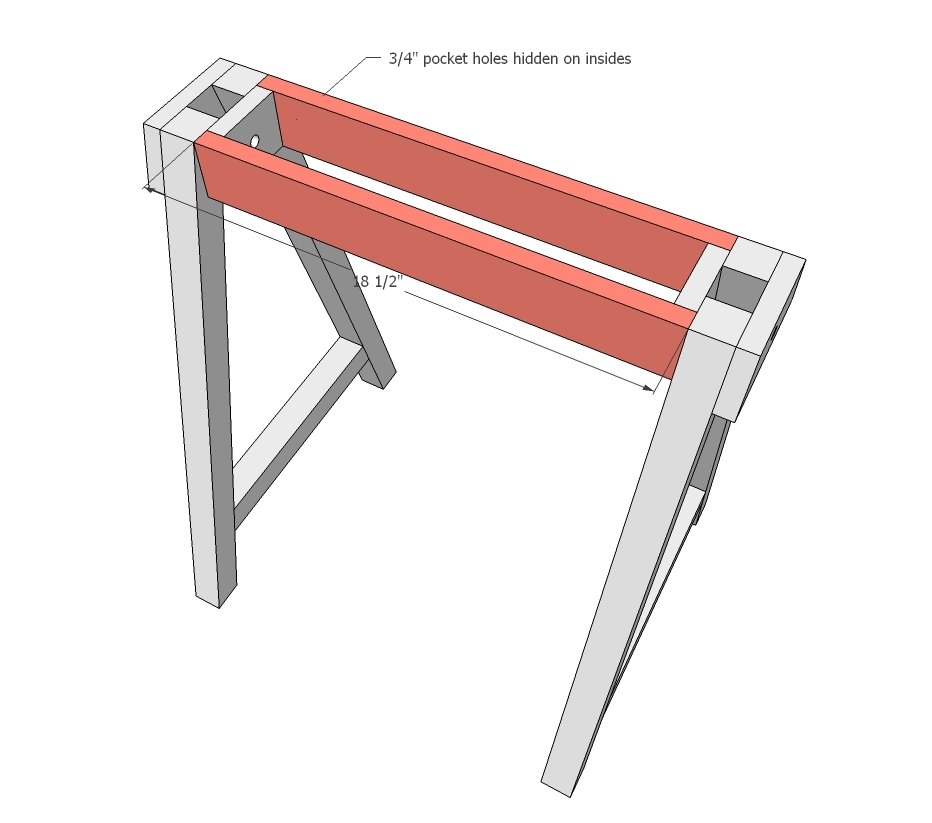
- 4 - 1x3 @ 18-1/2"
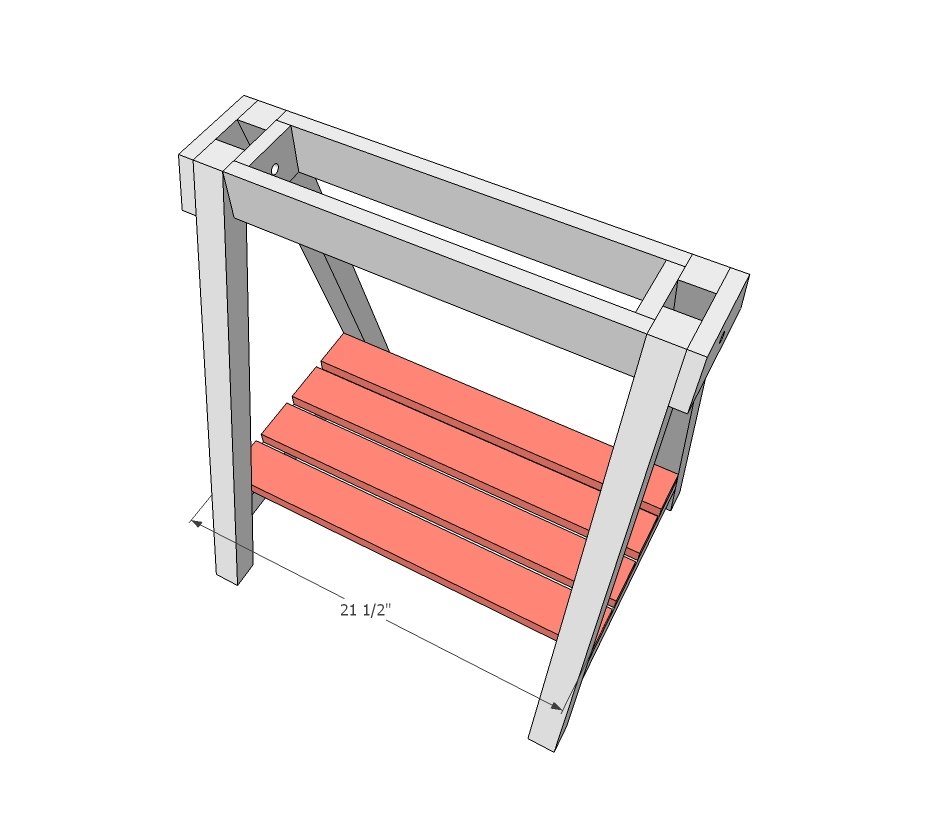
- 8 - 1x3 @ 21-1/2"
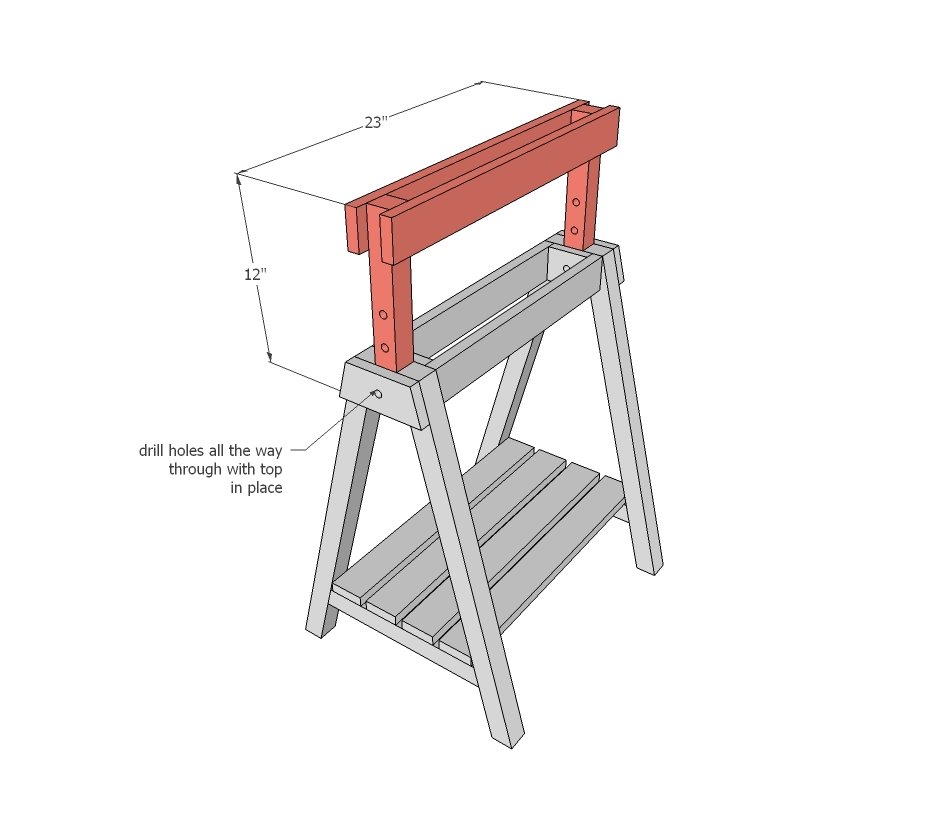
- 4 - 2x2 @ 12"
- 4 - 1x3 @ 23"
Tools
- measuring tape
- square
- pencil
- safety glasses
- hearing protection
- kreg-jig
- drill
- compound miter saw
- nailer
Step-by-step Instructions
Step 1
Start by building two legs per each sawhorse you want to make. I recommend using the Kreg Jig to attach the 2x2s together, but you can nail and glue the top piece on.
Step 2
Nail and glue the inside piece on.
Step 3
Nail and glue the horizontal supports to the two leg pieces.
Step 4
Nail and glue the shelving boards to the bottom 2x2s.
Step 5
Finishing
Sand all surfaces, starting with a medium grit and finishing with fine. Wipe off the dust, fill any holes or gaps with wood filler, and sand smooth once dry. Apply primer if you're painting, then finish with your choice of paint or stain and seal with a durable clear topcoat. For outdoor projects, use exterior-rated primer, paint or stain, and sealer so the piece stands up to the weather.
Source (temporary): https://www.ana-white.com/woodworking-projects/adjustable-height-sawhorses-desks