Adjustable Height Wood and Metal Stool
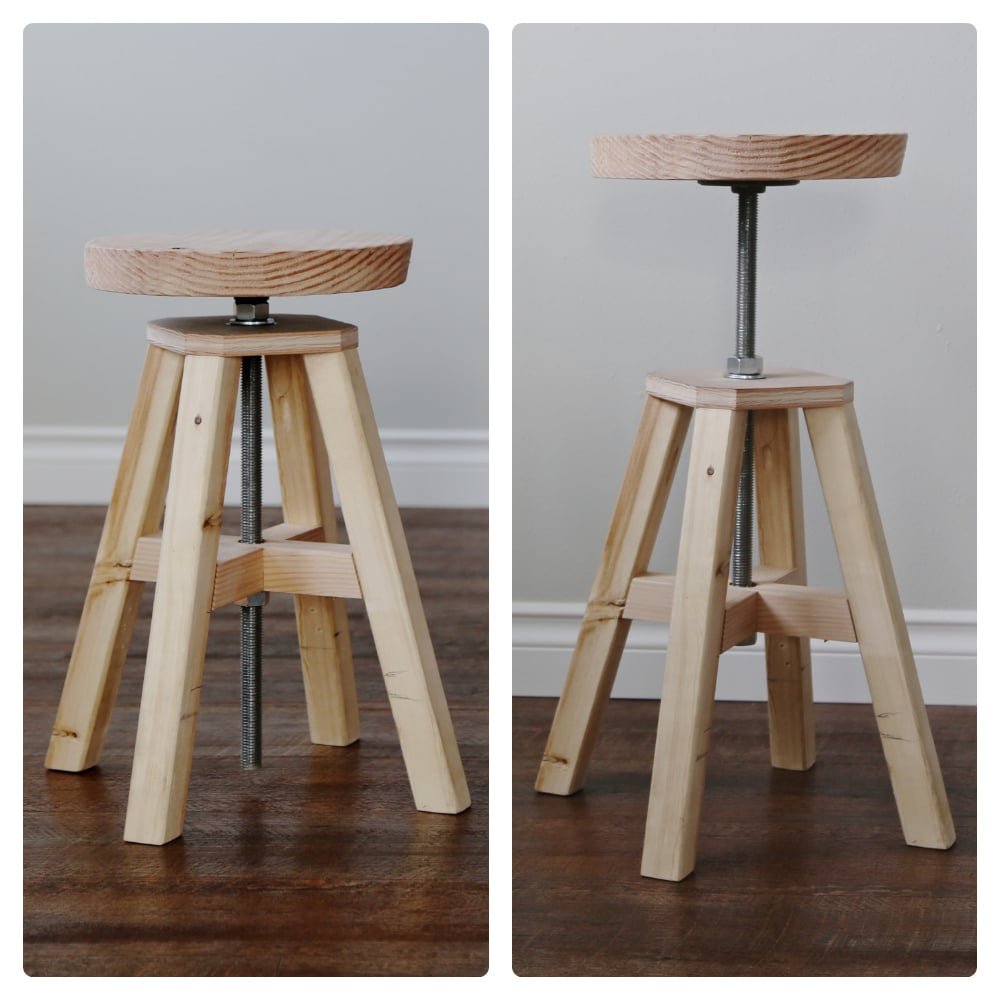
DIY Adjustable height stool made of hardware store parts and 2x2s. from
Specifications
| Project type | Stools |
|---|---|
| Room | Teens |
| Difficulty | Advanced |
Dimensions
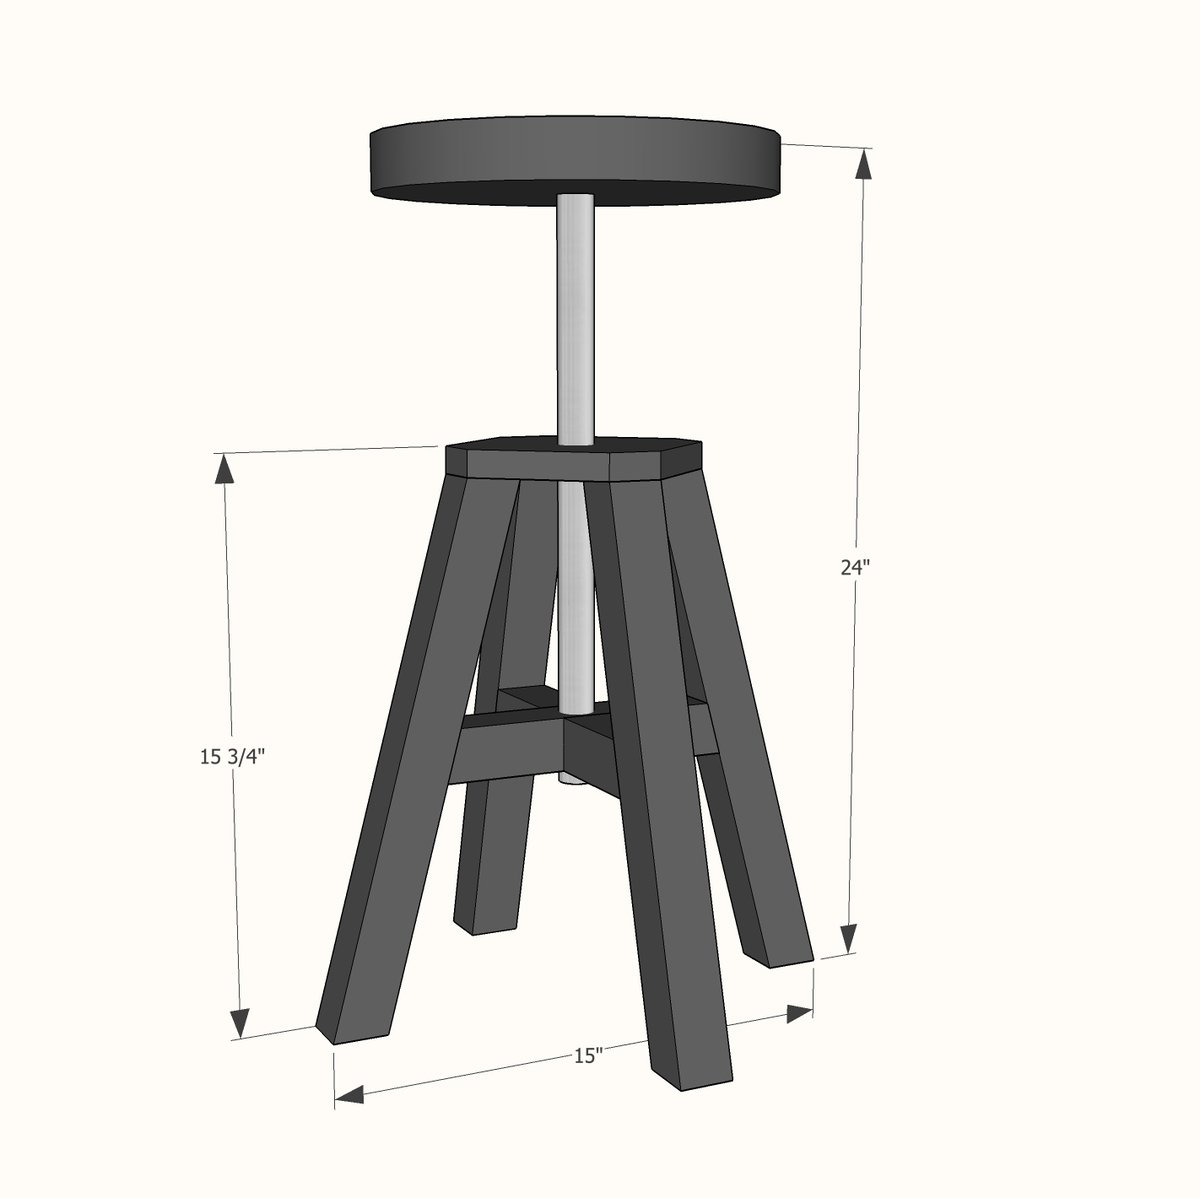
Use the size-specific shopping and cut lists below.
Shopping List
1 - 2x2 @ 8 feet long
1 - piece of scrap plywood 6" x 6"
1 - 2x12 or 1x12 cut into a round circle (you can also buy a plywood round for a stool top at most hardware stores)
1 - 3/4" All-Thread 16" long (if you can't find 16" all-thead, you can cut it down easily with a jigsaw or handsaw with a blade designed to cut metal)
1 - 3/4" Floor Flange to match all thread (also recommend pipe thread tape for securing all-thread into the flange)
2 - bolts and washers to match the all-thread
2-1/2" pocket hole screws
3" screws or lag bolts (heads will be visible) for attaching cross supports to the legs
Cut List
1 - 3/4" thick plywood, 6" x 6"
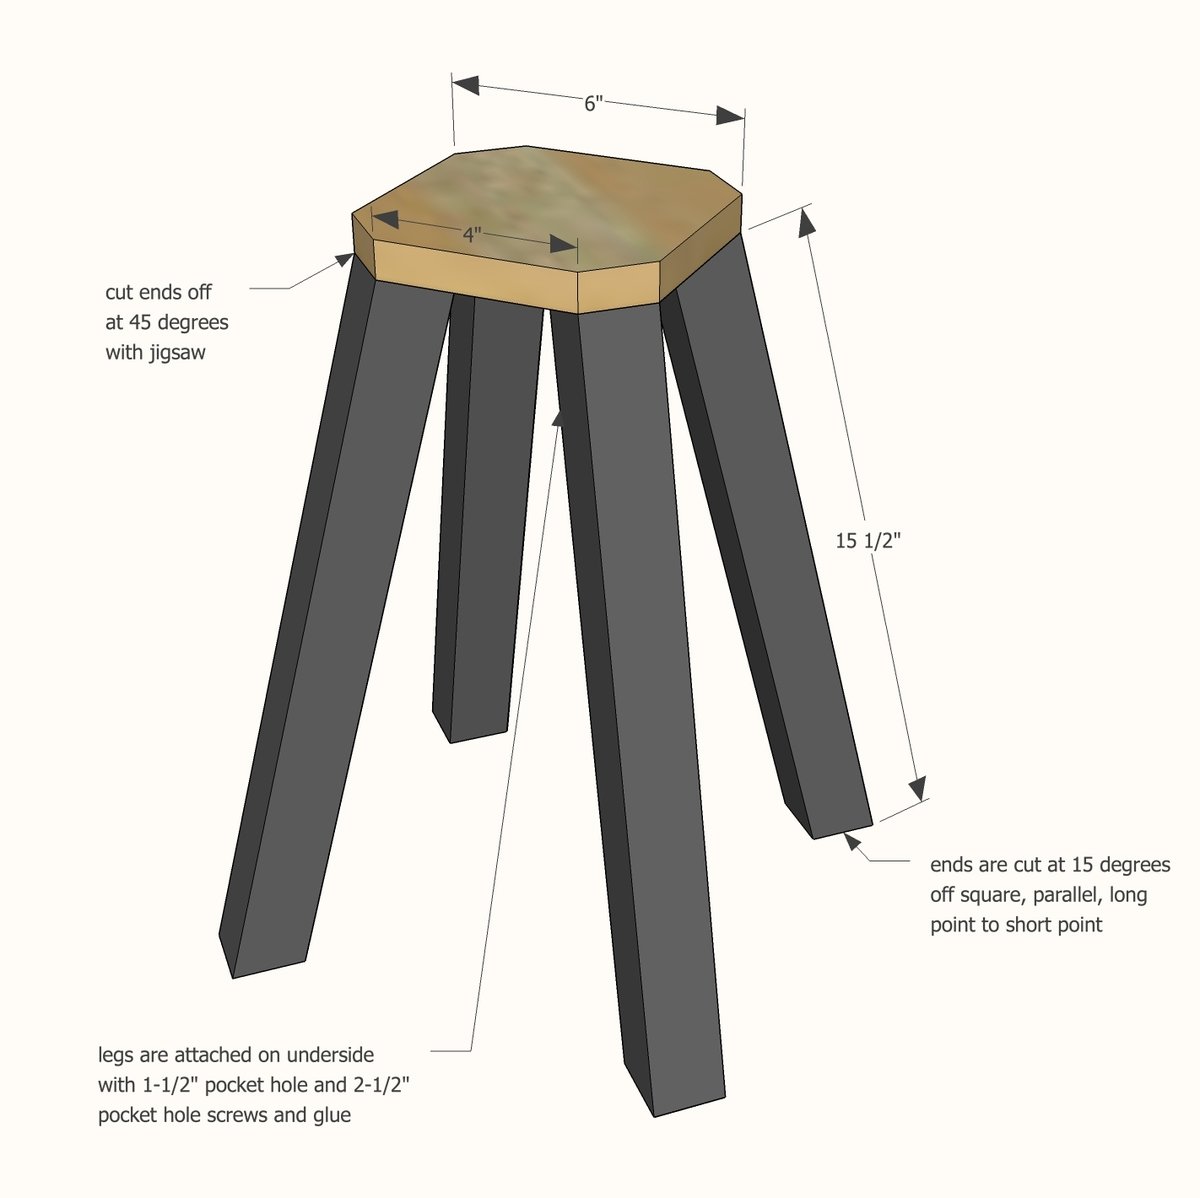
4 - 2x2 @ 15-1/2" long, long point to short point, both ends cut at 15 degrees off square, parallel to each other
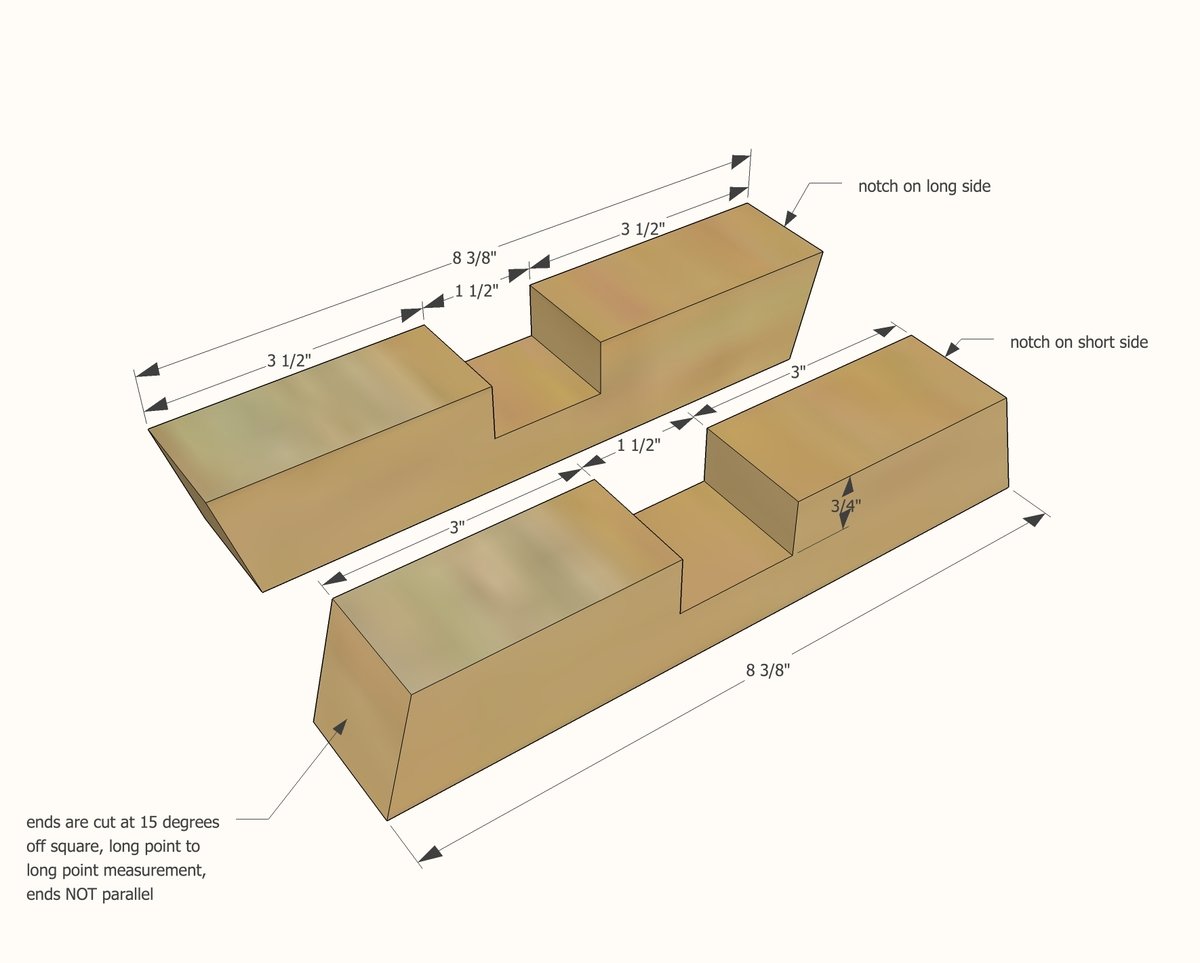
4 - 2x2 @ 8-3/8" long, long point to long point, both ends cut at 15 degrees off square, ends NOT parallel to each other
Tools
- measuring tape
- pencil
- safety glasses
- hearing protection
- kreg-jig
- drill
- jigsaw
- compound miter saw
- sander
- countersink drill bit
Step-by-step Instructions
Step 1
The best way we found to attach the legs to the base is with 1-1/2" pocket holes from underside, using 2-1/2" pocket hole screws and glue. Take a second to confirm the outside to outside measurement of the legs matches the diagram.
Step 2
Now this is the harder part of making this stool. There are easier ways but we felt that this was the right balance between difficulty and getting a nice looking project in the end. Use either a tablesaw or circular saw to notch out the cross support pieces (note that you notch one on top and one on bottom), 3/4" deep. You can do this by making multiple cuts with saw blade set at 3/4" in the area to notch out, and then remove any excess material with a chisel. Test the pieces to make sure they fit together.
Step 3
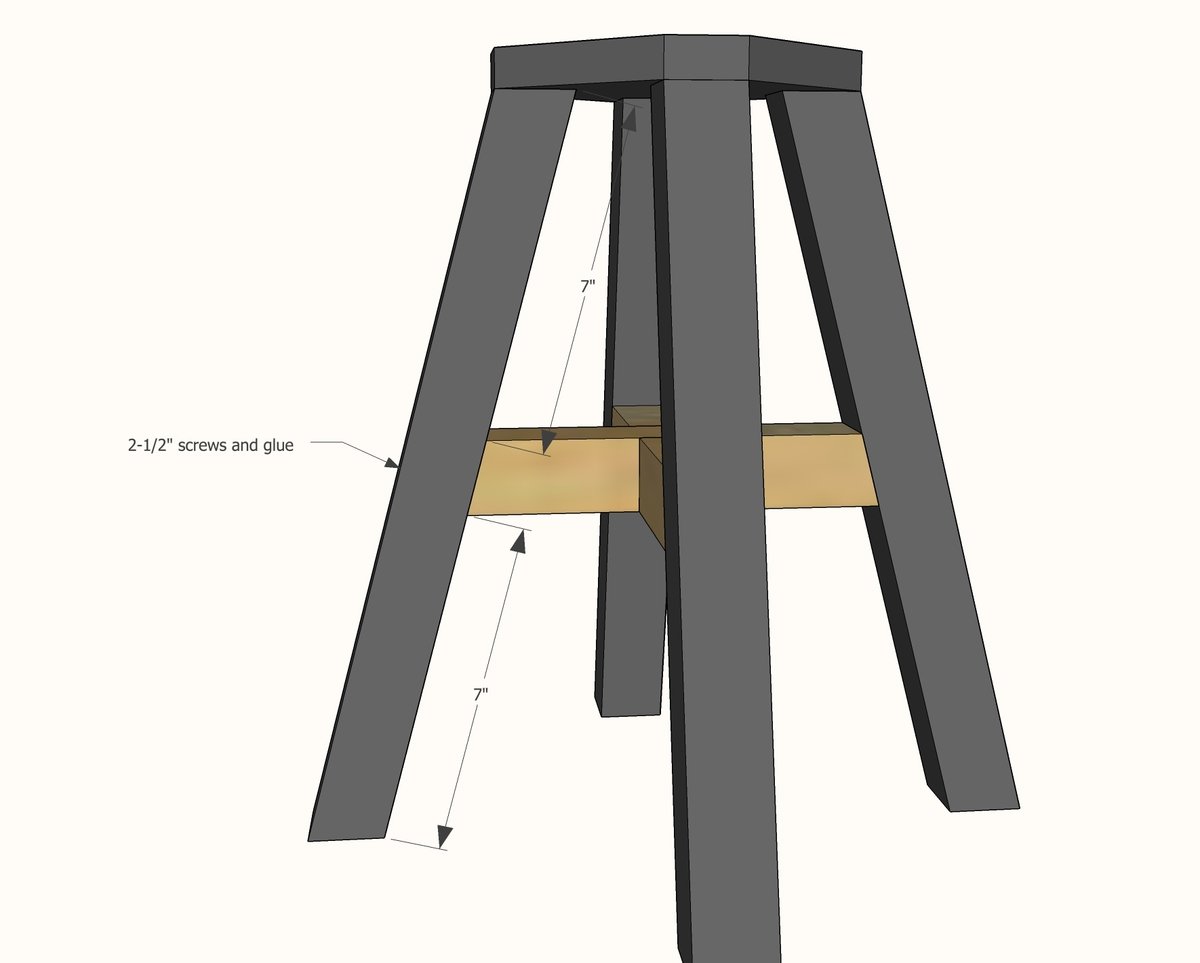
Attach the cross supports to the legs. Do not attach the actual cross supports to each other, as a bolt will need to pass through the center of them.
Step 4
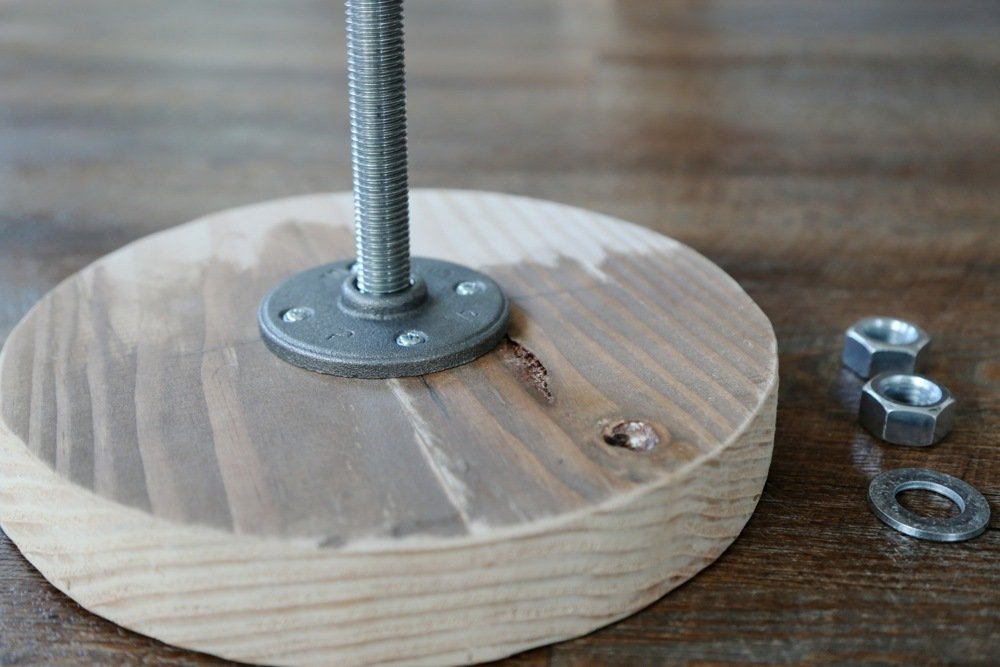
Attach the floor flange to the center of the seat (we used a scrap 2x12 cut with a jigsaw) and thread the all-thread into the flange.
Step 5
Step 6
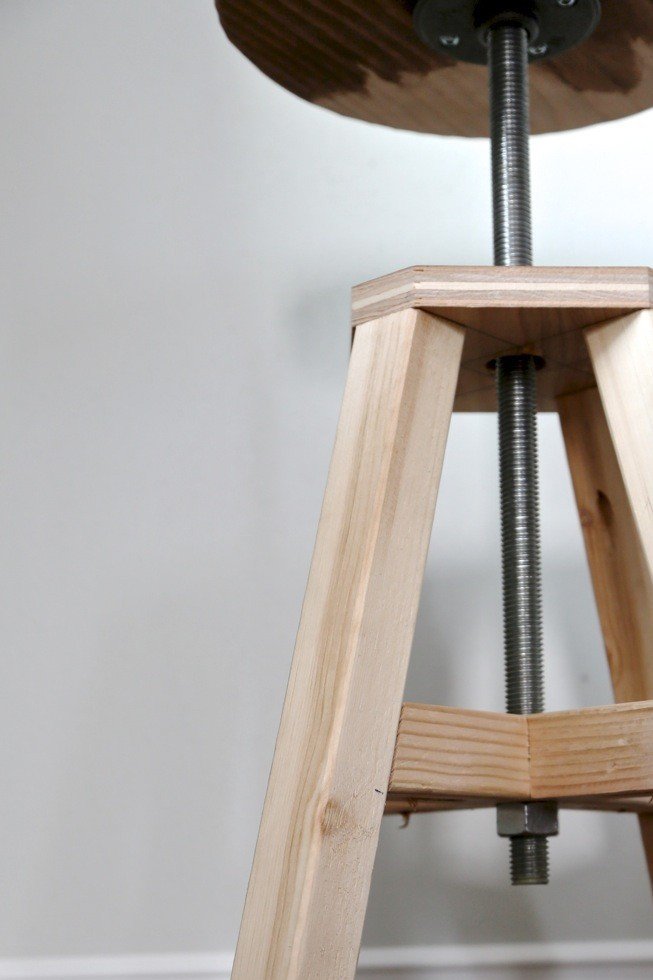
Turn the seat to adjust up or down. NOTE: Once you have the seat where you want it, make sure the nuts are still tight.
Finishing
Sand all surfaces, starting with a medium grit and finishing with fine. Wipe off the dust, fill any holes or gaps with wood filler, and sand smooth once dry. Apply primer if you're painting, then finish with your choice of paint or stain and seal with a durable clear topcoat. For outdoor projects, use exterior-rated primer, paint or stain, and sealer so the piece stands up to the weather.
Source (temporary): https://www.ana-white.com/woodworking-projects/adjustable-height-wood-and-metal-stool