Airplane Wall Decor or Shelf
Free Airplane Shelf Woodworking Plans – Whimsical Storage & Décor Bring a touch of charm and creativity to your space with this free airplane shelf woodworking plan. Perfect for kids’ rooms, nurseries, or playful wall décor, this unique design doubles as both a functional shelf and an eye-catching aviation-inspired décor piece. Features: • with step-by-step instructions • Designed to look like a vintage biplane – complete with propeller and landing gear details • Functions as a wall shelf or standalone décor object • Beginner-friendly build using basic tools and lumber • Customizable finish – paint or stain in neutrals, brights, or classic wood tones • Perfect size for displaying books, toys, or decorative items This airplane shelf project makes a great DIY gift or weekend build for anyone who loves aviation-themed décor. Create a one-of-a-kind piece that adds character and storage to your home. Download your today and start building this fun and functional airplane shelf décor project!
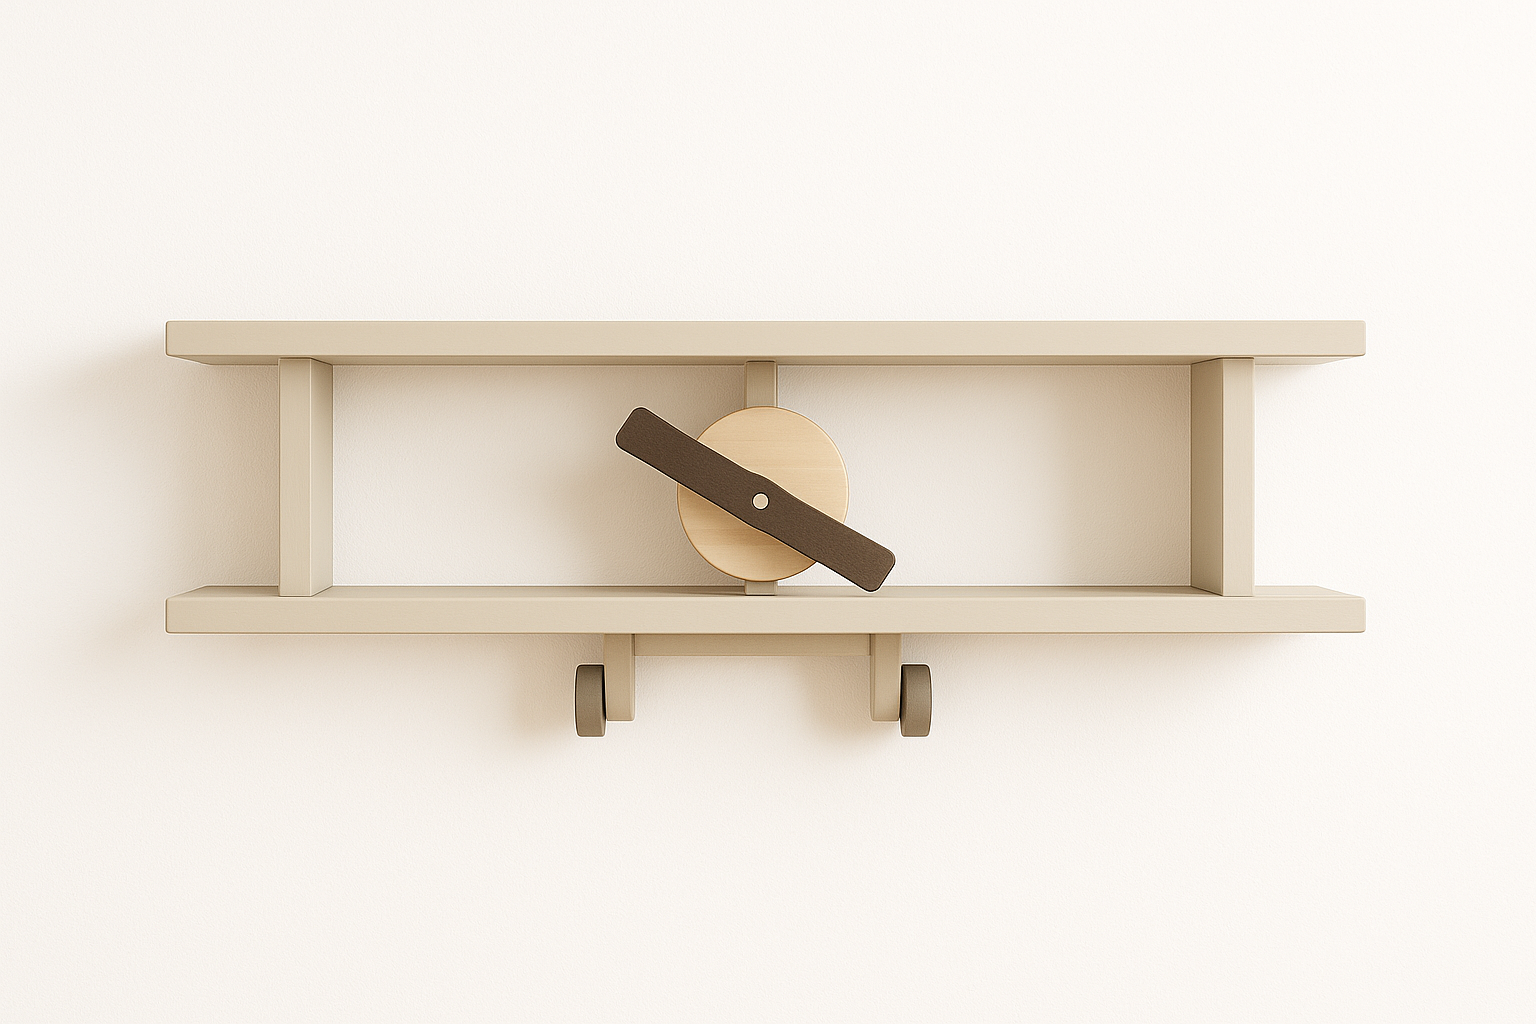
Specifications
| Project type | shelves |
|---|---|
| Room | Bedroom |
| Style | Children's and Kid's Room Furniture and Toy Plans |
| Difficulty | Beginner Projects |
| Estimated cost | Under $20 |
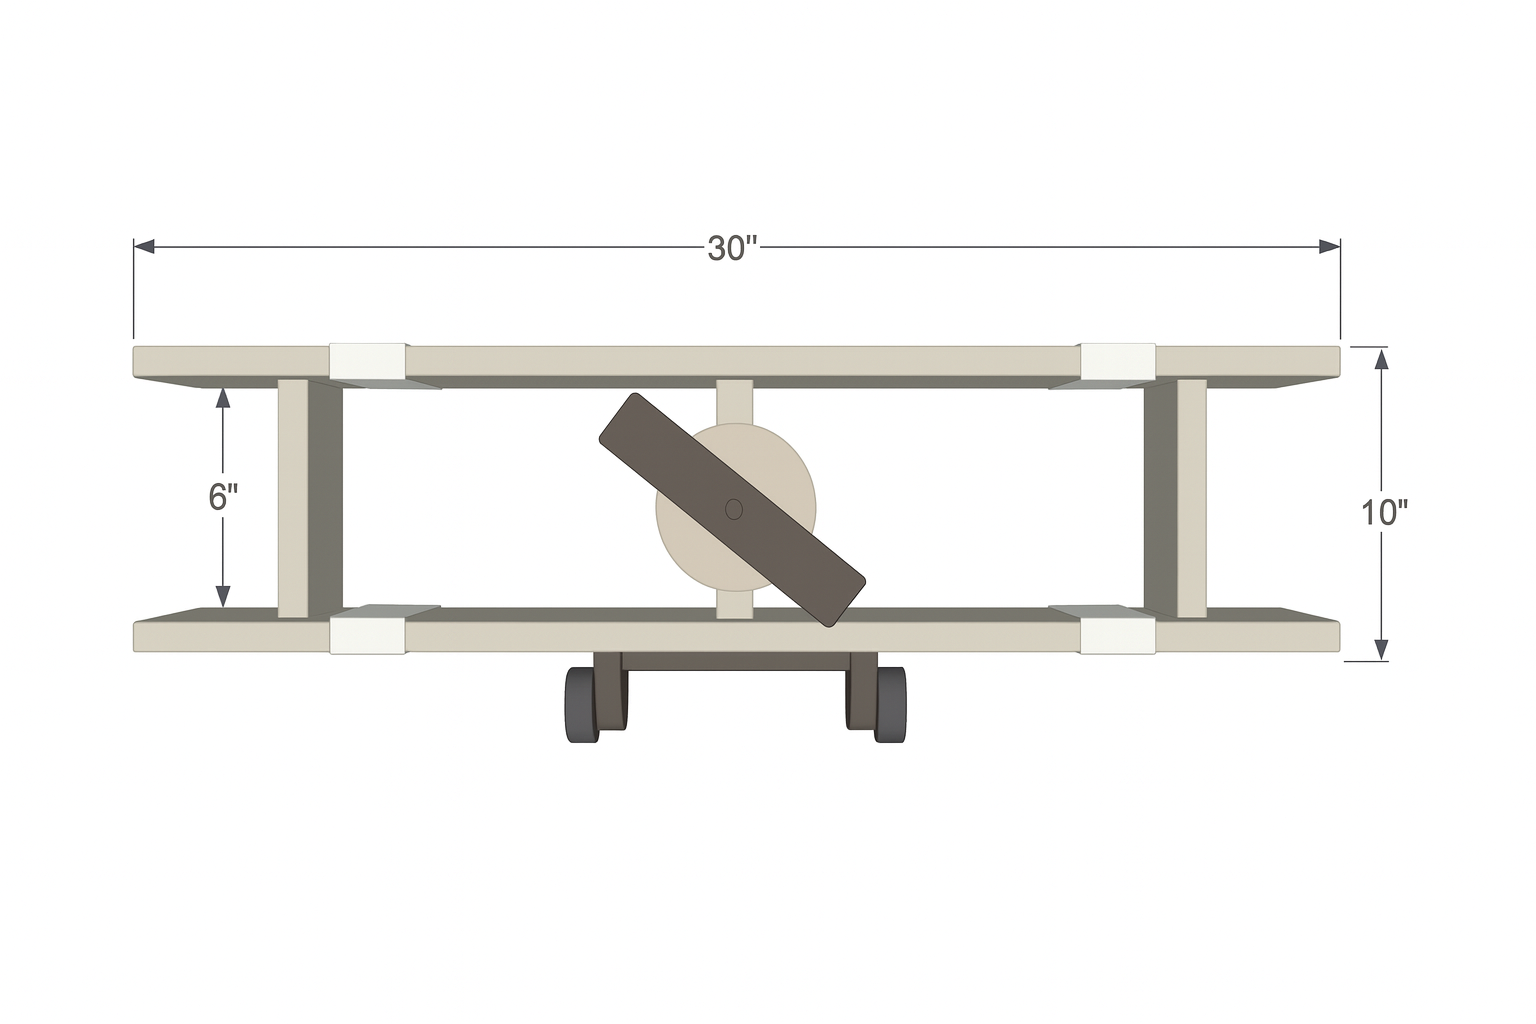
Dimensions
Use the size-specific shopping and cut lists below.
Shopping List
- 1 – 6 foot long 1×6
- 20″ of 1x2s 12″ of 1x4s
- 2″ self tapping star bit screws
- 1-1/4″ brad nails or self tapping wood screws
- wood glue
- finishing supplies
Cut List
- 2 – 1×6 @ 30″
- 2 – 1×2 @ 6″
- 2 – 1×4 @ 6″
- 1 – 4″ diameter circle (cut from 1×6 scraps)
- 2 – 2″ diameter circles (cut from 1×6 scraps)
- 2 – 1×2 @ 2 1/2″
Tools
- measuring tape
- square
- pencil
- hammer
- safety glasses
- hearing protection
- drill
- circular saw
- jigsaw
- sander
Step-by-step Instructions
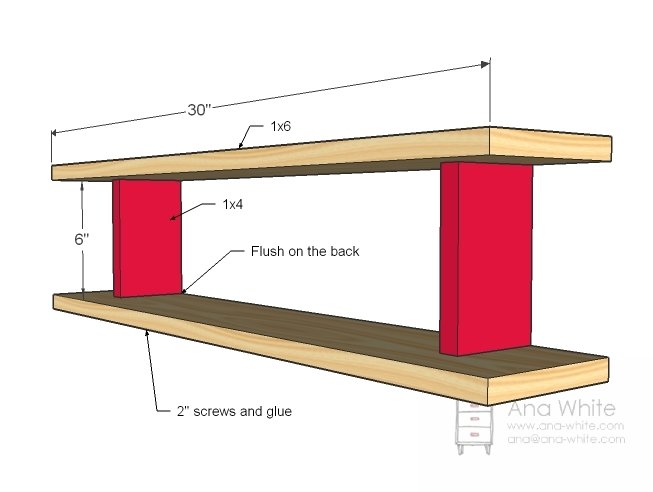
Step 1
Shelves - Attach the 1x4s flush to the back between the shelves. Predrill screw holes and use glue. The shelves are set in from the outsides 3″.
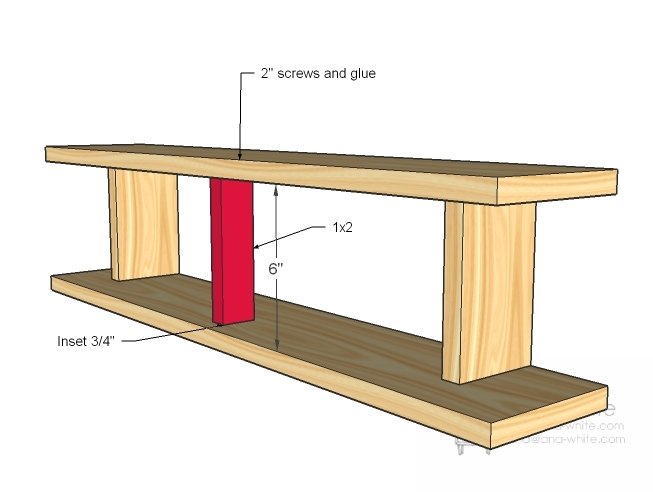
Step 2
Front - Now attach the front, centered on the shelves, inset 3/4″. Use glue, 2″ screws and predrill your holes.
Step 3
Face - Now cut your face out with a 4″ holes saw and line up on the front. The hole saw kit should have drilled a hole in the center already.
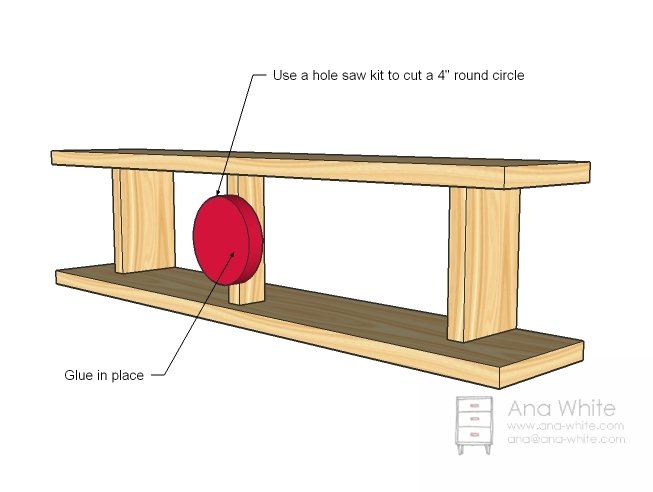
Step 4
Propeller - Now attach the propeller to the face and screw down, through the center, through the face, into the front.
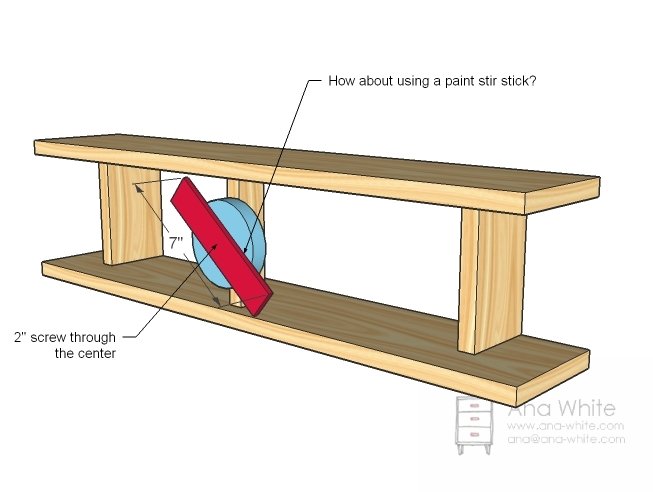
Step 5
Landing Gear - Build the landing gear by attaching 1x2 pieces together with brad nails and wood glue
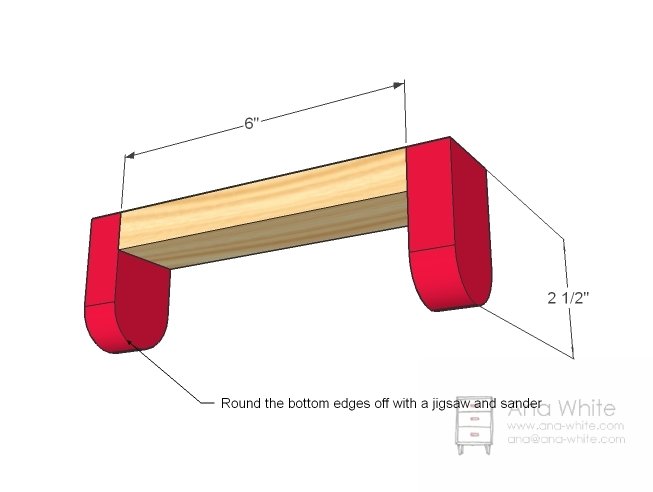
Step 6
Wheels- Now simply attach the wheels to the wheel base. I cut my wheels with a 2″ hole saw kit. You can also buy 2″ round wheels at hobby and craft stores – and probably 4″ round wood craft circles too – if you don’t have a hole saw kit.
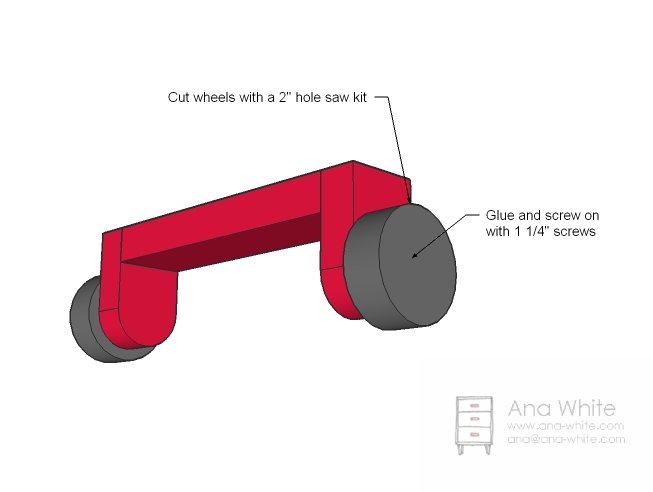
Step 7
Attaching the Wheels The wheels are inset 2″ from the front. Simply screw to the bottom with 1 1/4″ screws and glue.
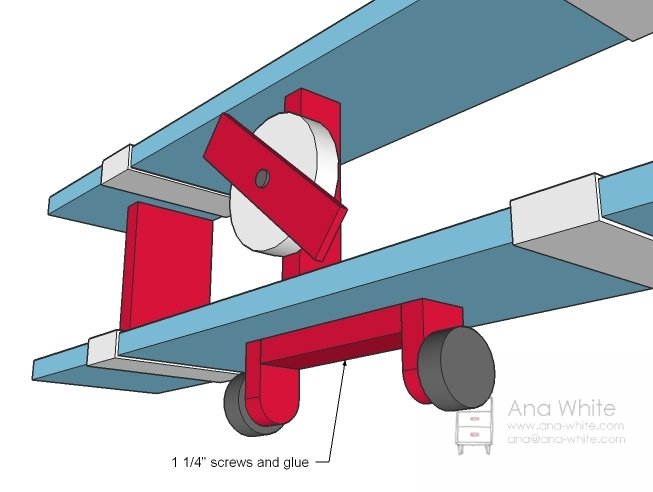
Step 8
Finishing - Fill holes with wood filler and finish as desired. Times gonna fly when you are building this one. Hanging - to hang, use a picture hanging cleat attached in two places on the back and use drywall anchors to hang on your wall.
Finishing
Sand all surfaces, starting with a medium grit and finishing with fine. Wipe off the dust, fill any holes or gaps with wood filler, and sand smooth once dry. Apply primer if you're painting, then finish with your choice of paint or stain and seal with a durable clear topcoat. For outdoor projects, use exterior-rated primer, paint or stain, and sealer so the piece stands up to the weather.
Source (temporary): https://www.ana-white.com/woodworking-projects/airplane-wall-decor-or-shelf