American Girl Dollhouse
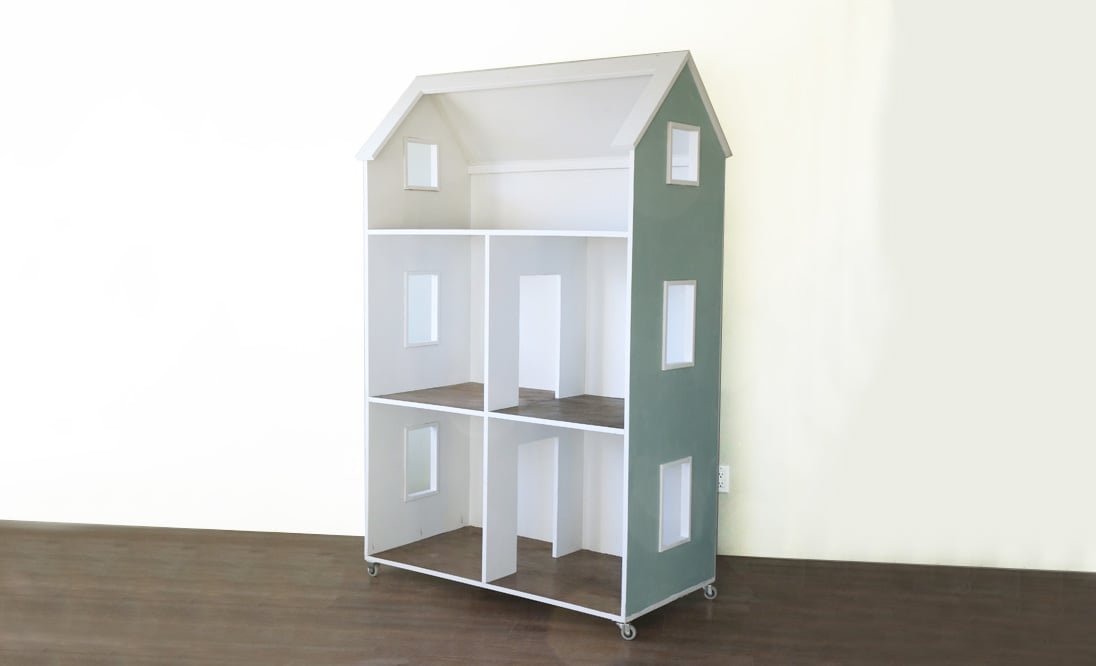
Free American Girl Dollhouse / 18 Inch Dollhouse Plans. This three story dollhouse features five large rooms. It's easy to build with our step by step diagrams, shopping and cut list, and lots of reader submitted photos. We also have lots of American Girl furniture and accessory plans.
Specifications
| Project type | Toys |
|---|---|
| Room | Kids and Toys |
| Style | Children's and Kid's Room Furniture and Toy Plans |
| Difficulty | Intermediate |
| Estimated cost | $100-$150 |
Dimensions
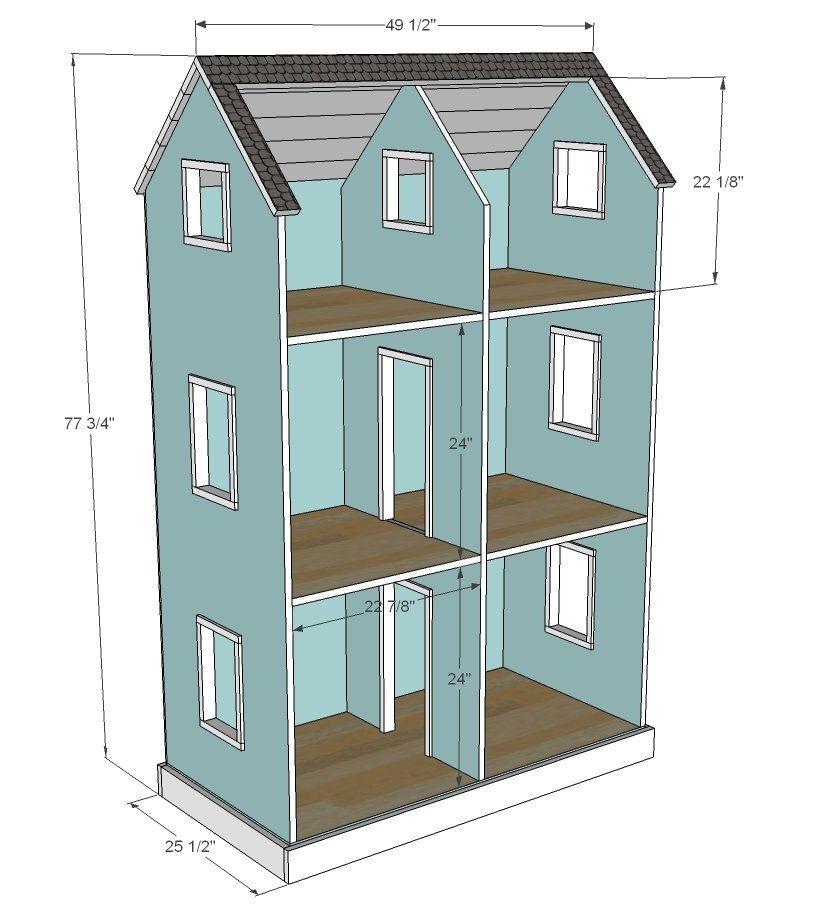
Use the size-specific shopping and cut lists below.
Shopping List
- 2 - sheets 3/4" plywood or MDF
- 1 - sheet 1/4" plywood or MDF (for back)
- 6 - 1x4 @ 12 feet long (add another one for the base if desired)
- 4 - 1x2 @ 8 feet long
- 1-1/4" pocket hole screws
- 1-1/4" finish nails or staples
Cut List
WALLS AND FLOORS
- 3 - 3/4" plywood or MDF @ 23-3/4" x 73" (sides and center divider)
- 1 - 3/4" plywood or MDF @ 23-3/4" x 48" (bottom)
- 4 - 3/4" plywood or MDF @ 23-3/4" x 22-7/8" (upper floors)
ROOF
- 5 - 1x4 @ 49-1/2" (OR 1- 3/4" plywood @ 49-1/2" x 17-1/2" (measure and cut to fit))
- 1 - 1x4 @ 49-1/2"
- 2 - 1x4 @ 14-3/4"
BACK
- 1 - 1/4" plywood @ 48" x 61-1/2"
WINDOWS - CUT TO FIT
Tools
- measuring tape
- square
- safety glasses
- hearing protection
- kreg-jig
- drill
- circular saw
- jigsaw
- nailer
- sander
Step-by-step Instructions
Step 1
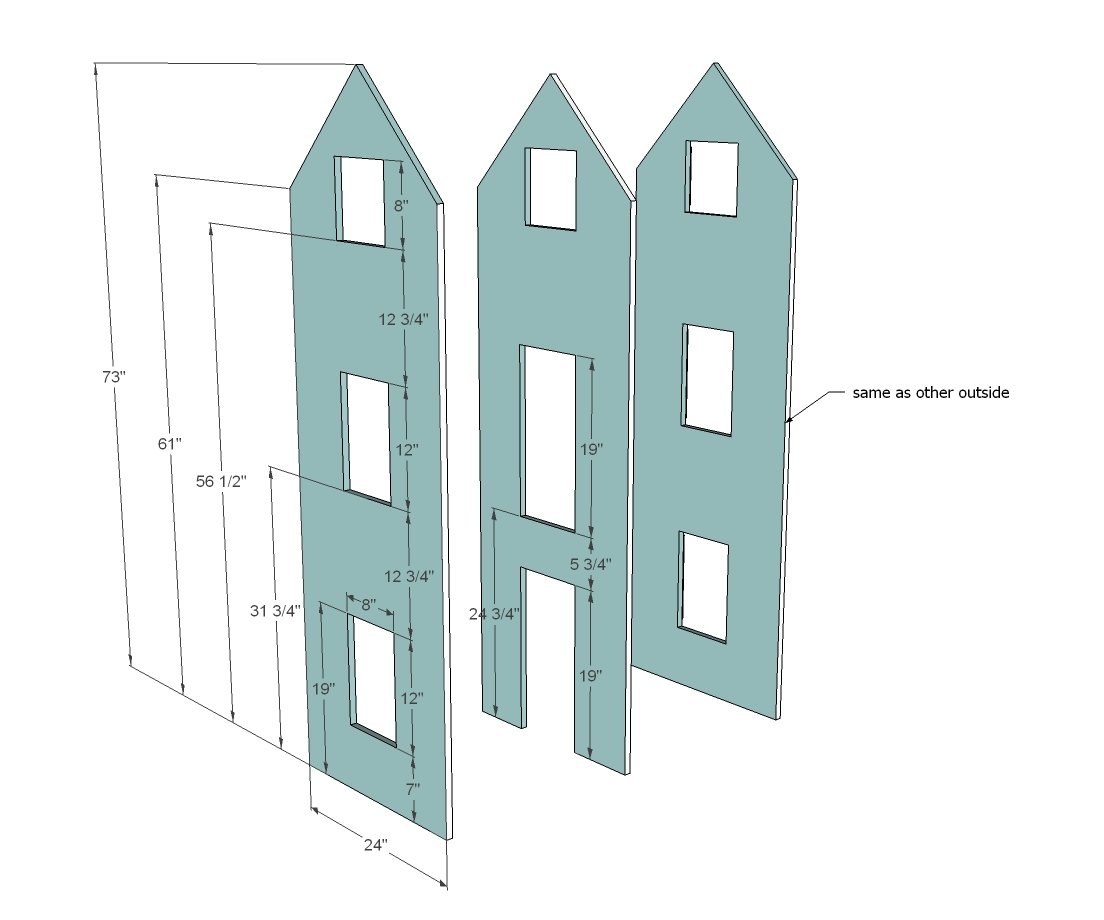
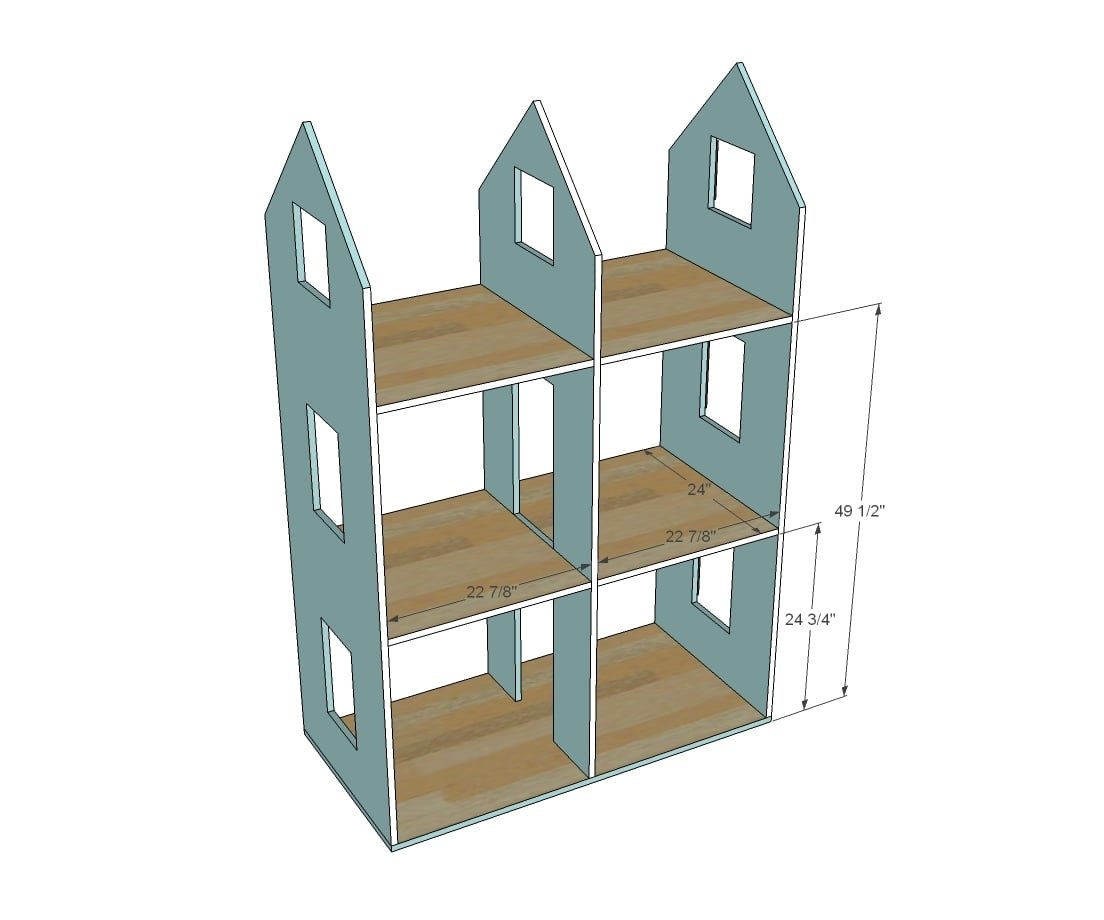
First, cut out all the pieces. If you don't have a truck or tablesaw, it might be easier to have your home improvement store rip your plywood into 22-3/4" widths, 8 feet long. Then cut the longest pieces first. The top roof angle is 45 degrees. You can easily find this by finding the center of your side and middle panels (at the top). This distance should be 11-7/8" from the sides. Then measure down 11-7/8", and draw a diagonal between the two points. Then mark out all windows and doors and cut out with a jigsaw.
Step 2
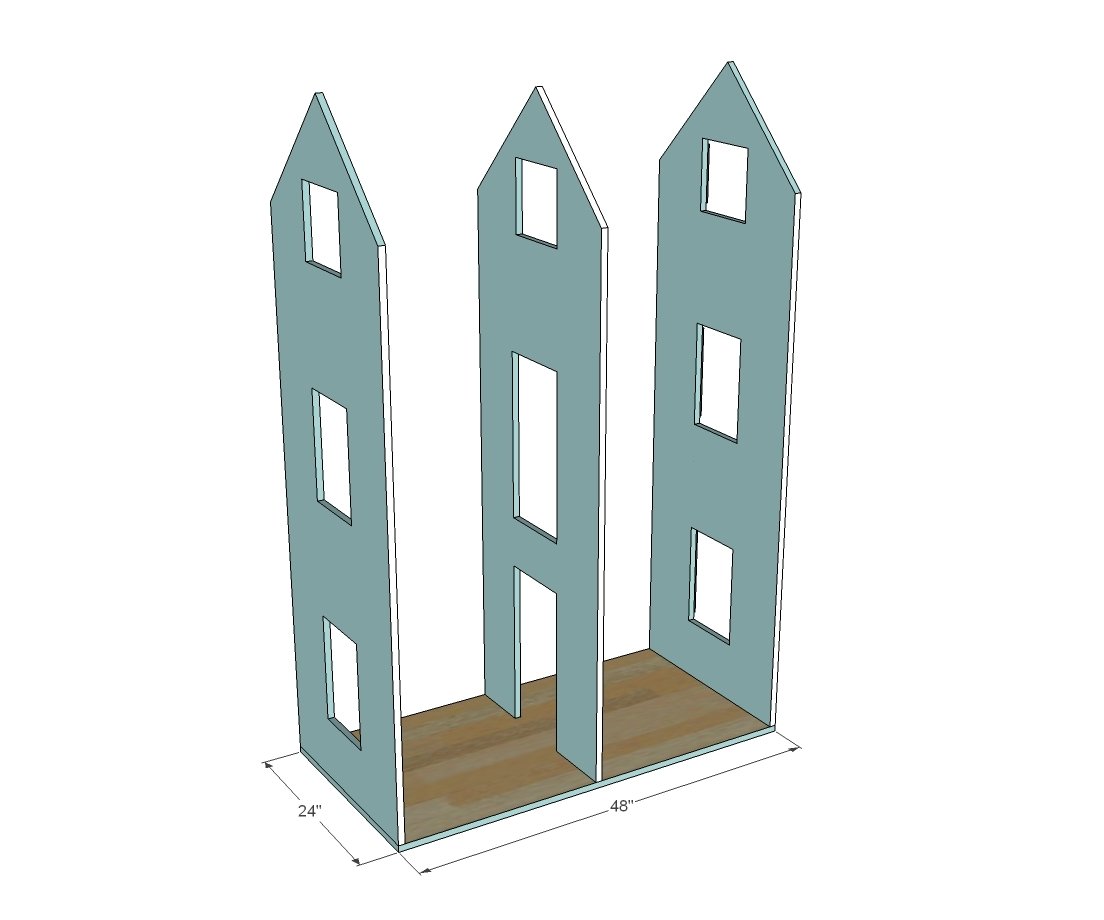
Once the pieces are cut, attach the floor to the walls. I used a Kreg Jig set at 3/4" and 1-1/4" pocket hole screws.
Step 3
Next, add the floors. I used 3/4" pocket holes on the underside and 1-1/4" pocket hole screws.
Step 4
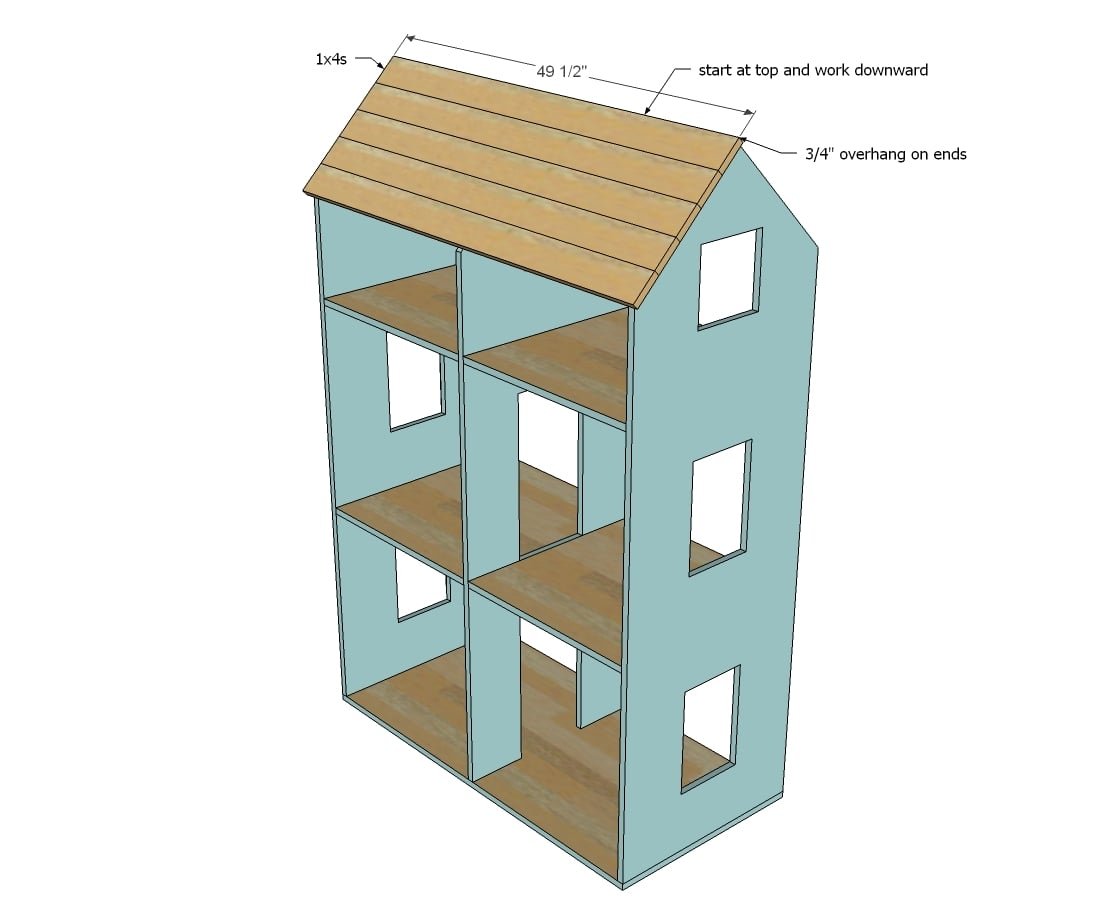
Because we opted for one large room on the top floor, I opted to use plywood for my roof (no center support without the divided upper room). Keep top edge flush as you attach room with glue and finish nails or staples.
Step 5
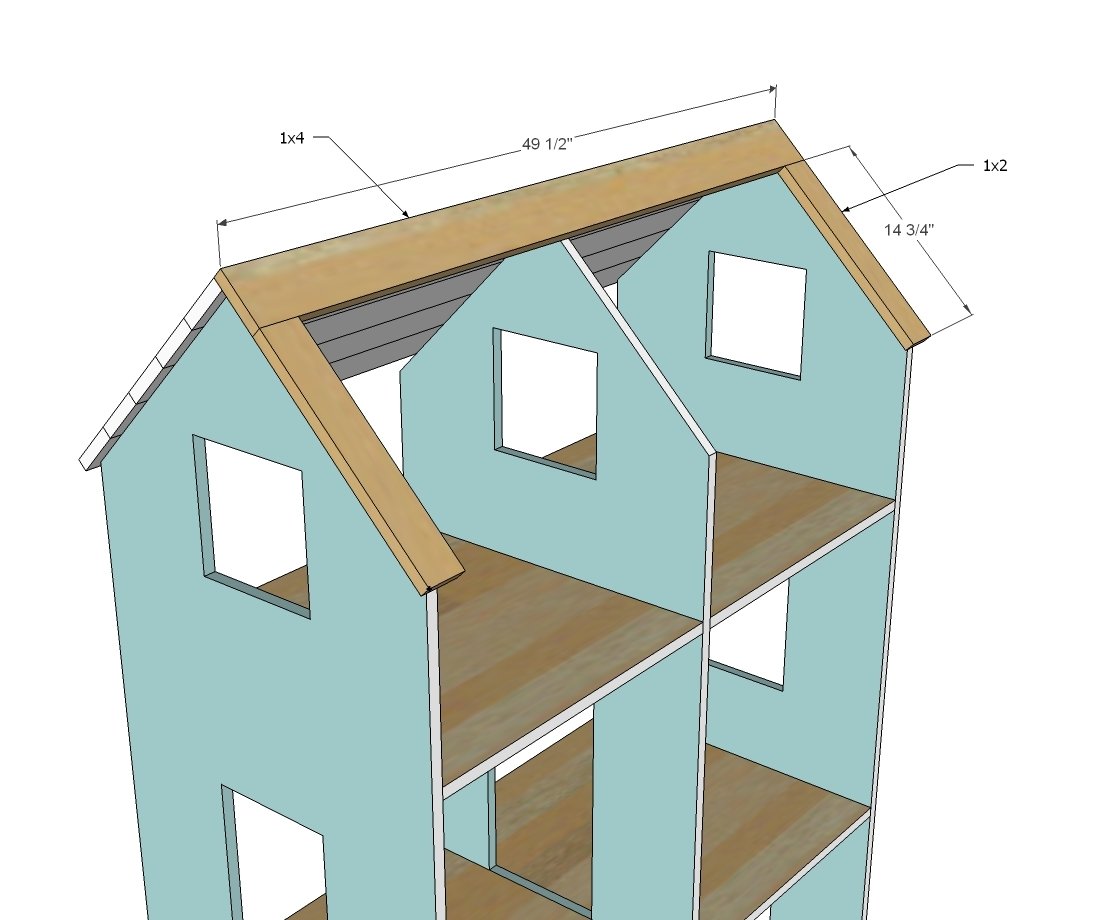
For the roof front, we just used 1x boards. If first attached together with pocket holes, and then attached the entire roof panel on top.
Step 6
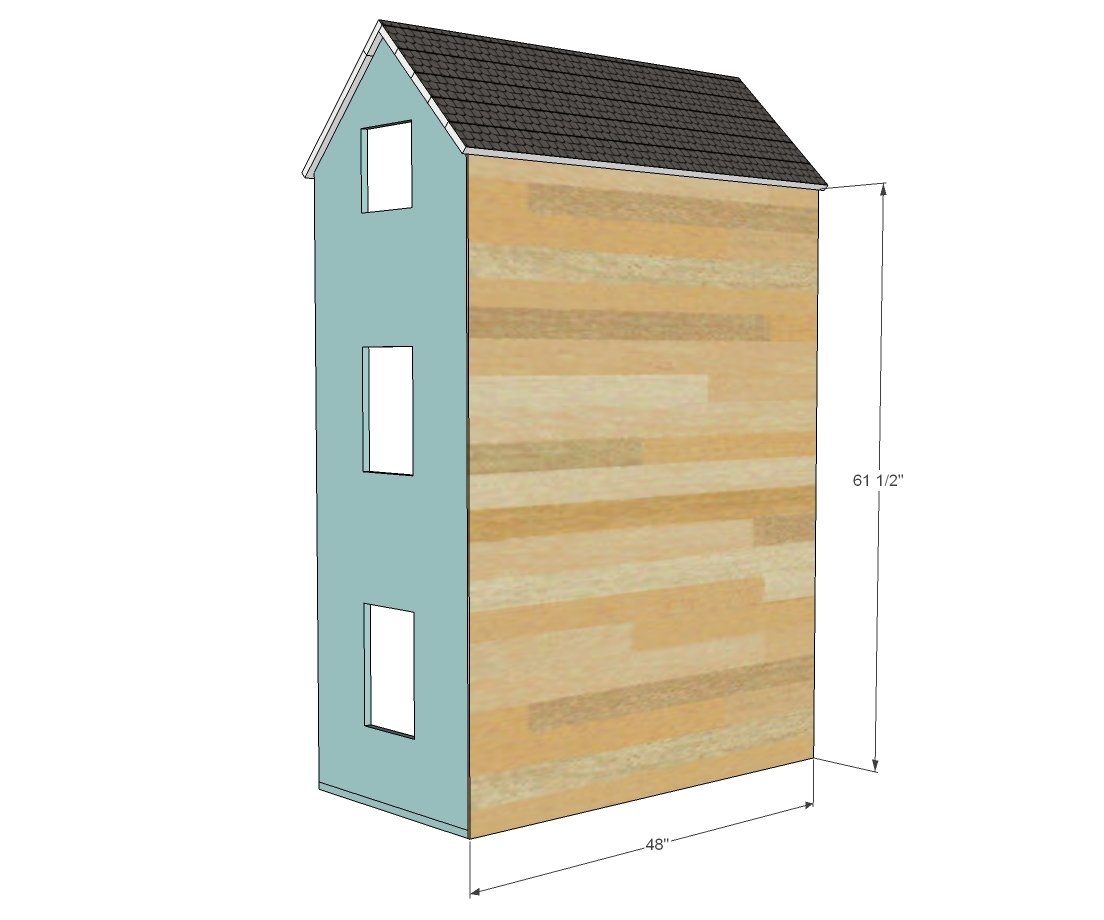
For the back, I used 1/4" plywood and nailed it to all of the walls and floors with glue.
Step 7
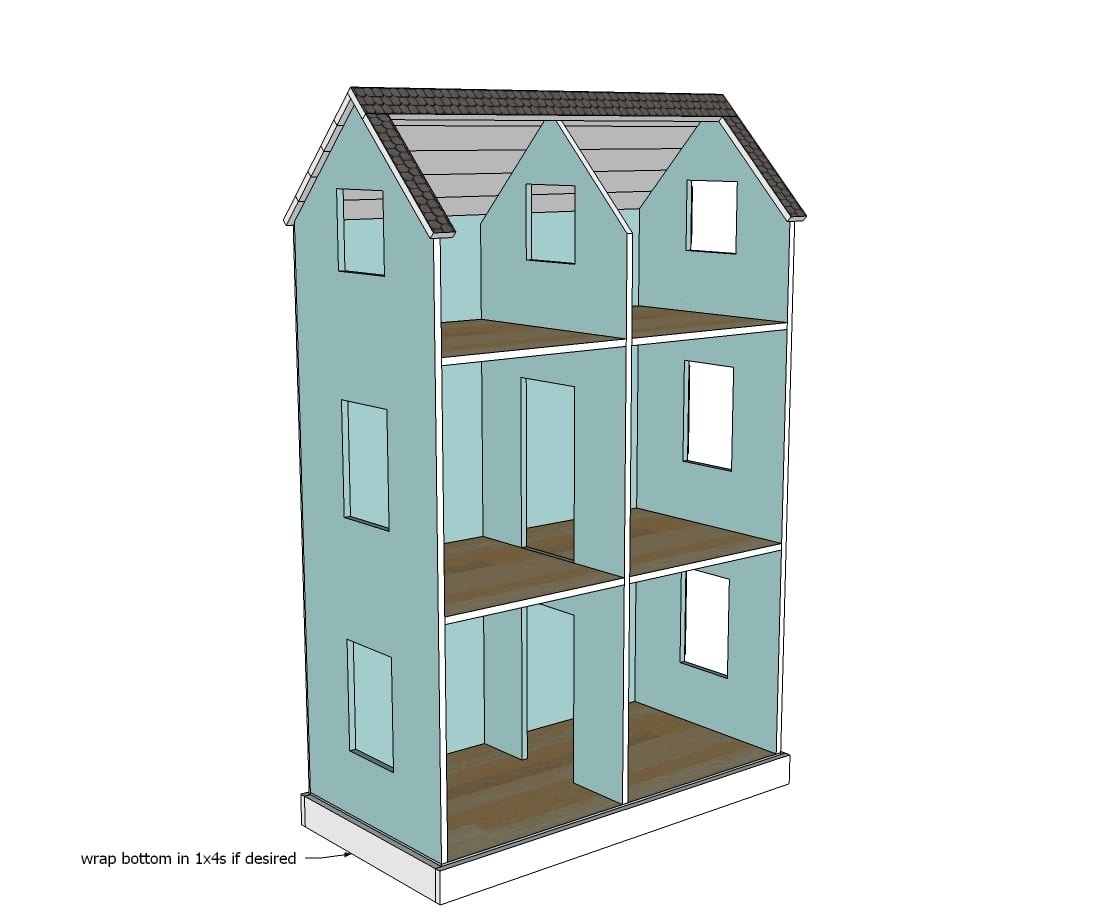
We opted for caster wheels instead, but you could also finish out the base with 1x boards. Shown in the diagram is 1x4s.
Step 8
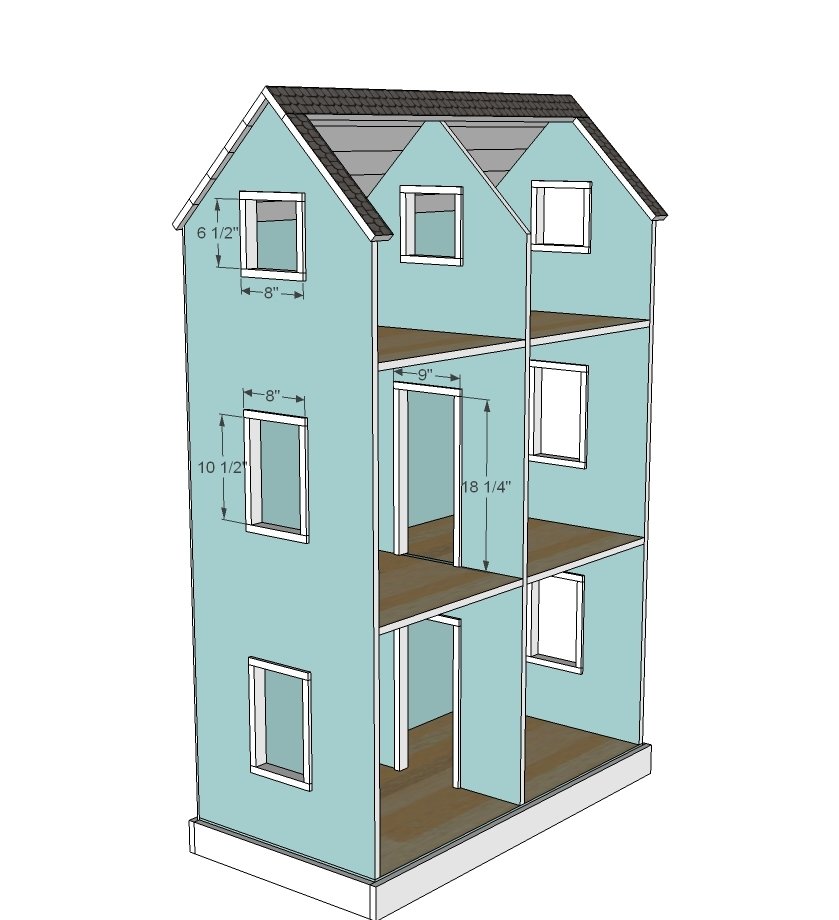
I measured each window and built the window trim to fit snugly, gluing in place when I was done.
Step 9
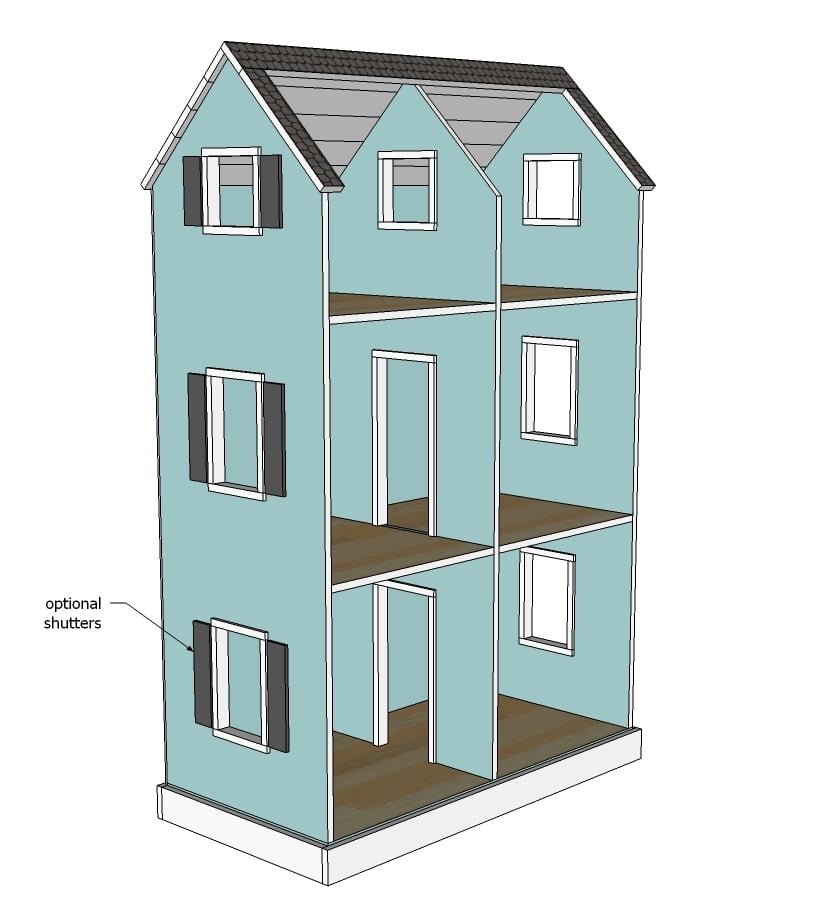
I haven't added shutters yet, but this is what 1x2 shutters would look like.
Finishing
Sand all surfaces, starting with a medium grit and finishing with fine. Wipe off the dust, fill any holes or gaps with wood filler, and sand smooth once dry. Apply primer if you're painting, then finish with your choice of paint or stain and seal with a durable clear topcoat. For outdoor projects, use exterior-rated primer, paint or stain, and sealer so the piece stands up to the weather.
Source (temporary): https://www.ana-white.com/woodworking-projects/american-girl-dollhouse-fits-18-dolls