Ana's Slipper Chair
A few years ago, Ana posted a drawing of a slipper chair on the Knock-Off Wood Facebook page. She hadn't had time to create the plans... I wanted to build the chair so I hacked Ana's drawing and created plans for it!
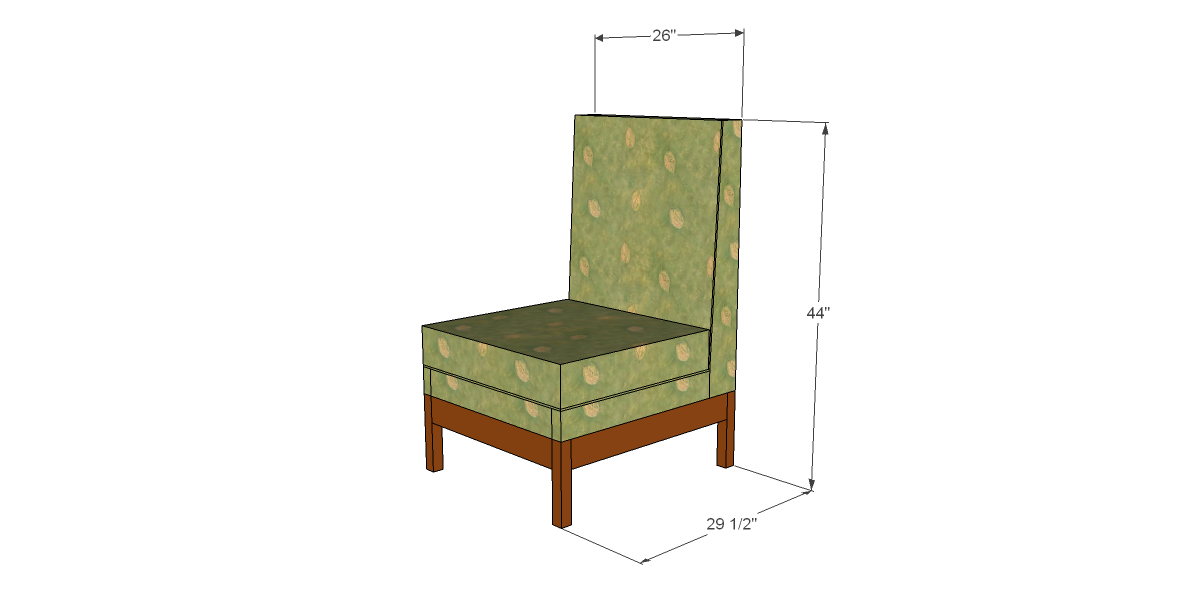
Specifications
| Project type | Chairs |
|---|---|
| Room | Teens |
| Style | Cottage Style Furniture Plans |
| Difficulty | Intermediate |
| Estimated cost | $20 - $50 |
Dimensions
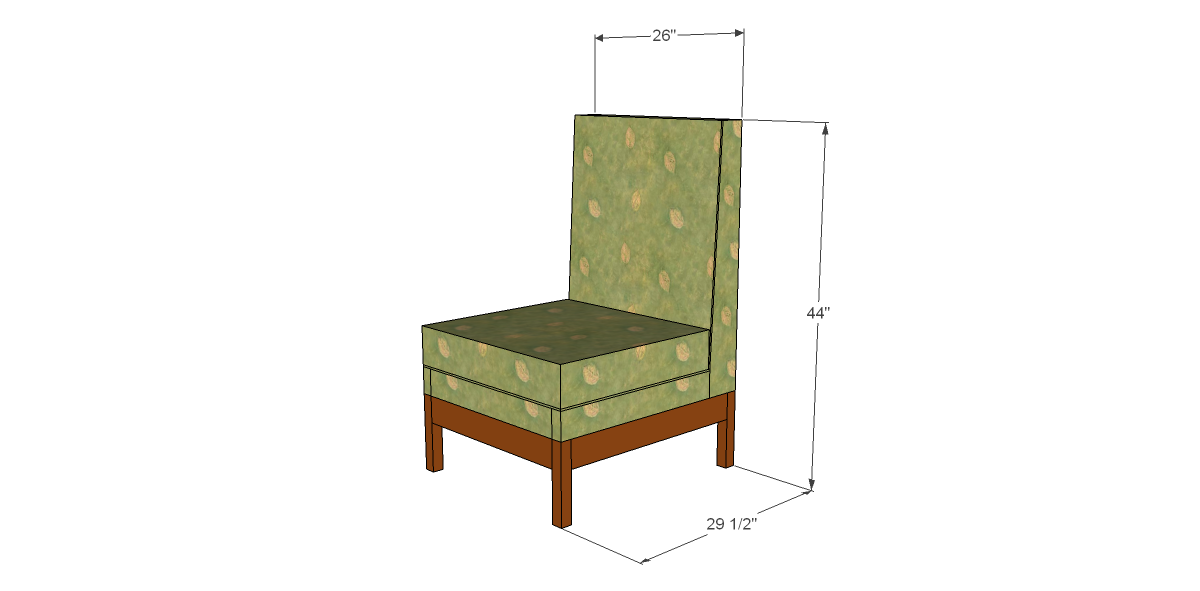
Use the size-specific shopping and cut lists below.
Shopping List
1 – 2x2 at 6’
3 – 2x4 at 8’
1 – 2x6 at 8’
Half sheet of ¼” lauan or hardboard
2-1/2” pocket hole screws
1-1/4” brad nails
4 – 4” carriage bolts with nuts
8 – fender washers
1” upholstery foam
5” upholstery foam
Upholstery batting
Fabric
Upholstery tacks
Cut List
4 – 2x2 at 10” – Legs
5 – 2x4 at 23” – Leg Frame, Support, & Seat Box
2 – 2x4 at 26-1/2” – Leg Frame
2 – 2x4 at 24-1/4” – Seat Box
1 – 2x2 at 23” – Seat Support
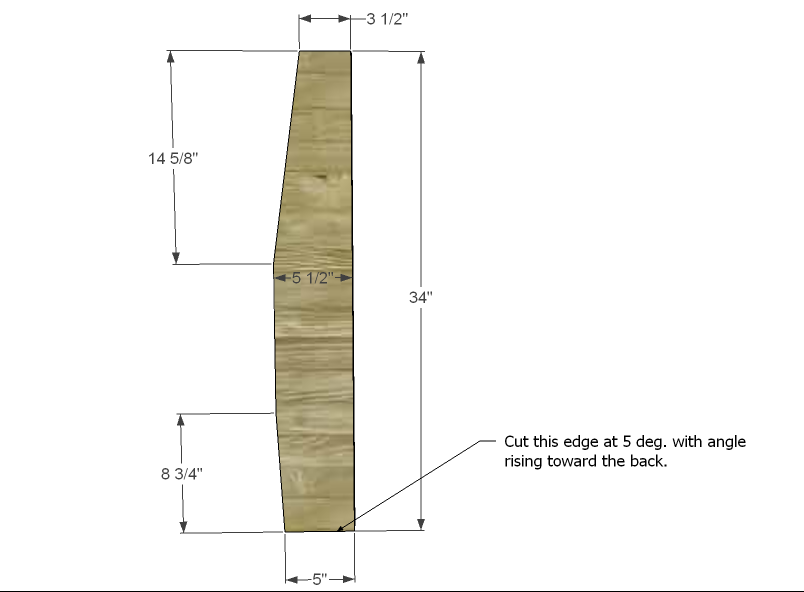
2 – 2x6 at 34” – Back Frame Sides
3 – 2x4 at 23” – Back Frame
1 – 2x6 at 23” (ripped to 5” wide) – Back Frame Bottom
1 – ¼” lauan or hardboard at 26” x 30-1/2” – Back
1 – ¼” lauan or hardboard at 23-3/4” x 26” – Seat
Tools
- measuring tape
- square
- pencil
- safety glasses
- hearing protection
- kreg-jig
- drill
- circular saw
- jigsaw
- compound miter saw
- table saw
- nailer
- sander
- staple gun
Step-by-step Instructions
Step 1
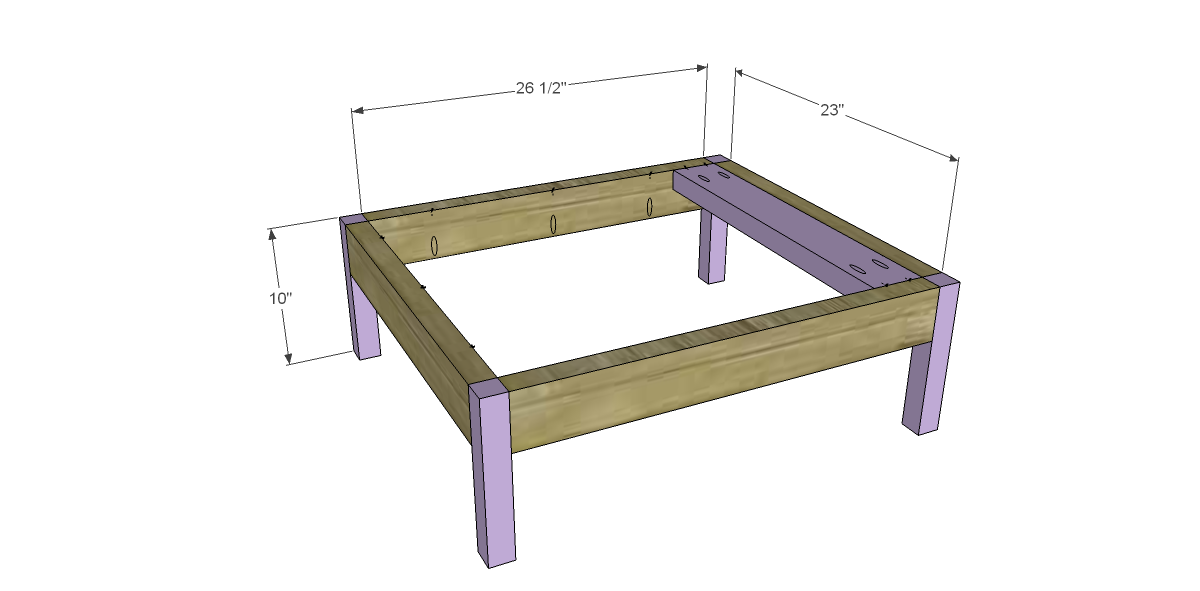
Cut the pieces for the frame. Drill pocket holes in each end of the 2x4 pieces, as well as one long edge of the sides and the front (to attach the top). Assemble using glue and 2-1/2" pocket hole screws. Paint or stain as desired and set aside.
Step 2
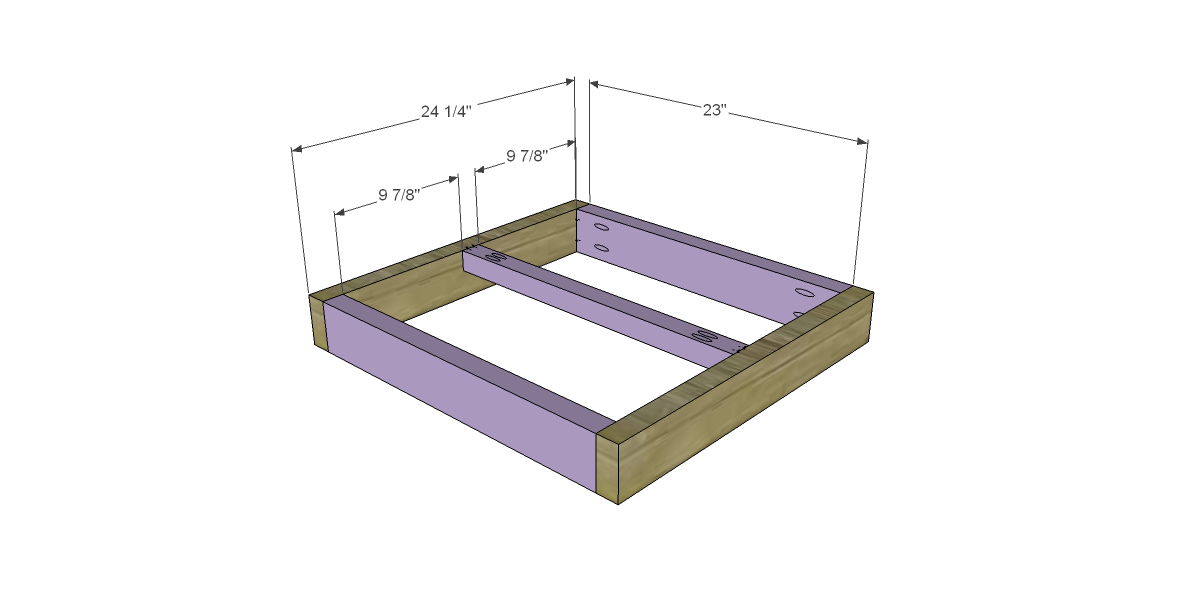
Cut the pieces for the seat box. Drill pocket holes in each end of the shorter pieces, as well as the 2x2 support. Assemble the frame as shown using glue and 2-1/2" pocket hole screws.
Step 3
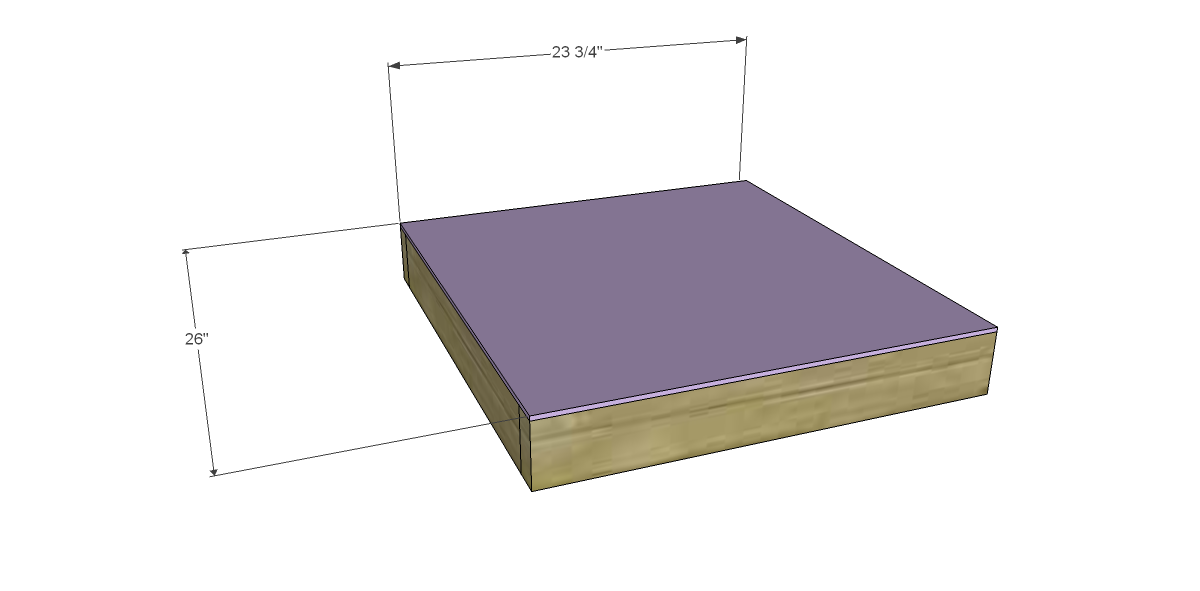
Cut the piece for the seat and attach to the frame using glue and 1-1/4" brad nails.
Step 4
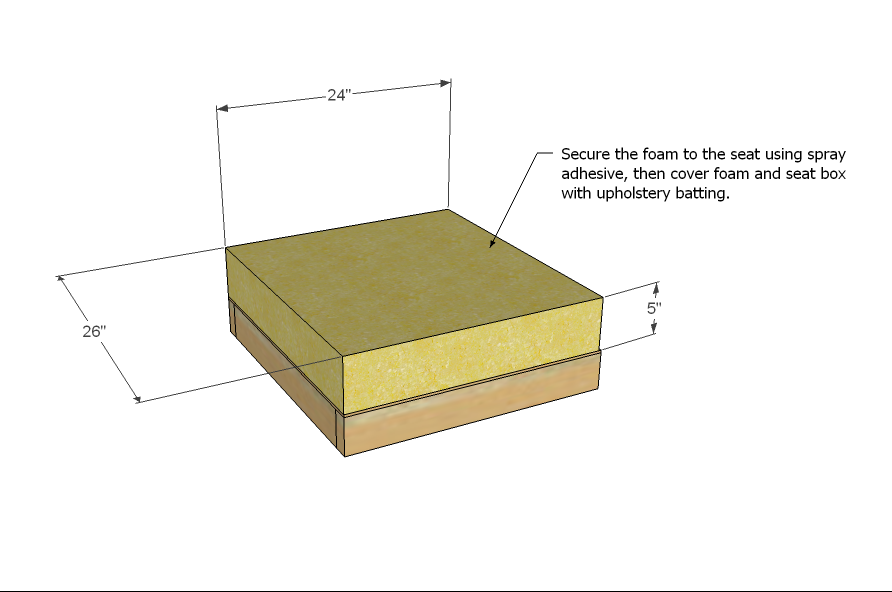
Cut the 5" foam and position on the seat with spray adhesive. Cover the foam and seat box with upholstery batting, then fabric. Secure to the underside of the box using staples.
Step 5
Step 6
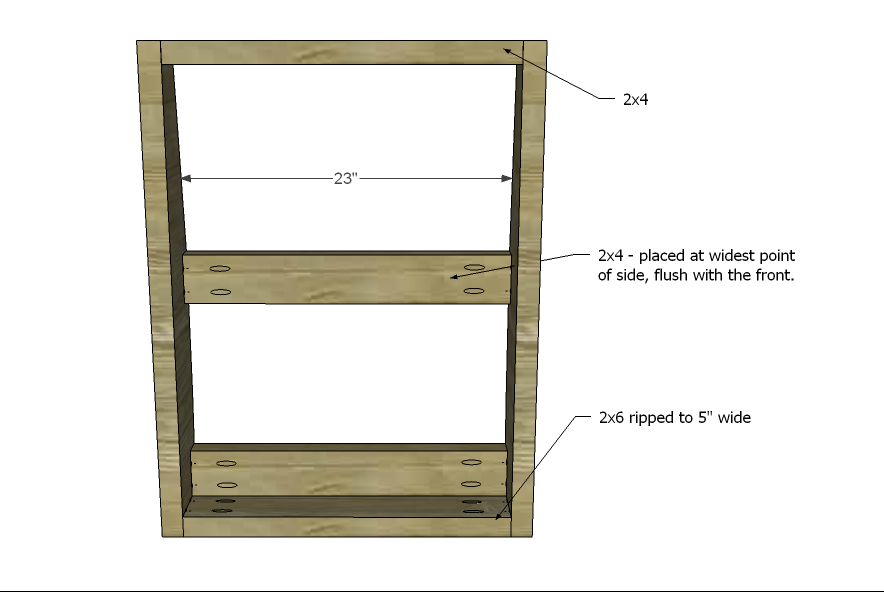
Cut the remaining pieces for the back frame and drill pocket holes in each end. Position as shown and secure using glue and 2-1/2" pocket hole screws.
Step 7
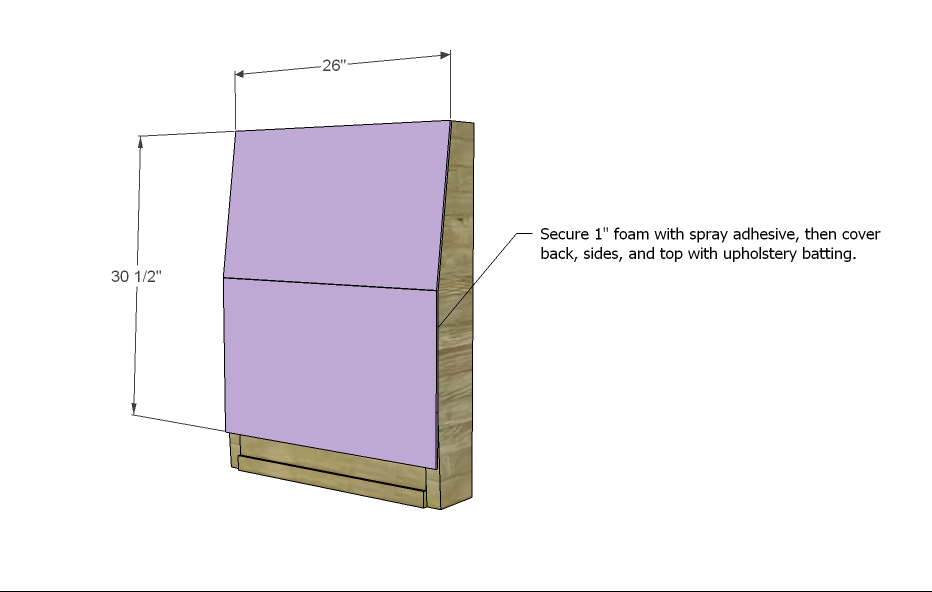
Cut the piece for the back rest. It will bend slightly over the curve. Secure using glue and 1-1/4" brad nails. Position the 1" foam using spray adhesive. Cover the back rest, sides, and top of the back frame with upholstery batting and fabric. Staple to the inside of the frame.
Step 8
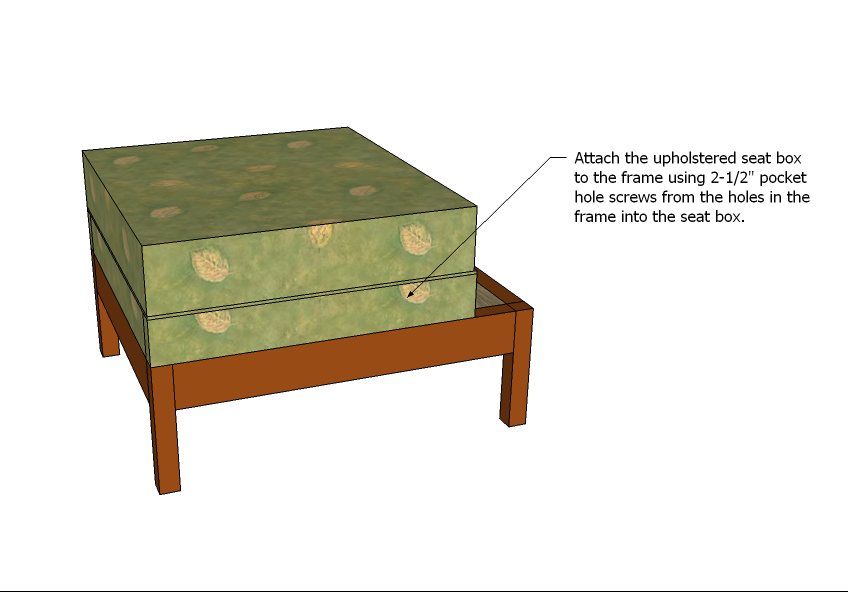
Position the seat box on the frame and secure using 2-1/2" pocket hole screws drilled through the upper edges of the frame.
Step 9
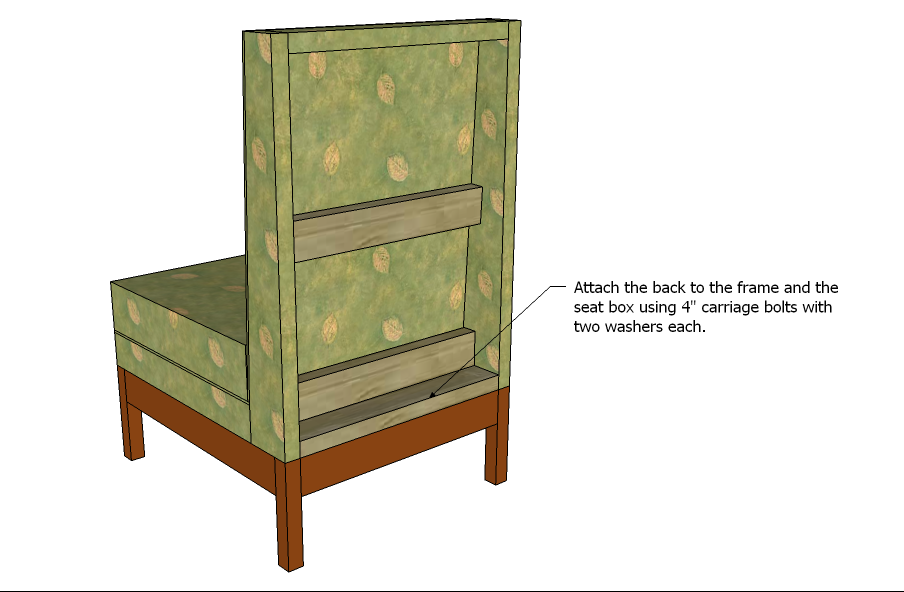
Position the back frame and clamp in place. Drill two holes (for the carrieage bolts) through the lower stretcher on the back frame into the seat box, as well as through the bottom piece of the back frame into the chair frame. Insert the bolts using a washer on each side of the pieces and tighten with a socket wrench. Cut a piece of the fabric to cover the exposed area of the back and secure in place using upholstery tacks.
Finishing
Sand all surfaces, starting with a medium grit and finishing with fine. Wipe off the dust, fill any holes or gaps with wood filler, and sand smooth once dry. Apply primer if you're painting, then finish with your choice of paint or stain and seal with a durable clear topcoat. For outdoor projects, use exterior-rated primer, paint or stain, and sealer so the piece stands up to the weather.
Source (temporary): https://www.ana-white.com/woodworking-projects/anas-slipper-chair