Angled Bookrack and Toybin
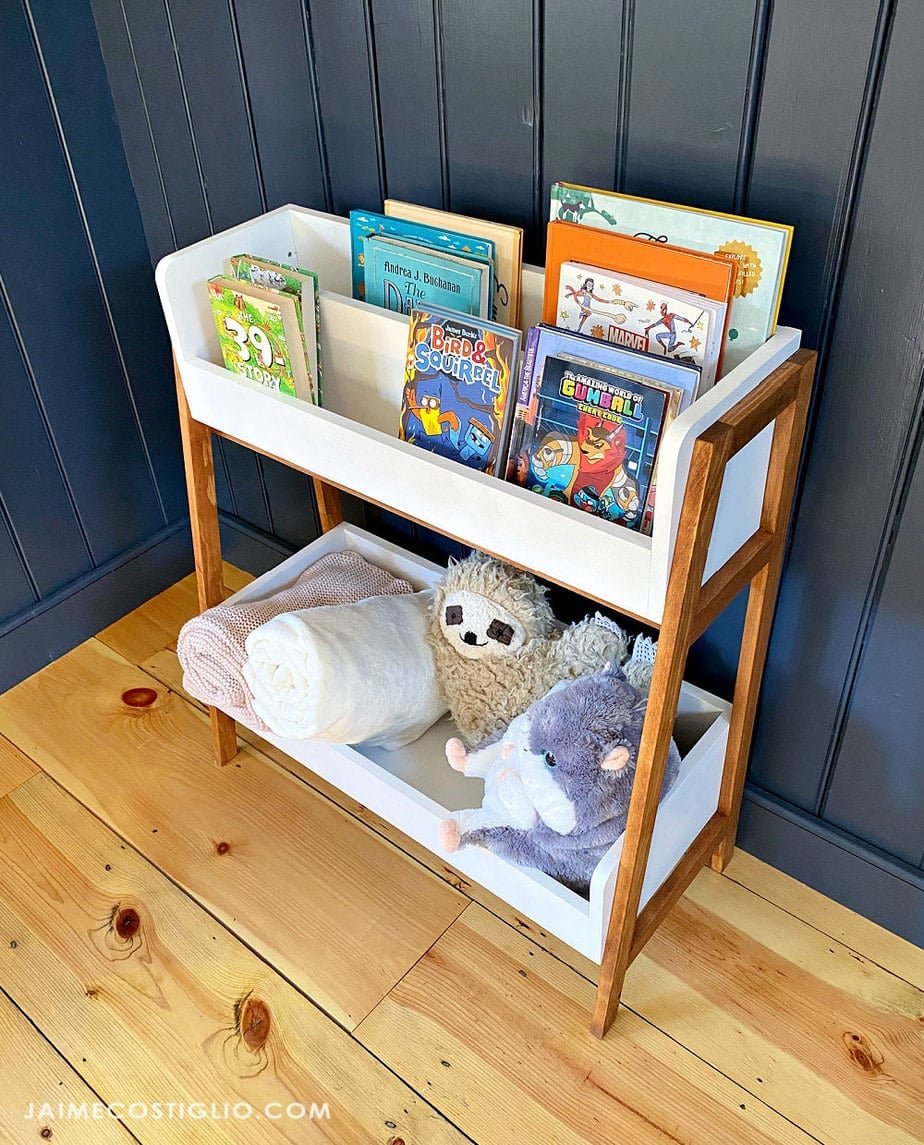
Build your own bookrack with toy bin with! Features a upper shelf for sorting books of different sizes, and a generous bottom bin for holding stuffies and larger items. Built by for Handbuilt Holiday 2021. from
Specifications
| Project type | Bookshelf and Bookcase Plans |
|---|---|
| Room | Storage Solutions |
| Difficulty | Intermediate |
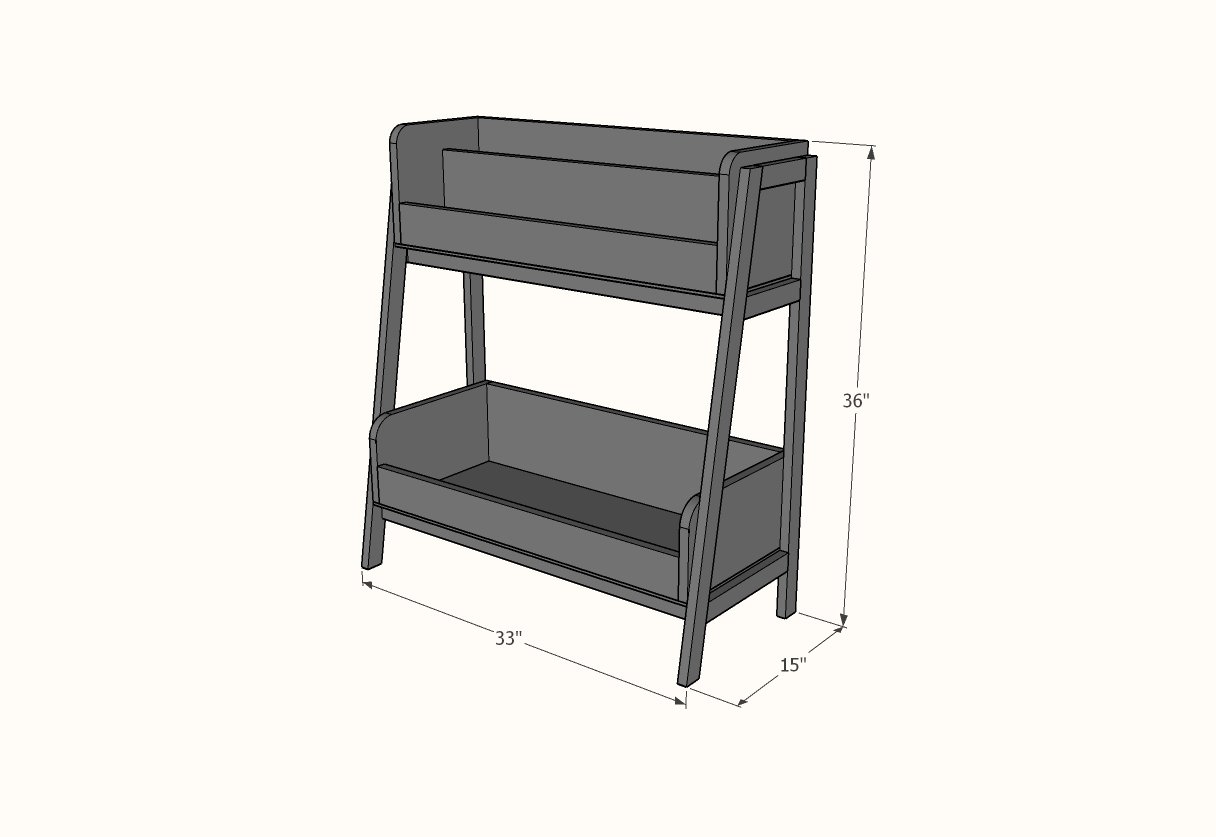
Dimensions
Use the size-specific shopping and cut lists below.
Shopping List
- 4 - 1x2 @ 8 feet long
- 2 - 1x10 @ 5 feet long
- 1 - 1x8 @ 8 feet long
- 1 - 1x4 @ 6 feet long
- 1 - 1/4" plywood panel or underlayment panel @ 24" x 48"
- 1-1/4" and 3/4" brad nails
Cut List
Frame
- 2 - 1x2 @35" - back legs
- 2 - 1x2 @ 35-1/2" - front legs - both ends cut at 10 degrees off square, ends are parallel, long point to short point
- 2 - 1x2 @ 6" - long point measurement, one end cut at 10 degrees off square
- 2 - 1x2 @ 7-1/2" - long point measurement, one end cut at 10 degrees off square
- 2 - 1x2 @ 11-1/8" - long point measurement, one end cut at 10 degrees off square
- 4 - 1x2 @ 31-1/2"
Top Shelf
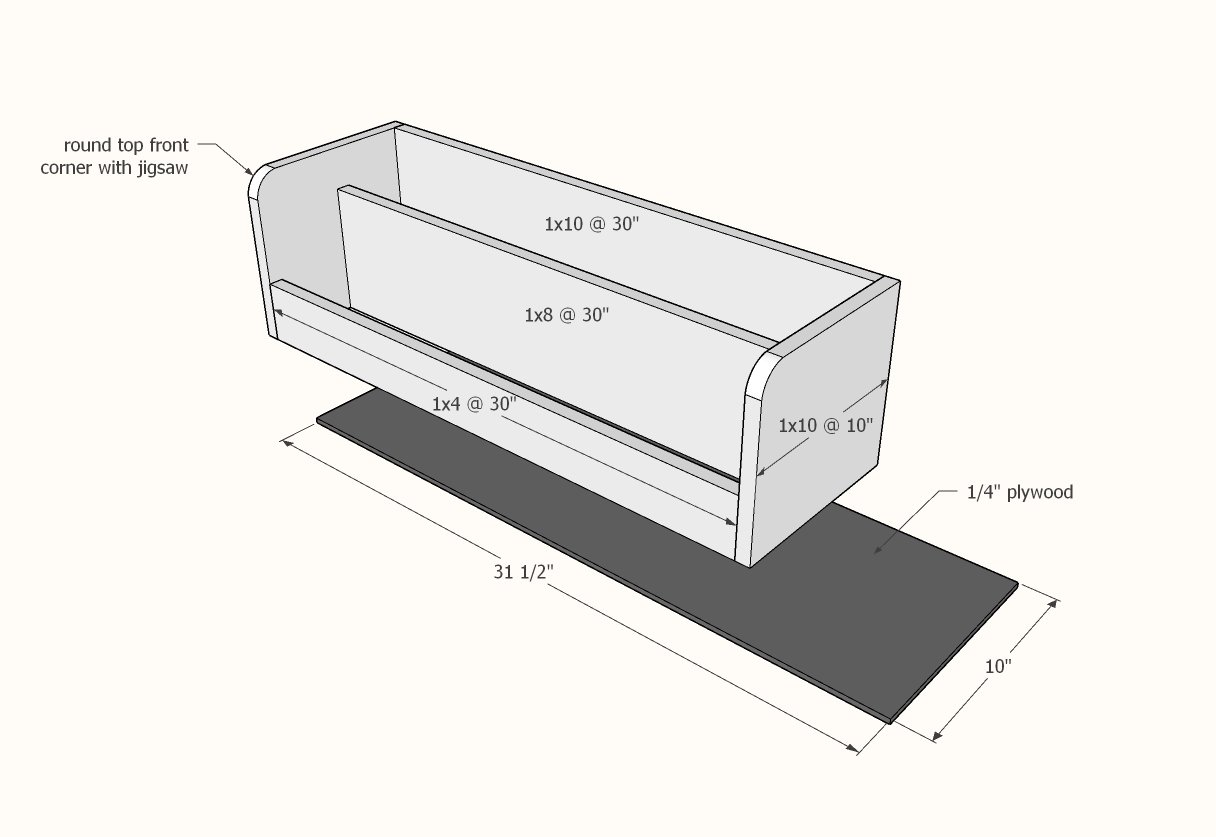
- 2 - 1x10 @ 10"
- 1 - 1x10 @ 30"
- 1 - 1x8 @ 30"
- 1 - 1x4 @ 30"
- 1 - 1/4" plywood @ 10" x 31-1/2"
Bottom Shelf
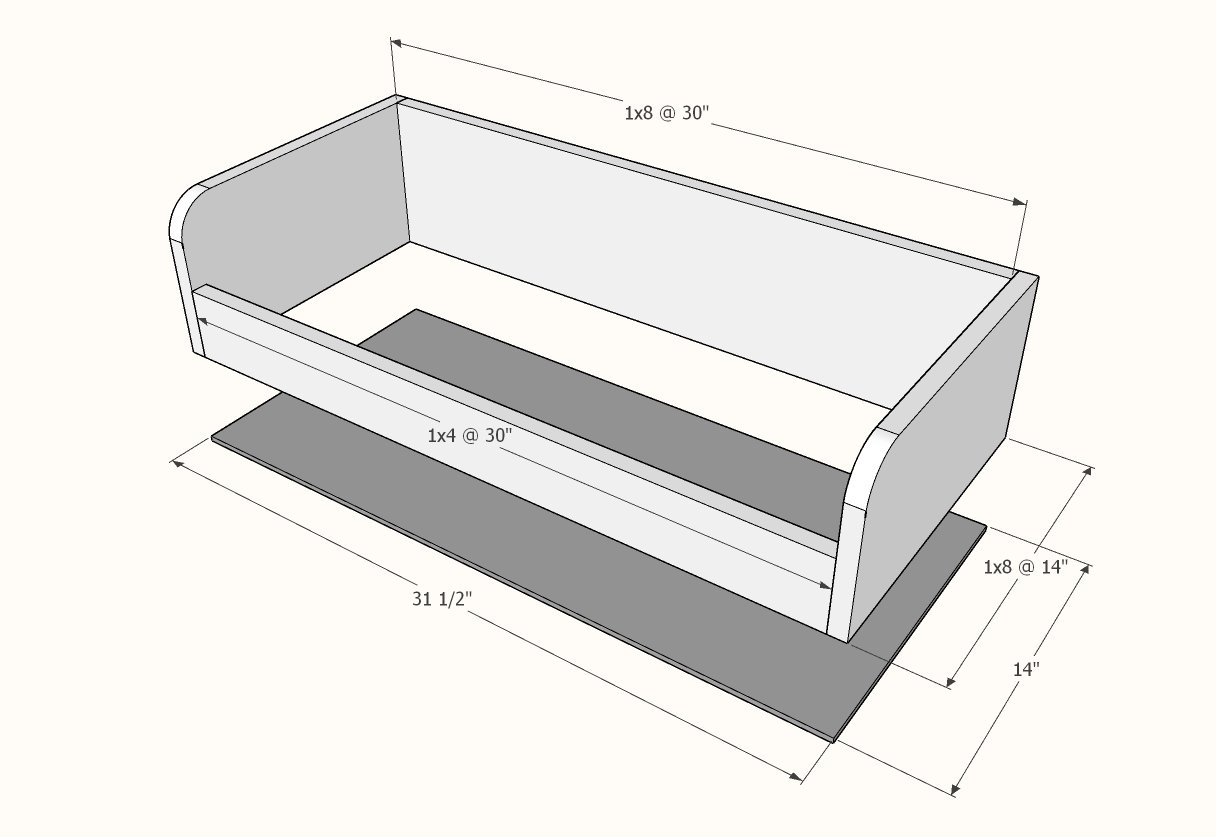
- 2 - 1x8 @ 14"
- 1 - 1x8 @ 30"
- 1 - 1x4 @ 30"
- 1 - 1/4" plywood @ 10" x 31-1/2"
Tools
- measuring tape
- square
- pencil
- safety glasses
- kreg-jig
- drill
- jigsaw
- compound miter saw
- nailer
- sander
Step-by-step Instructions
Step 1
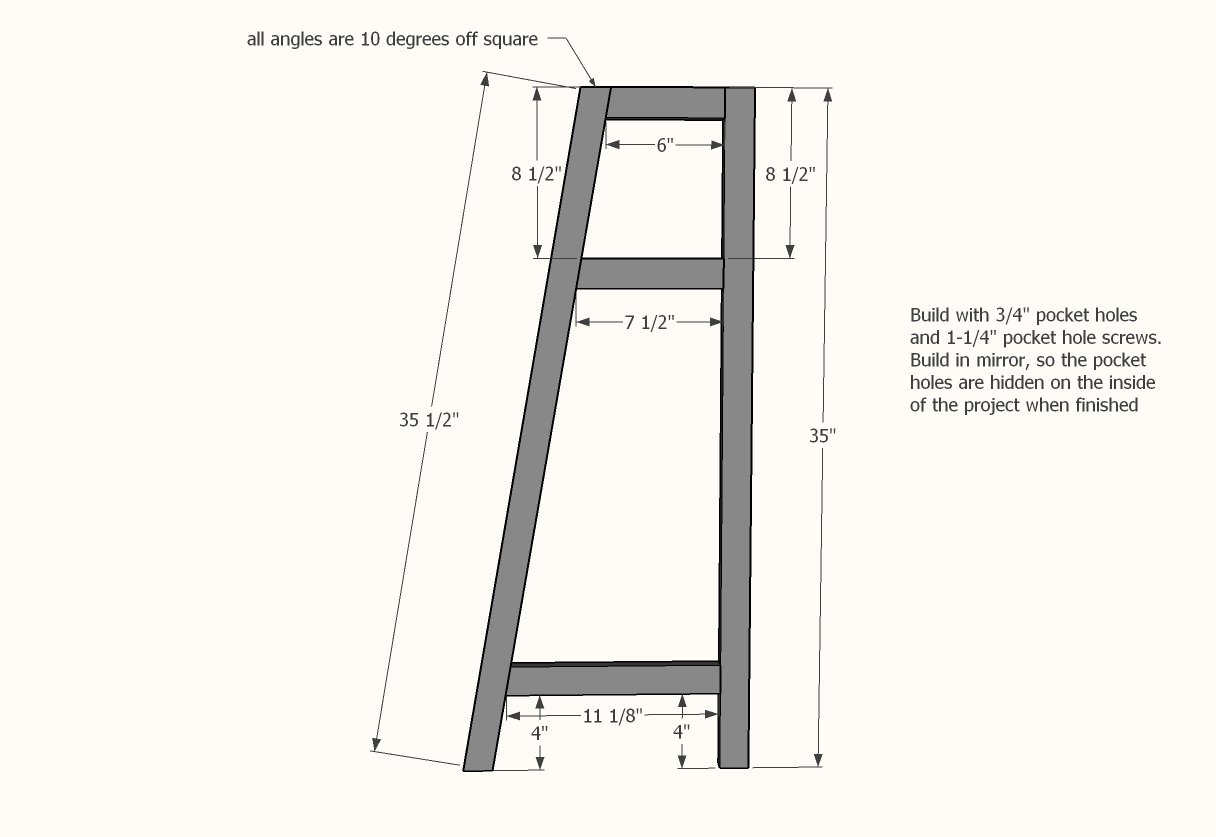
Lay out the leg sets and mark. Drill pocket holes and attach. Two pocket holes are recommended, but you could get away with one if you use glue. Make sure you build in mirror, so the pocket holes are hidden on the inside.
Step 2
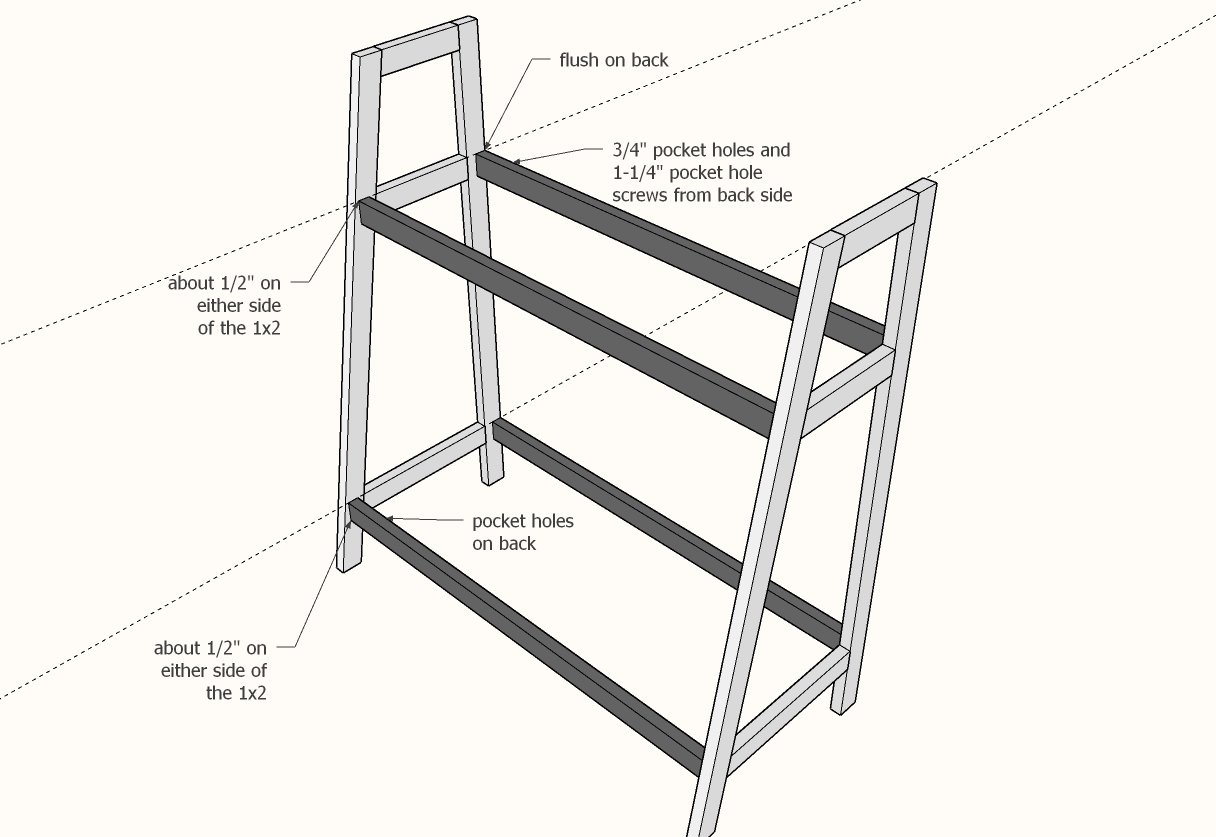
Attach the horizontal supports to the legs with pocket holes on the back side - two pocket holes per joint is recommended.
Build the book rack portion with 1-1/4" brad nails and glue.
Use 5/8" brad nails and glue to attach the bottom.
Build the lower bin using 1-1/4" brad nails and wood glue.
Attach bottom with 5/8" brad nails and wood glue.
Step 5
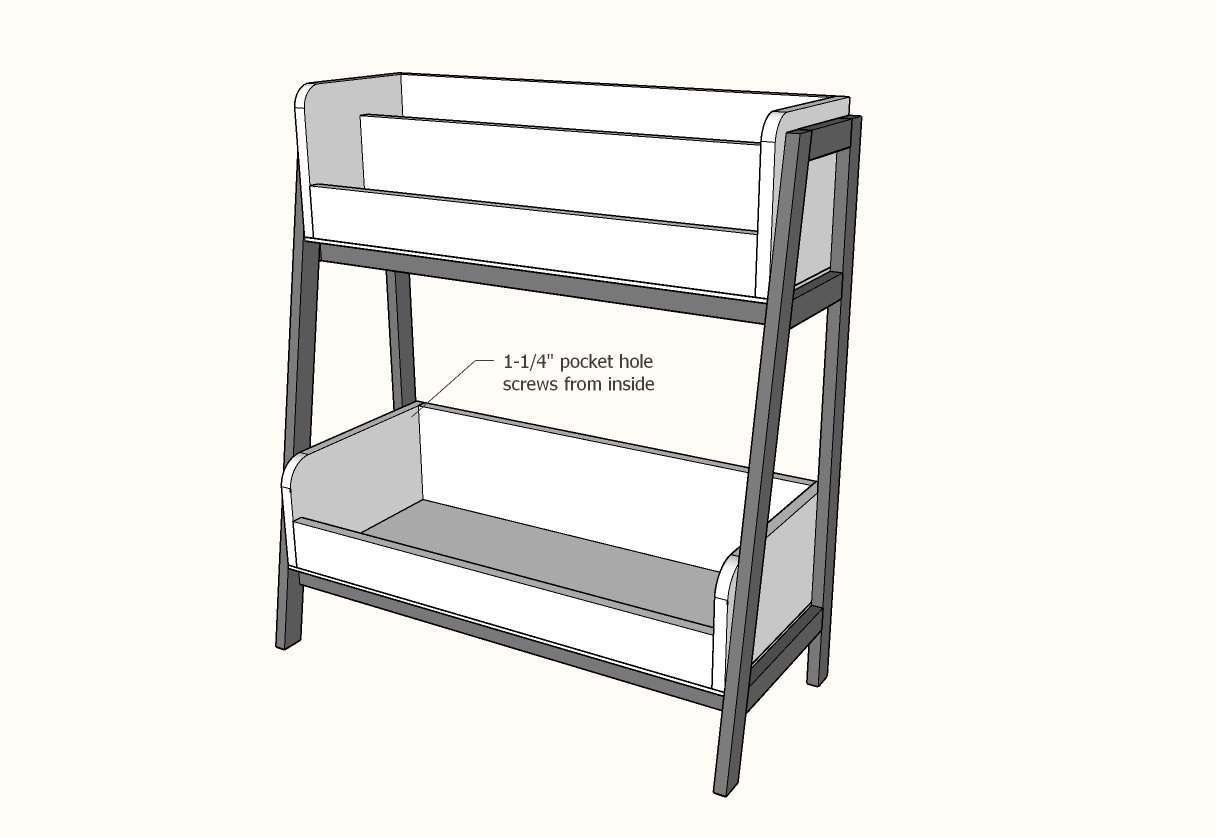
Place the bins inside the frame and attach from inside into the frame with 1-1/4" screws (yes, you can use pocket hole screws).
Finishing
Sand all surfaces, starting with a medium grit and finishing with fine. Wipe off the dust, fill any holes or gaps with wood filler, and sand smooth once dry. Apply primer if you're painting, then finish with your choice of paint or stain and seal with a durable clear topcoat. For outdoor projects, use exterior-rated primer, paint or stain, and sealer so the piece stands up to the weather.
Source (temporary): https://www.ana-white.com/woodworking-projects/angled-bookrack-and-toybin