Animal Book Cart
to build an animal book cart. You can easily customize the front for any type of animal. Easy to build with just a few tools and step by step diagrams and lots of photos.
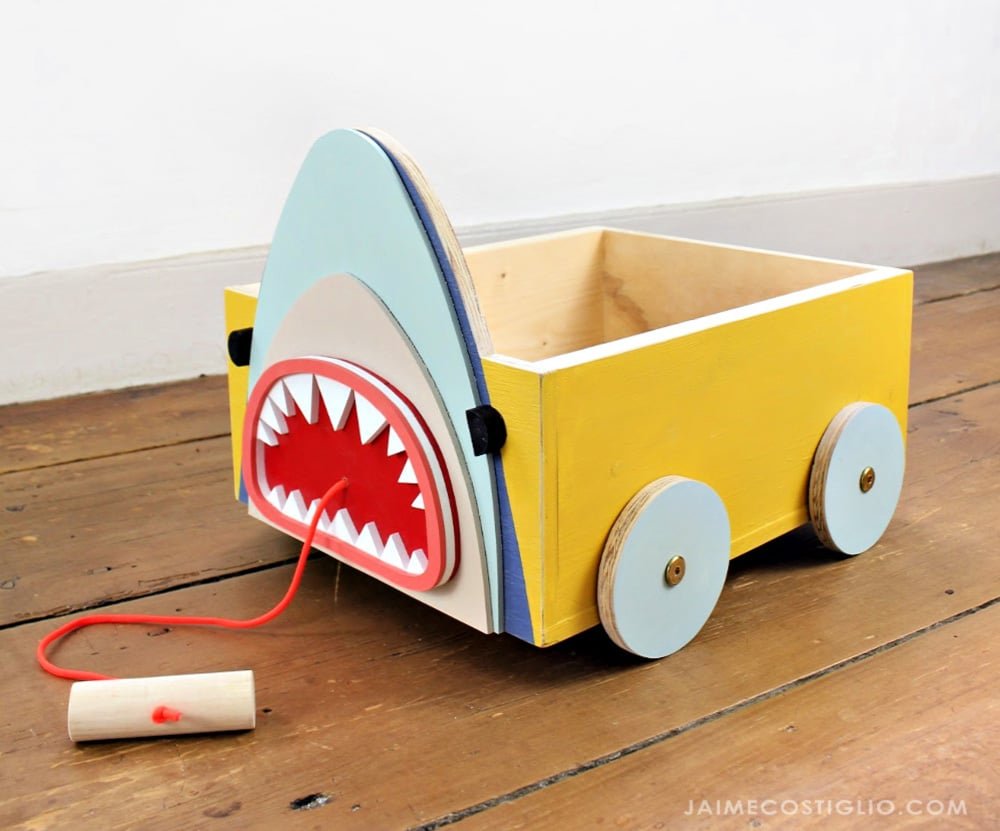
Specifications
| Project type | Toys |
|---|---|
| Room | Kids and Toys |
| Difficulty | Beginner Projects |
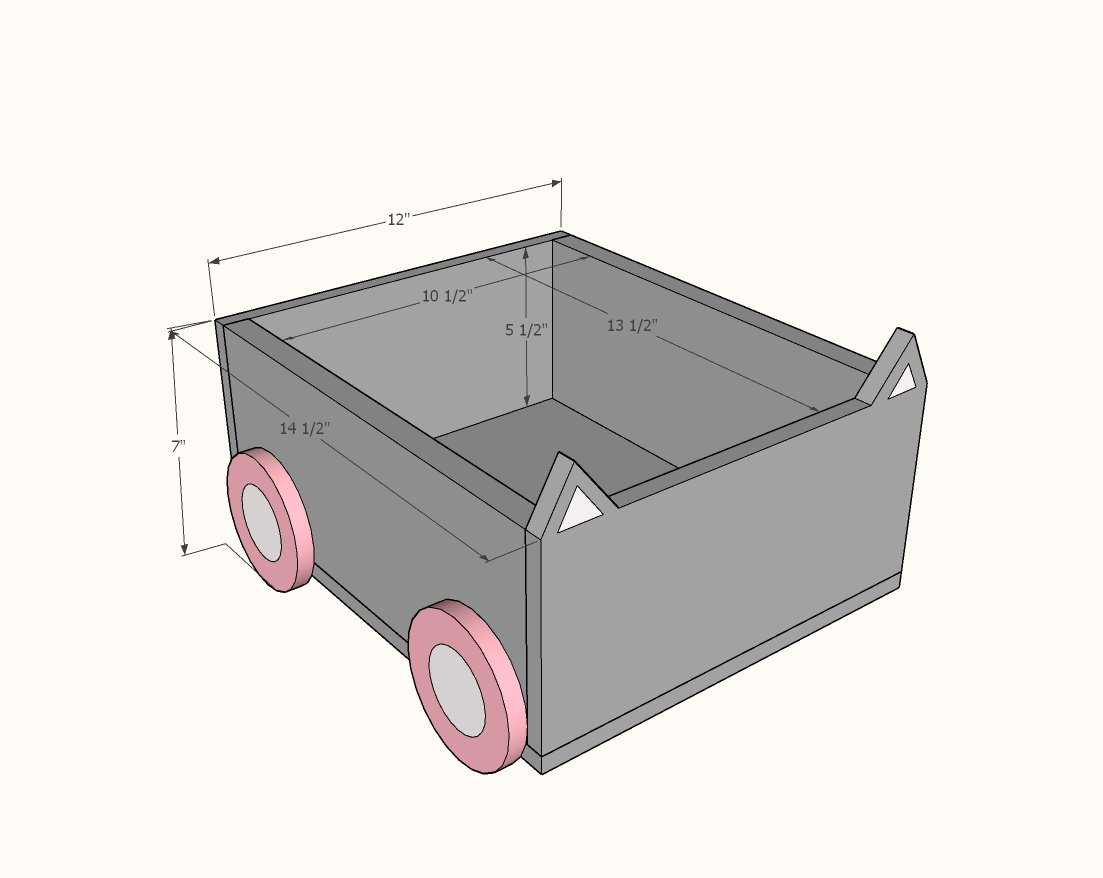
Dimensions
Use the size-specific shopping and cut lists below.
Shopping List
- 1x6 - 28" of board needed
- 1/2" plywood - 12" x 36"
- 4 - 2" bolts with nuts, washers for attaching wheels
- Rope (about 2 feet) and dowel piece or scrap wood can be used
- 1-1/4" brad nails
- Wood glue
Cut List
- 2 - 1x6 @ 13-1/2"
- 1 - 1/2" plywood @ 12" x 5-1/2"
- 1 - 1/2" plywood 12" x 14-1/2"
- Cut front 12" wide by desired height of ears from 1/2" plywood
- Cut wheels from scrap 1/2" plywood
Tools
- measuring tape
- pencil
- safety glasses
- hearing protection
- drill
- jigsaw
- nailer
- sander
Step-by-step Instructions
Cut wood pieces according to cut list.
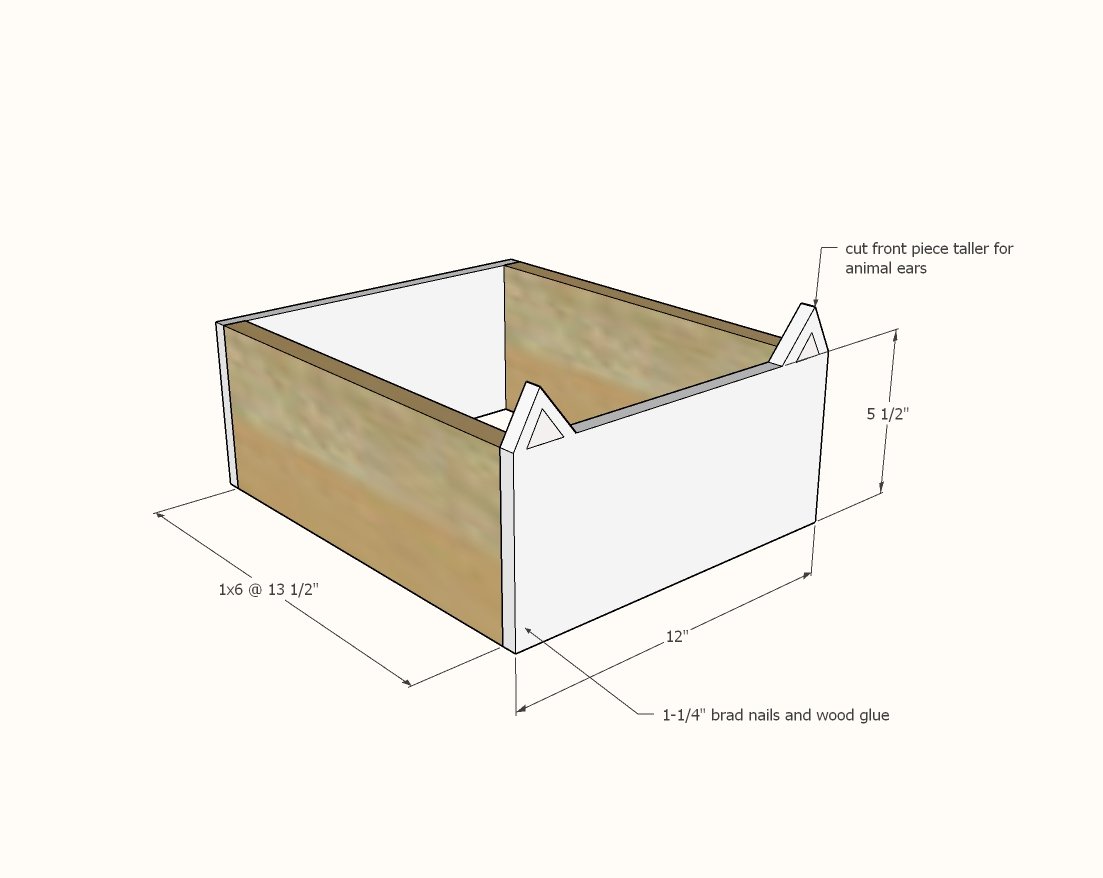
Cut front piece larger and draw animal ears on top of wood piece. Cut out with jigsaw. Attach 1/2" plywood to the 1x6 ends with 1-1/4" brad nails and wood glue.
Step 2
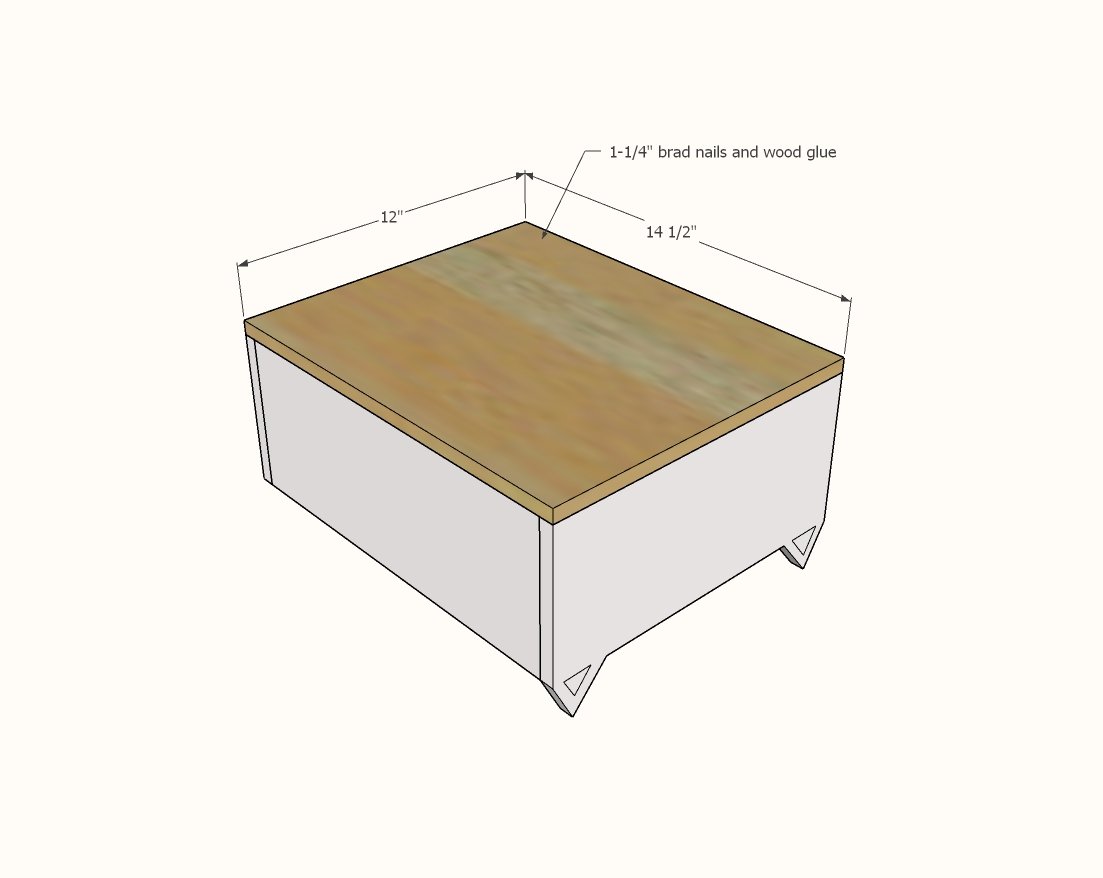
Nail the bottom on with 1-1/4" brad nails and wood glue.
Step 3
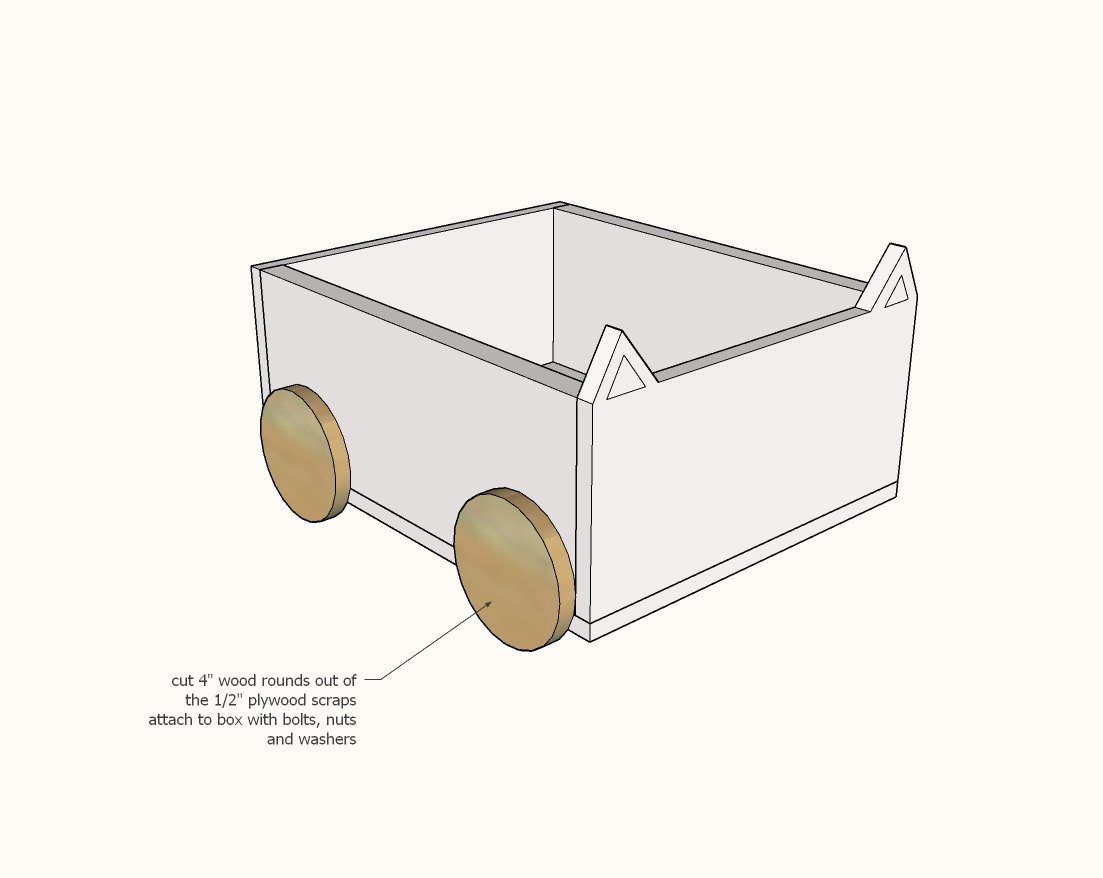
Cut wheels out about 4" diameter (can be larger but shouldn't be much smaller) with a jigsaw from leftover 1/2" plywood. Drill holes in the center of the wheels slightly larger than your bolt shaft. Drill holes in the 1x6 cart sides, about 1/2" up on the 1x6, and install wheels on the cart. Jaime provides more details on what bolts she used and photos of this step here. Add optional rope with handle to front by drilling out a hole in the front, and placing a knot on the back of the rope so it can't pull through the hole.
Finishing
Sand all surfaces, starting with a medium grit and finishing with fine. Wipe off the dust, fill any holes or gaps with wood filler, and sand smooth once dry. Apply primer if you're painting, then finish with your choice of paint or stain and seal with a durable clear topcoat. For outdoor projects, use exterior-rated primer, paint or stain, and sealer so the piece stands up to the weather.
Source (temporary): https://www.ana-white.com/woodworking-projects/animal-book-cart