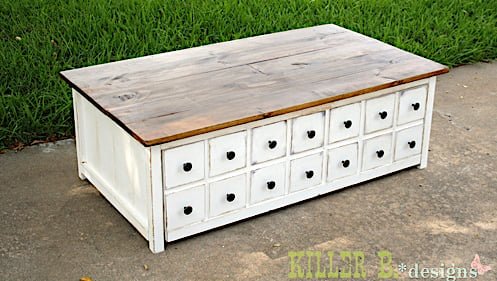
Apothecary Coffee Table with Toybox Trundle
DIY this coffee table with a hidden storage trundle! from include diagrams, shopping and cut list and lots of user submitted photos.
Specifications
| Project type | Coffee Tables |
|---|---|
| Room | Kids and Toys |
| Style | Cottage Style Furniture Plans |
| Difficulty | Intermediate |
Dimensions
Use the size-specific shopping and cut lists below.
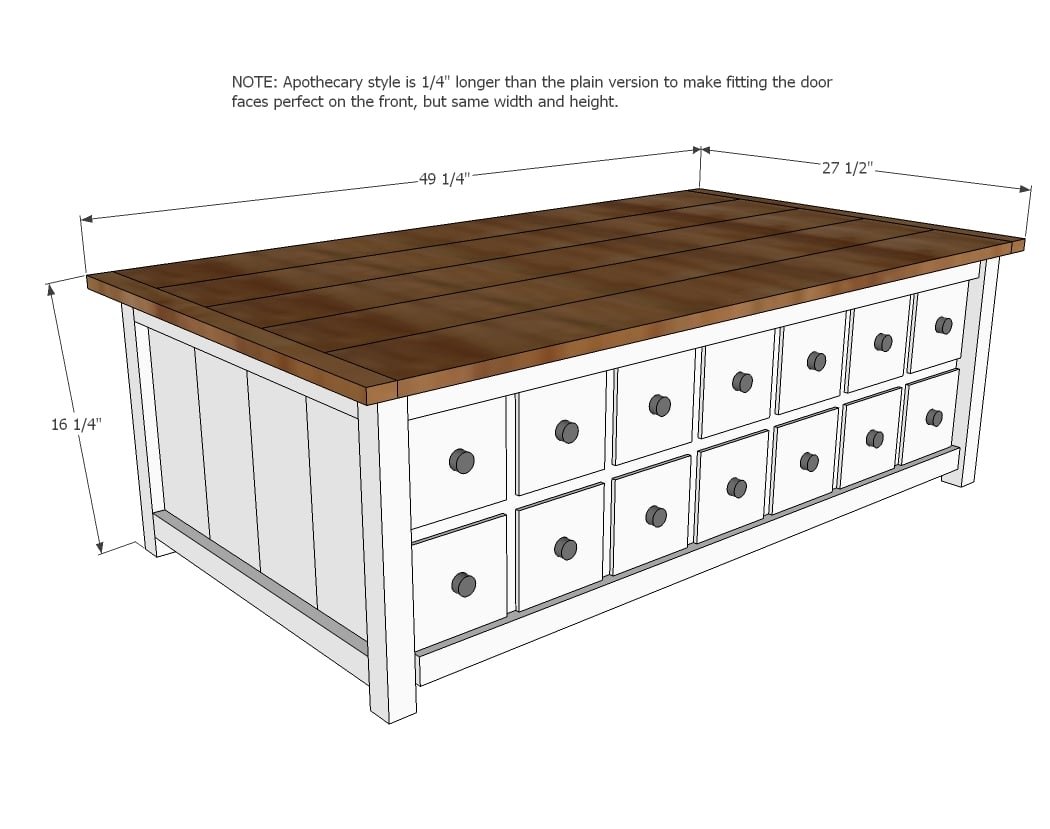
Shopping List
- 4 - 1x6 @ 8 feet long
- 3 - 2x2 @ 8 feet long
- 1 - 1x3 @ 6 feet long
- 1 - 1x12 @ 12 feet long
- 1 - 1x2 @ 10 feet long
- 1/4 sheet of - 1/2" plywood
- 4 - 1 1/2" caster wheels with an overall clearance of 2"
- 1 1/4 inch brad nails
- 1 1/4 inch pocket hole screws
- 1” brad nails
- 14 knobs
- Glue
Cut List
COFFEE TABLE FRAME
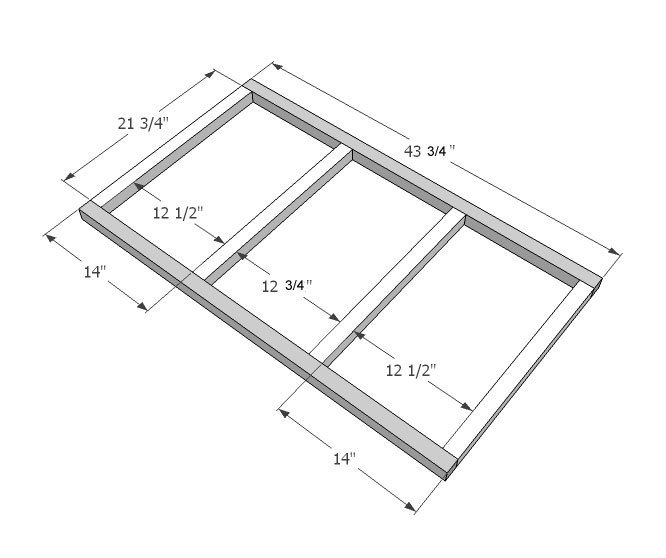
- 4 - 2x2 @ 21 3/4" (cut to length of your leg sides)
- 2 - 2x2 @ 43 3/4"
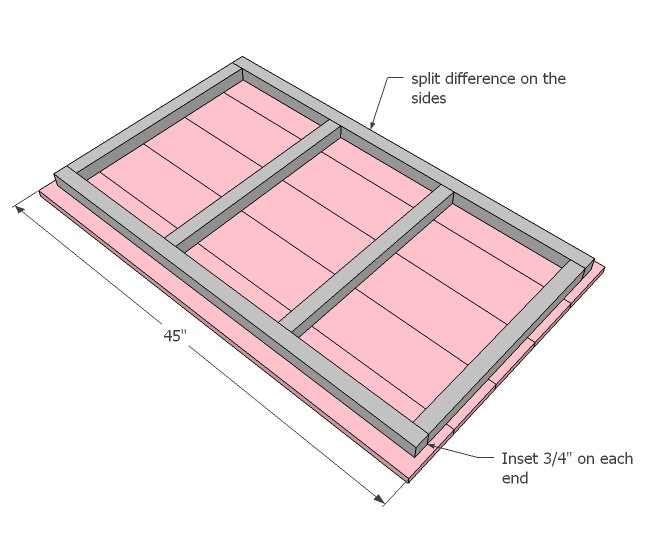
- 5 - 1x6 @ 45 1/4" (diagrams show 46 ¼” but this will not overlap legs so I recommend shortening)
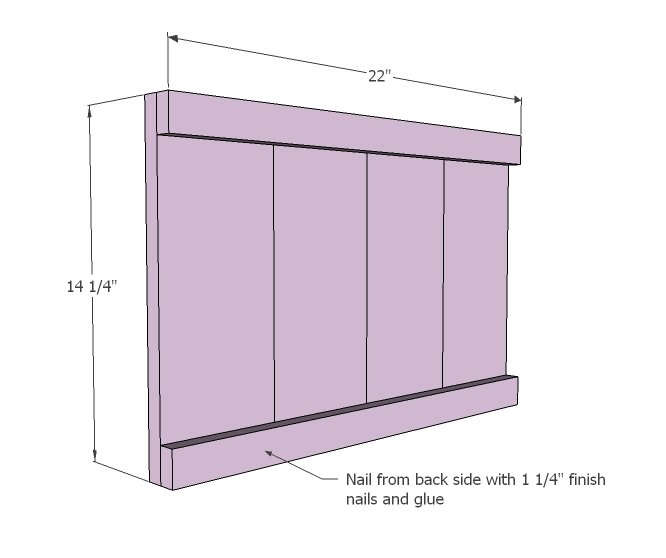
- 8 - 1x6 @ 14 1/4"
- 4 - 1x2 @ 22" (side trim - cut to fit)
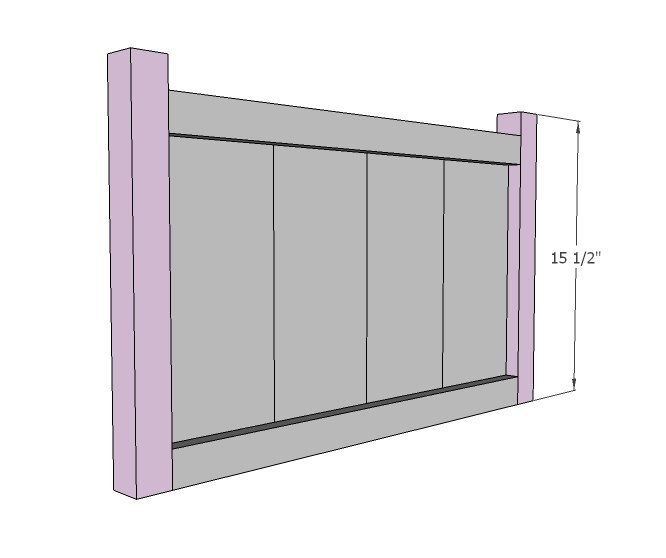
- 2 - 2x2 @ 15 1/2" (for caster wheels with overall clearance of 2" - most commonly 1 1/2" diameter wheels)
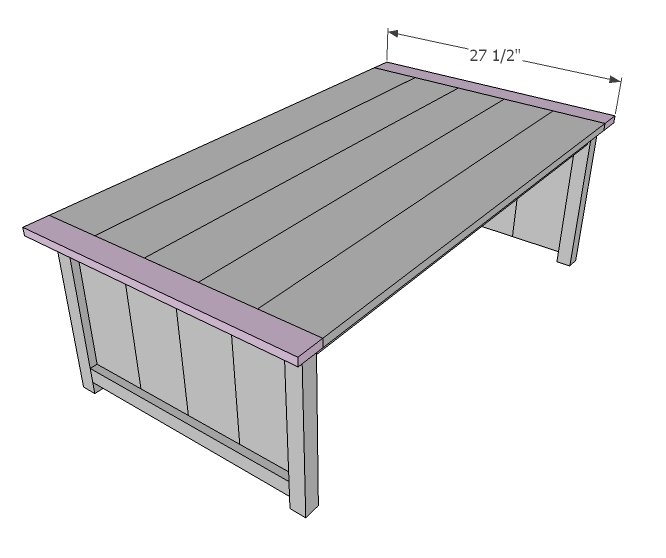
- 2 - 1x3 @ 27 1/2" (cut to width of tabletop)
TRUNDLE
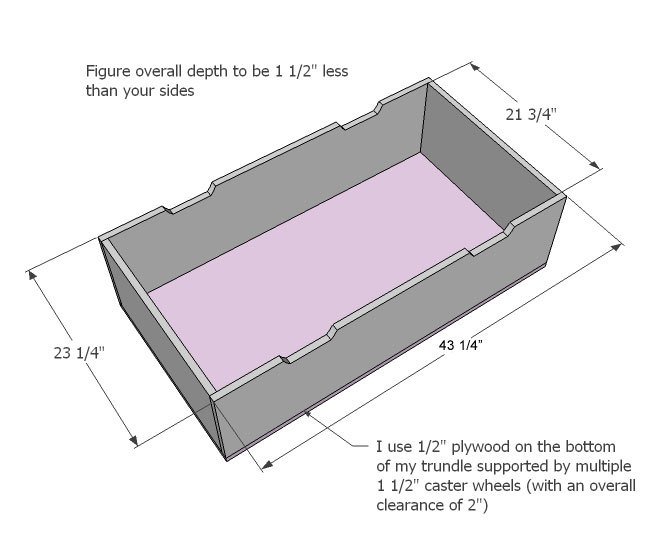
- 2 - 1x12 @ 43 1/4"
- 2 - 1x12 @ 23 1/4" (1/4" less in length than the side trim)
- 2 - 1x2 @ 43 1/4"
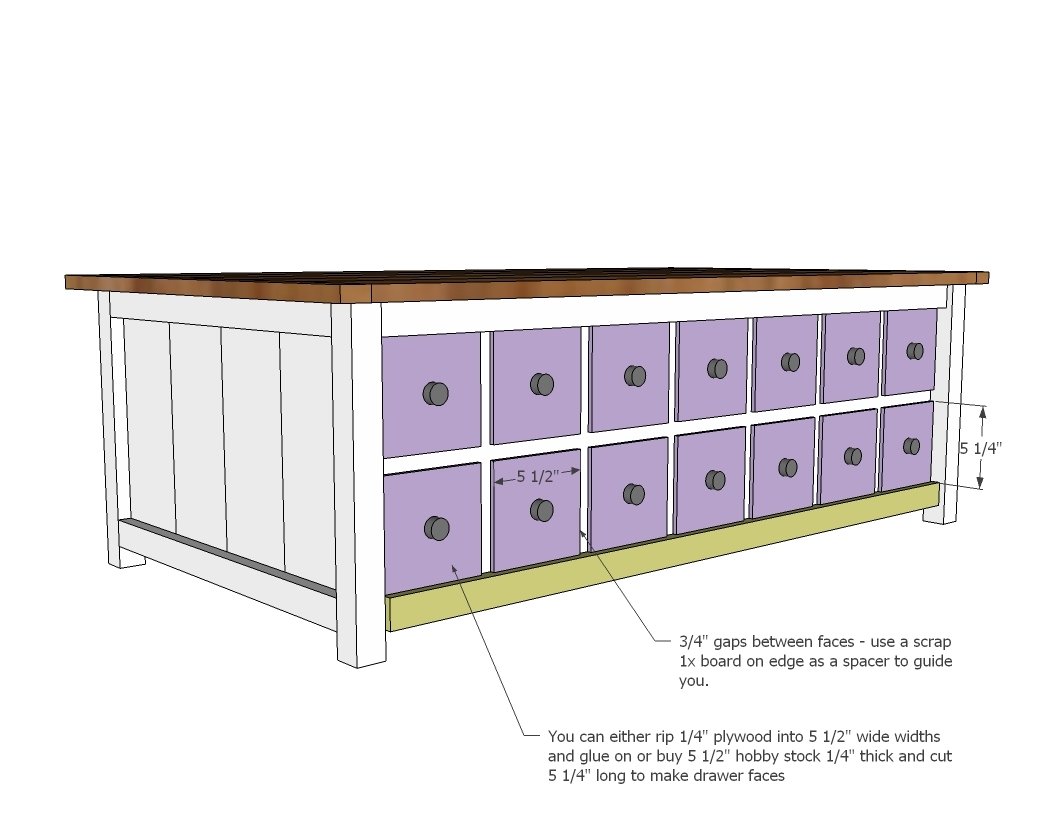
- 14 – 5 ½” wide x ¼” thick hobby stock or ¼” plywood for false drawer fronts
Tools
- measuring tape
- square
- pencil
- safety glasses
- hearing protection
- kreg-jig
- drill
- circular saw
- sander
- level
Step-by-step Instructions
Step 1
First, build the top frame.
Step 2
Then add the tabletop boards. You can build the tabletop first, then attach too. NOTE: Brooke recommends adding 5" to the tabletop boards and omitting the breadboard ends.
Step 3
Now build two of the sides. Again, you can build the side panels first, then attach side trim.
Step 4
And then add the legs. Try PHs on the insides - 3/4" and 1 1/4" PH screws. NOTE: You will want your legs to fit the length of your caster wheels. This plan assumes your caster wheels have an overall clearance of 2" and your 1x12s are 11 1/4" wide.
Step 5
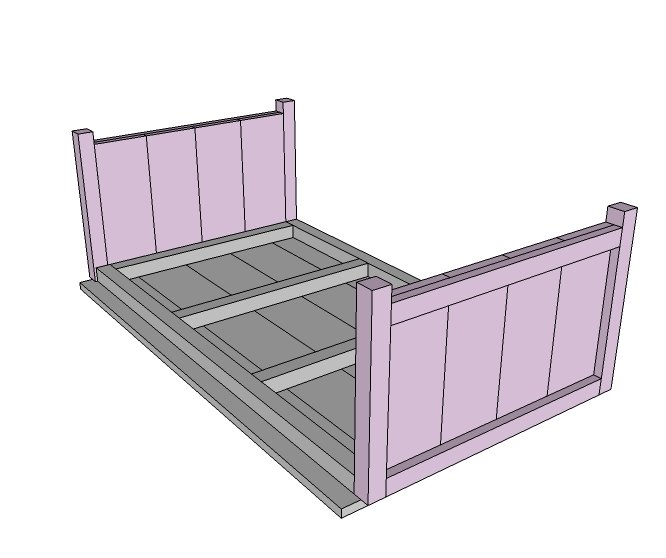
Step 6
If you did the breadboards....
Step 7
Ooops - don't notch out handles. Build the bottom box. Attach plywood to bottom.
Step 8
And then the little drawer faces!
Step 9
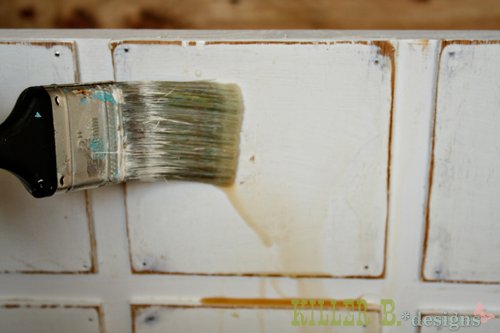
And Brooke is sharing with us her finishing tutorial too!
Finishing
Sand all surfaces, starting with a medium grit and finishing with fine. Wipe off the dust, fill any holes or gaps with wood filler, and sand smooth once dry. Apply primer if you're painting, then finish with your choice of paint or stain and seal with a durable clear topcoat. For outdoor projects, use exterior-rated primer, paint or stain, and sealer so the piece stands up to the weather.
Source (temporary): https://www.ana-white.com/woodworking-projects/apothecary-coffee-table-toybox-trundle