Apothecary Console Table
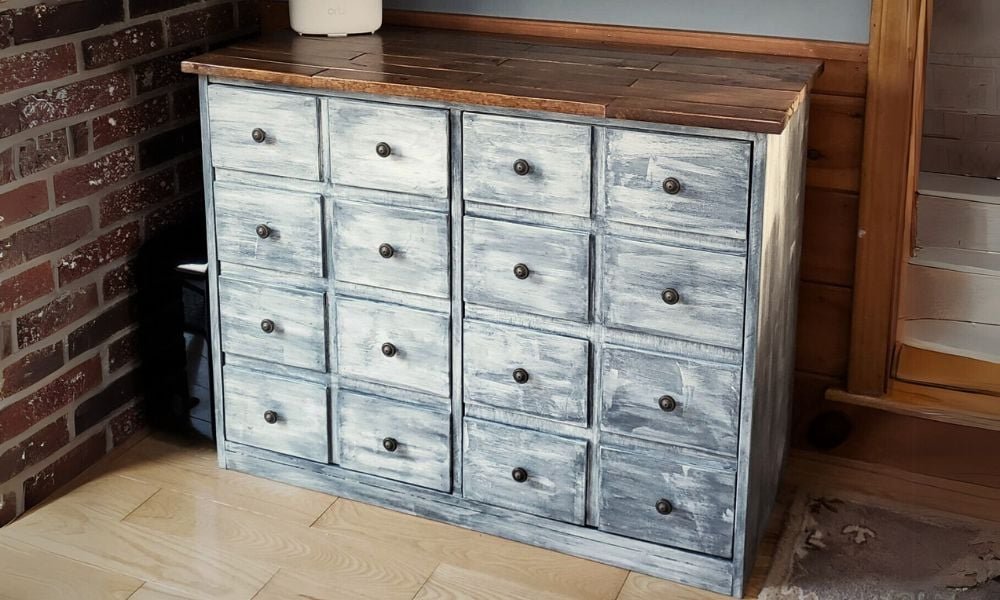
to build a Apothecary Console, featuring two doors and shelves, with apothecary style false fronts. Inspired by Pottery Barn Andover Console table, build your own with these step by step plans and save.
Specifications
| Project type | Console Table Plans |
|---|---|
| Room | Entryway and Mudroom |
| Style | Cottage Style Furniture Plans |
| Difficulty | Intermediate |
| Estimated cost | $100-$150 |
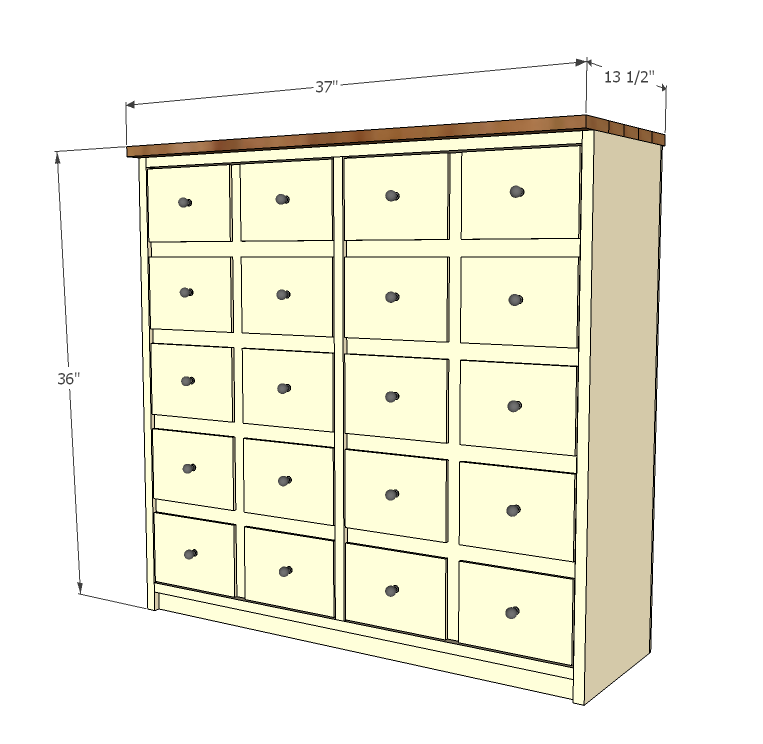
Dimensions
Use the size-specific shopping and cut lists below.
Shopping List
- 3 - 1x3 @ 8 feet long
- 1 - 1x2 @ 4 feet long
- 1 - 1x10 @ 8 feet long
- 2 - 1x12 @ 6 feet long
- 1 - 1x12 @ 4 feet long
- 1 - 1/2 sheet 1/4" plywood (grab a full sheet if you use 1/4" plywood for the door faces)
- 1 - 1/2 sheet of 1/2" thick hardwood plywood (look in hobby wood section of Lowes)
- 12 feet of 1x6 boards, 1/4" thick stock (look in hobby section of Lowes, or you could use 1/4" plywood from the back cut into 5 1/2" widths)
- 20 Knobs or handles
- 2 sets Euro Style inset hinges (see last step)
Cut List
Carcass
- 2 - 1x12 @ 35 1/4" (Sides)
- 2 - 1x12 @ 35 1/2" (Top/Bottom)
- 1 - 1x12 @ 32 1/4" (Center)
- 4 - 1x10 @ 17 3/8" (Shelves)
- 1 - 1x2 @ 35 1/2" (Footer)
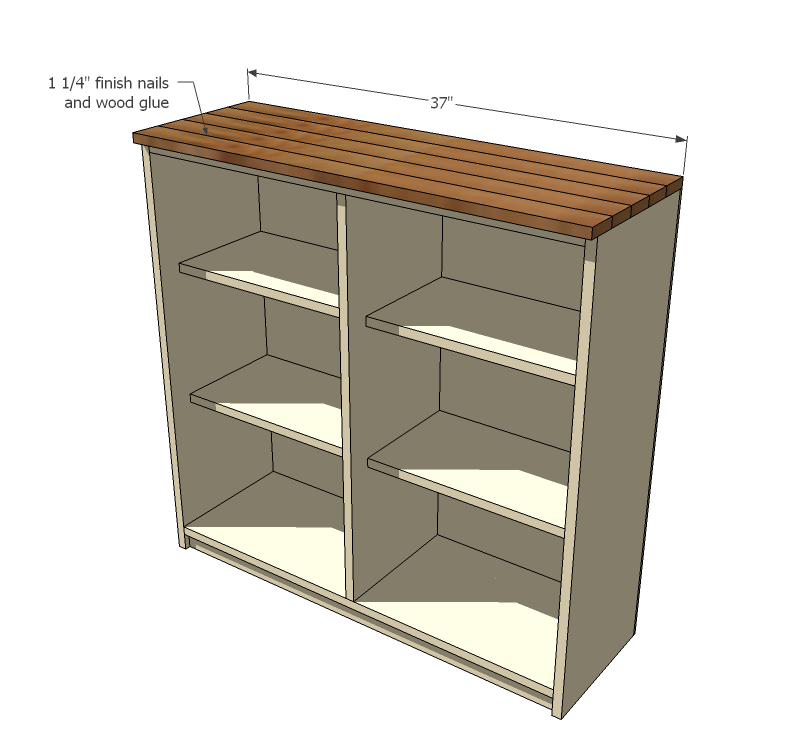
- 5 - 1x3 @ 35 1/2" (Decorative Top)
- 1 - 1/4" Plywood @ 35 1/4" x 37" (Back)
Door Faces
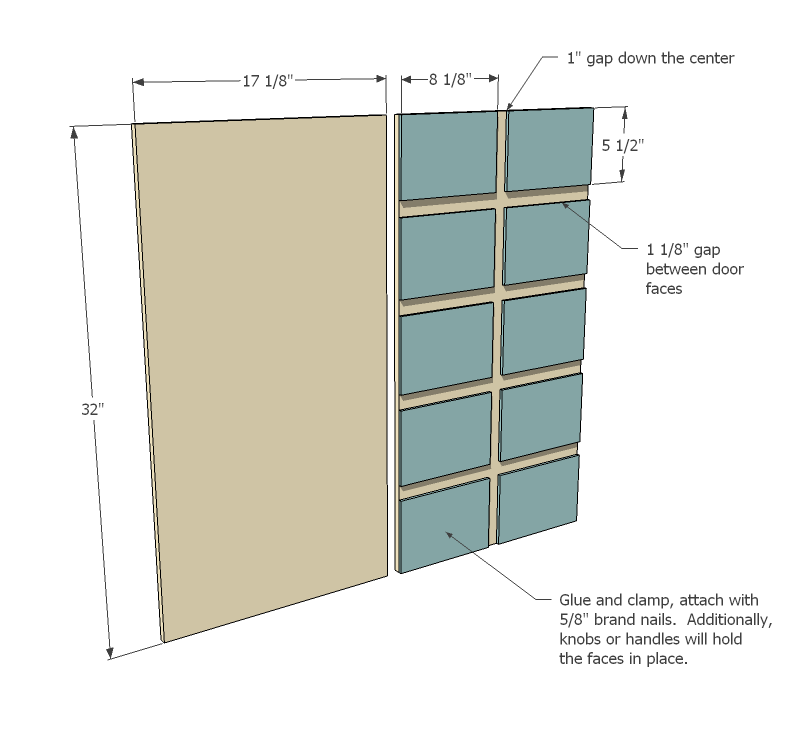
- 2 - 1/2" Plywood @ 32" x 17 1/8"
- 20 - 1/4" thick, 5 1/2" wide hobby stock boards @ 8 1/8" OR 20 pieces of 1/4" plywood (leftover from back) @ 5 1/2" x 8 1/8"
Tools
- measuring tape
- square
- pencil
- safety glasses
- hearing protection
- kreg-jig
- drill
- circular saw
- nailer
- sander
- level
- countersink drill bit
Step-by-step Instructions
Step 1
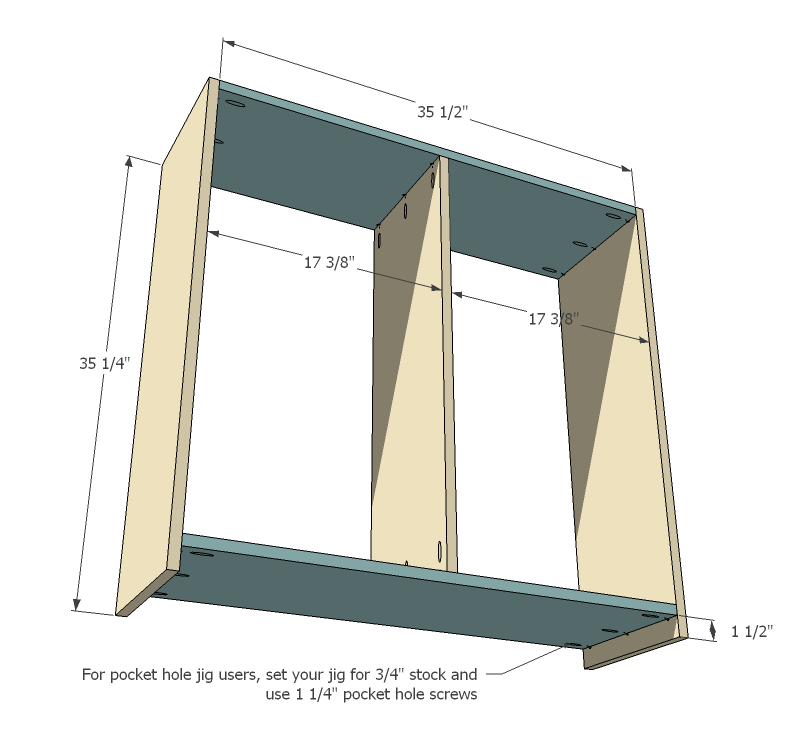
I've included pocket holes for Kreg Jig users. But certainly, you can (and I did for many years) build with glue and screws or a finish nailer. You will want to use 2" fasteners and check for square after each step. Build the box as shown above.
Step 2
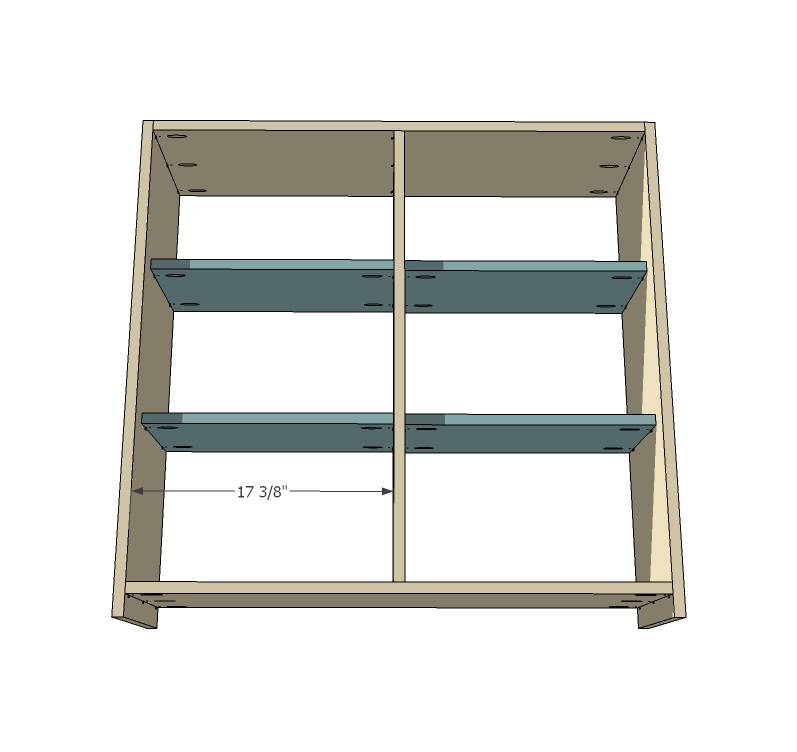
Once your box is built, add shelves as shown above. In the diagram, shelves are spaced 10" apart. You can space any distance apart to suit your needs. I recommend making one shelf set fixed, but you could use shelf pins to make one shelf adjustable.
Step 3
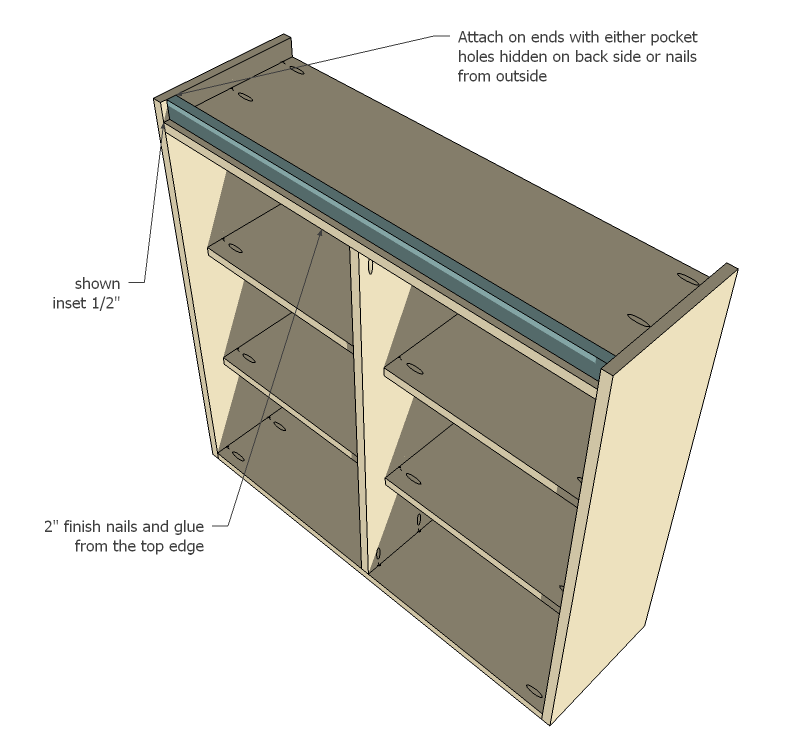
Now add the 1x2 footer as shown above.
Step 4
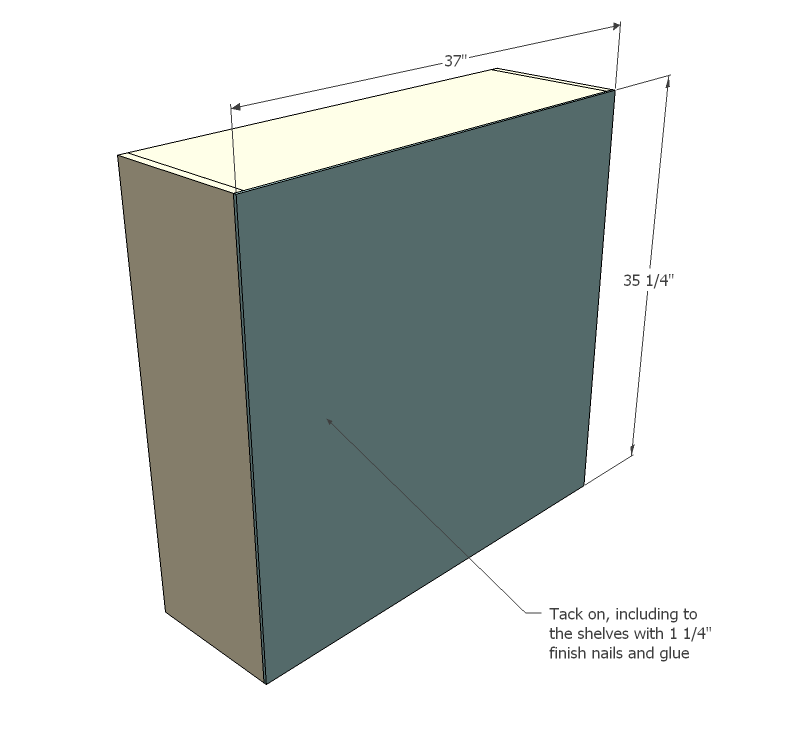
Attach back with nails and glue, making sure the box is square, and you nail into fixed shelves.
Step 5
Step 6
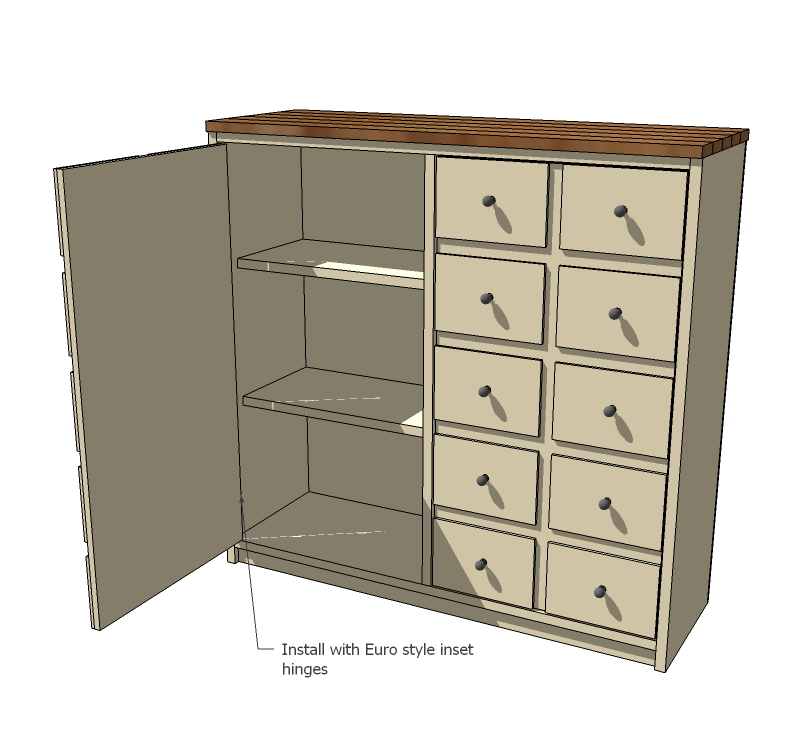
Carefully cut the 1/2" plywood doors and fit to the openings. There should be approximately a 1/8" gap on all sides, and the doors sit inset. Once satisfied, layout the faces and glue down. Clamp and let dry. If you have 5/8" nails, tack down as well - but remember, all those knobs aren't letting those faces go anywhere.
The best hinges to use with these cabinet doors (and easiest to install) are these:
I find them cheaper at Lowes, but also available at the Home Depot. Follow the instructions that come with the hinges. Another note, before you put the back on, you could position the door (remember it sets 3/4" inset totally, to include the false fronts) in the opening and attach hinges. Mark the location of the hinges when you are happy that there is a even gap around all sides of the door, and uninstall the hinges. That way, when you go to install the door, you have the location marked out.
Finishing
Sand all surfaces, starting with a medium grit and finishing with fine. Wipe off the dust, fill any holes or gaps with wood filler, and sand smooth once dry. Apply primer if you're painting, then finish with your choice of paint or stain and seal with a durable clear topcoat. For outdoor projects, use exterior-rated primer, paint or stain, and sealer so the piece stands up to the weather.
Source (temporary): https://www.ana-white.com/woodworking-projects/apothecary-console-table