Apothecary Console
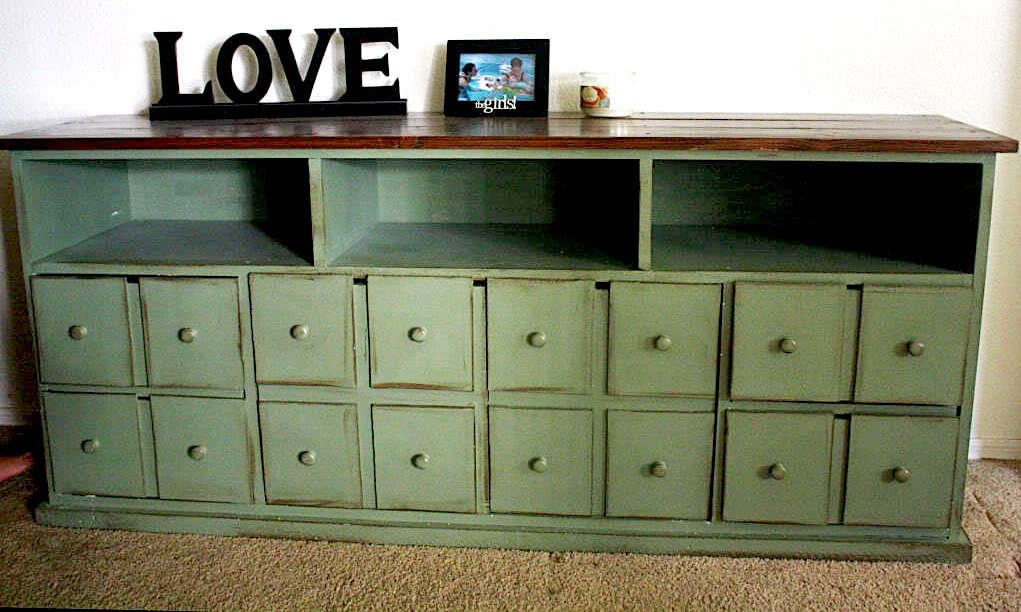
This beautiful apothecary console features three open cubbies perfect for storing entertainment controllers, four drawers and two cabinets, all concealed by door fronts that look like an apothecary cabinet. Loved by so many, this console is easy to build and can add that touch of character to your family room.
Specifications
| Project type | Media and Entertainment Centers |
|---|---|
| Room | Storage Solutions |
| Style | Farmhouse Furniture |
| Difficulty | Advanced |
| Estimated cost | $150 - $200 |
Dimensions
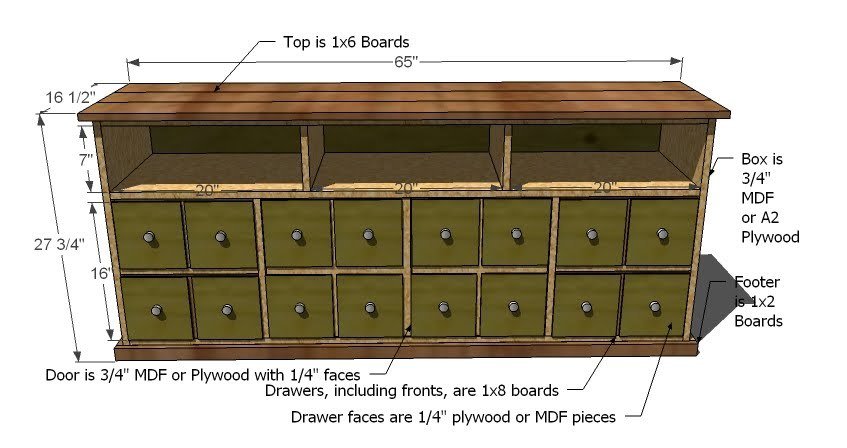
Use the size-specific shopping and cut lists below.
Shopping List
- 2 – Sheets of 3/4″ MDF or Plywood, cut into 15 1/2″ wide strips, 8′ Long
- 1 – 1/4″ Plywood or Lauan or MDF (for the back)
- 1 – 12′ long 1×6
- 1- 8′ long 1×6 Boards
- 2 – 1×2 Boards
- 2″ self tapping star bit screws
- 1 1/4″ self tapping star bit screws
- Wood Glue
- Wood Filler
- Finishing Supplies
Cut List
- 3 – 1×16 @ 61 1/2″ (Shelves)
- 2 – 1×16 @ 16 1/4″ (Bottom Dividers)
- 2 – 1×16 @ 14 3/4″ (Drawer Dividers)
- 2 – 1×16 @ 7″ (Top Dividers)
- 2- 1×16 @ 27″ (Sides)
- 1 – 1/4″ Plywood @ 63 x 27″ (Back)
- 3 – 1×6 @ 65″ (Top)
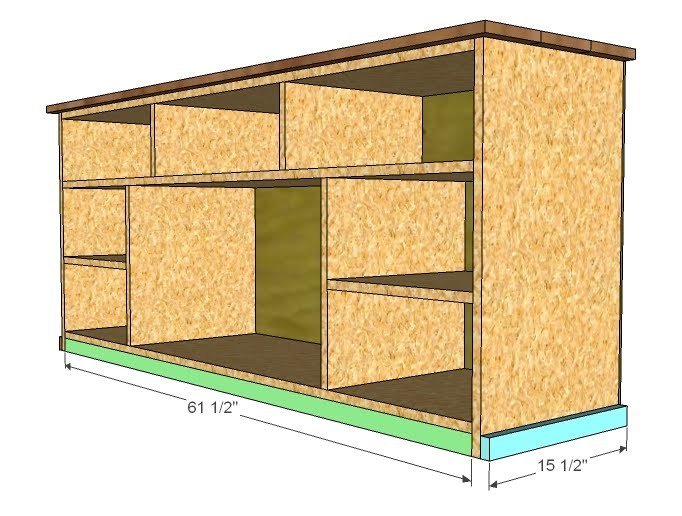
- 1 – 1×2 @ 61 1/2″ (Inset front footer)
- 2 – 1×2 @ 15 1/2″ (Side Footer)
- 1 – 1×2 @ 64 1/2″ (Front Footer)
Tools
- measuring tape
- square
- pencil
- safety glasses
- hearing protection
- kreg-jig
- drill
- circular saw
- nailer
- sander
Step-by-step Instructions
Step 1
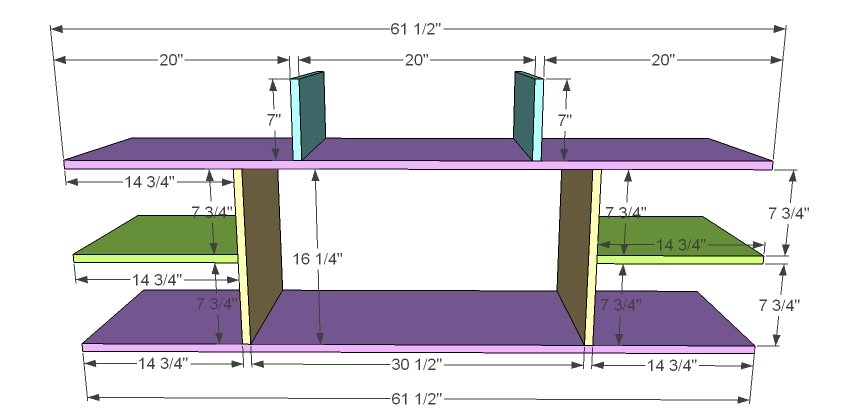
Box Partitions Begin by marking out all the joints on both sides of the boards as shown above. Don’t forget that the boards are 3/4″ thick. Then beginning on the bottom partition (yellow) attach the green partition. Now attach the yellow boards to the purple. Finally, attach the blue boards to the purple. Use 2″ screws and glue. Remember, you can click on images to see a full size view.
Step 2
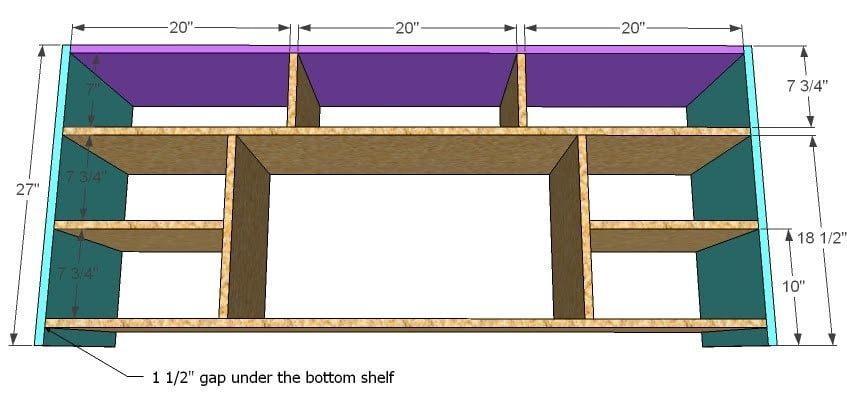
Finish the Box Begin by marking joints on both sides of the boards. Then attach with 2″ screws and glue the top to the top partitions. Then attach the sides to all of the shelves and the top, ash shown above.
Step 3
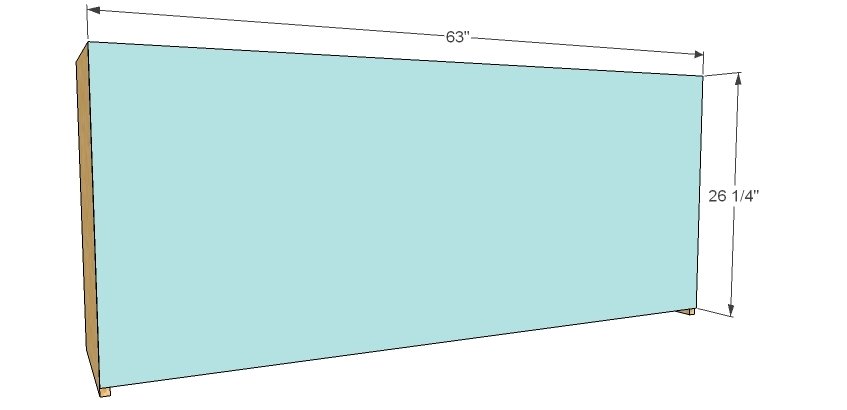
Back Cut your 1/4″ plywood as shown above. Then use 1 1/4″ nails and glue to attach the back to the box. Don’t forget to fasten to all of the partitions and shelves. Make sure your project is nice and square before attaching the back. The measurements shown here are slightly different from the cut list because I choose to make the cabinet slightly taller for drawer reasons, but either measurement would work just fine.
Step 4
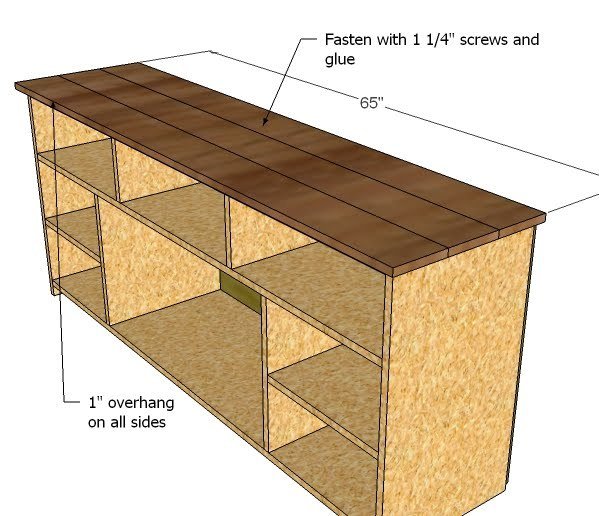
Top Using 1 1/4″ screws and glue, fasten the top boards to the top. Notice that there is a 1″ overhang on the front and the sides, but the back rests flush with the back edge of the sides.
Step 5
Step 6
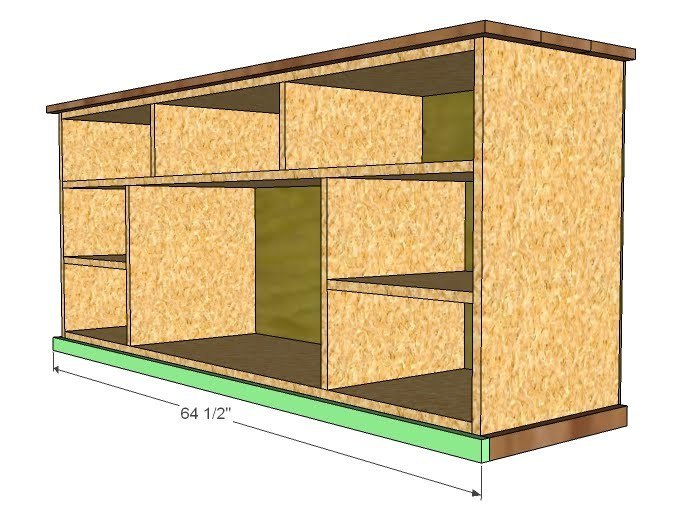
Footer, Front Using 1 1/4″ Screws or nails and glue, fasten the front footer to the pieces from step 5. Keep outside edges flush.
Step 7
Drawers and Doors: Click here for Part 2
Finishing
Sand all surfaces, starting with a medium grit and finishing with fine. Wipe off the dust, fill any holes or gaps with wood filler, and sand smooth once dry. Apply primer if you're painting, then finish with your choice of paint or stain and seal with a durable clear topcoat. For outdoor projects, use exterior-rated primer, paint or stain, and sealer so the piece stands up to the weather.
Source (temporary): https://www.ana-white.com/woodworking-projects/apothecary-console