Apothecary End Table-Cabinet
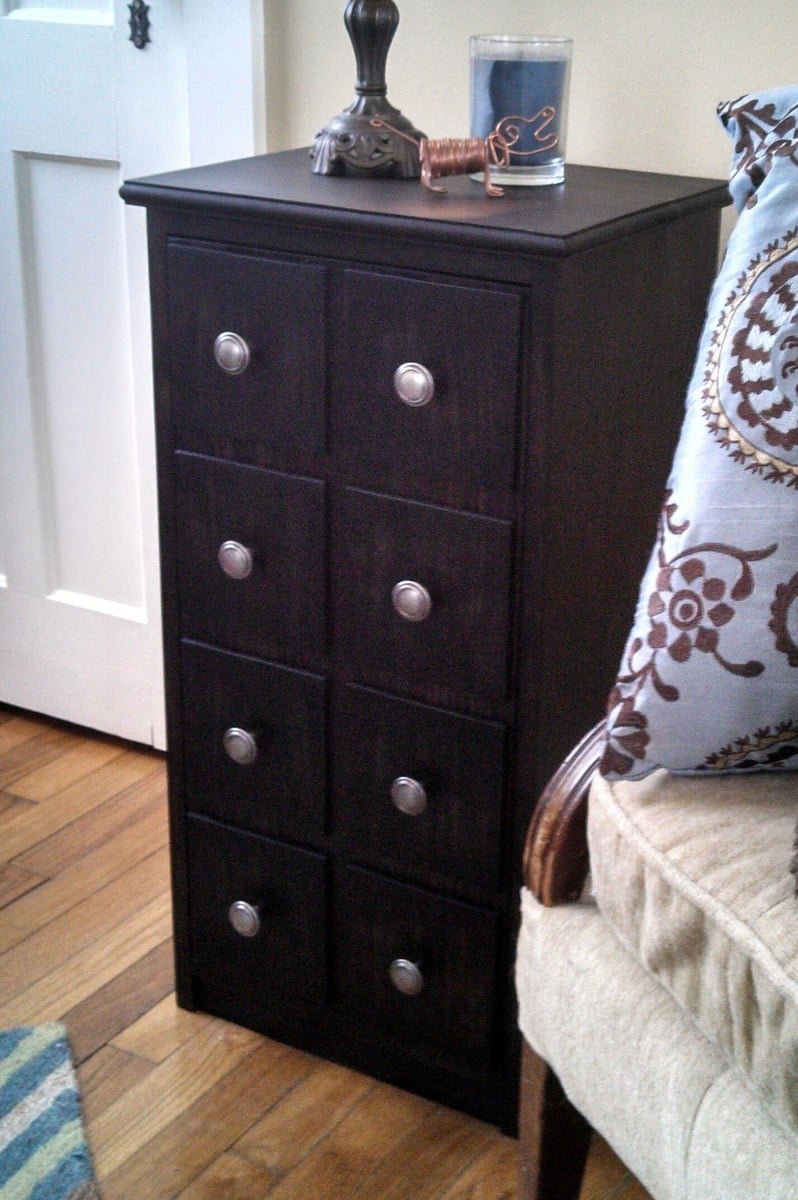
This project was a real problem solver... I needed a table next to the couch for a lamp, a place to set a drink, a place to store magazines and hide the TV remote. I always liked the look of the various apothecary plans here, so I decided to meld all of my needs into one piece! Here's what I came up with... a small Apothecary Cabinet, perfect for magazines, storing remotes and more. It has an antique style with a dark, modern finish.
Specifications
| Project type | Cabinet Plans |
|---|---|
| Room | Bedroom |
| Difficulty | Beginner Projects |
| Estimated cost | $50 - $100 |
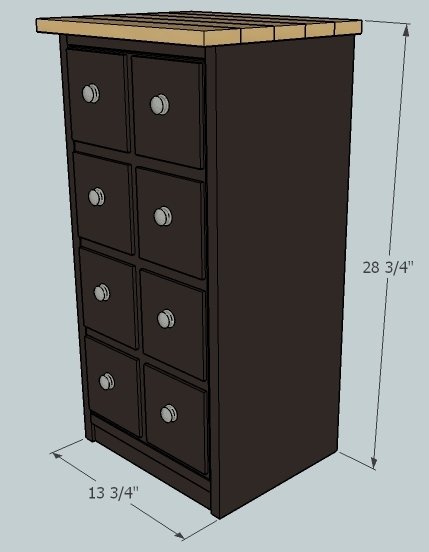
Dimensions
Use the size-specific shopping and cut lists below.
Shopping List
1 - 1x12x8
1 - 1x3x8
1 - 1x2x2
1 - 1/2" 24" x 48" plywood
1 - 1/4" 1x6x4 (look in hobby section of Lowes)
2 sets Euro Style inset hinges
8 knobs
Cut List
2 - 1x12 @ 28" (sides)
2 - 1x10⁻³/4" @ 12-1/4" (top and bottom shelves)
1 - 1x10⁻¹/4" @ 12-1/4" (middle shelf)
1 - 1x1-1/2" @ 1- 1/4" (bottom rail)
1 - 1/2" plywood 12-1/4" x 26-1/2" (back)
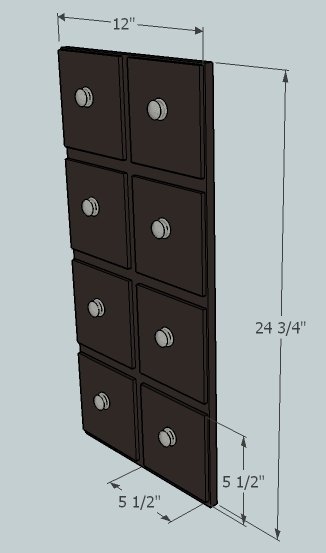
1 - 1/2" plywood 12" x 24-3/4" (door)
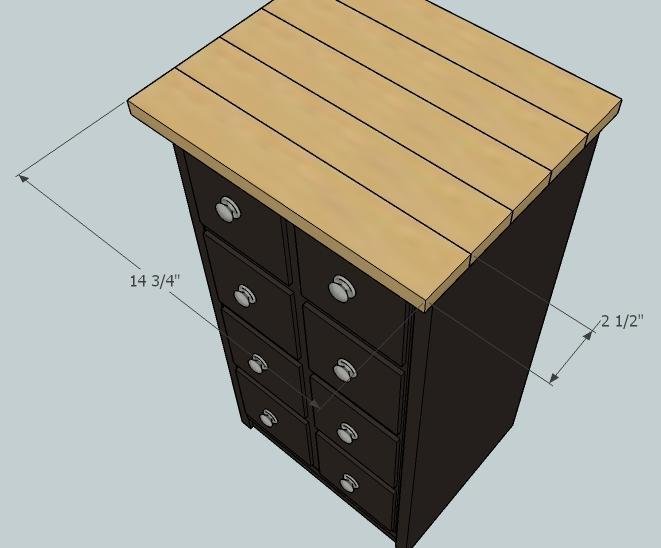
5 - 1x3 @ 14-3/4" (top)
8 - 1/4" 1x6 @ 5-1/2" (drawer fronts)
Tools
- measuring tape
- square
- pencil
- safety glasses
- hearing protection
- kreg-jig
- drill
- circular saw
- compound miter saw
- table saw
- nailer
- sander
Step-by-step Instructions
Step 1
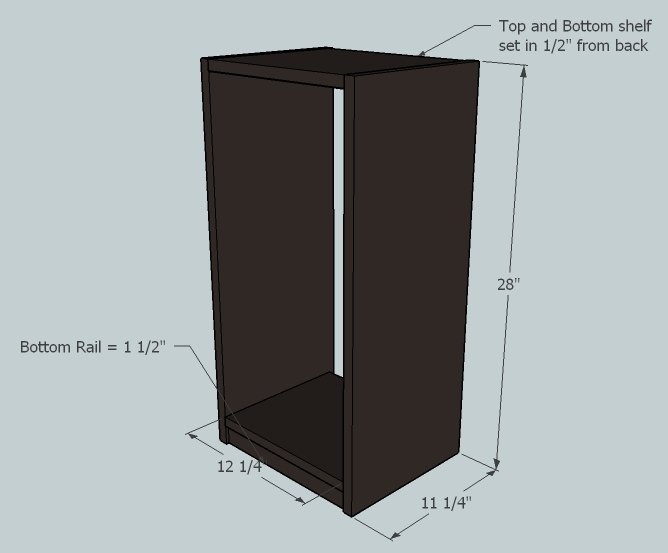
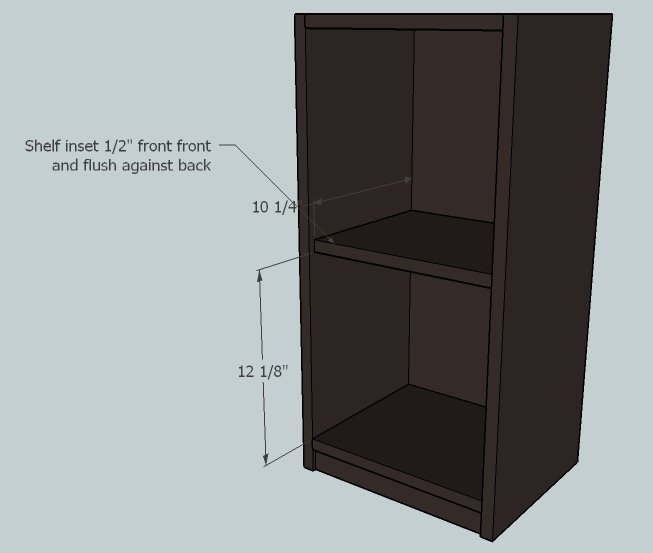
Cut side panels and bottom rail to length. Cut shelves to length and rip to width. Using pocket holes/screws attach the top and bottom shelves (save the middle shelf for step 3). Also attach bottom rail using pocket holes/screws.
Step 2
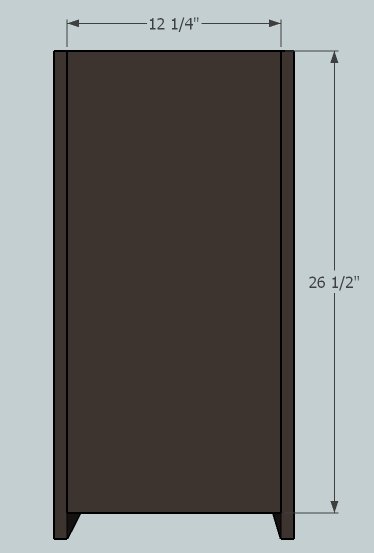
Cut the back panel to length and rip to width. Attach using 1 1/4" finish nails.
Step 3
Cut two pieces of scrap 12 1/8". Use the scraps to support the middle shelf and attach shelf to sides using pocket screws.
Step 4
Double check the door measurements. The door should have 1/8" clearance on each side. Cut the door to length and rip to width. Cut 8 drawer fronts. Attach the drawer fronts using the the knobs. Attach the door using 2 sets Euro Style inset hinges hinges (follow the directions that come with the hinges to install).
Step 5
Finishing
Sand all surfaces, starting with a medium grit and finishing with fine. Wipe off the dust, fill any holes or gaps with wood filler, and sand smooth once dry. Apply primer if you're painting, then finish with your choice of paint or stain and seal with a durable clear topcoat. For outdoor projects, use exterior-rated primer, paint or stain, and sealer so the piece stands up to the weather.
Source (temporary): https://www.ana-white.com/woodworking-projects/apothecary-end-table-cabinet