Armoire with Open Shelves and Magnetic Doors
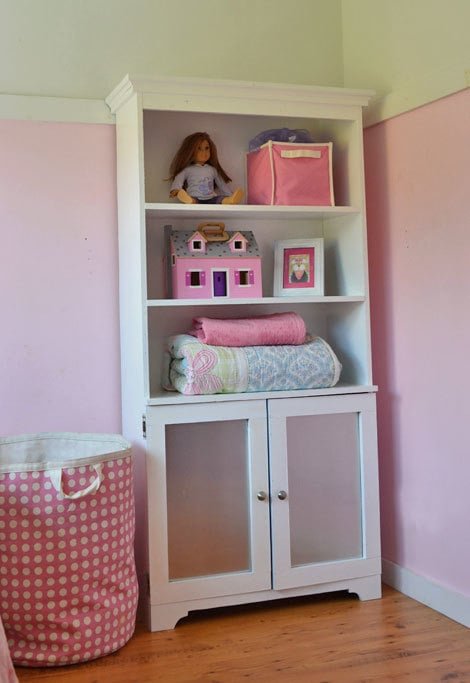
Build this armoire with open storage and concealed storage behind magnetic metal doors. Industrial chic with just a touch of metal, this cute kids room DIY project contains to build!
Specifications
| Project type | Hutch Plans |
|---|---|
| Room | Bedroom |
| Style | Modern Style Furniture Plans |
| Difficulty | Intermediate |
| Estimated cost | $100-$150 |
Dimensions
Use the size-specific shopping and cut lists below.
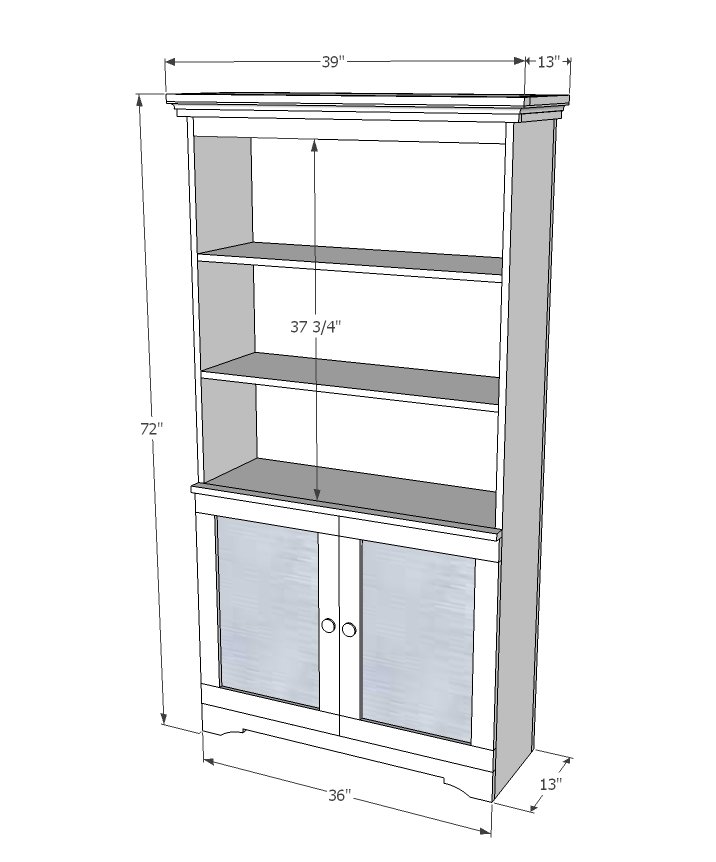
Shopping List
5 - 1x12 @ 6 feet long
1 - 1x4 @ 6 feet long
2 - 1x2 @ 8 feet long
2 - 1x3 @ 8 feet long
20" wide tin flashing roll, 4 feet long
2 sets of hinges
2 knobs
Optional 3/4" x 3/4" cove moulding
1 sheet 1/4" plywood
Cut List
2 - 1x12 @ 71 1/4"
1 - 1x12 @ 36"
5 - 1x12 @ 34 1/2"
1 - 1x4 @ 36"
1 - 1x4 @ 34 1/2"
1 - 1x2 @ 36"
1 - 1x2 @ 37 1/2"
1 - 1x2 @ 39"
4 - 1x2 @ 11 1/4" (Width of 1x12)
4 - 1x3 @ 20 1/2"
4 - 1x3 @ 17 7/8"
1 - 1/4" plywood @ 72" x 36"
Tools
- measuring tape
- square
- pencil
- safety glasses
- hearing protection
- kreg-jig
- drill
- jigsaw
- compound miter saw
- nailer
- sander
- level
- countersink drill bit
Step-by-step Instructions
Step 1
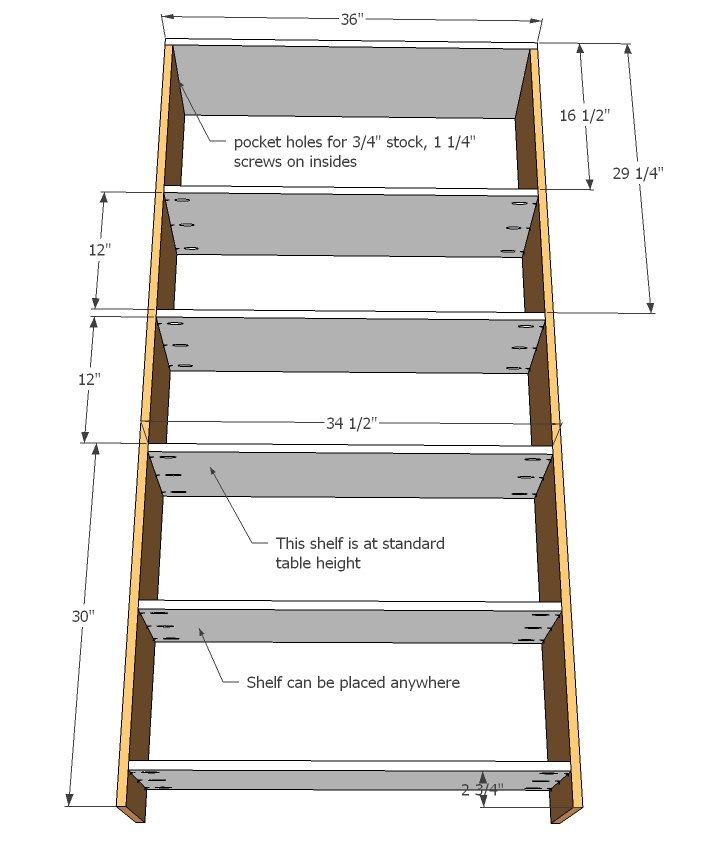
Build the cabinet box as shown above, using either 3/4" Kreg Jig holes and pocket hole screws or 2" screws and glue, countersinking screws. Adjust the box for square by taking a diagonal measurement from opposite corners, ensuring measurements match. Bottom, middle and top shelves must be fixed, remaining shelves can be adjustable or fixed at different heights. You can also use 1x10s for the non-fixed shelves for a different look or inset doors.
Step 2
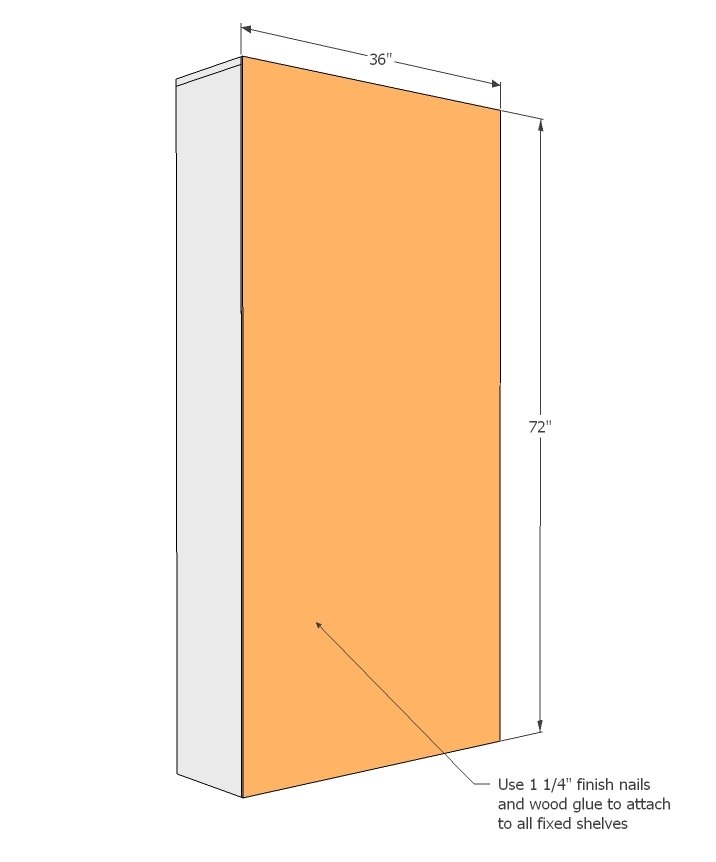
Attach the back as shown above, using finish nails and wood glue.
Step 3
Now the header, nail in place from all sides as shown above.
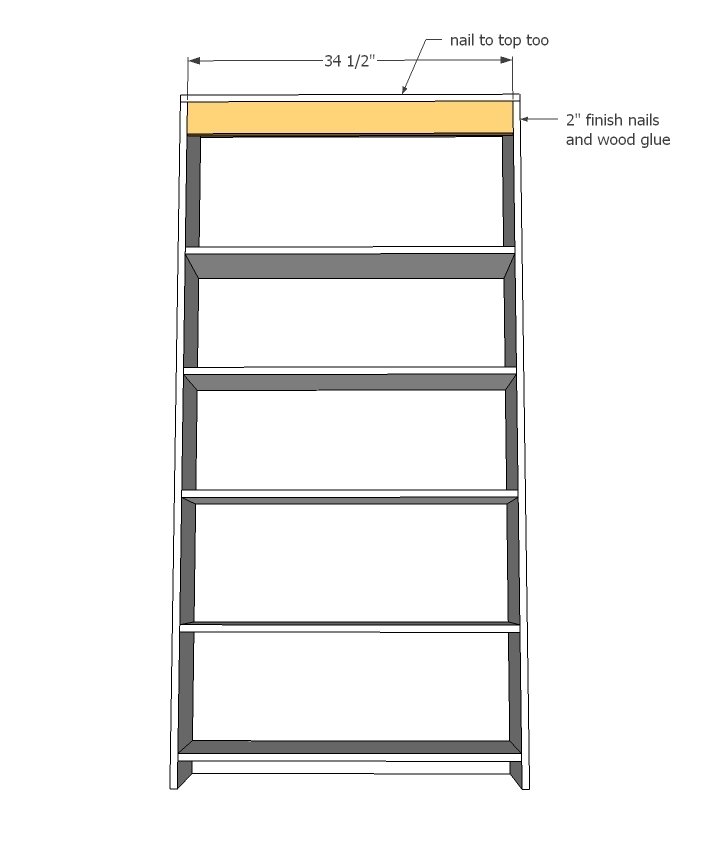
Step 4
The footer is attached on top with 2" finish nails and wood glue. If you wish, you can use a jigsaw to cut out a decorative pattern.
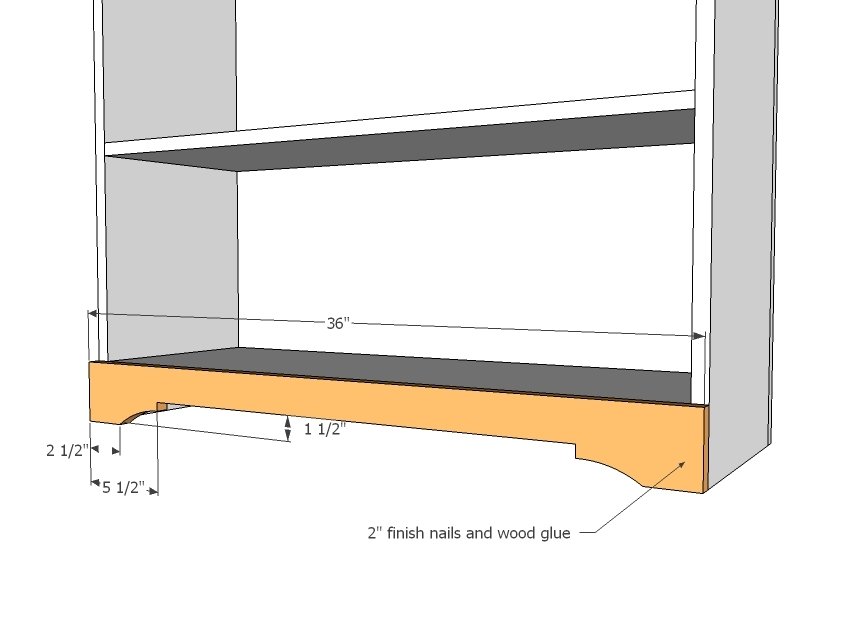
Step 5
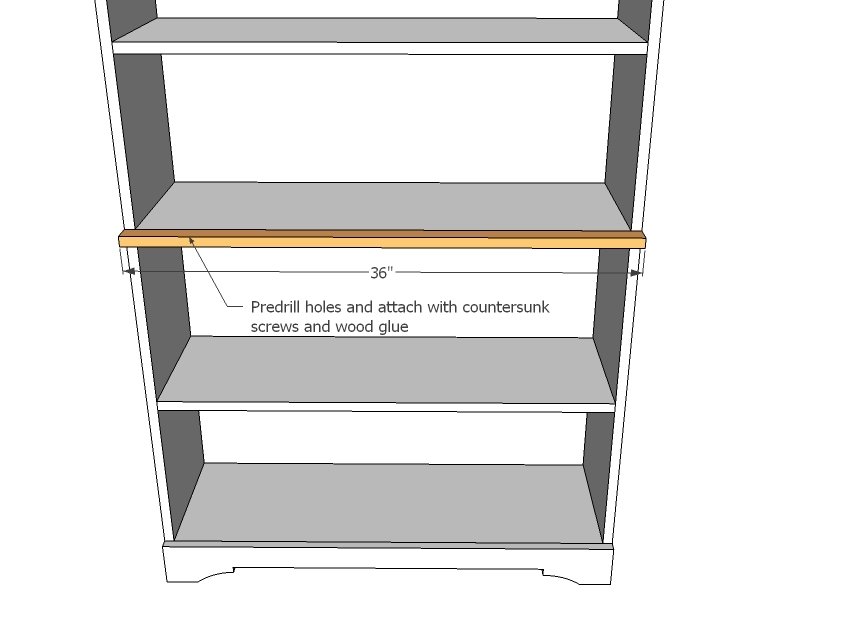
Step 6
Use 1 1/4" finish nails and glue. I like to hold the top 1x2 in place to guide me as I attach these.
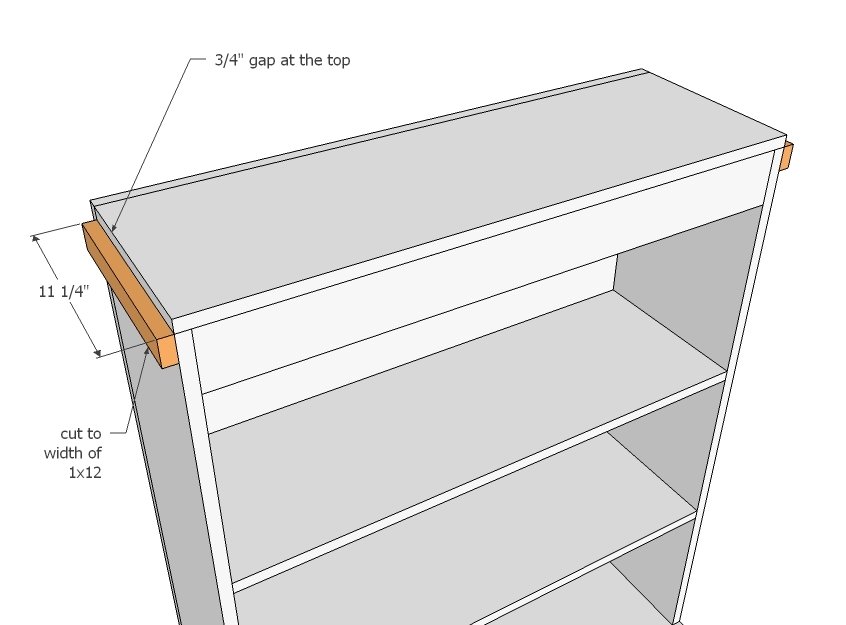
Step 7
Now the front - use 1 1/4" finish nails again.
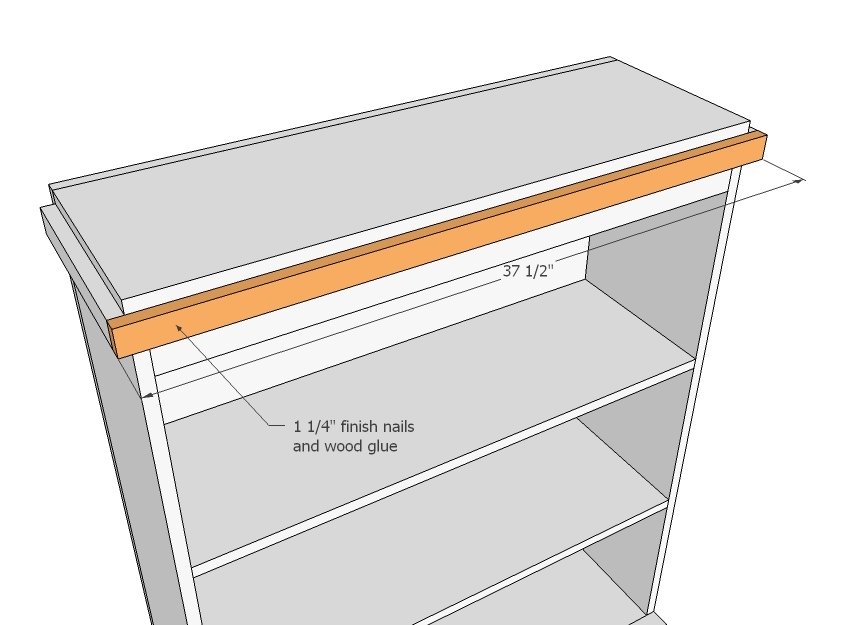
Step 8
Now for the top, use 2" finish nails and wood glue.
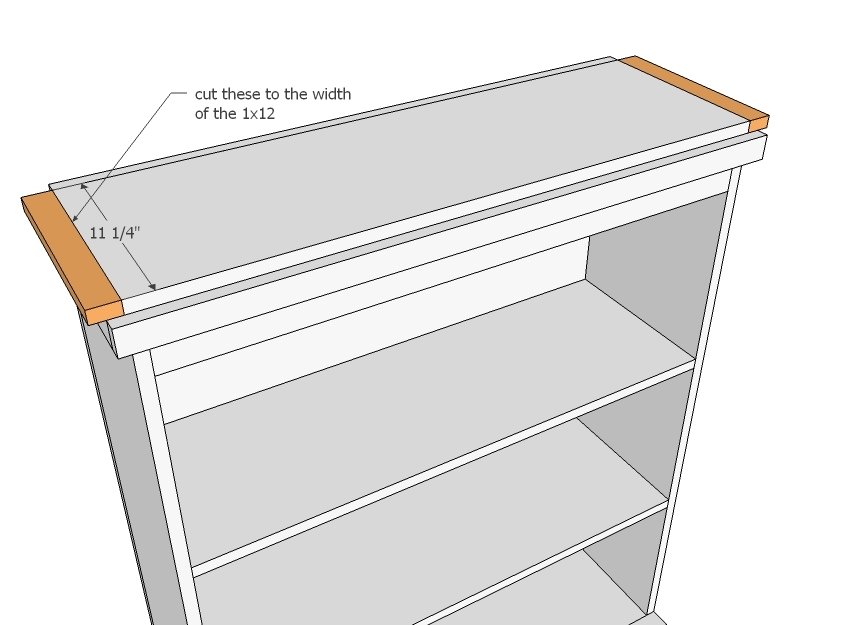
Step 9
Here too.
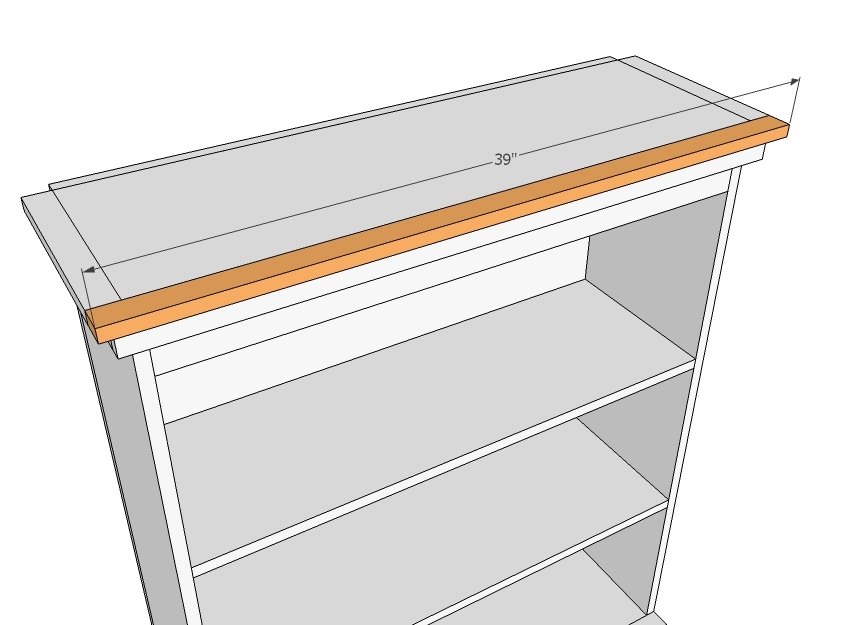
Step 10
I wanted to soften my crown, so used 3/4" x 3/4" cove mouding, mitered around the top as shown above.
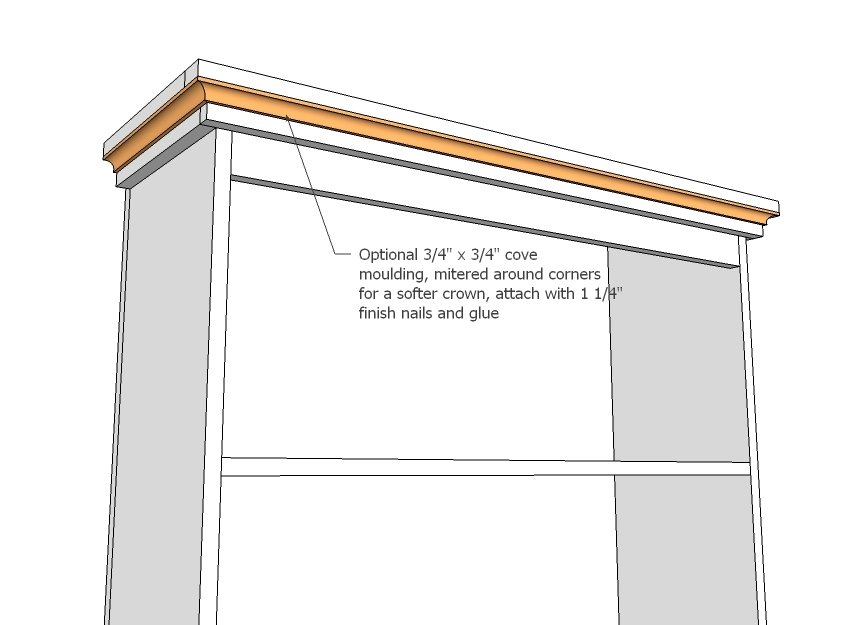
Step 11
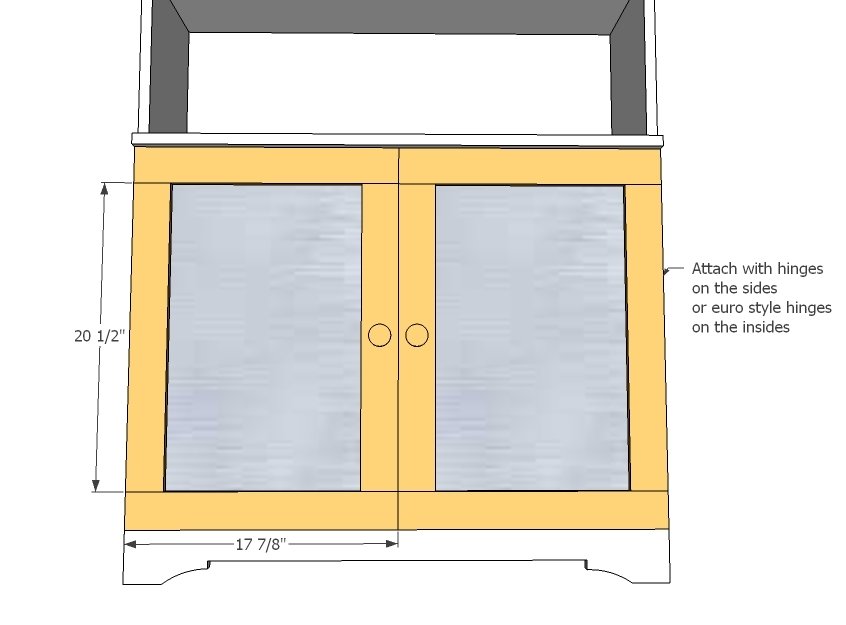
I built door frames as shown above using the Kreg Jig, with pocket holes set for 3/4" stock, 1 1/4" screws. Then I finished the empty frame and painted. Finally, I stapled the tin flashing to the back with 3/4" staples. I also filed sharp points from the tin flashing and covered the edges with clear tape.
Finishing
Sand all surfaces, starting with a medium grit and finishing with fine. Wipe off the dust, fill any holes or gaps with wood filler, and sand smooth once dry. Apply primer if you're painting, then finish with your choice of paint or stain and seal with a durable clear topcoat. For outdoor projects, use exterior-rated primer, paint or stain, and sealer so the piece stands up to the weather.
Source (temporary): https://www.ana-white.com/woodworking-projects/armoire-open-shelves-and-magnetic-doors