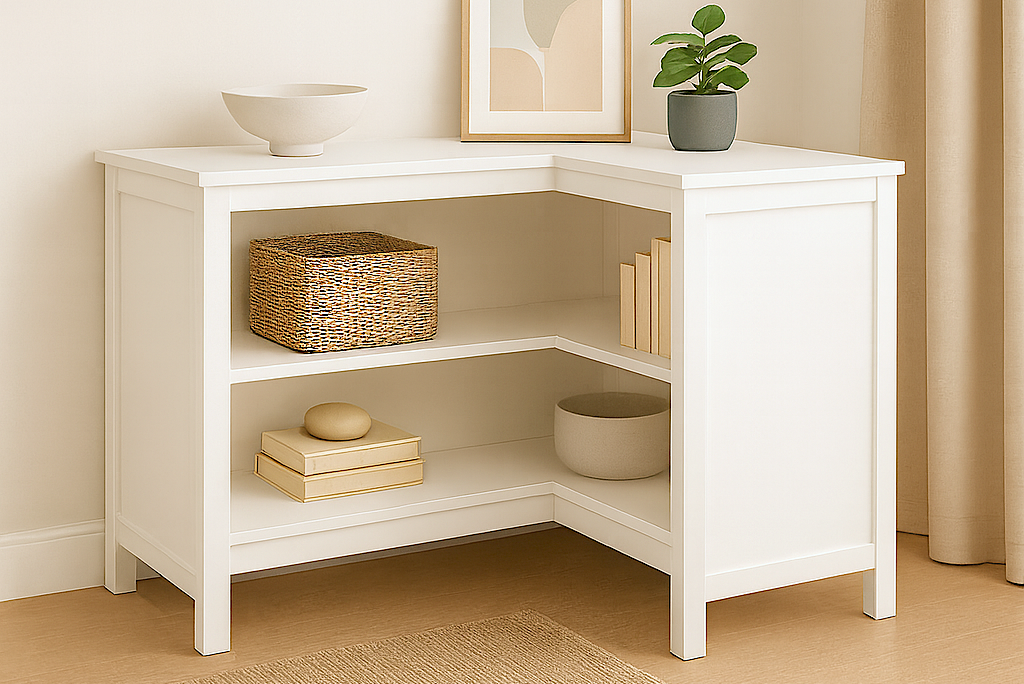
Around the Corner Bookshelf
to build a corner bookshelf. This bookshelf wraps around a corner, adding storage where you need it. with diagrams and shopping list from
Specifications
| Project type | Bookshelf and Bookcase Plans |
|---|---|
| Room | Storage Solutions |
| Difficulty | Advanced |
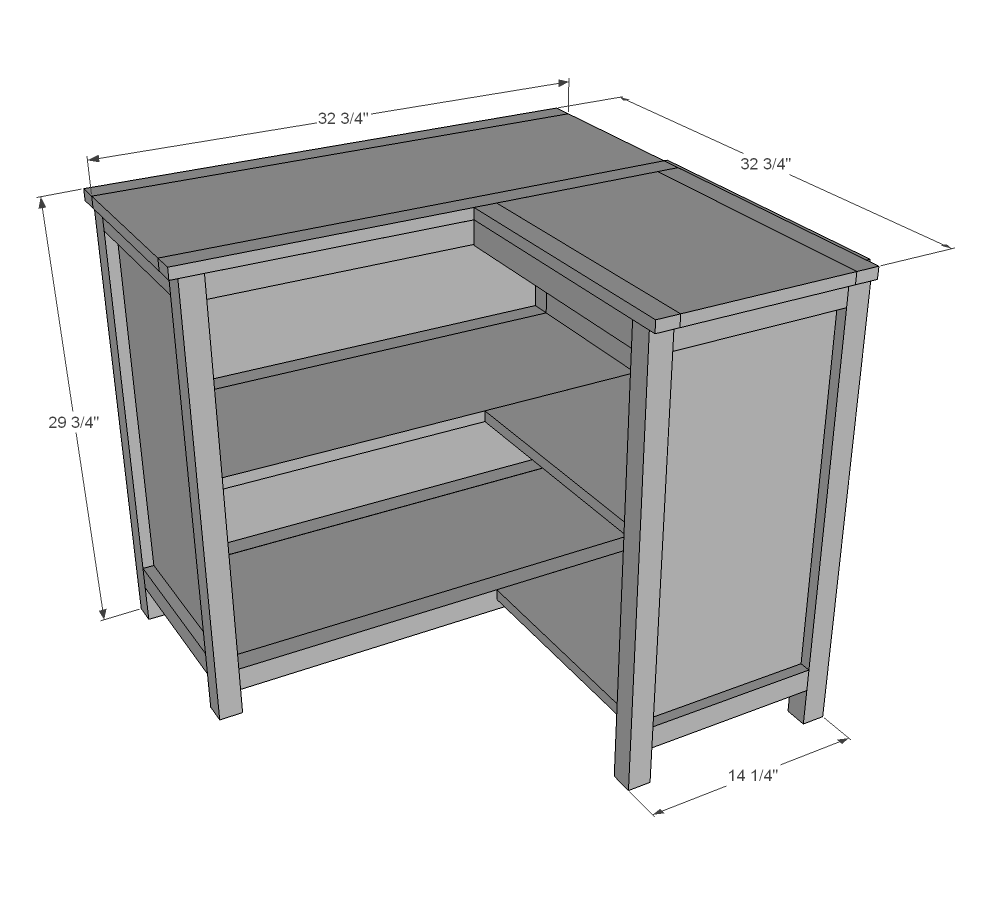
Dimensions
Use the size-specific shopping and cut lists below.
Shopping List
- 2 - 1x12 @ 10 feet long
- 2 - 1x2 @ 8 feet long
- 4 - 2x2 @ 8 feet long
- 1-1/4" pocket hole screws
- 1-1/4" brad nails
- wood glue
Cut List
MAIN BOOKSHELF - CAN BE MADE ALONE OR ADDED TO SIDES
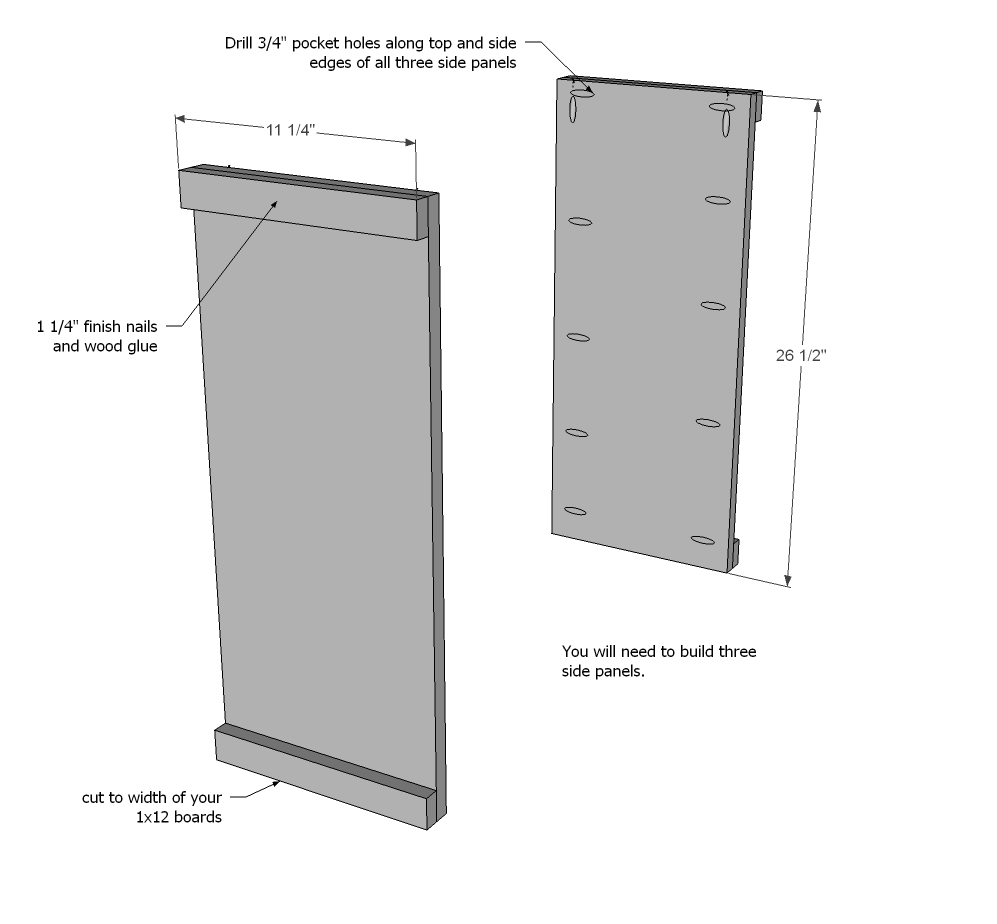
- 4 - 1x2 @ 11-1/4" side trim
- 2 - 1x12 @ 26-1/2" - side panels
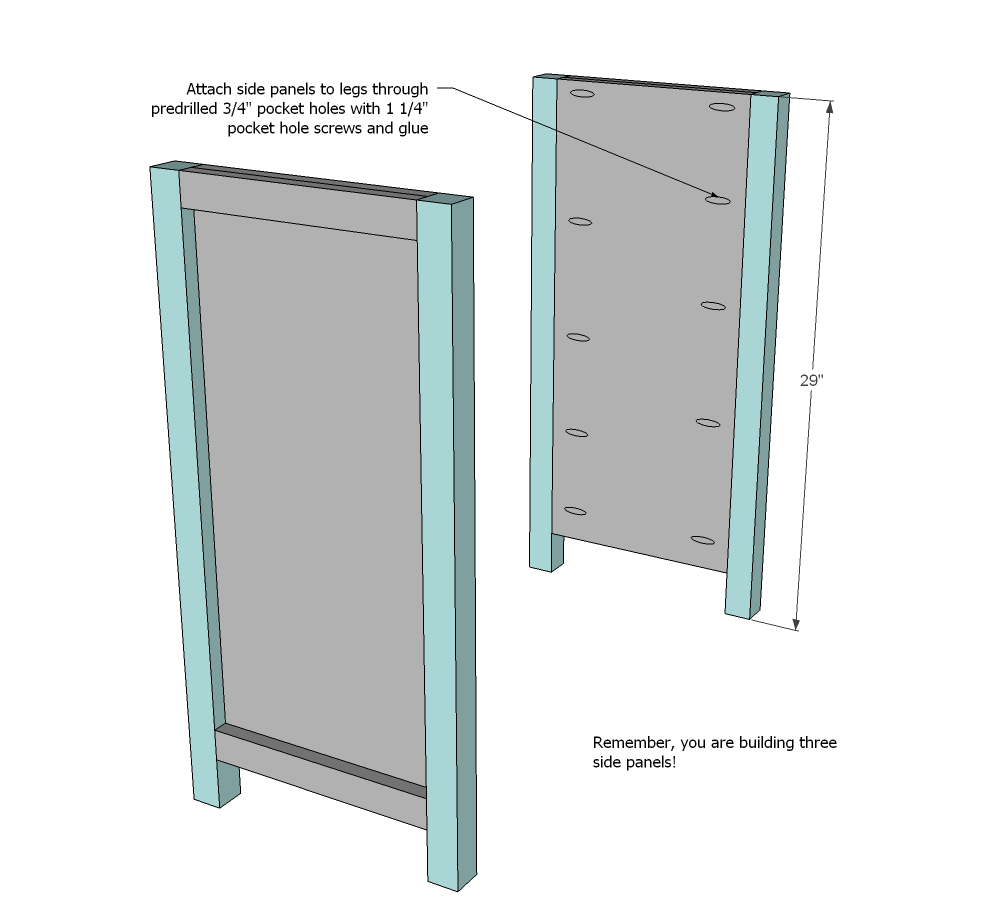
- 4 - 2x2 @ 29" - legs
- 4 - 2x2 @ 29-1/4" - top/bottom trim
- 2 - 1x12 @ 29-1/4" middle and bottom shelves
- 2 - 1x2 @ 29-1/4" - middle shelf trim
- 1 - 1x12 @ 32-3/4" - top
- 2 - 1x2 @ 32-3/4" - top trim
CORNER ADD ON
- 2 - 1x2 @ 11-1/4" - side panel trim
- 1- 1x12 @ 26-1/2" - side panel
- 2 - 2x2 @ 29" - legs
- 4 - 2x2 @ 16-1/2" - top and bottom trim
- 2 - 1x12 @ 16-1/2" - bottom and middle shelf
- 1 - 1x12 @ 18-1/2" - top
- 2 - 1x2 @ 18-1/2" - top trim
BACKS
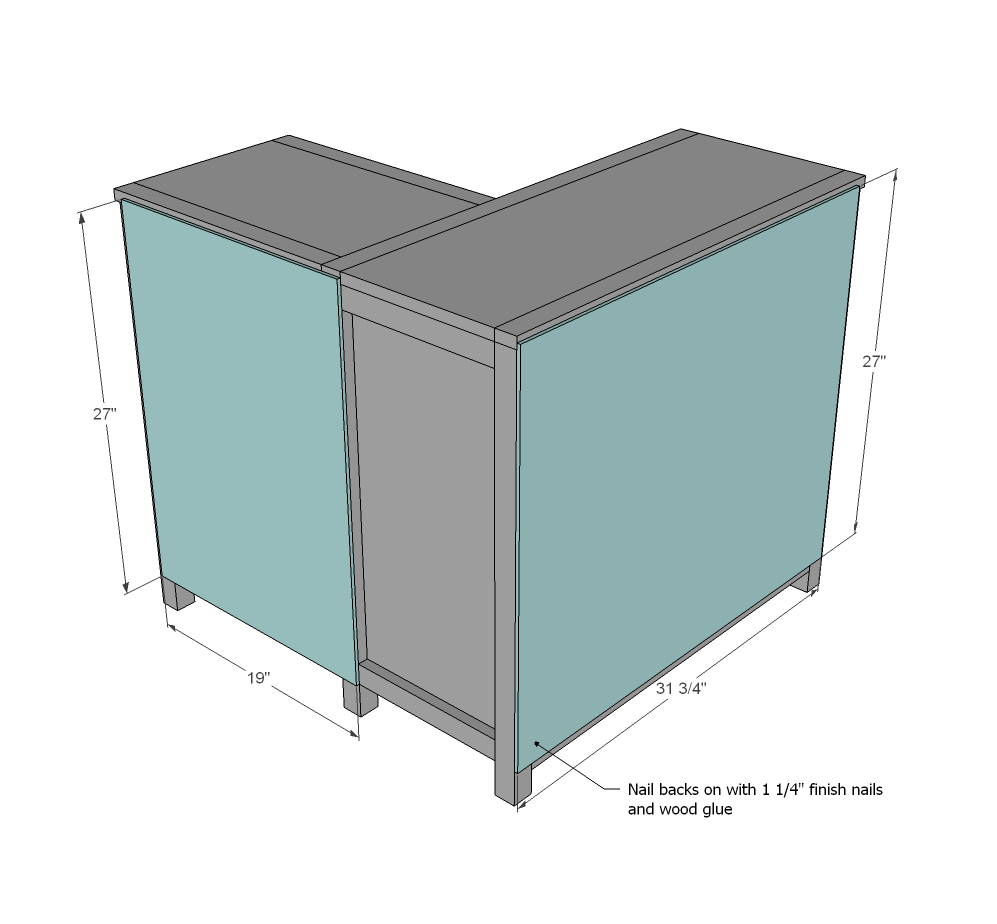
- 1 - 1/4" plywood @ 27" x 19"
- 1 - 1/4" plywood @ 27" x 31-2/4"
Tools
- measuring tape
- square
- pencil
- safety glasses
- kreg-jig
- drill
- circular saw
- compound miter saw
- nailer
- sander
Step-by-step Instructions
Step 1
Attach 1x2 side trim pieces to the 1x12s. If using pocket holes, drill along the front and back edges for attaching legs in later steps.
Step 2
Attach legs to side panels with pocket hole screws.
Step 3
Attach top supports to legs.
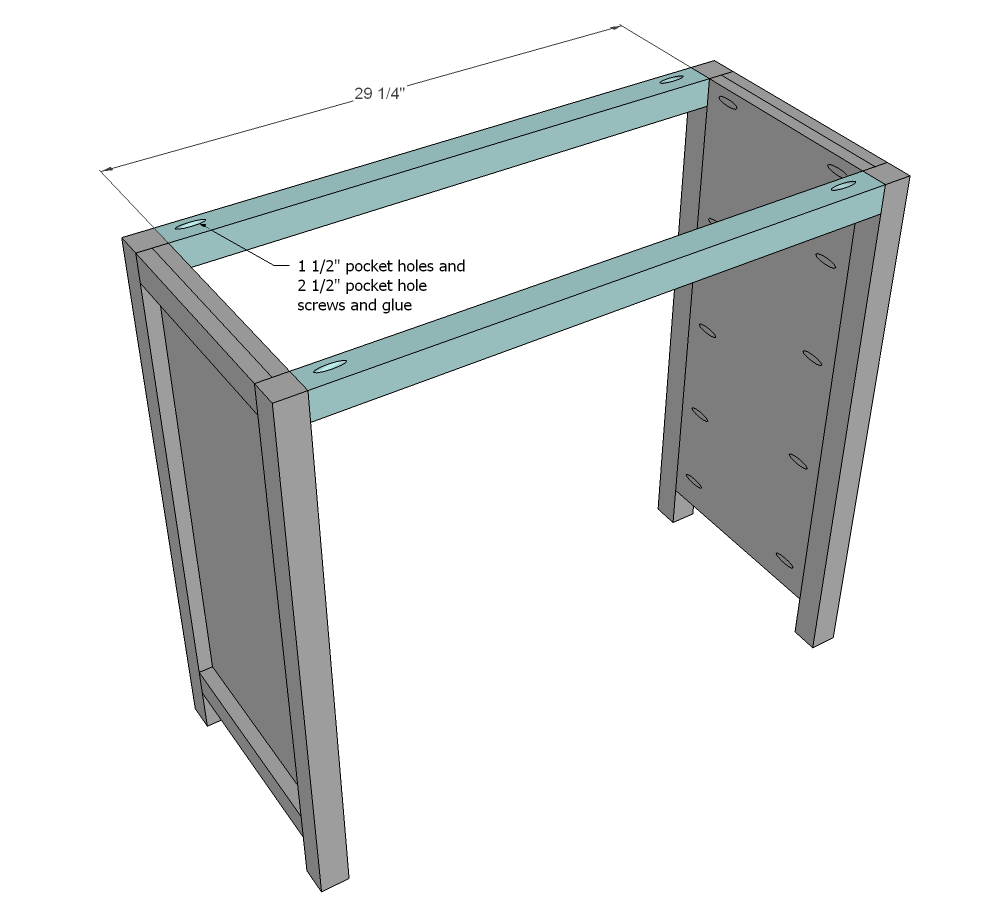
Step 4
Attach side trim to shelf. Then attach entire shelf to the side panels.
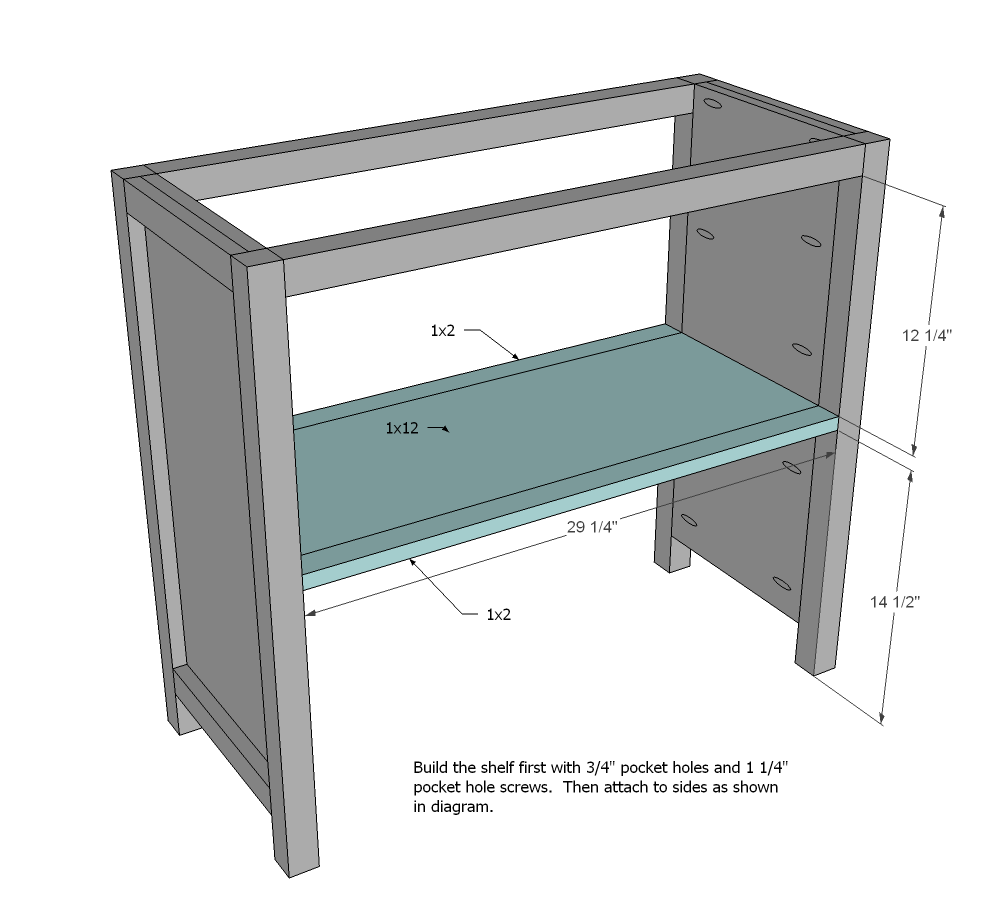
Step 5
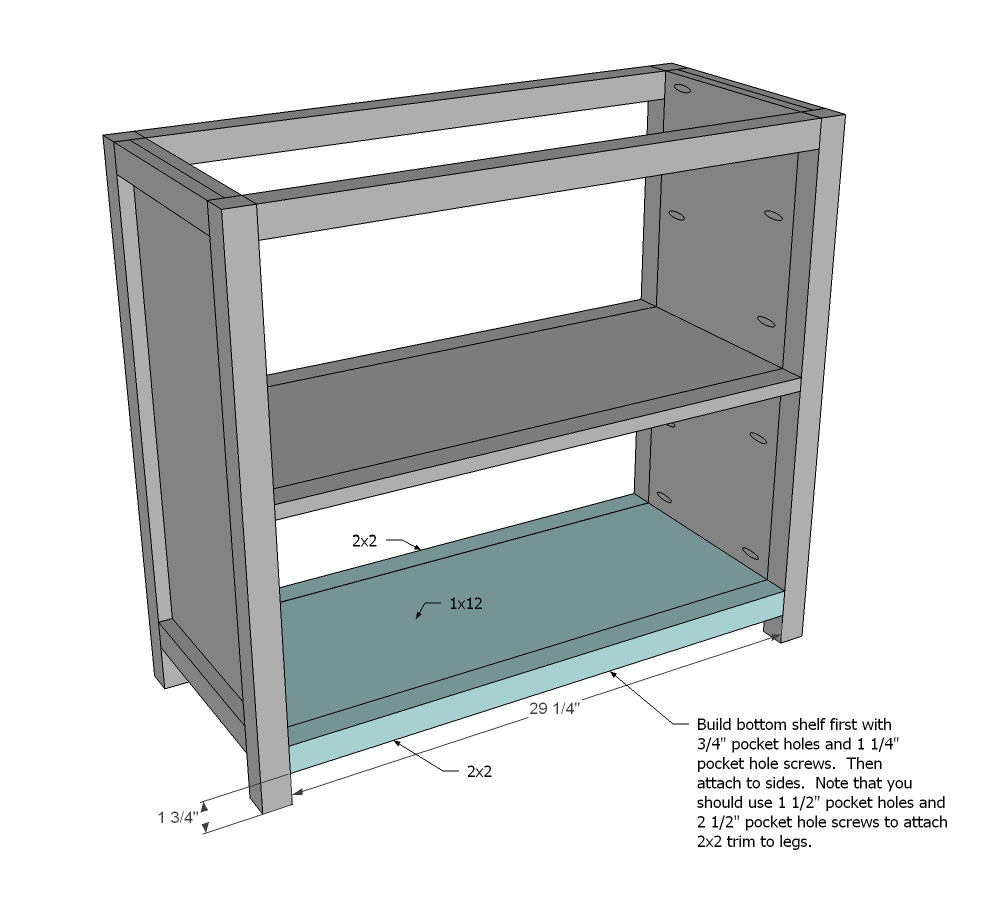
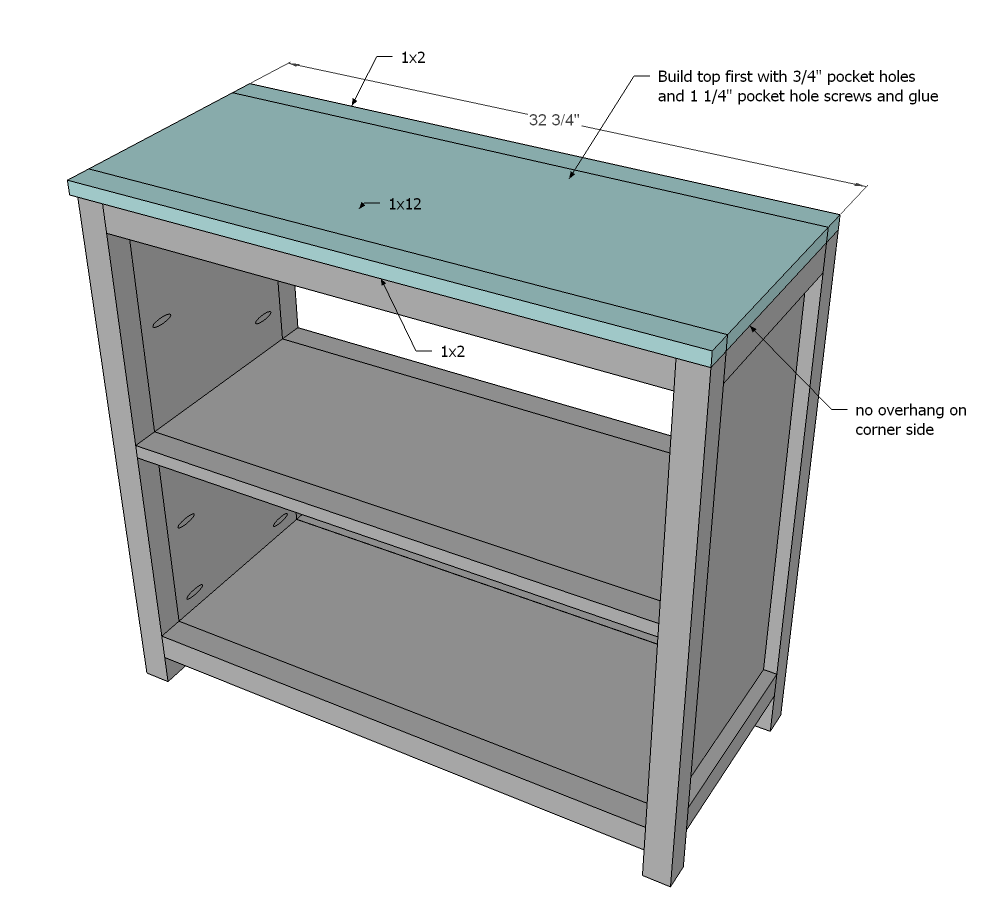
Attach side trim pieces to the top. Then attach top to the bookshelf base.
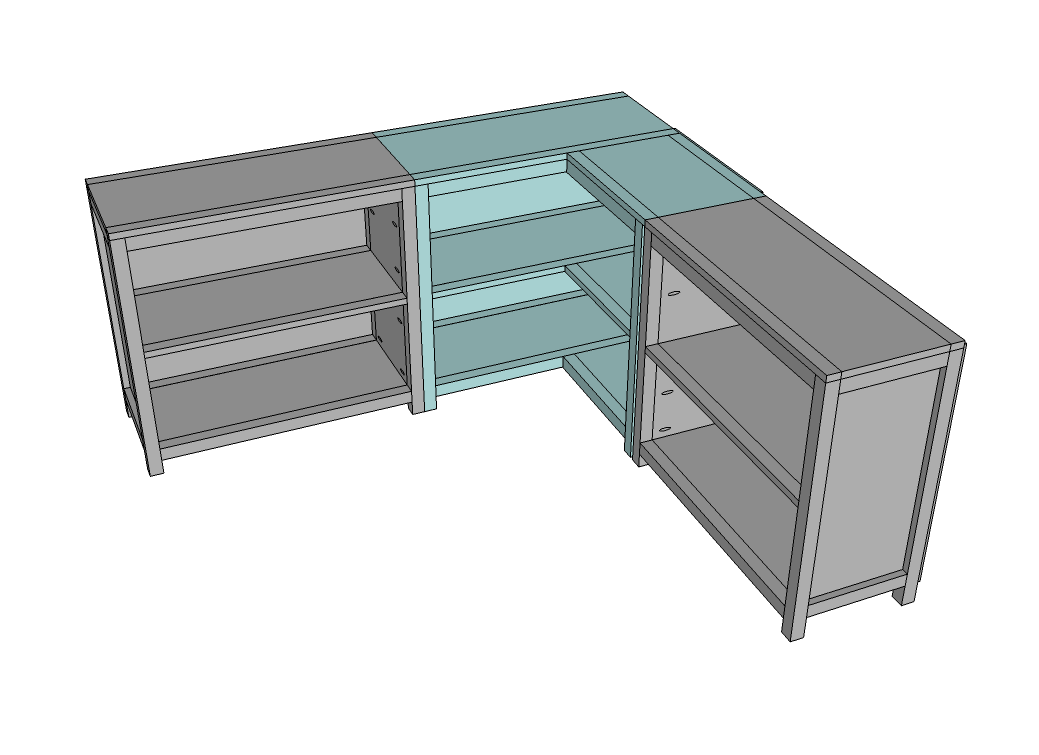
This completes the bookshelf. You can also add a back (see last step). You can also build single bookshelves along side the corner bookshelves following steps 1-6.
For the corner add on, build a third side panel as done in step 1 and 2.
Attach to main bookshelf with pocket holes.
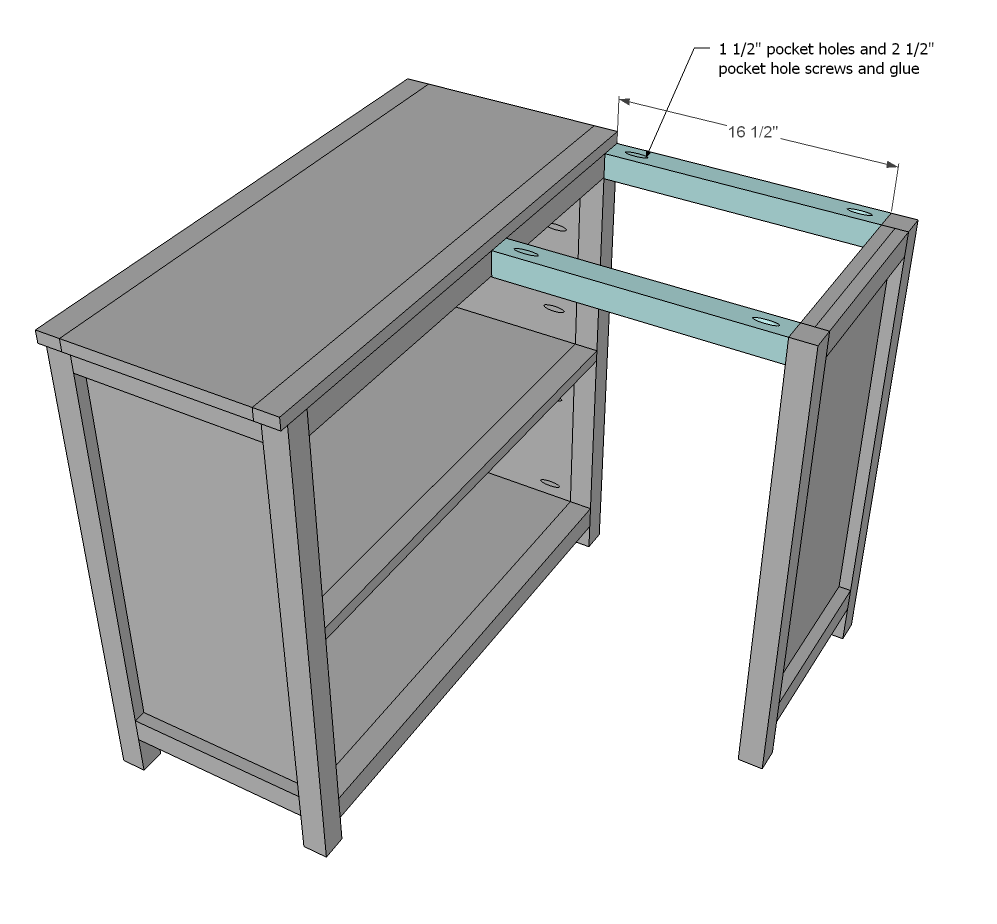
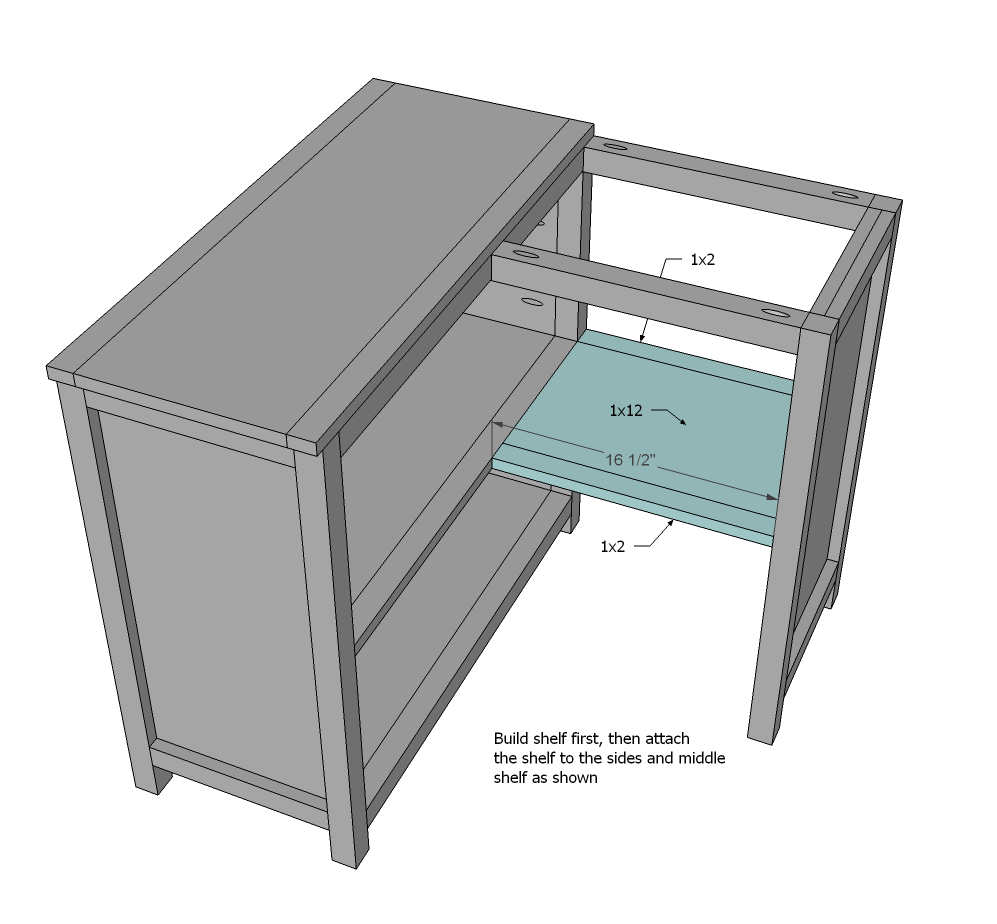
Step 8
Add middle shelf with 1x2 trim pre-attached.
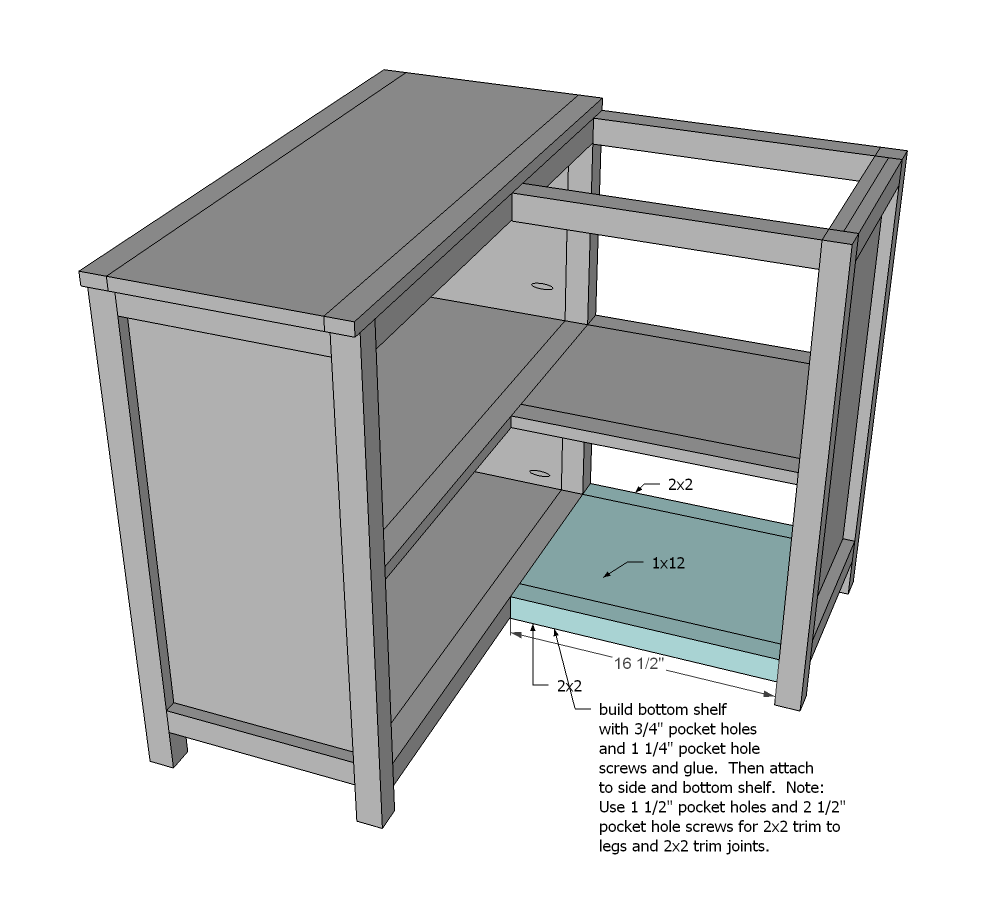
Step 9
Add bottom shelf with 2x2 trim attached.
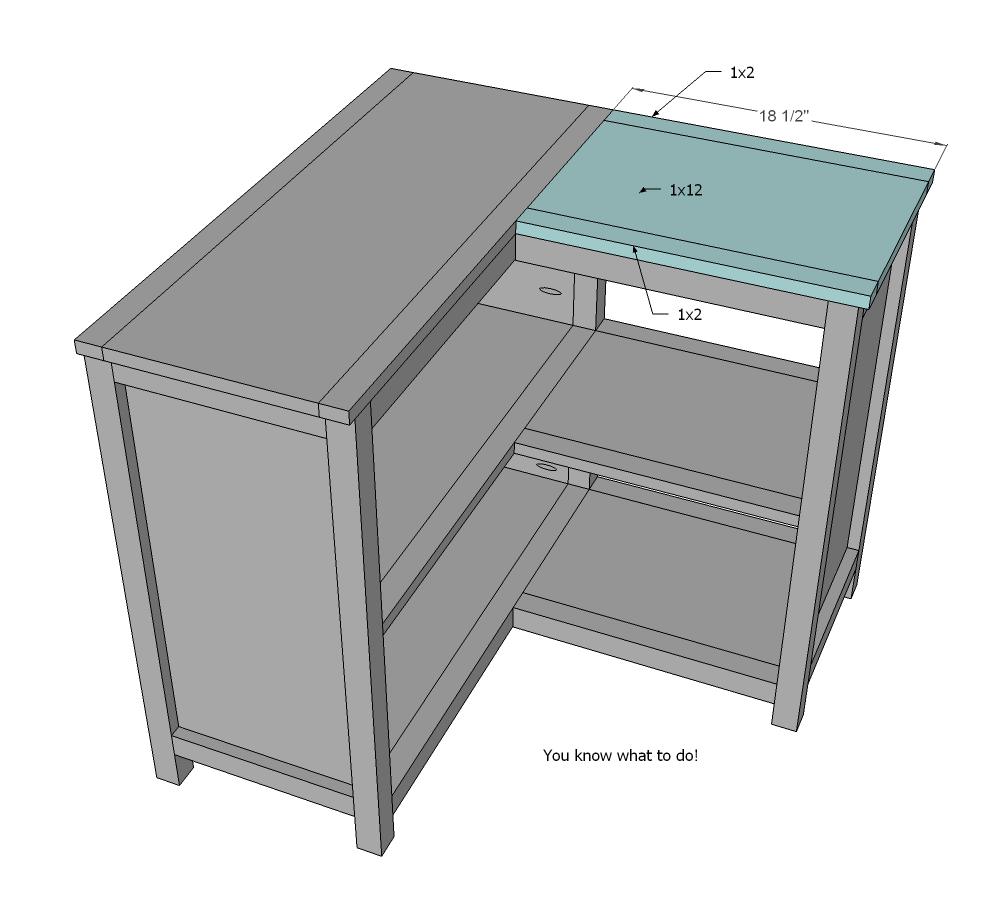
Step 10
Build top and attach on top.
Step 11
Nail or staple back on with glue.
Step 12
Finishing
Sand all surfaces, starting with a medium grit and finishing with fine. Wipe off the dust, fill any holes or gaps with wood filler, and sand smooth once dry. Apply primer if you're painting, then finish with your choice of paint or stain and seal with a durable clear topcoat. For outdoor projects, use exterior-rated primer, paint or stain, and sealer so the piece stands up to the weather.
Source (temporary): https://www.ana-white.com/woodworking-projects/around-corner-bookshelf-updated-plans