Art Cart Underbed
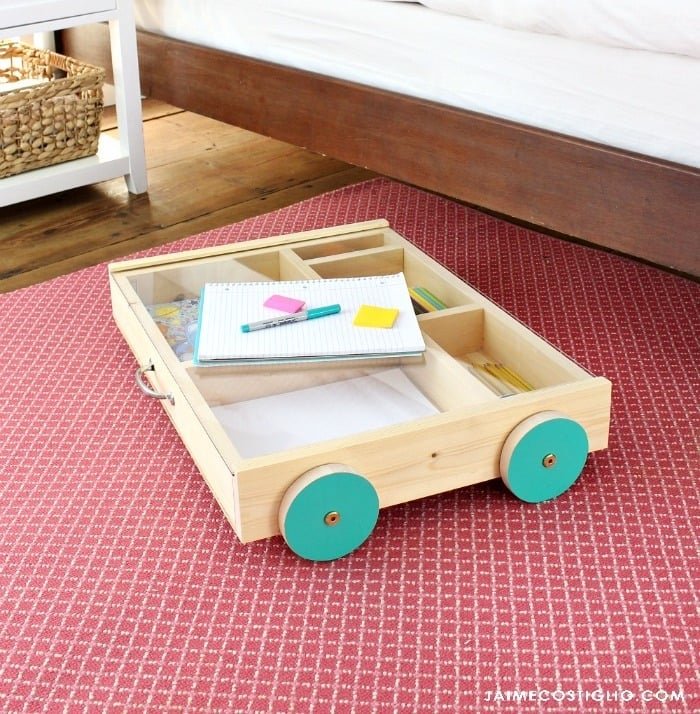
Art cart that rolls under bed or sofa. DIY
Specifications
| Project type | Toys |
|---|---|
| Room | Teens |
| Style | Children's and Kid's Room Furniture and Toy Plans |
| Difficulty | Beginner Projects |
Dimensions
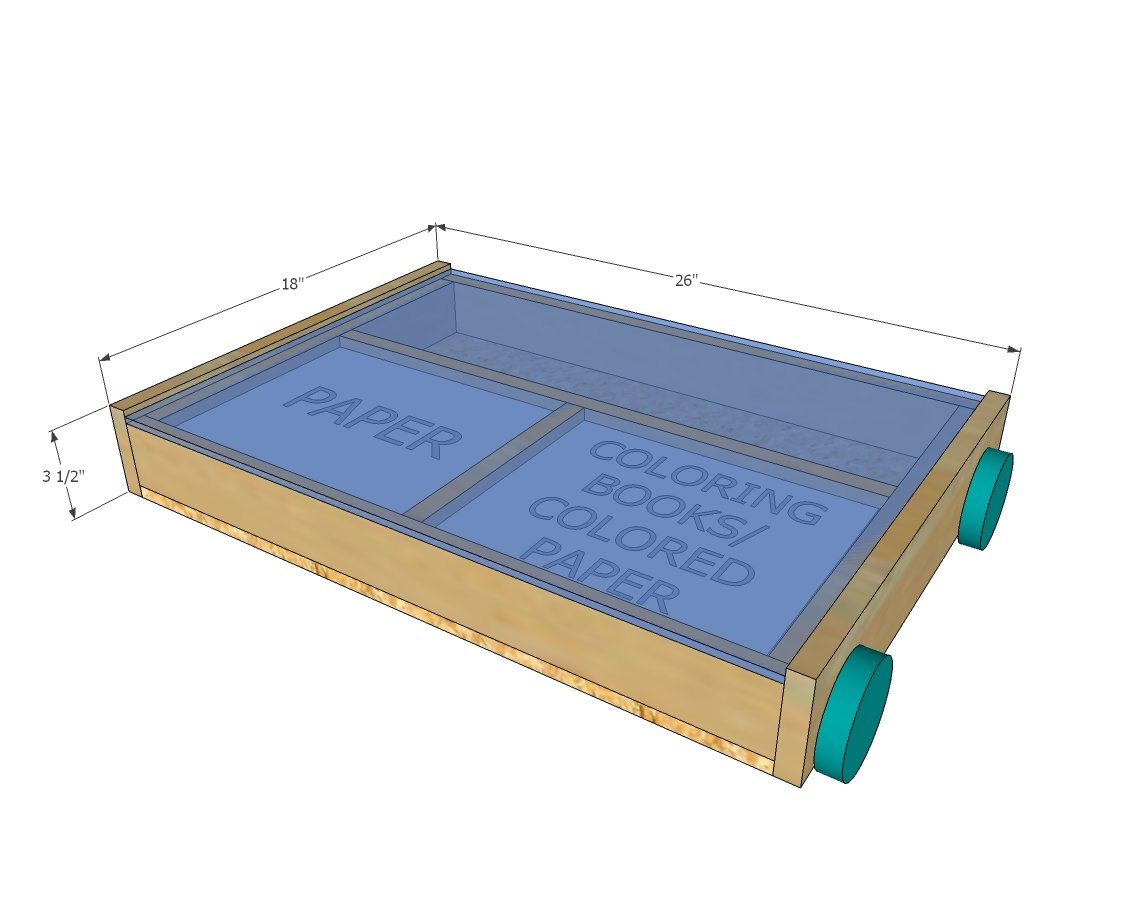
Use the size-specific shopping and cut lists below.
Shopping List
- 1 - 1x4 @ 3 feet long
- 2 - 1x3 @ 8 feet long
- 1/4" or 1/2" plywood panel 18" x 24-1/2"
- 18" x 24" clear plastic sheet
- Scrap 1x5 or larger for cutting wheels out of
- 4 - 2" stainless steel hex bolts with nuts and washers
- 3/4" brad nails or staples (to match your fastening tool)
Cut List
- 2 - 1x4 @ 18"
- 2 - 1x3 @ 24-1/2"
- 2 - 1x3 @ 16-1/2"
- 1 - 1x3 @ 23"
- 1 - 1x3 @ 9"
- Bottom plywood 18" x 24-1/2"
Tools
- measuring tape
- square
- hammer
- safety glasses
- hearing protection
- drill
- jigsaw
- nailer
- sander
- countersink drill bit
Step-by-step Instructions
Step 1
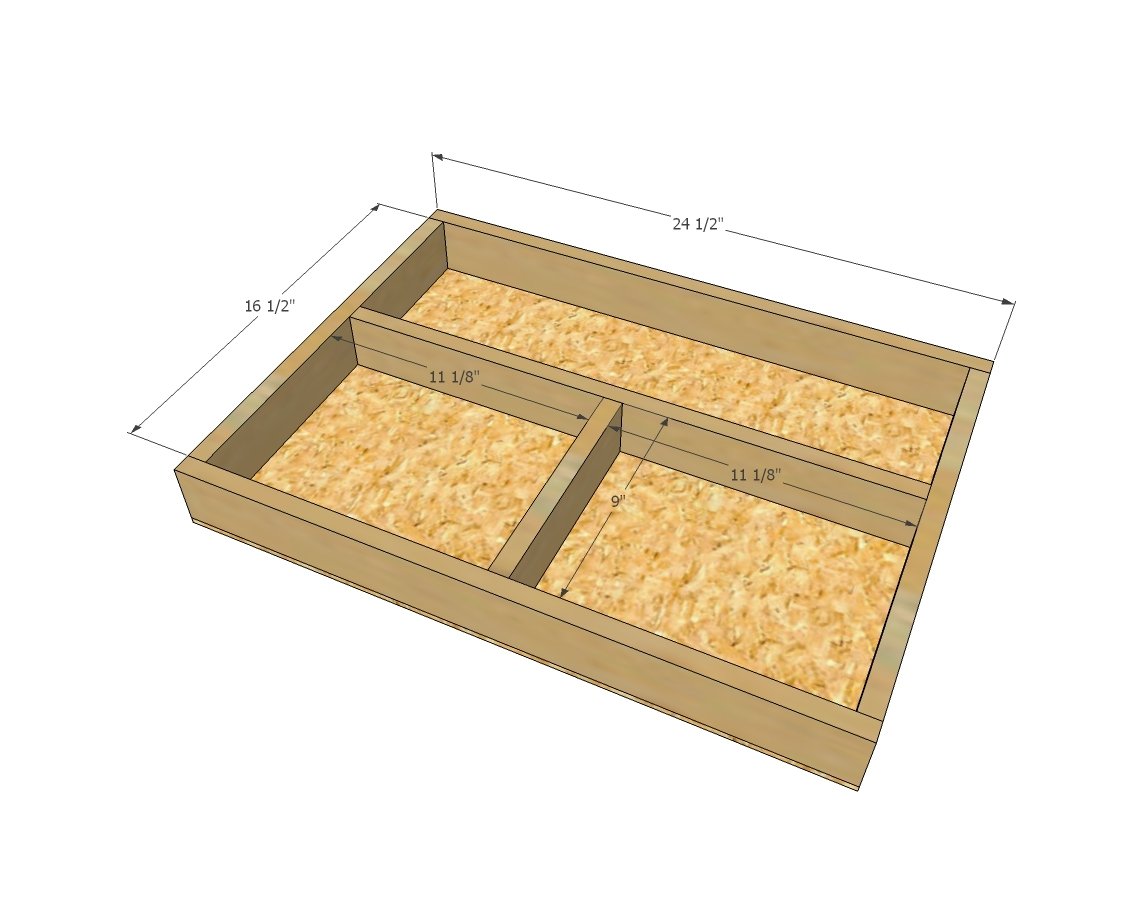
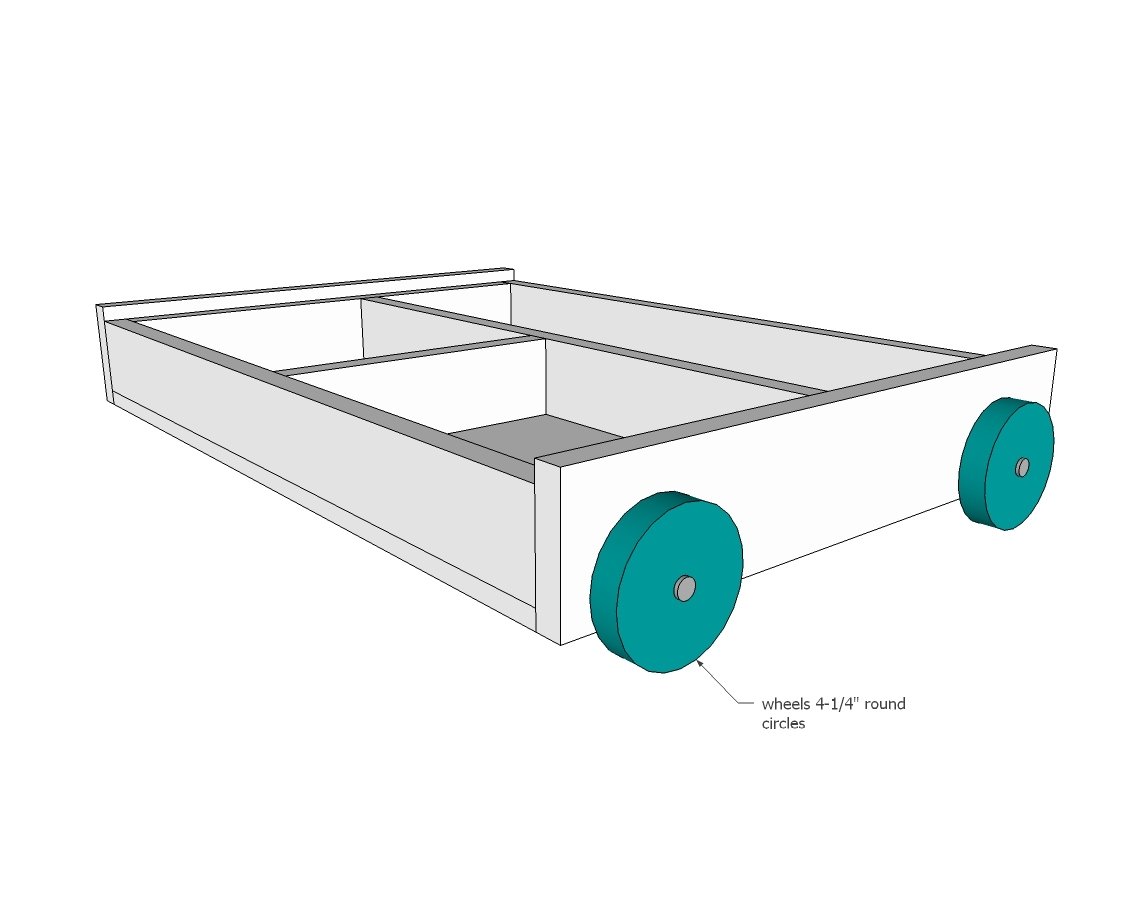
Attach 1x3s together to create the divider shape - work from inside out so you have room for your tool to fasten. Use glue and 2" fasteners. Attach bottom to 1x3s with 3/4" brad nails or staples and glue.
Step 2
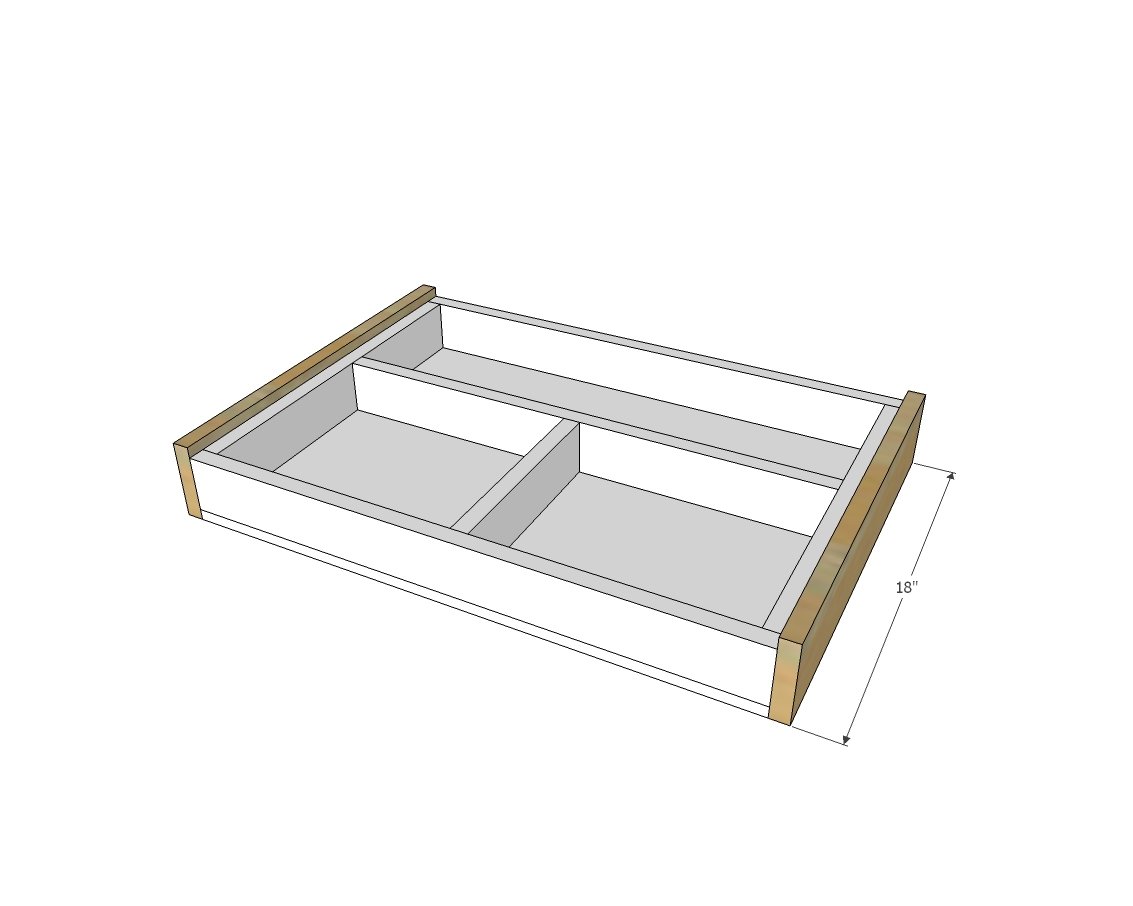
Attach 1x4s to outside of 1x3s with glue and 1-1/4" brad nails.
Step 3
Cut wheels (Jaime used a quart paint can as a template) and cut out with a jigsaw. Sand until smooth. Drill holes in center of wheels. Place tray on top of 1x material to elevate off the floor. Then mark center of wheels on sides of tray. Drill out holes to match your bolts. Install wheels using bolts and nuts.
Step 4
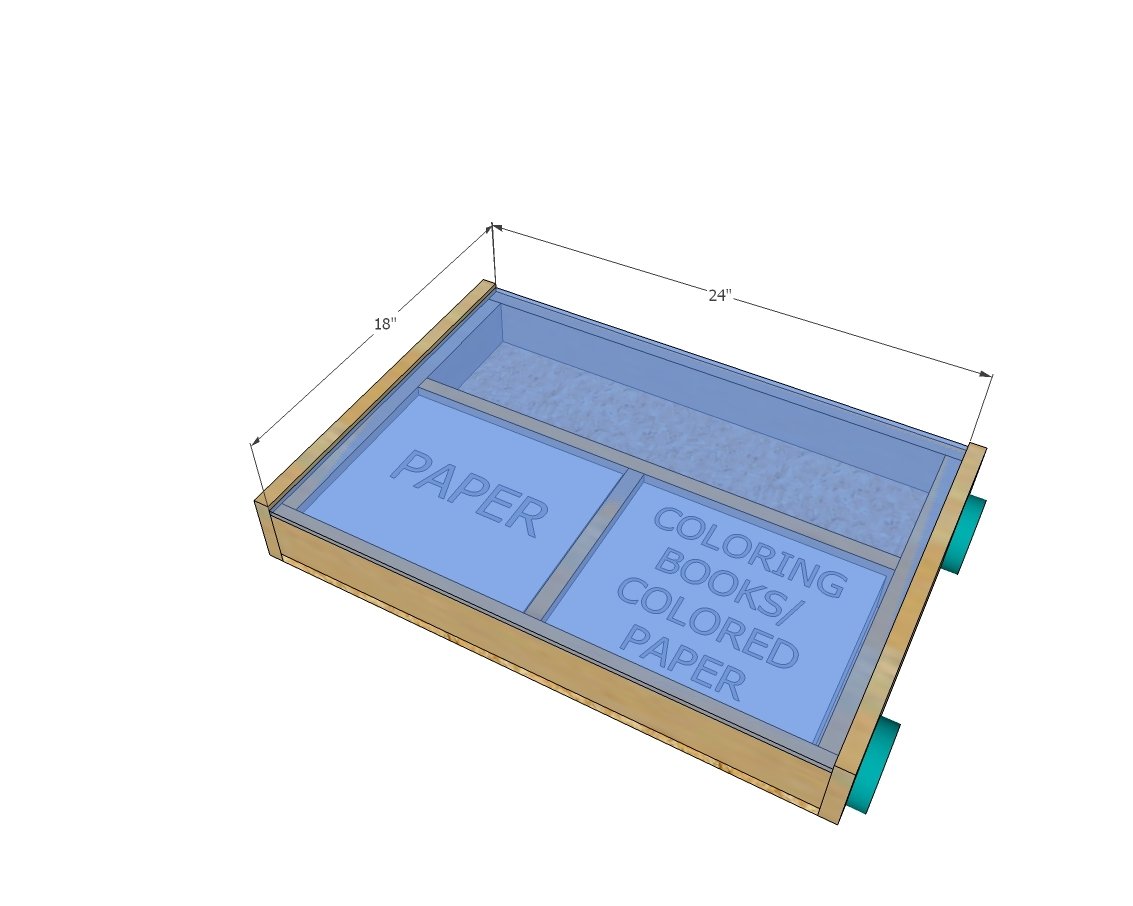
The acrylic sheet sits on top of the project.
Finishing
Sand all surfaces, starting with a medium grit and finishing with fine. Wipe off the dust, fill any holes or gaps with wood filler, and sand smooth once dry. Apply primer if you're painting, then finish with your choice of paint or stain and seal with a durable clear topcoat. For outdoor projects, use exterior-rated primer, paint or stain, and sealer so the piece stands up to the weather.
Source (temporary): https://www.ana-white.com/woodworking-projects/art-cart-underbed