Bailey Console Table with Doors
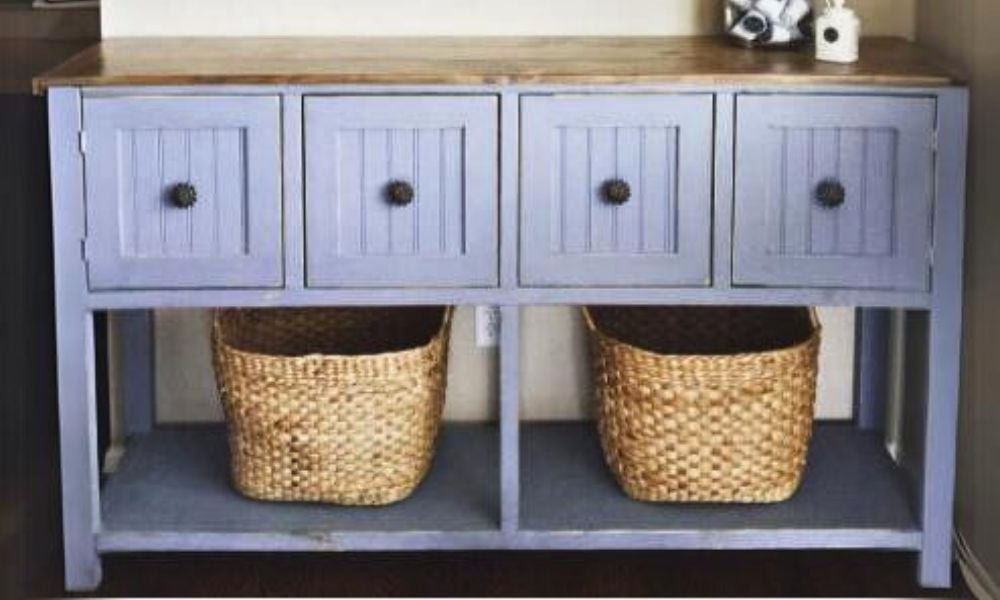
Free console table plans featuring large cubbies with doors and a large bottom shelf. The include step by step instructions, diagrams, shopping and cut list and lots of reader submitted photos. See also: Bailey Console Table with Drawers
Specifications
| Project type | Console Table Plans |
|---|---|
| Room | Bedroom |
| Difficulty | Intermediate |
Dimensions
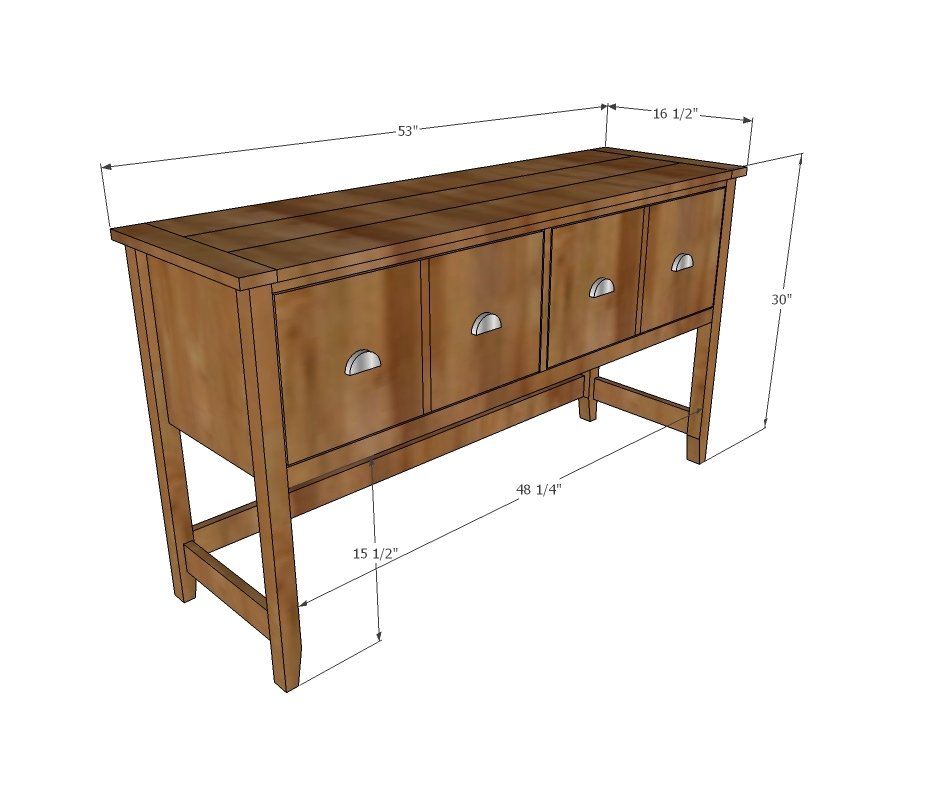
Use the size-specific shopping and cut lists below.
Shopping List
- 3 – 2x2 @ 8 feet long
- 2 – 1x2 @ 8 feet long
- 2 – 1x2 @ 8 feet long
- 1 – 1x6 @ 12 feet long
- 1 – 1x12 @ 4 feet long
- 24” x 48” 3/4” plywood panel (can also use planked 1x pieces for sides)
- 1 – full sheet of 1/4" thick plywood
- 1 – 1x8 @ 12 feet long
- 4 knobs
- 2 sets of euro style (white bottom corner mount style) drawer slides, 14” length
- 1-1/4” and 3/4” brad nails
- 1-1/4” and 2-1/2” pocket hole screws
- Wood glue
Cut List
- 4 – 2x2 @ 29-1/4” (legs)
- 2 – 2x2 @ 48-1/4” (below drawer support)
- 2 – 1x2 @ 48-1/4” (above drawer support)
- 2 – 1x2 @ 11-1/2” (in between drawer support)
- 2 – 3/4” plywood @ 13” x 13-3/4” (sides) – can also use planked wood pieces
- 1 – 1x3 @ 48-1/4” (stretcher, back)
- 2 – 1x3 @ 13” (stretcher, sides)
- 1 – 1/4” plywood @ 13-3/4” x 50-1/4”
- 4 – 1x8 @21-1/4” (drawer front and backs)
- 4 – 1x8 @ 14-1/2” (drawer sides)
- 2 – 1/4” plywood @ 22-3/4” x 14-1/2” (drawer bottom)
- 2 – 1x12 @ 23-1/2” long (drawer faces)
- 3 – 1x6 @ 47-7/8” (tabletop boards)
- 2 – 1x3 @ 16-1/2” (breadboard ends)
Tools
- measuring tape
- square
- pencil
- safety glasses
- hearing protection
- kreg-jig
- drill
- compound miter saw
- nailer
- sander
Step-by-step Instructions
Step 1
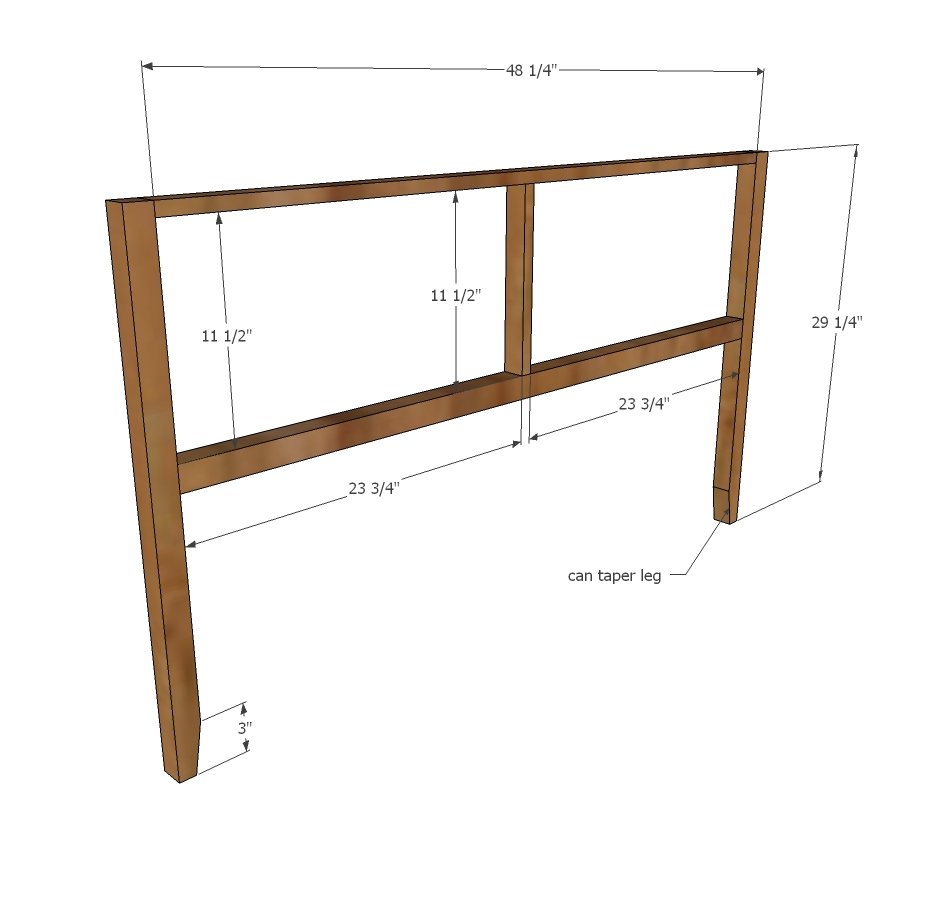
Build the frame for the console, using pocket holes. Use 3/4” pocket holes when ANY 1x material is being joined, and 1-1/2” pocket holes when ONLY 2x material is being joined. Hide pocket holes on undersides and top sides, where will be hidden from sight. Build two identical frames – this is important for drawer slides to work correctly.
Step 2
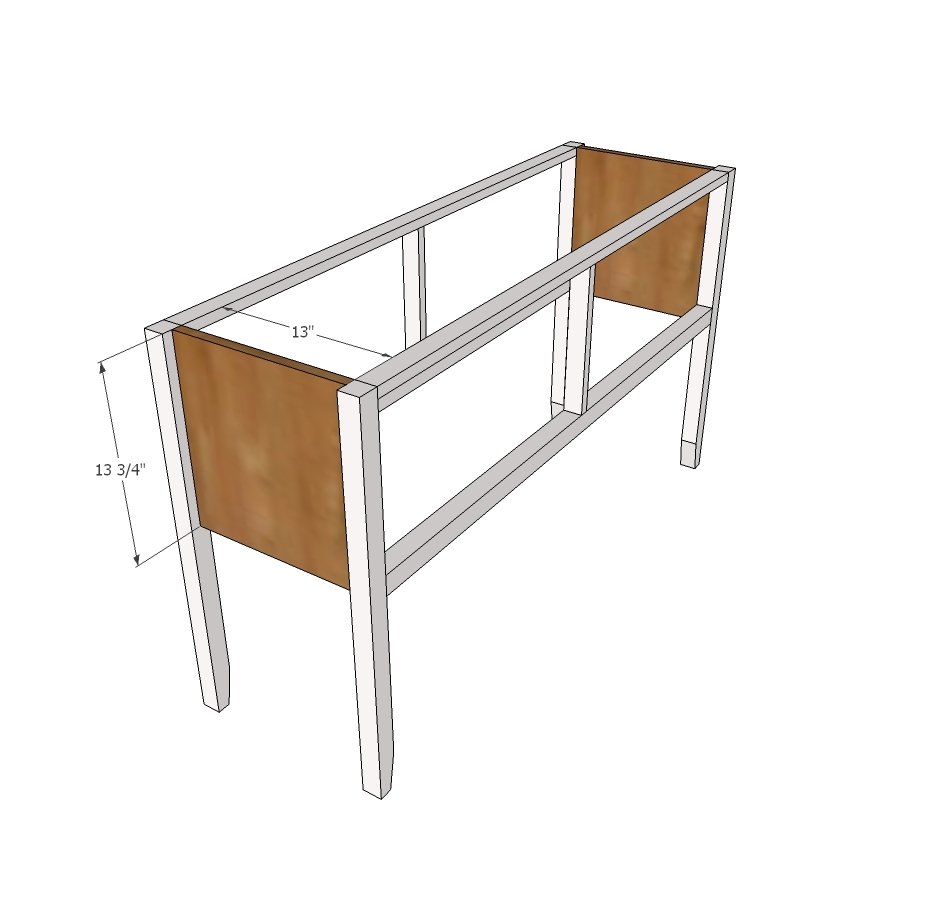
Drill ¾” pocket holes along side and top edges of ¾” plywood panels and attach to legs, pocket holes on inside, flush to inside of project. Make sure project is square – cross bracing at corners can be added to further increase strength and stability.
Step 3
Attach bottom aprons with ¾” pocket holes, hiding on back sides and insides.
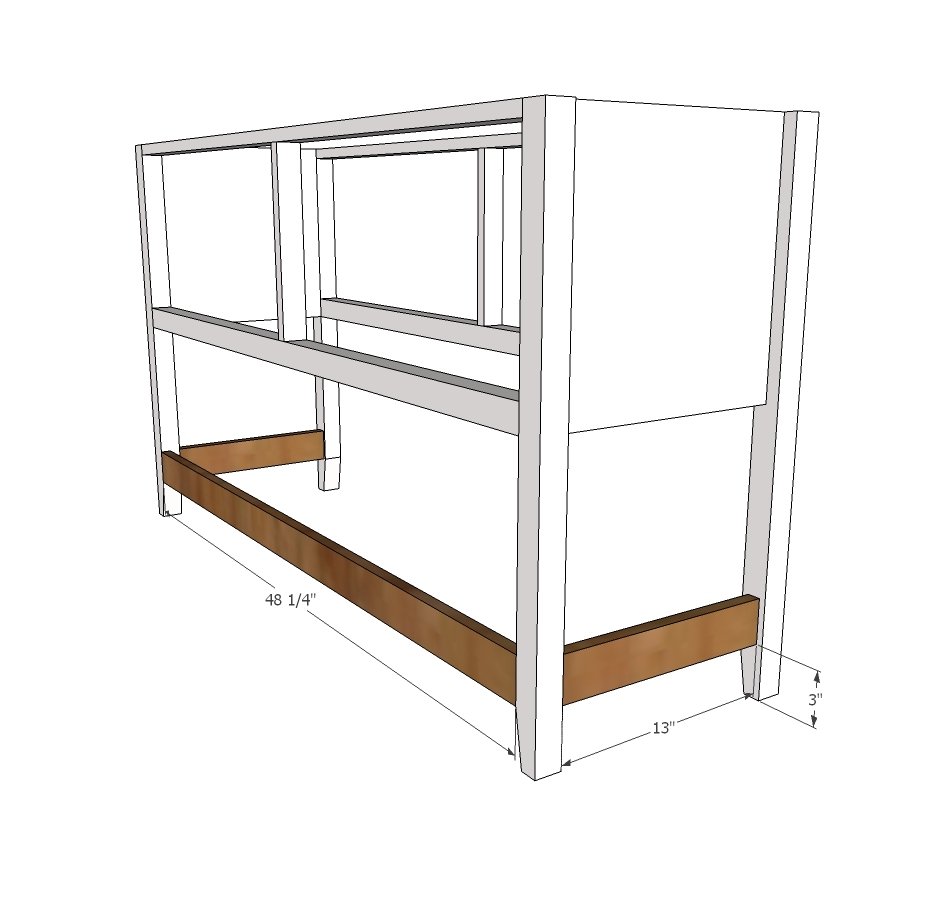
Step 4
Attach back with nails and wood glue.
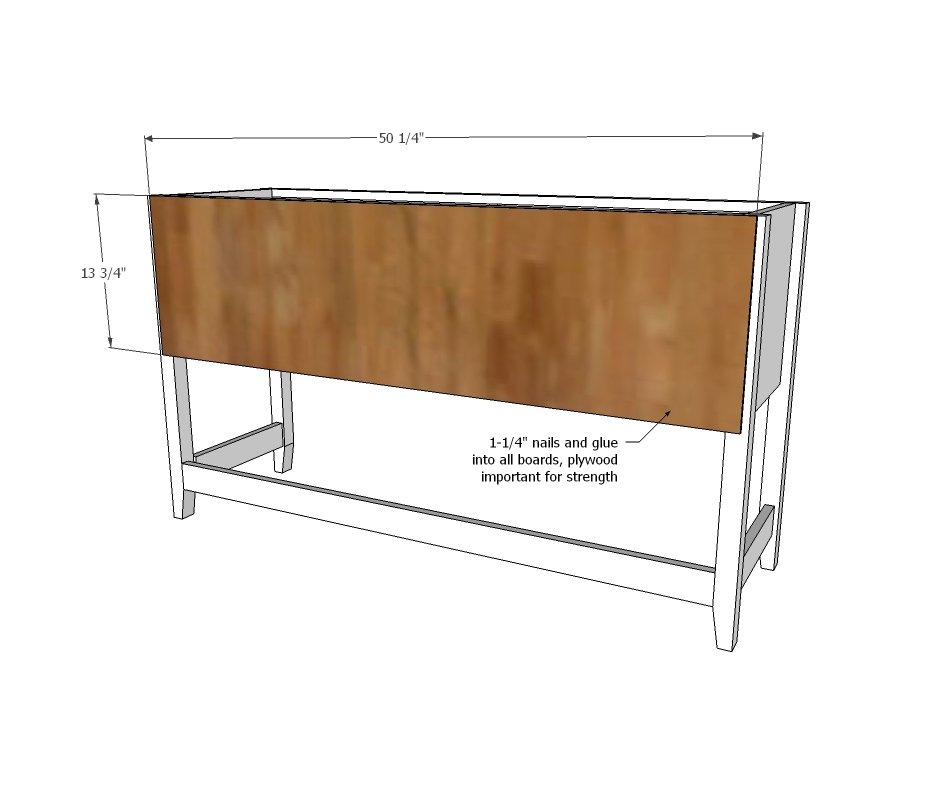
Step 5
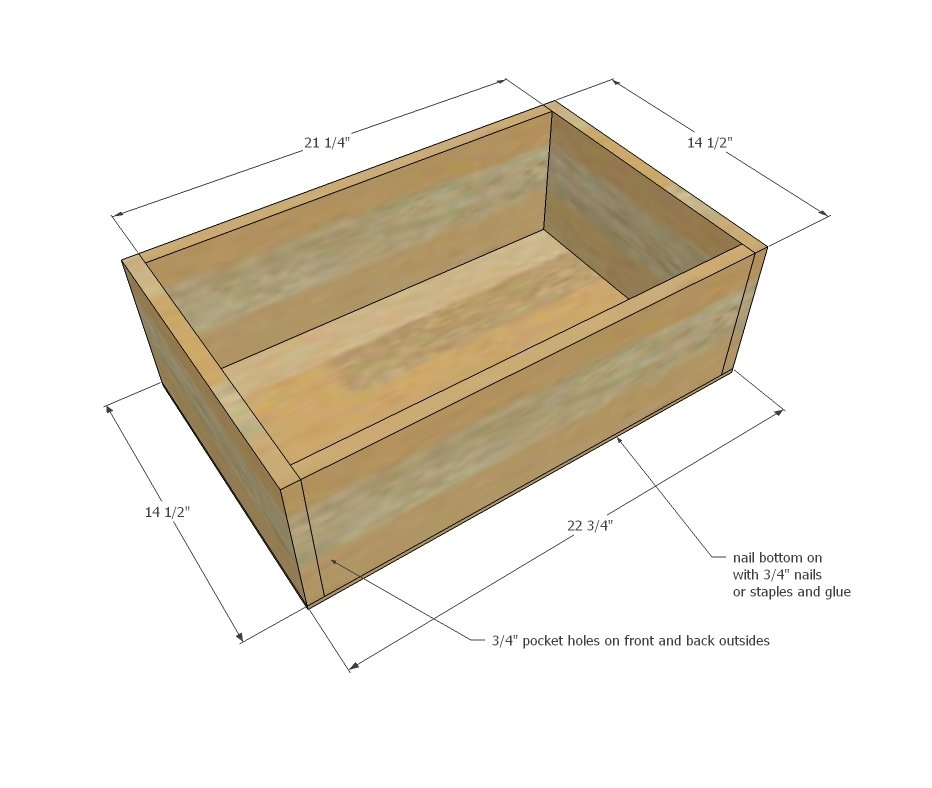
Step 6
Install drawers with drawer slides, inset ¾” from front of cabinet. Adjust until drawers slide easily.
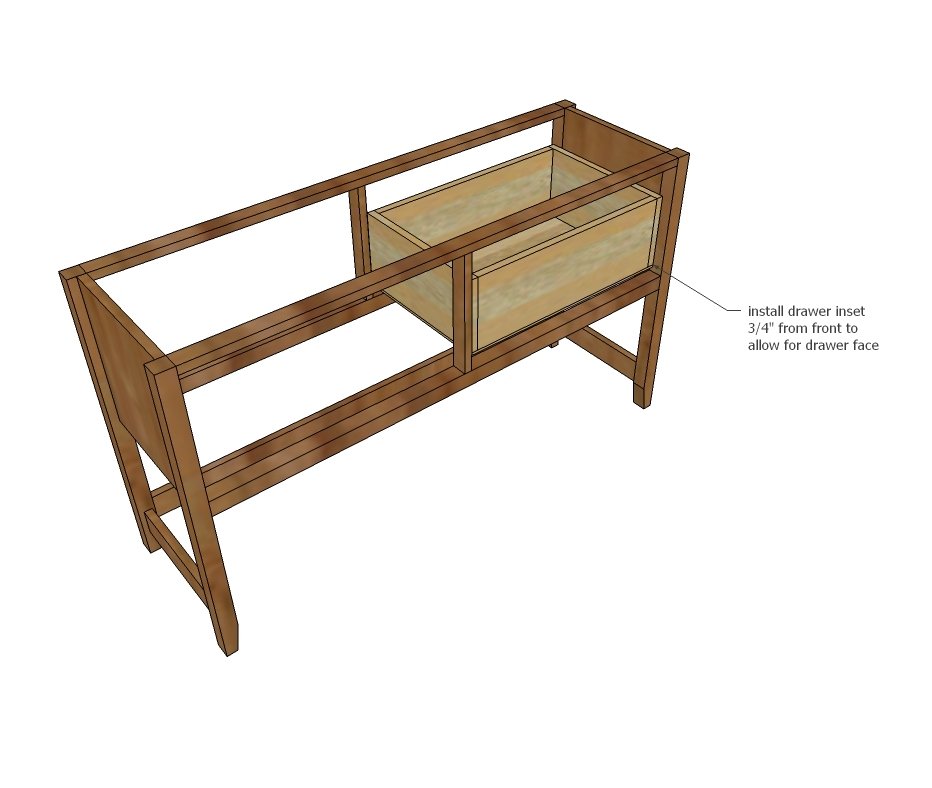
Step 7
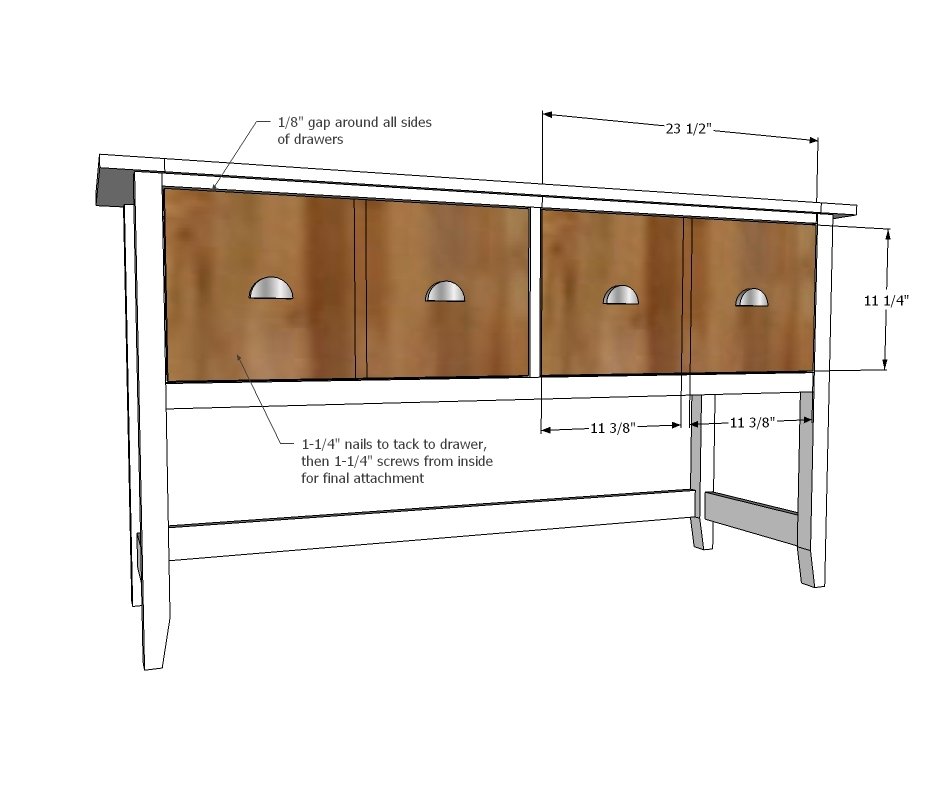
Attach drawer faces to drawer boxes, leaving 1/8” gap around all sides of drawer faces. Secure from inside with 1-1/4” screws.
Step 8
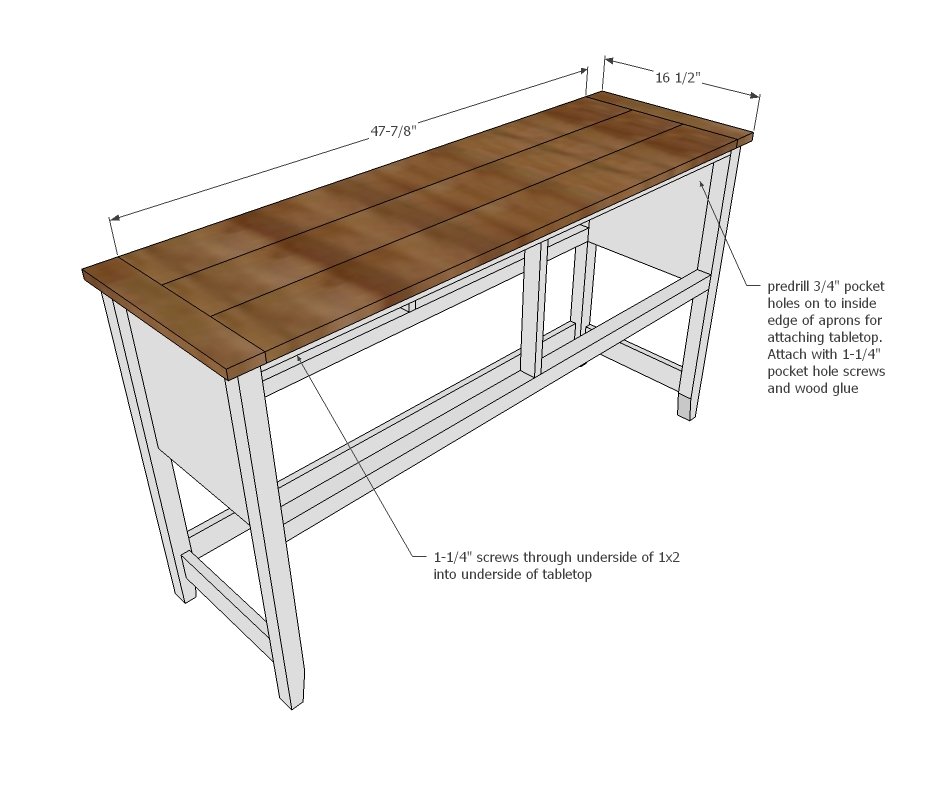
Build top with ¾” pocket holes. Remove drawers and attach tabletop to frame with 1-1/4” screws and wood glue.
Finishing
Sand all surfaces, starting with a medium grit and finishing with fine. Wipe off the dust, fill any holes or gaps with wood filler, and sand smooth once dry. Apply primer if you're painting, then finish with your choice of paint or stain and seal with a durable clear topcoat. For outdoor projects, use exterior-rated primer, paint or stain, and sealer so the piece stands up to the weather.
Source (temporary): https://www.ana-white.com/woodworking-projects/bailey-console-table-doors