Banquette Bench with Flip-Up Storage
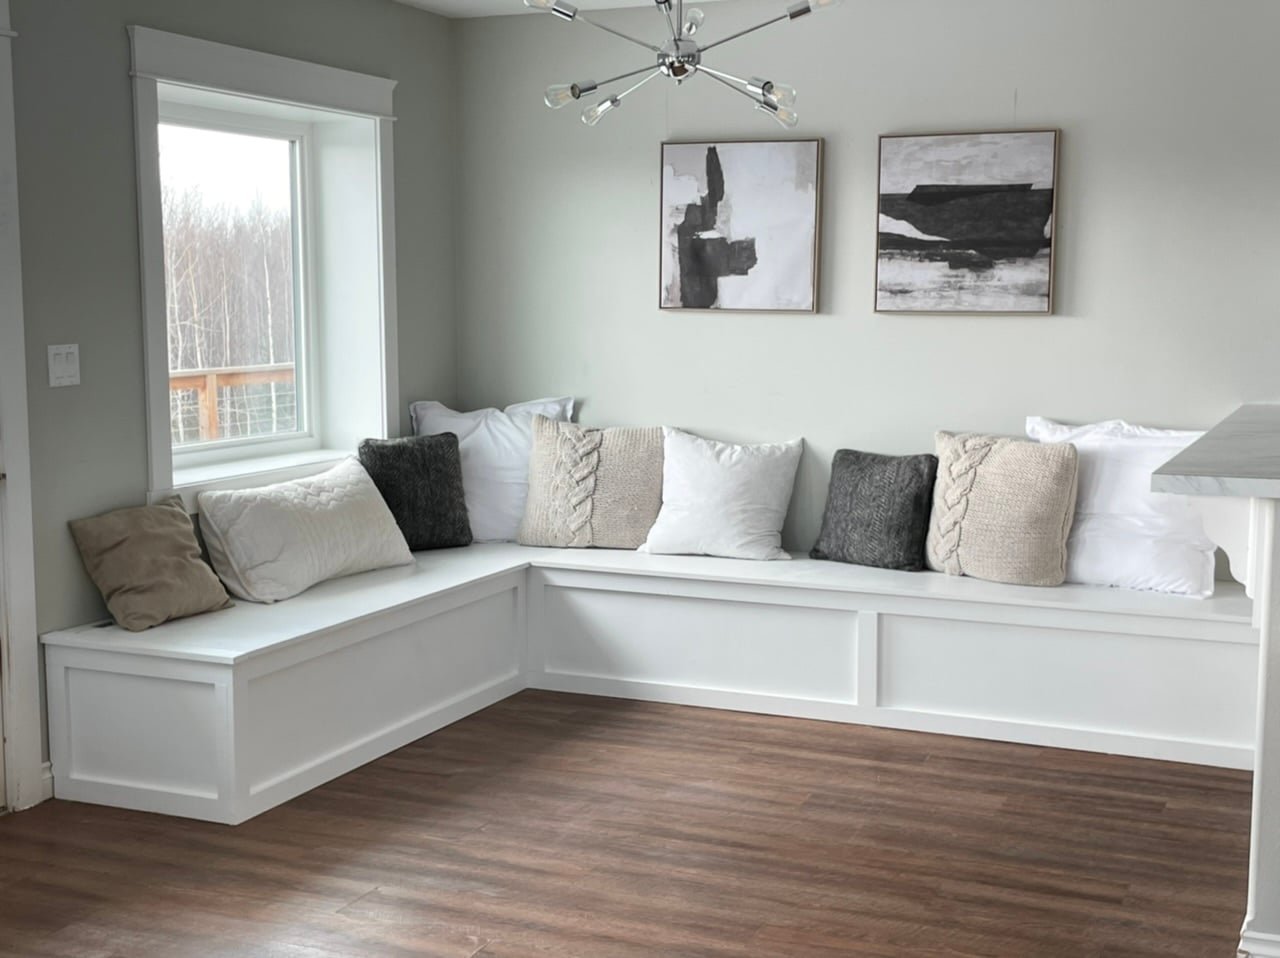
Add storage and seating with a custom-fit built-in banquette. Build it straight, in a corner, around an angled dining nook, or as a window seat.
Specifications
| Project type | Storage Benches |
|---|---|
| Room | Dining Room |
| Style | Built-In |
| Difficulty | Intermediate |
| Estimated cost | About $300 for a large nook |
| Build time | Three days including paint |
Dimensions
Use the size-specific shopping and cut lists below.
Shopping List
2x4s for the frame
1/4-inch plywood for sheeting the sides
3/4-inch plywood or project boards for the top panels
1x3 boards for most trim
1x2 and 1x4 boards for trimming corners
2-1/2-inch self-tapping star-drive screws for framing
3/4-inch and 1-1/4-inch brad nails
Wood glue
Edge banding for plywood top edges
Surface-mount hinges and hinge supports
Wood filler, 120-grit sandpaper, primer, and paint
Cut List
CUT AS YOU GO. Build the 2x4 frames to fit the room first. Once the frames are level, square, and secured, measure every plywood panel, trim board, and top piece directly from the project. Add center supports to any span longer than four feet.
Tools
- Tape measure
- Pencil
- Safety glasses
- Speed square
- Level
- Drill
- Circular saw
- Jigsaw
- Brad nailer
- Power sander
- Clamps
Step-by-step Instructions
Build the upper frames
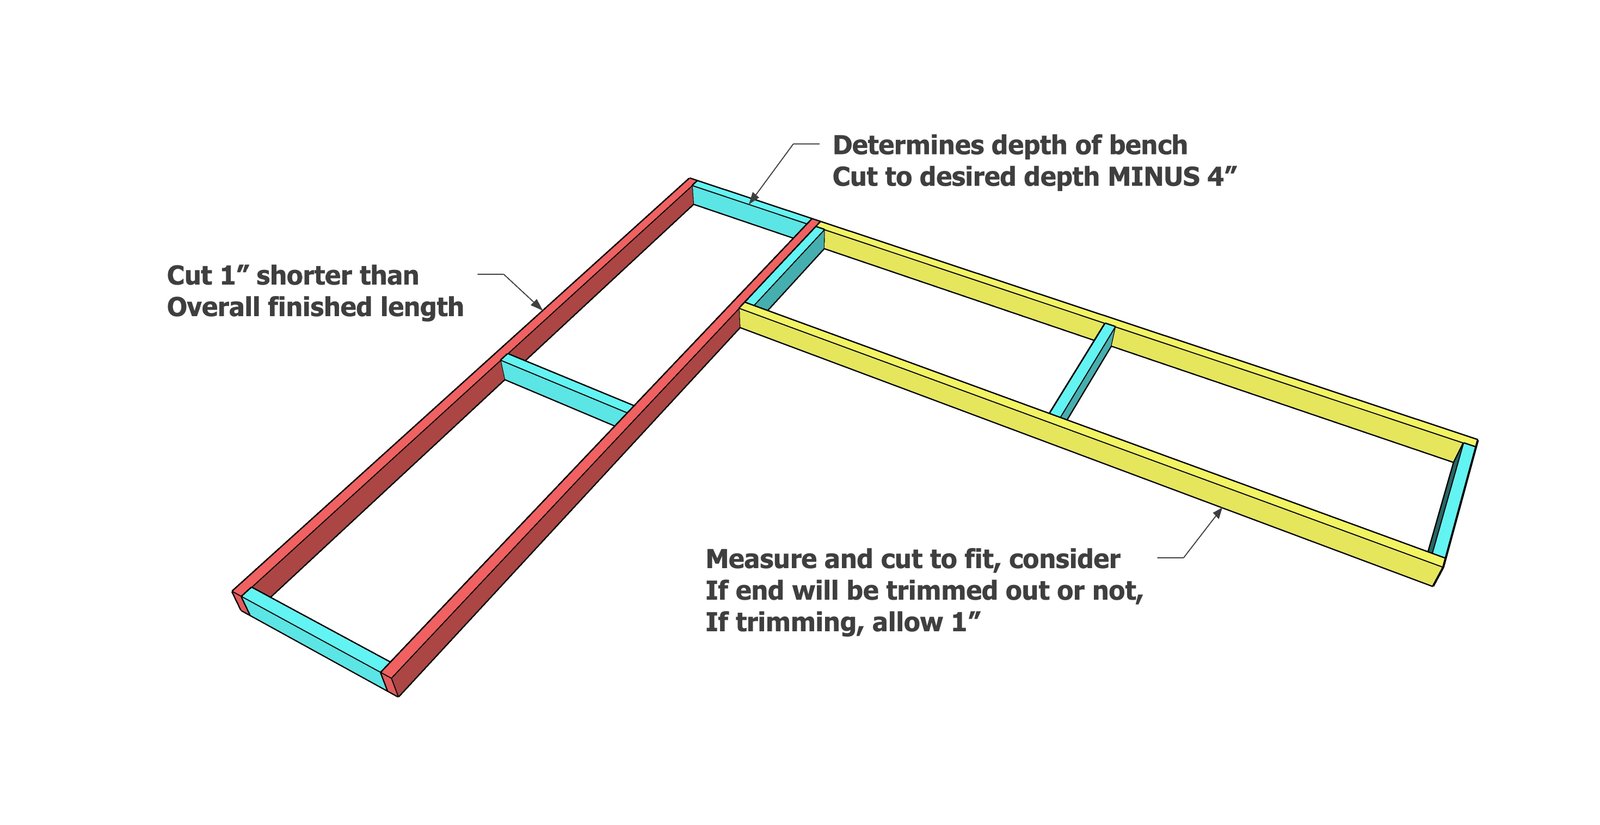
Choose the finished bench depth. For a 24-inch-deep bench, cut the frame ends 20 inches long. Build 2x4 frames in the shape of the seating, starting with one section and measuring adjoining sections to fit. Add center supports to spans over four feet.
Add the legs
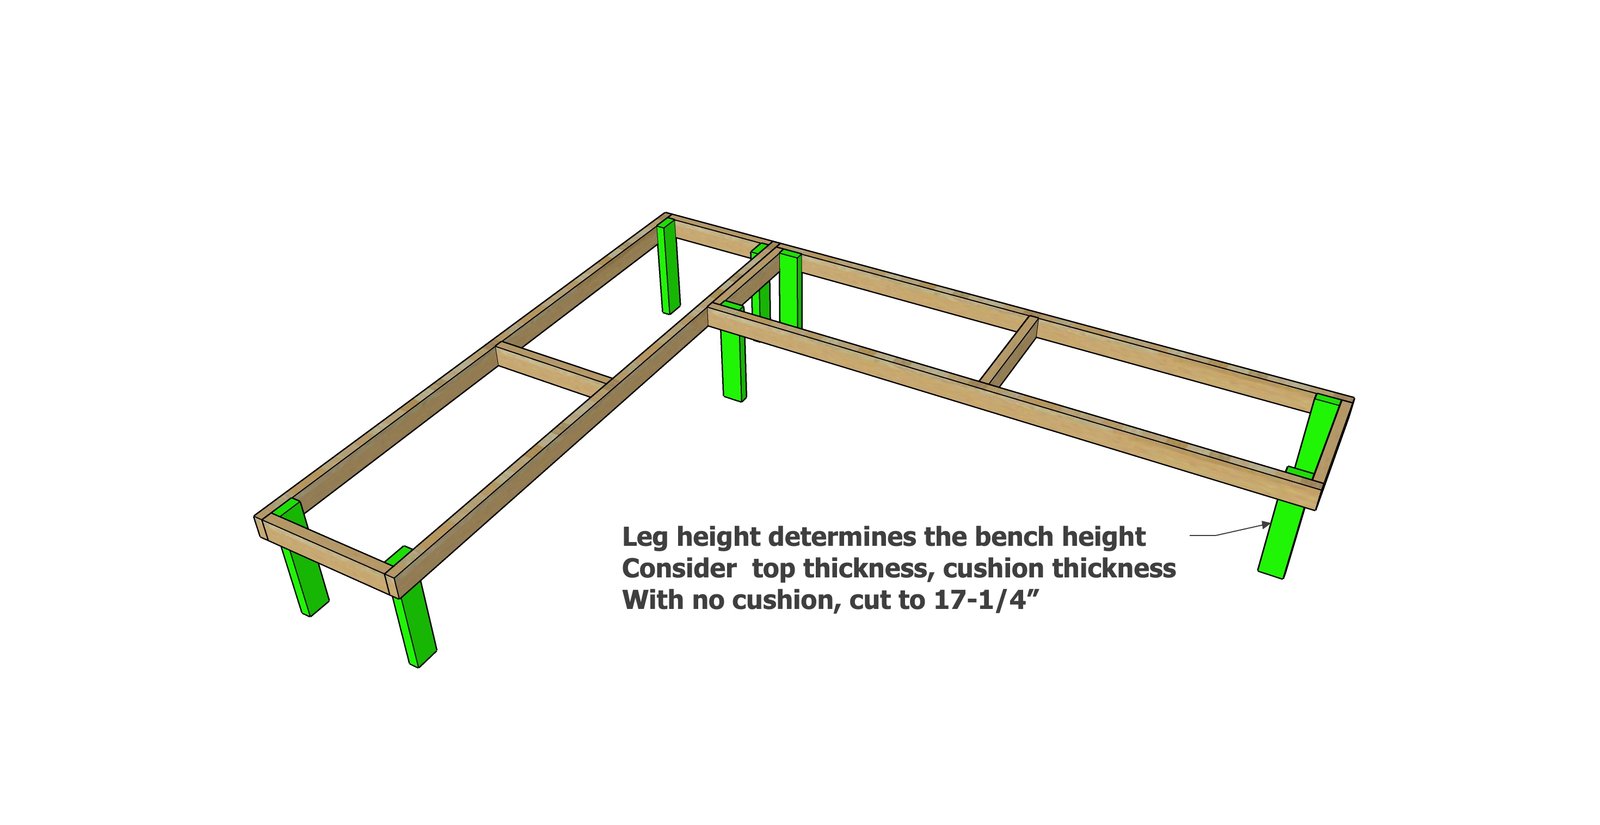
Cut all legs to the same length—17-1/4 inches in the example—and fasten them inside the upper frames with 2-1/2-inch screws. Level and square the frames before continuing.
Install the lower framing
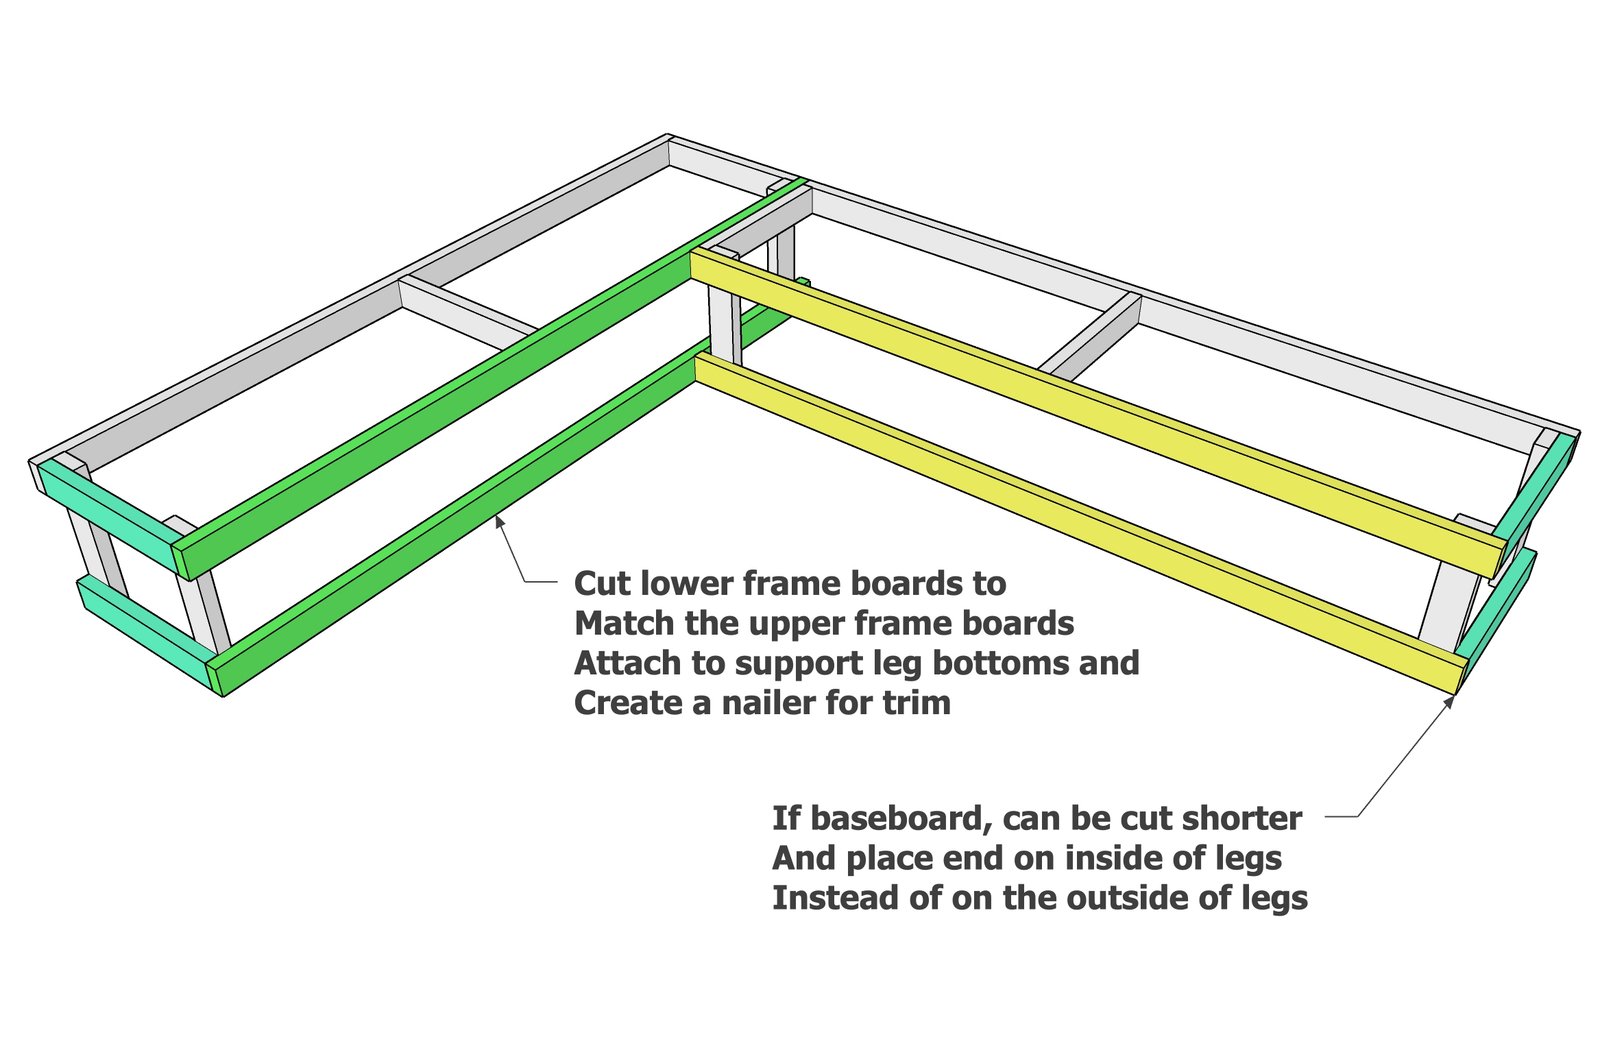
Connect the legs with lower 2x4 framing. This strengthens the bench and creates nailers for the plywood and trim. Adjust end pieces as needed when building over existing baseboard.
Add blocking and secure the frames
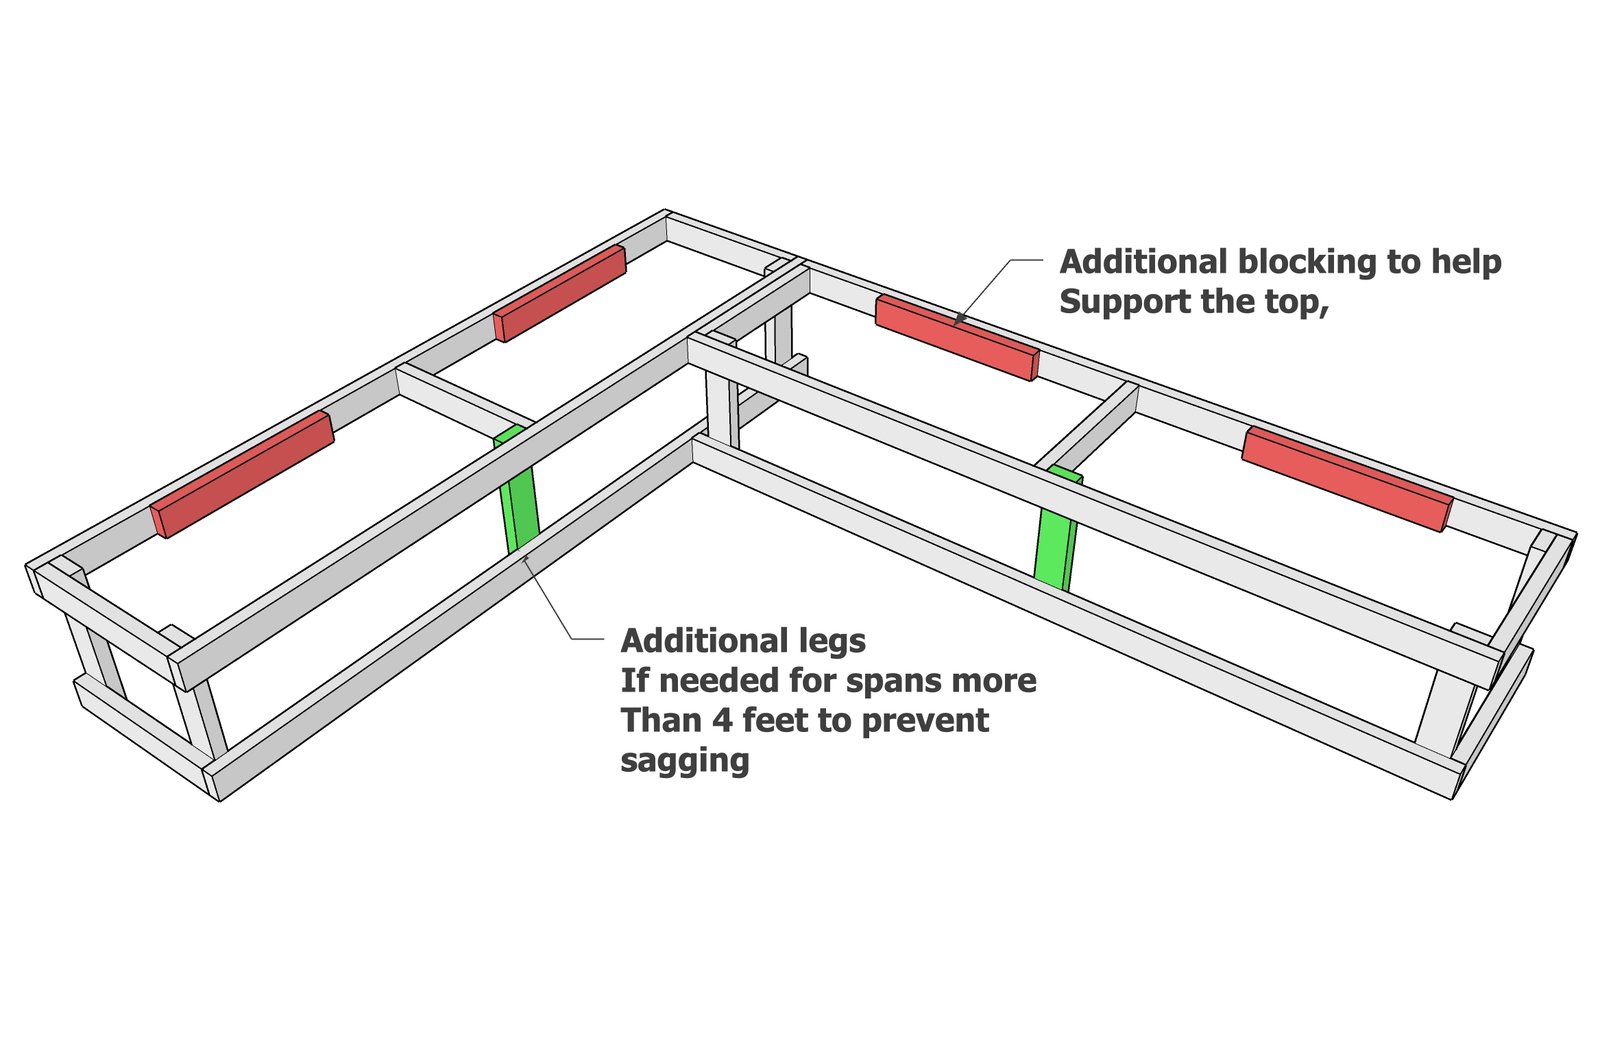
Add scrap-wood blocking at the back to support the hinges and seat tops. Add more legs beneath spans longer than four feet, fasten the bench to the wall if needed, and confirm that it is level and does not rock.
Panel the bench base
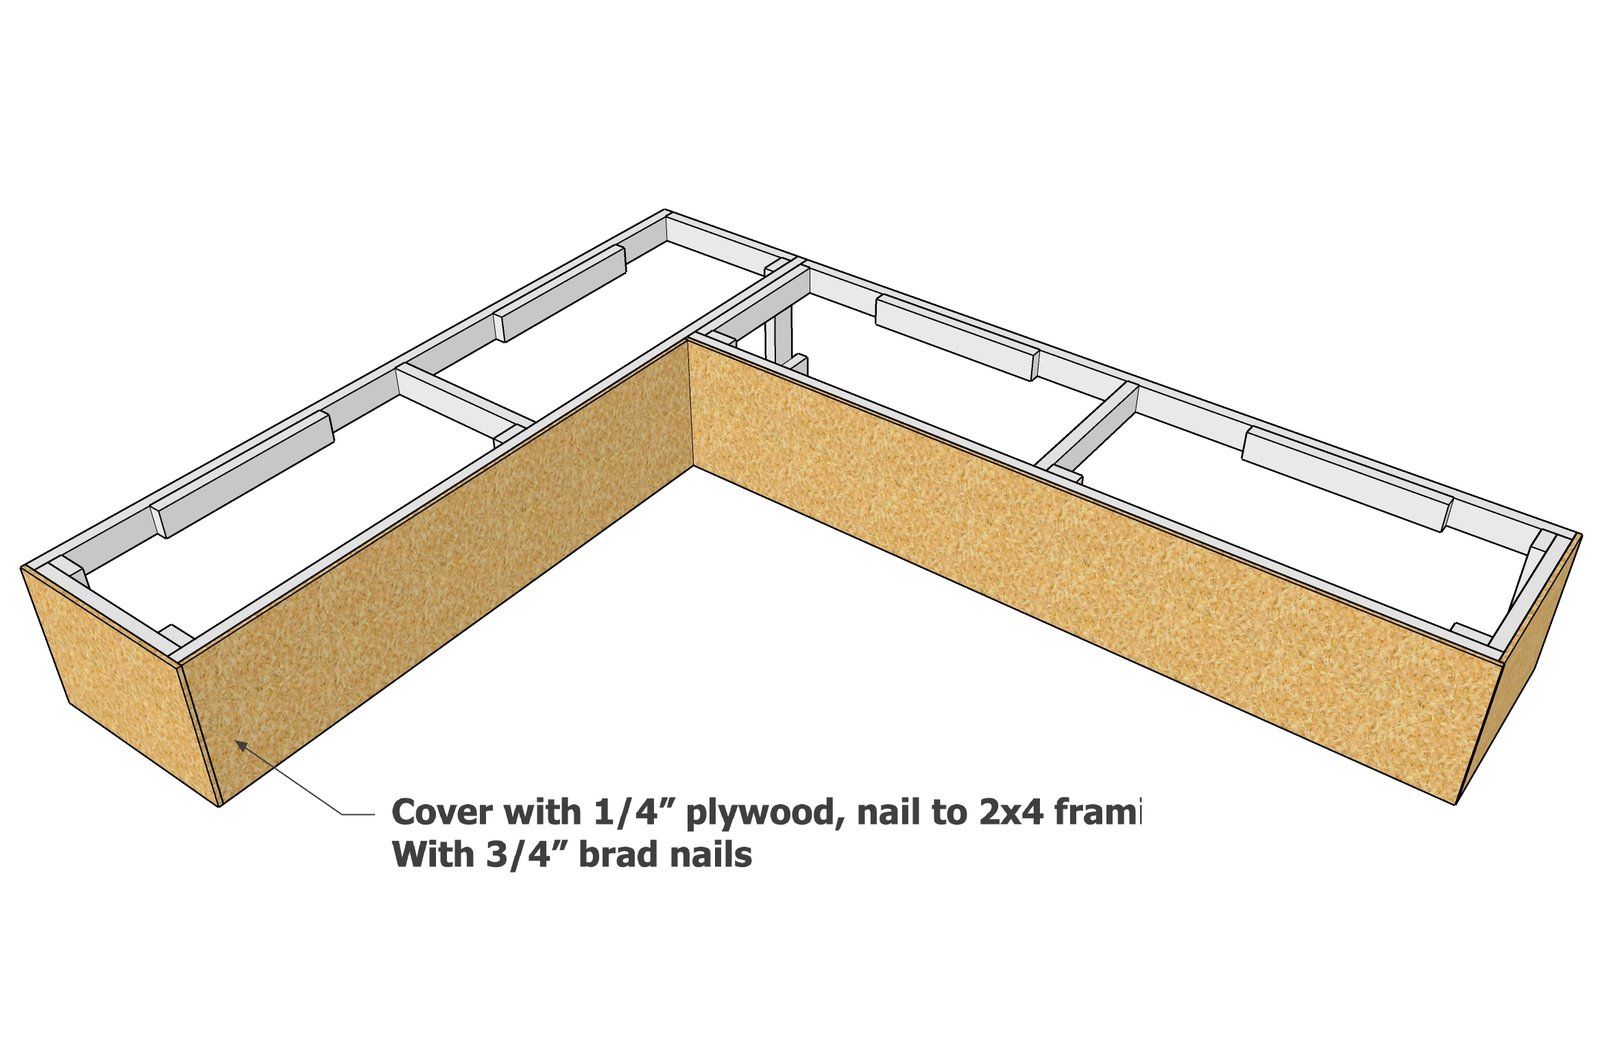
Rip 1/4-inch plywood to the bench height, crosscut each panel to fit, and attach it with glue and 3/4-inch brad nails. The trim will cover the panel joints and edges.
Add horizontal trim
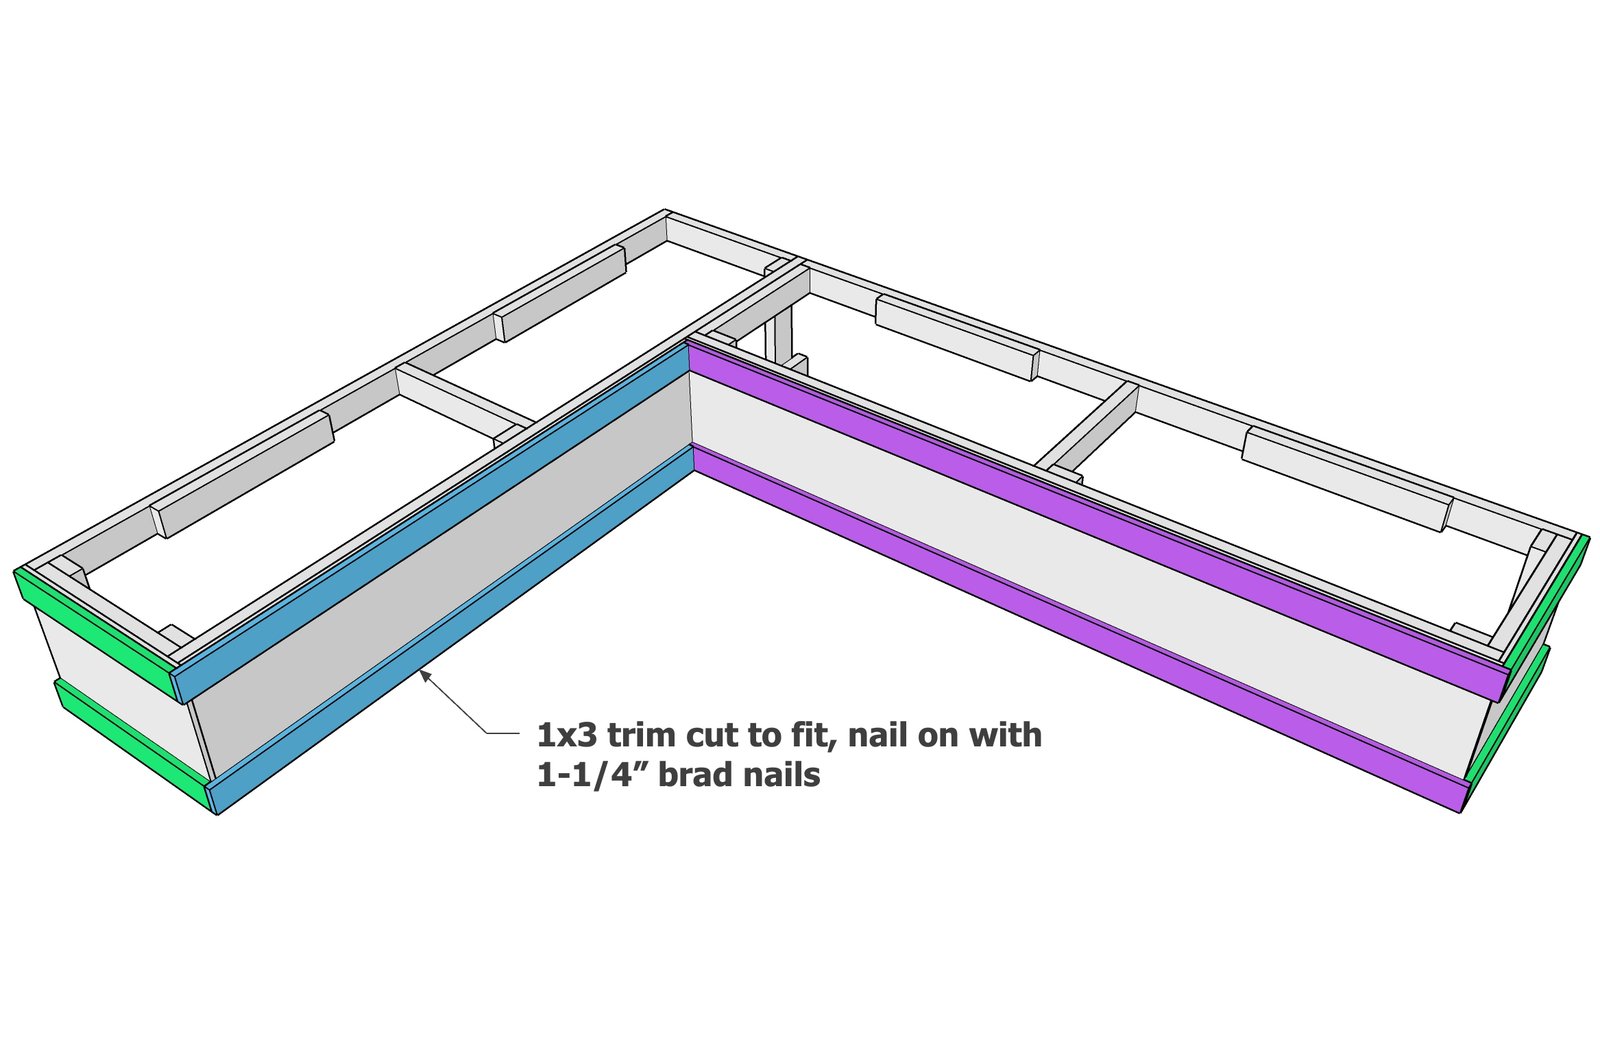
Measure and cut 1x3 boards for the top and bottom trim. Attach them with glue and 1-1/4-inch brad nails, trimming the most visible faces last so fewer butt ends show.
Add upright and corner trim
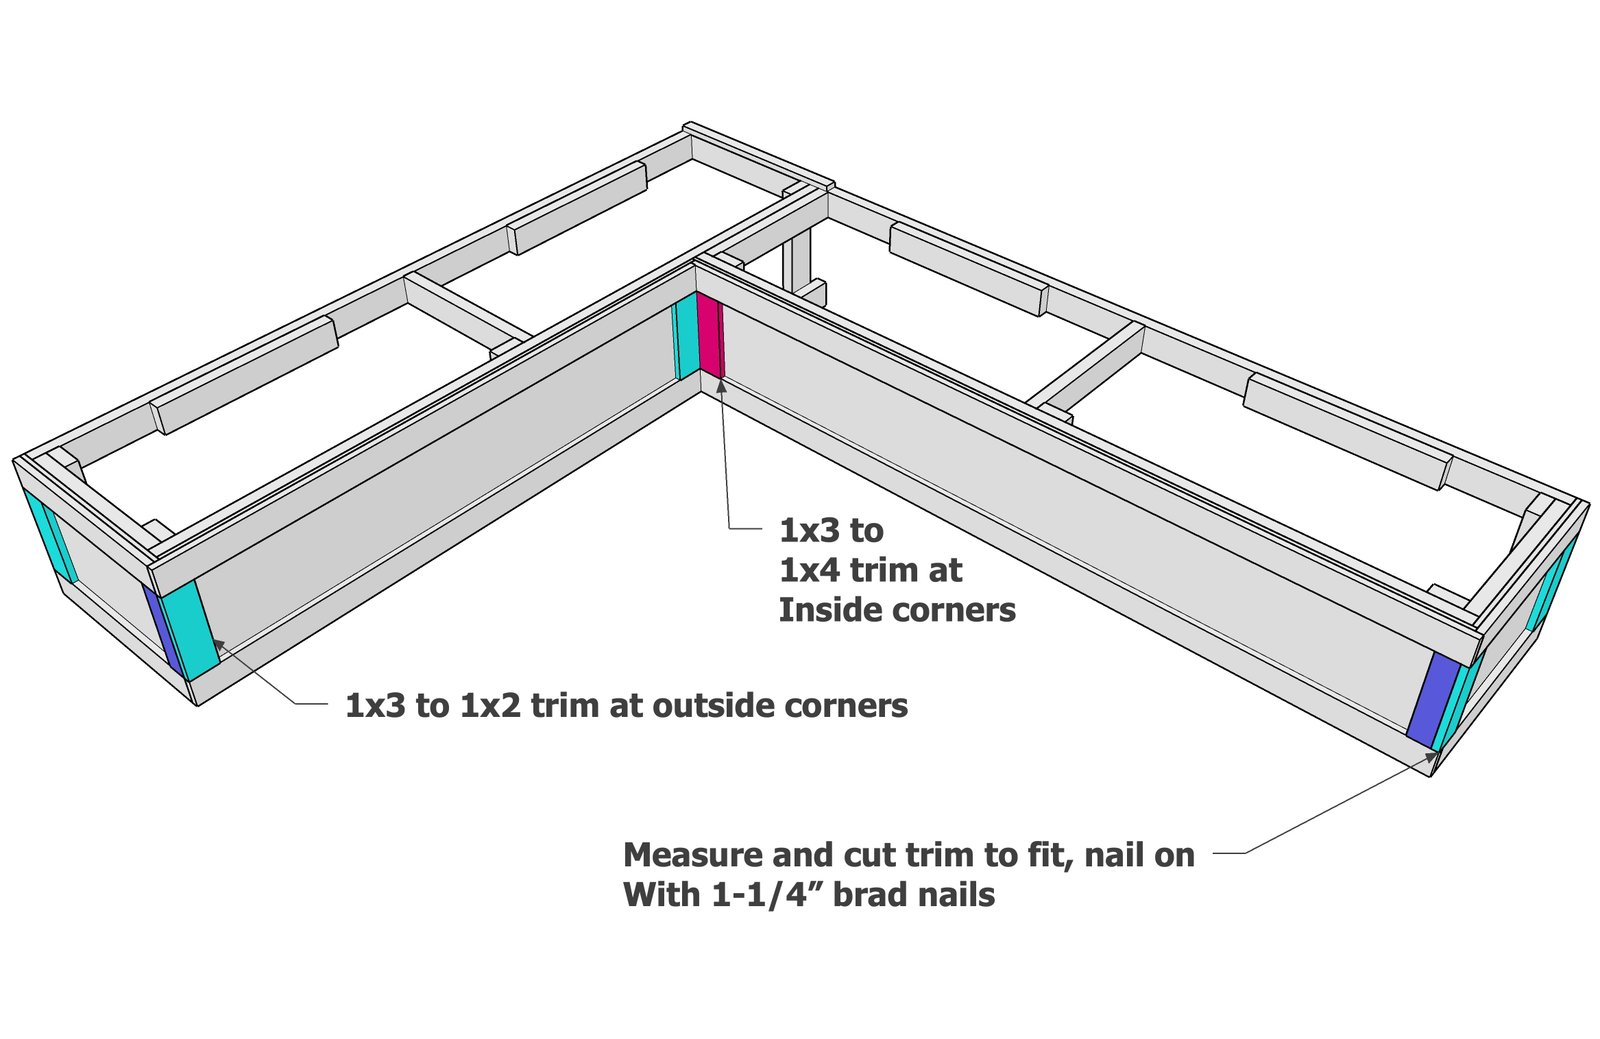
Fill in the vertical trim. A 1x4 paired with a 1x3 works well at inside corners; a 1x2 paired with a 1x3 works well at outside corners. Use trim to cover gaps where the bench meets the walls.
Begin the seat-top trim
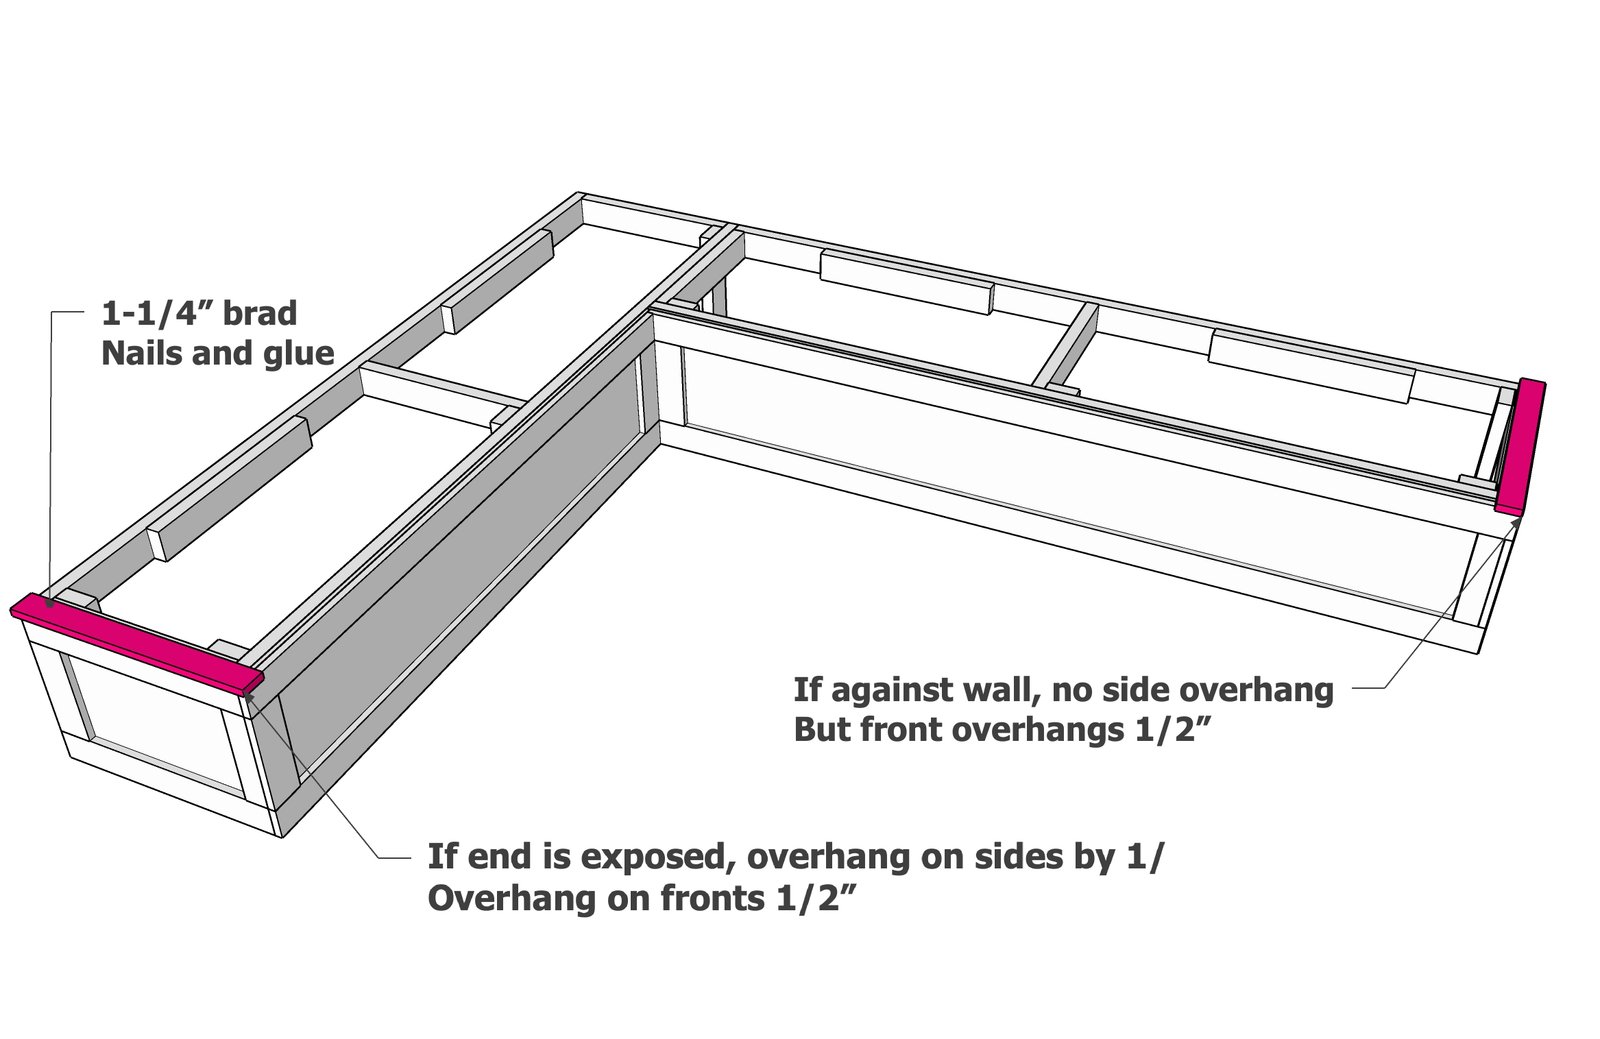
Attach 1x3 boards along the top with 3/4-inch overhangs at the front and exposed sides. Set trim flush where it meets a wall. Fasten with glue and 1-1/4-inch brad nails.
Trim along the back wall
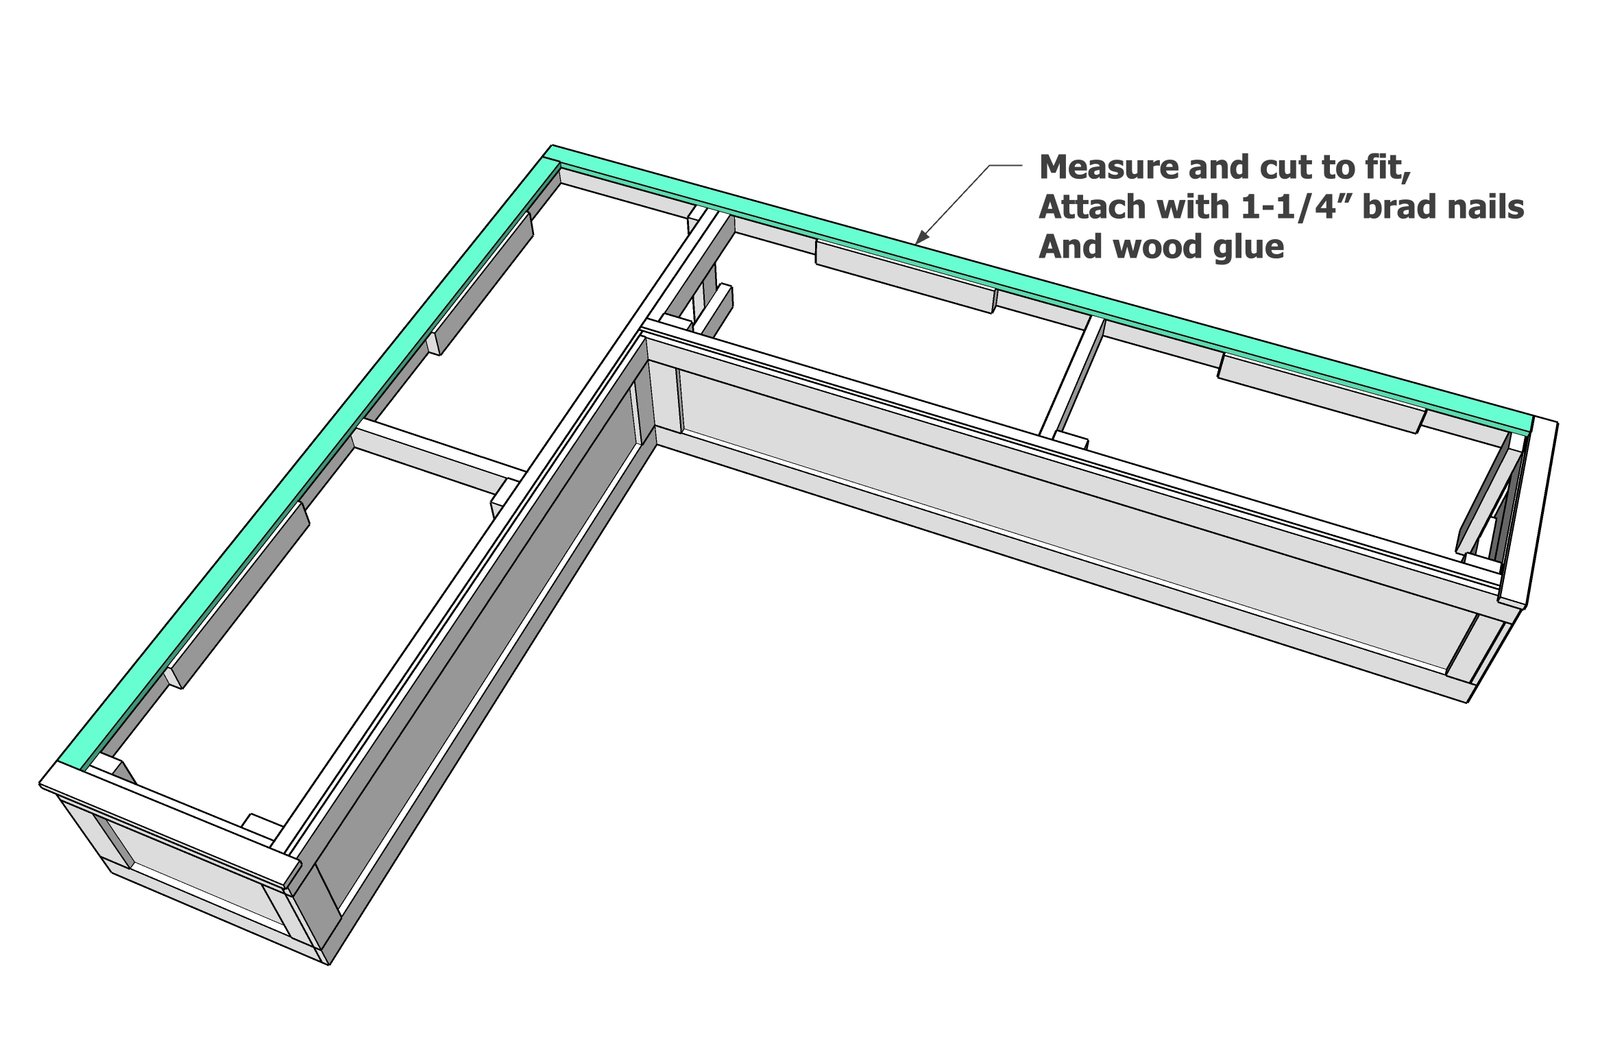
Fit 1x3 trim along the back. If the wall is bowed or out of square, add shoe moulding or a taller 1x4 or 1x6 backsplash-style board to hide the variation.
Fit and hinge the seat tops
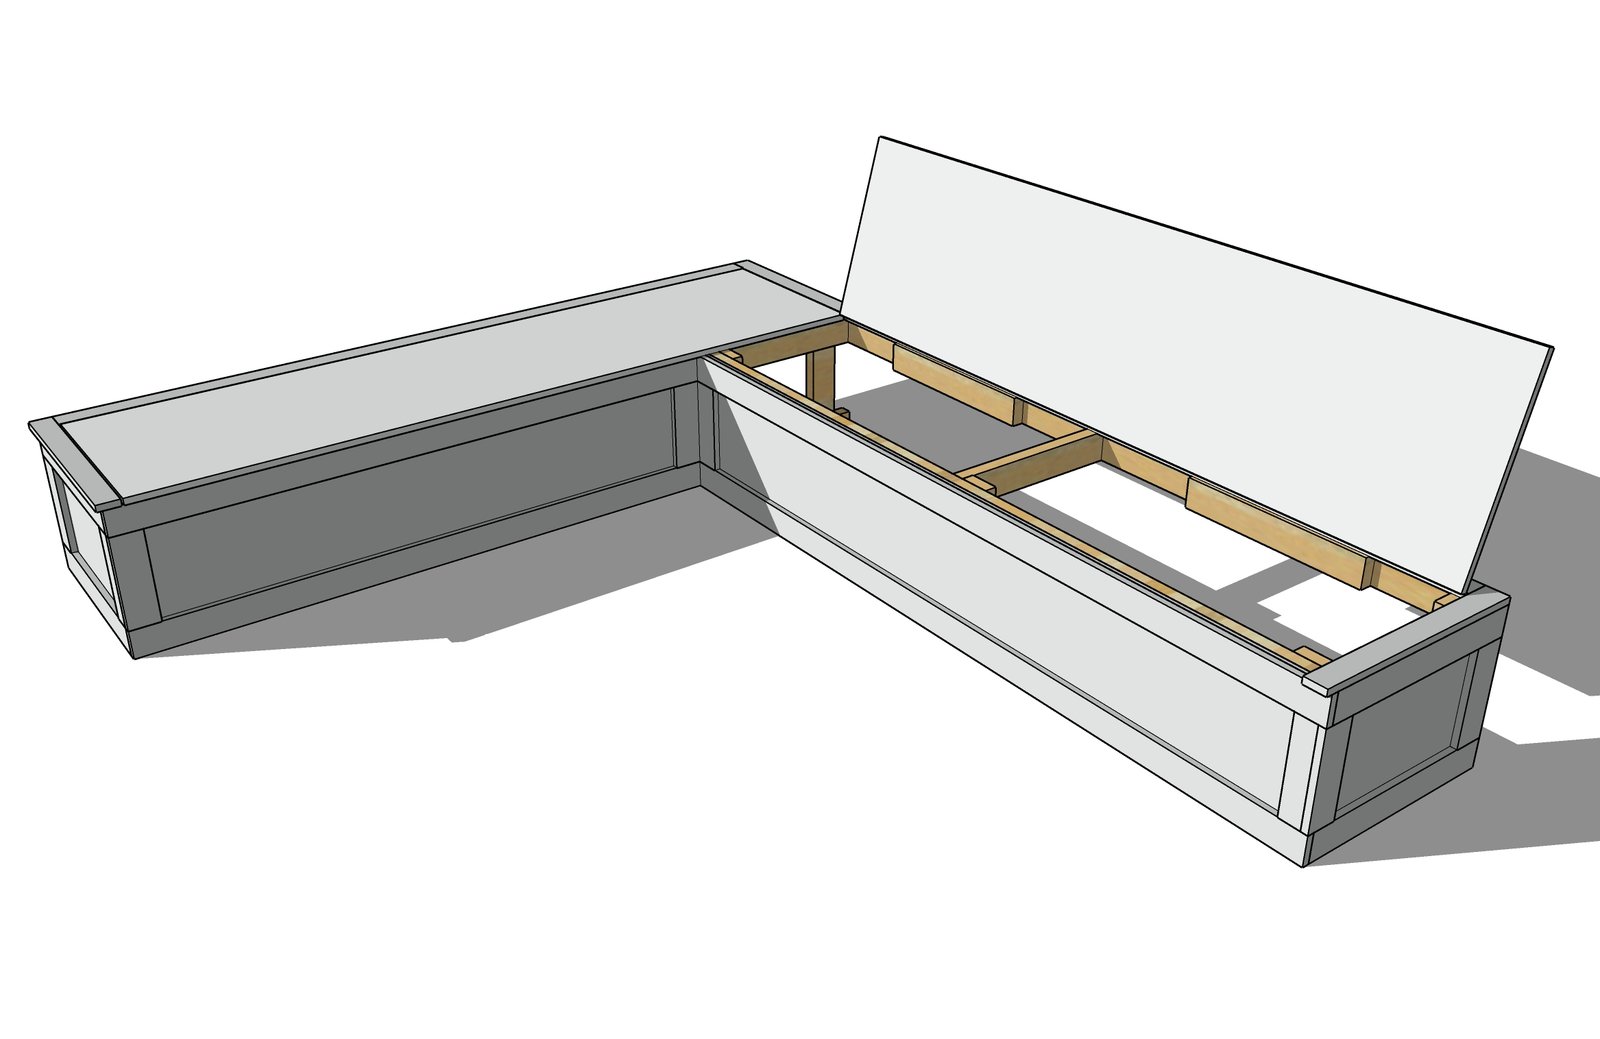
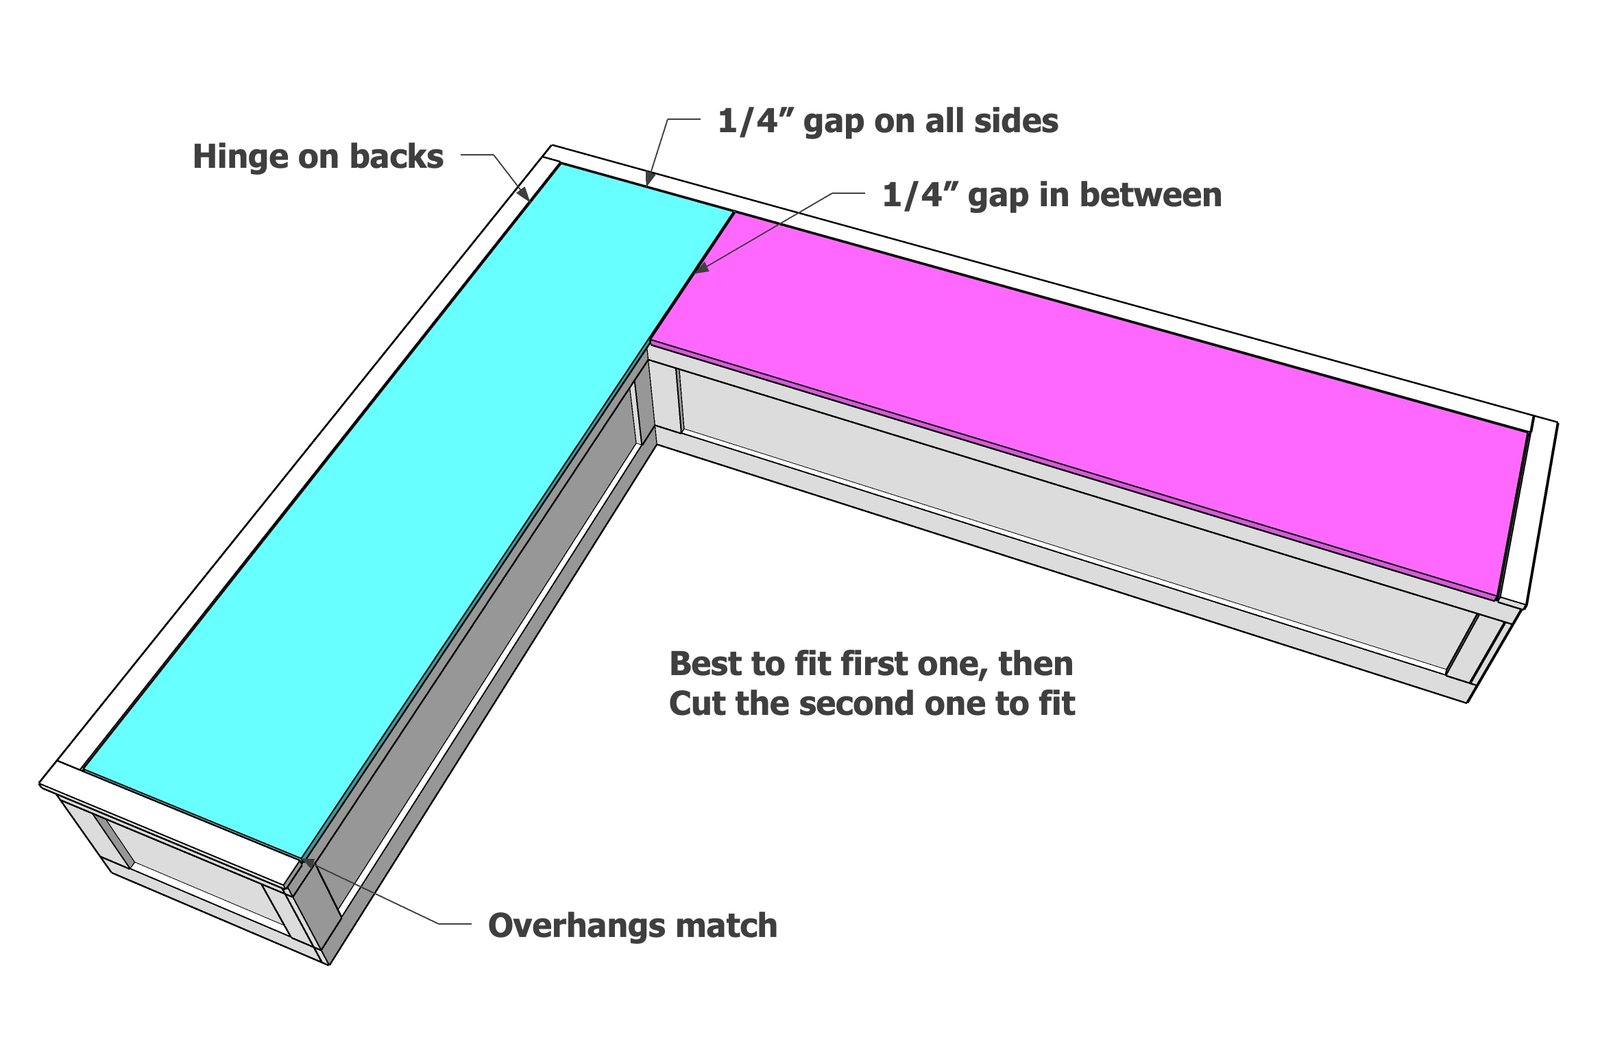
Rip 3/4-inch plywood to the seat width, allowing 1/4-inch gaps at hinges. Edge-band the fronts, cut and fit one top at a time, and fully support the ends of every section. Install surface-mount hinges and lid supports.
Finishing
Sand all surfaces, starting with a medium grit and finishing with fine. Wipe off the dust, fill any holes or gaps with wood filler, and sand smooth once dry. Apply primer if you're painting, then finish with your choice of paint or stain and seal with a durable clear topcoat. For outdoor projects, use exterior-rated primer, paint or stain, and sealer so the piece stands up to the weather.
Source (temporary): https://www.ana-white.com/woodworking-projects/banquette-bench-flip-storage-customizable-size-and-shape