Bar Height Desk, Study Station, or Kitchen Island
This DIY bar-height desk is the perfect solution for small spaces! Built using an off-the-shelf 24" x 48" project panel and standard 1x boards, it’s both affordable and easy to build with basic tools. The open design includes built-in shelving for storing books, baskets, or kitchen essentials—making it incredibly versatile. Use it as a standing desk, a spot to pull up a couple of bar stools for studying or dining, or even as a compact kitchen island for meal prep in tiny spaces. With a clean, modern style and minimal footprint, this project is ideal for dorm rooms, apartments, craft nooks, and more. include step-by-step diagrams, shopping list, and cut list to make building easy and beginner-friendly!
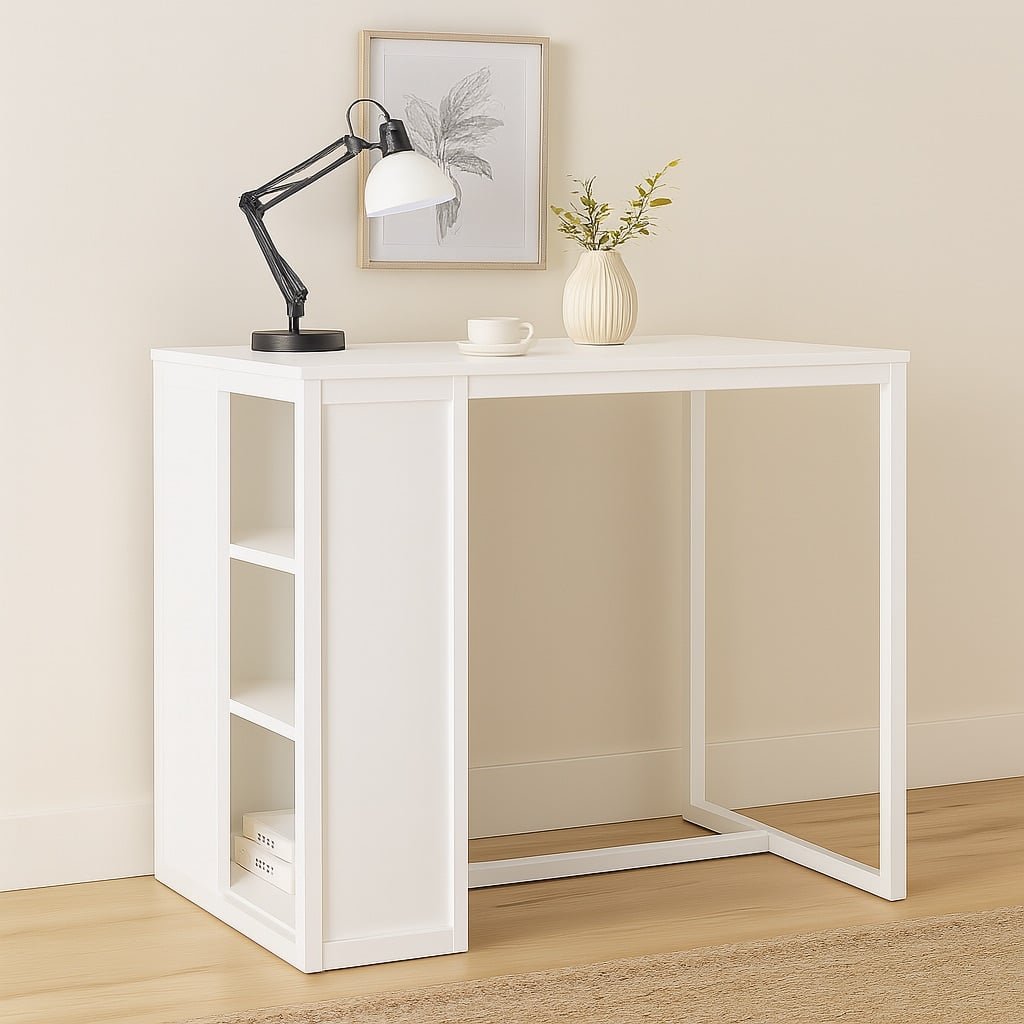
Specifications
| Project type | Kitchen Island Plans |
|---|---|
| Room | kitchen |
| Style | Modern Style Furniture Plans |
| Difficulty | Intermediate |
Dimensions
Use the size-specific shopping and cut lists below.
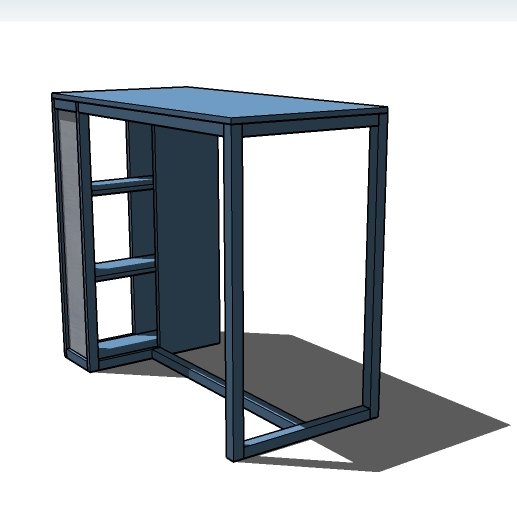
Shopping List
- 1 - 1x8 @ 12 feet long
- 1 - 1x12 @ 8 feet long
- 2 - 1x2 @ 8 feet long
- 3 - 2x2 @ 8 feet long
- 1 - 24" x 48" Pine Project panel or plywood panel (needs to be 24" x 48")
- If you have a pocket hole jig, you'll need 1-1/4" and 2-1/2" pocket hole screws
- If no pocket hole jig, use 1-1/4" and 2" brad nails, and 2" self tapping star bit screws
- wood glue
- wood filler
- finishing supplies
- if using plywood top panel, edge banding is recommended. You'll need 12 feet. Here is a video on how to do edge banding
Cut List
- 1 - 1x8 @ 41-1/4" - side end
- 4 - 1x8 @ 22-1/2" - shelves
- 2 - 1x12 @ 41-1/4" - side shelves
- 3 - 1x2 @ 7-1/4" - trim
- 2 - 1x2 @ 41-1/4" - side trim
- 4 - 1x2 @ 11" - shelf trim
- 2 - 2x2 @ 37-3/4" - side aprons
- 2 - 2x2 @ 21" - bottom and top of leg piece
- 2 - 2x2 @ 41-1/4" - legs
- 1 - 2x2 @ 37-1/2" - stretcher
measure and cut trim pieces to fit
Tools
- measuring tape
- square
- pencil
- safety glasses
- hearing protection
- drill
- circular saw
- nailer
- sander
- level
- countersink drill bit
Step-by-step Instructions
Step 1
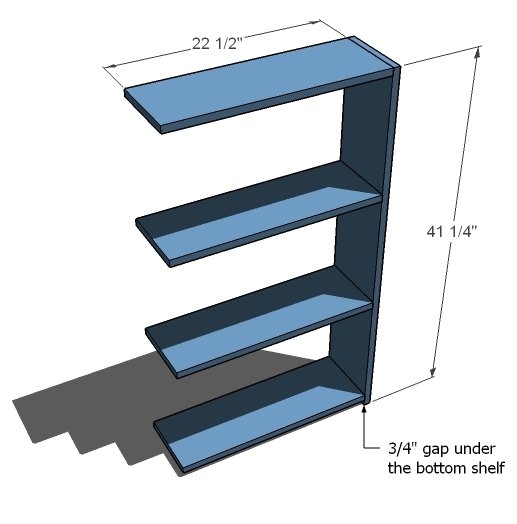
Build the basic shelving system from the 1x8s as shown, attach with either brad nails, 2" self tapping star bit screws or 1-1/4" pocket hole screws.
Step 2
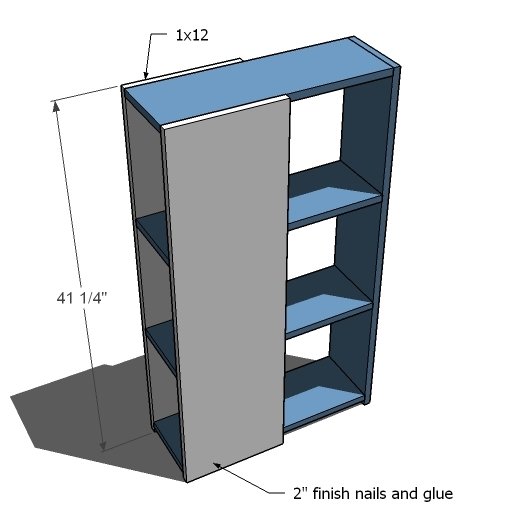
Attach the 1x12s to the sides with 1-1/4" brad nails and wood glue. Use the 1x12s to square up the 1x8 shelving.
Step 3
Measure and cut to fit the bottom trim piece and attach with 1-1/4" brad nails and glue.
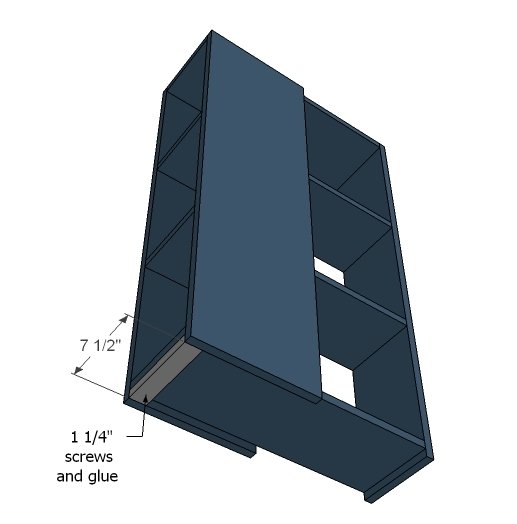
Step 4
Repeat for additional trim on the front - measure and cut for exact fit.
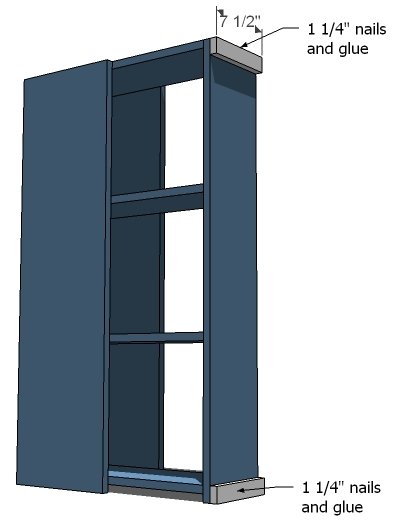
Step 5
Measure and cut the trim for the sides with 1x2s and attach with 1-1/4" brad nails and glue.
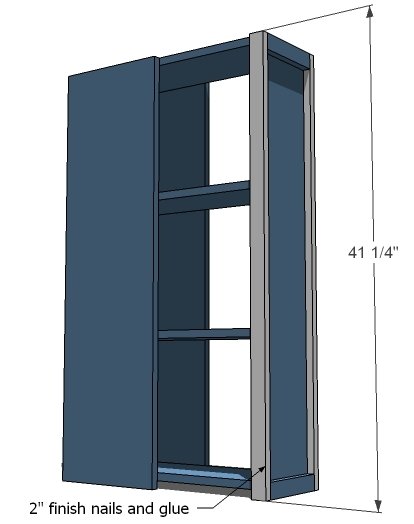
Step 6
Finally, measure and cut the trim for the sides and attach.
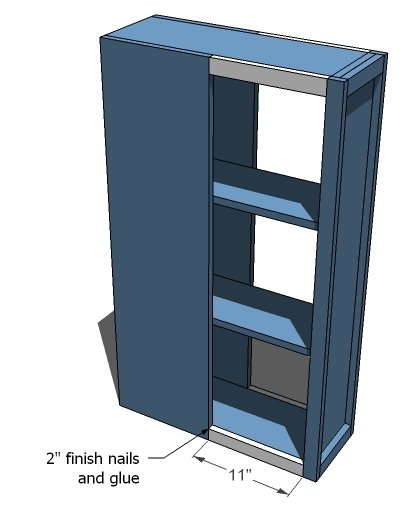
Step 7
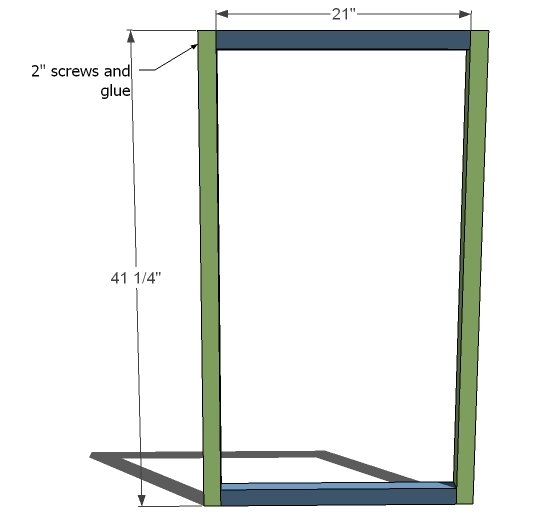
Build the end leg set with either 2-1/2" pocket hole screws and glue or 2" self tapping screws and glue.
Step 8
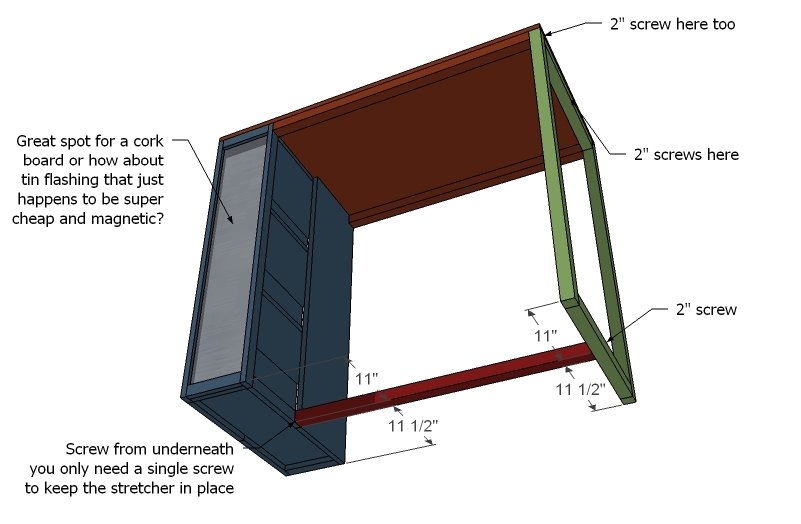
Assemble the pieces together with screws.
Step 9
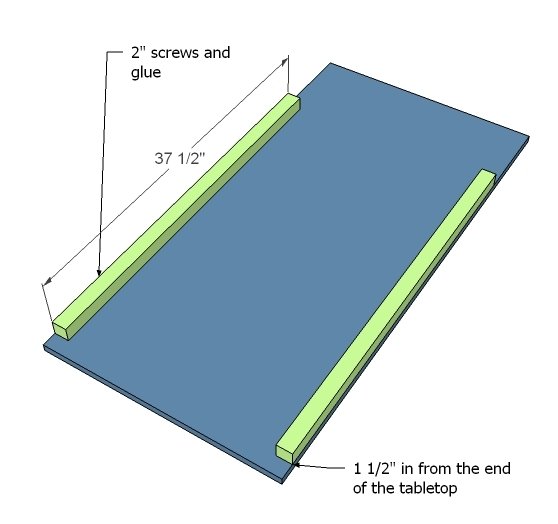
The pine tabletop or project panel needs to be reinforced so it doesn't sag. Add the 2x2s as shown to underside of the tabletop, you can also attach from top with 1-1/4" brad nails and glue. Measure and cut to fit for a perfect fit.
Finishing
Sand all surfaces, starting with a medium grit and finishing with fine. Wipe off the dust, fill any holes or gaps with wood filler, and sand smooth once dry. Apply primer if you're painting, then finish with your choice of paint or stain and seal with a durable clear topcoat. For outdoor projects, use exterior-rated primer, paint or stain, and sealer so the piece stands up to the weather.
Source (temporary): https://www.ana-white.com/woodworking-projects/bar-height-desk-study-station-or-kitchen-island-free-diy-plans