Barn Door Bookcase
Build your own barn door bookcase from It's a beautiful piece that displays and hides, adding functionality to any room of your home. with diagrams, shopping list and cut list.
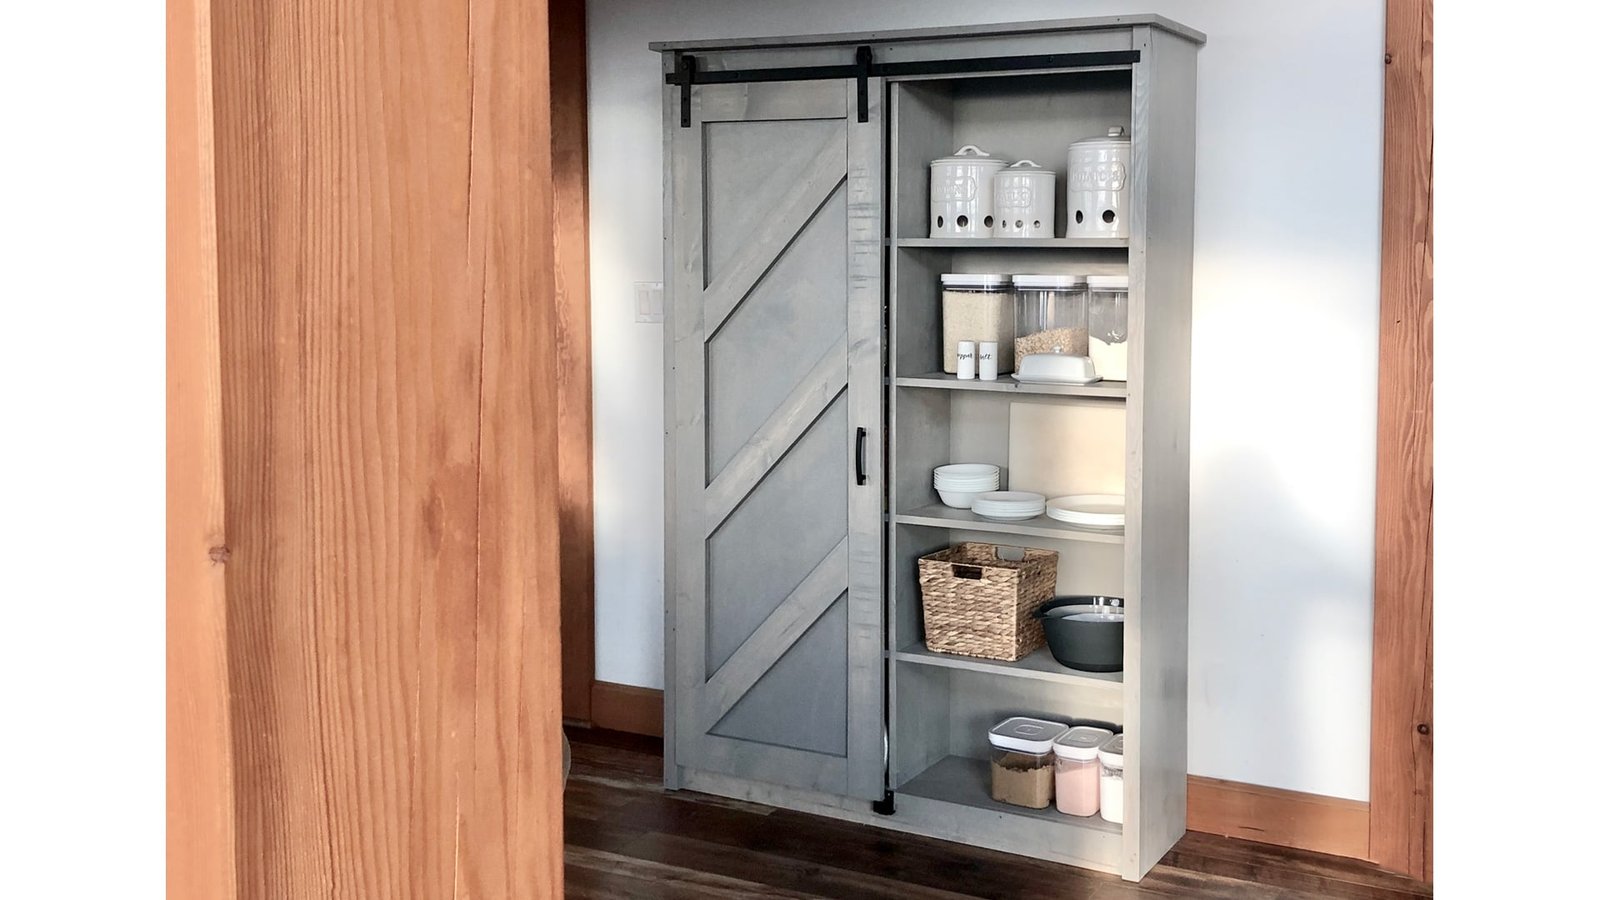
Specifications
| Project type | Lockers |
|---|---|
| Room | Storage Solutions |
| Style | Farmhouse Furniture |
| Difficulty | Intermediate |
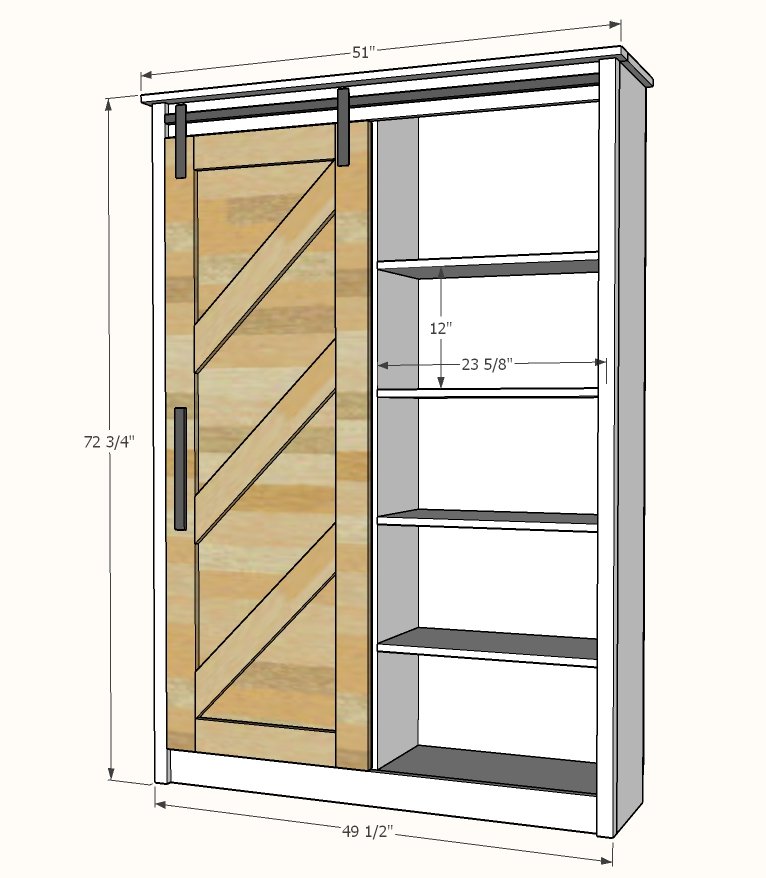
Dimensions
Use the size-specific shopping and cut lists below.
Shopping List
- 3 - 1x12 @ 6 feet long (use for bookshelf sides)
- 2 - 1x12 @ 8 feet long (use for shelves)
- 1 - 1x12 @ 10 feet long (use for top, remainder for shelves)
- 2 - 2x2 @ 6 feet long
- 2 - 1x2 @ 8 feet long
- 1 - 1x3 @ 8 feet long
- 4 - 1x4 @ 8 feet long
- 1 - 1/4" plywood 4x8 full sheet
- 1 - 1/4" pocket hole screws (about 100)
- 2" trim screws (about 10)
- 3/4" and 1-1/4" brad nails
- wood glue
- 48" barn door hardware kit ( I used this one from Amazon affiliate link )
Cut List
Carcass
- 3 - 1x12 @ 72"
- 4 - 1x2 @ 23-5/8"
- 10 - 1x12 @ 23-5/8"
- 1 - 1x3 @ 51" - top
- 1 - 1x12 @ 51" - top
- 1 - 1/4" plywood @ 25" x 72-3/4" - back
Face Frame
- 2 - 2x2 @ 72"
- 2 - 1x4 @ 46-1/2"
- 1 - 1x2 @ 65"
Door
- 2 - 1x4 @ 66"
- 2 - 1x4 @ 16"
- 3 - 1x4 @ 22-5/8" - long point to short point, both ends cut at 45 degrees, ends are parallel
- 1 - 1/4" plywood @ 23" x 66"
Tools
- measuring tape
- square
- pencil
- safety glasses
- hearing protection
- kreg-jig
- drill
- circular saw
- compound miter saw
- nailer
- sander
Step-by-step Instructions
Cut 1x12 boards using the compound miter saw.
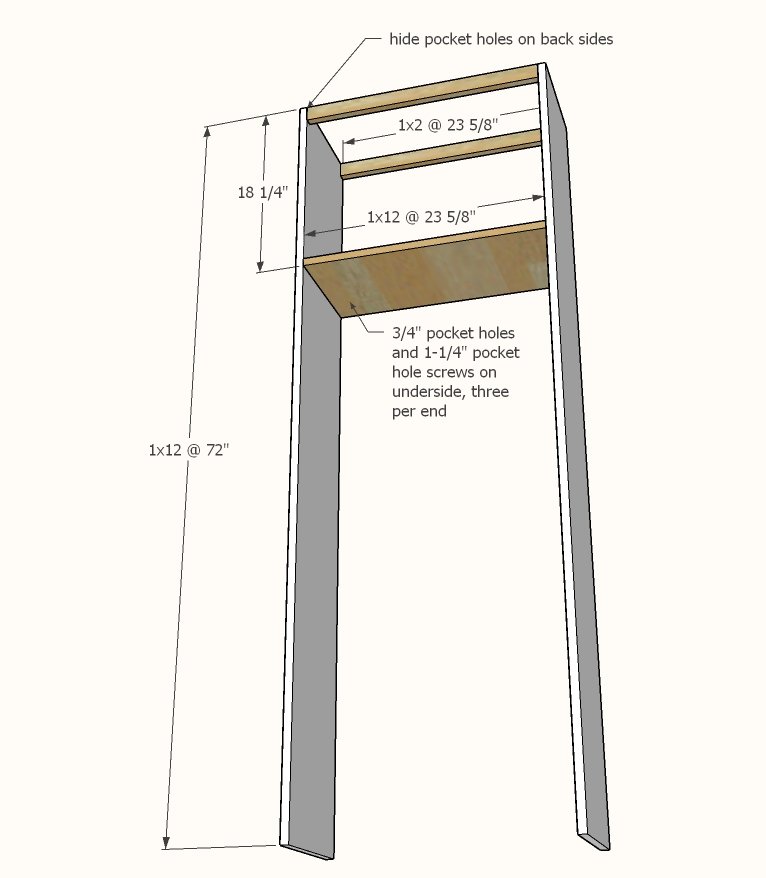
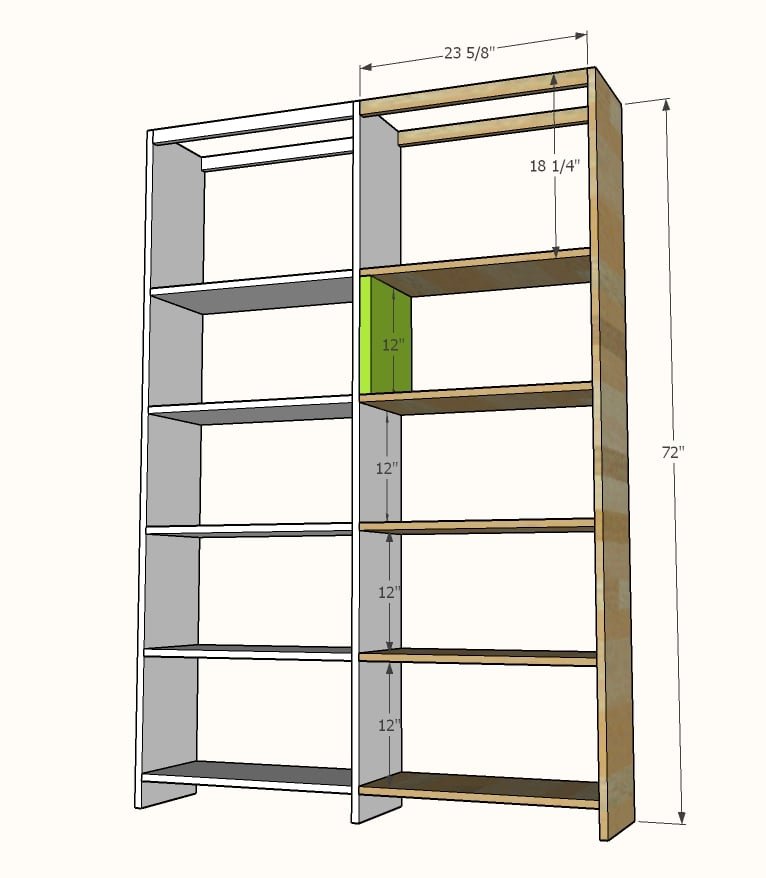
Drill 3 - 3/4" pocket holes on each end of all the shelf boards. Drill 1 - 3/4" pocke thole on each end of the 1x2 @ 23-5/8" long. Start by building one bookcase as shown in diagram.
Cut a scrap wood spacer block (or two) to 12" long.
Use it as a spacer and continue attaching shelves, working from the top down, with the pocket holes on the bottom of the shelves.
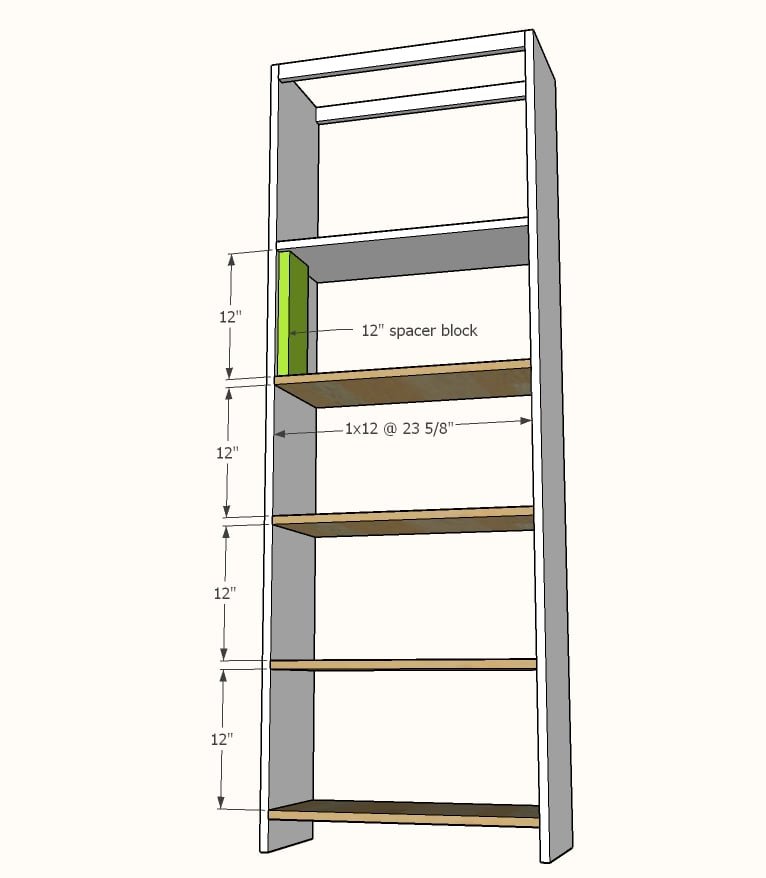
Repeat to add the second half of the bookshelf to the first bookshelf.
Set aside.
Step 4
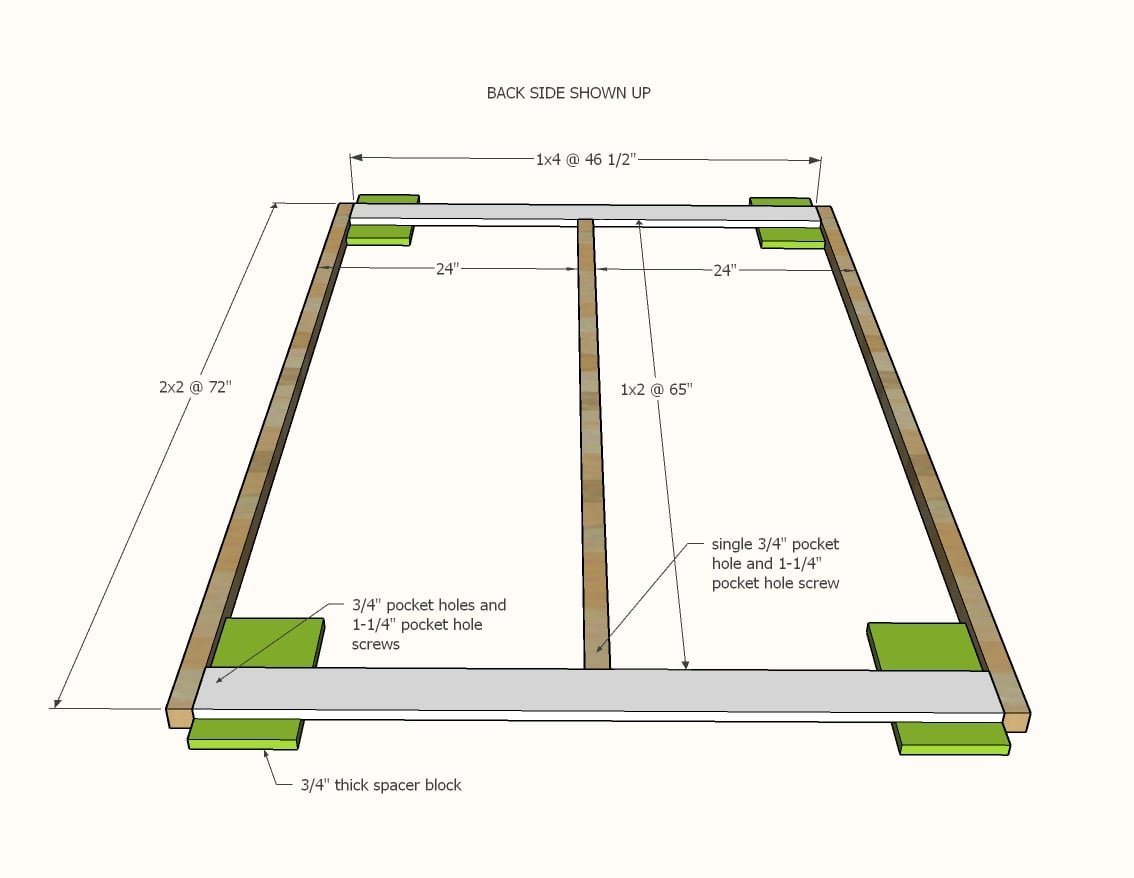
On a flat level surface, build the face frame as shown. Scrap 1x boards can be used as spacers to help you attach the 1xs to the 2x2 legs, since the wood is different thicknesses.
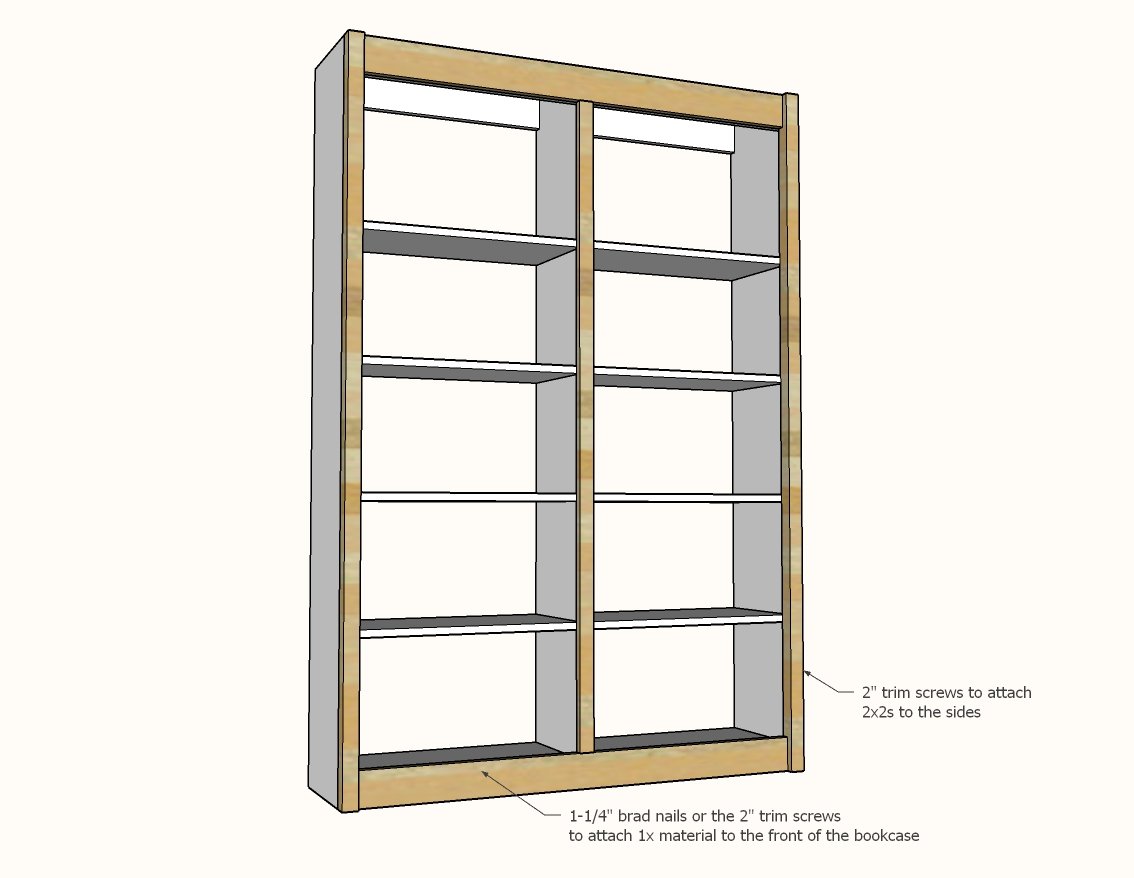
Make sure the bookshelf is on a flat, level surface. Adjust for square if needed.
Attach the face frame to the front with glue and 1-1/4" brad nails. Use the 2" screws to attach the 2x2s to the bookcase sides.
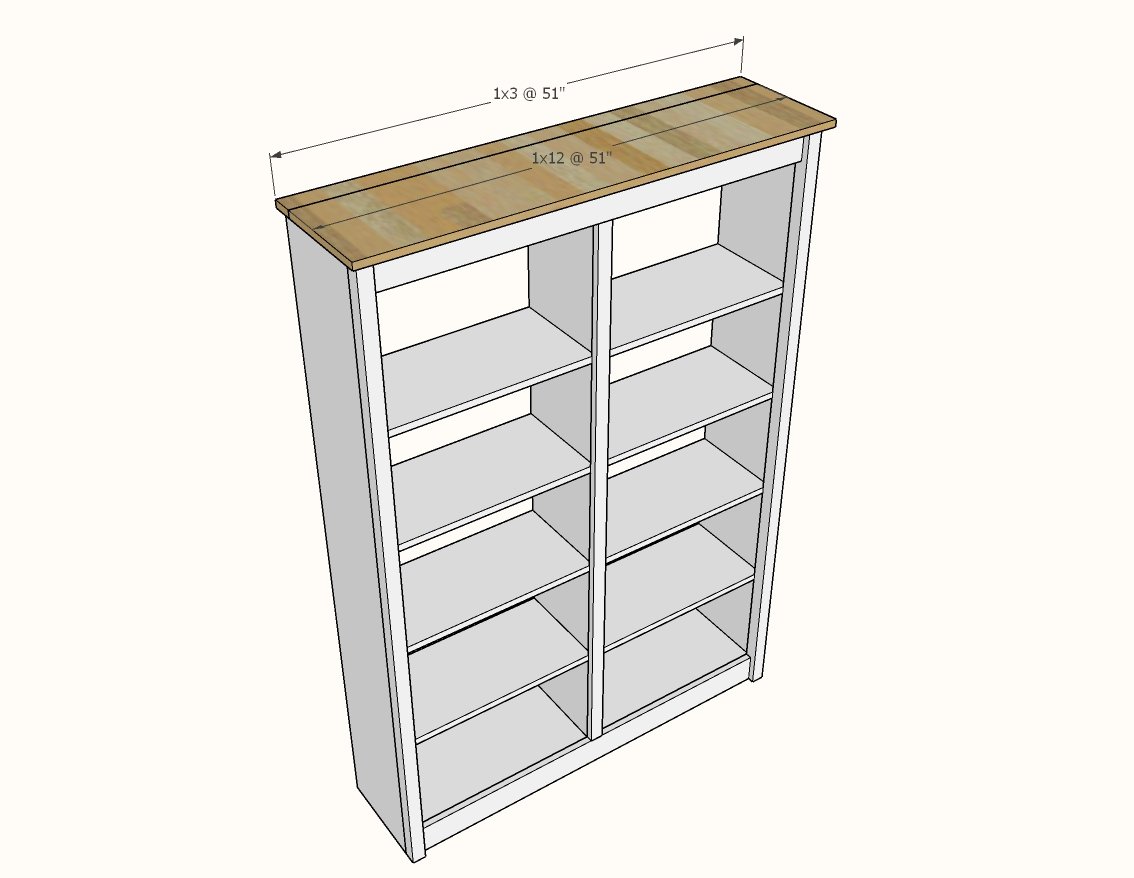
Attach the top with glue and 1-1/4" brad nails.
I also recommend adding some 2" screws.
Build the barn door with 3/4" pocket holes and 1-1/4" pocket hole screws.
Cut the 1/4" plywood into two pieces, one 23" wide and one 25" wide, both 8 feet long. Cut the 23" piece down in length to fit on the back of the barn door. Add the back with 3/4" brad nails and glue.
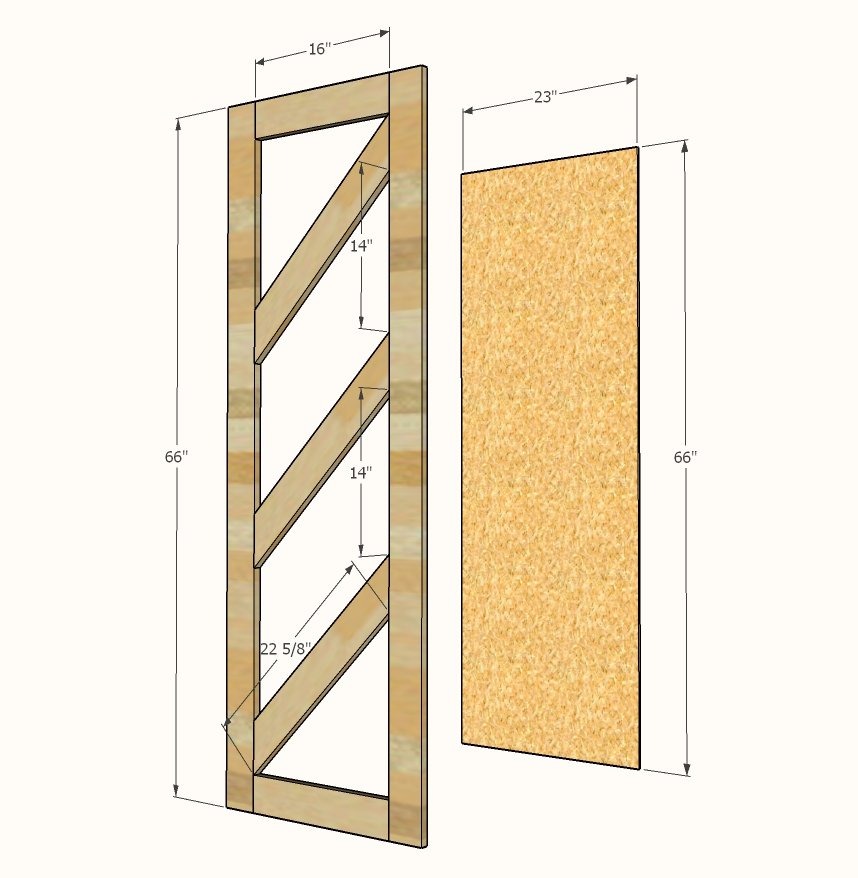
Step 8
Add the remaining piece of 1/4" plywood to the back of the bookcase with glue and brad nails. Make sure the bookcase is square before attaching and use the square, factory edge to guide you when attaching.
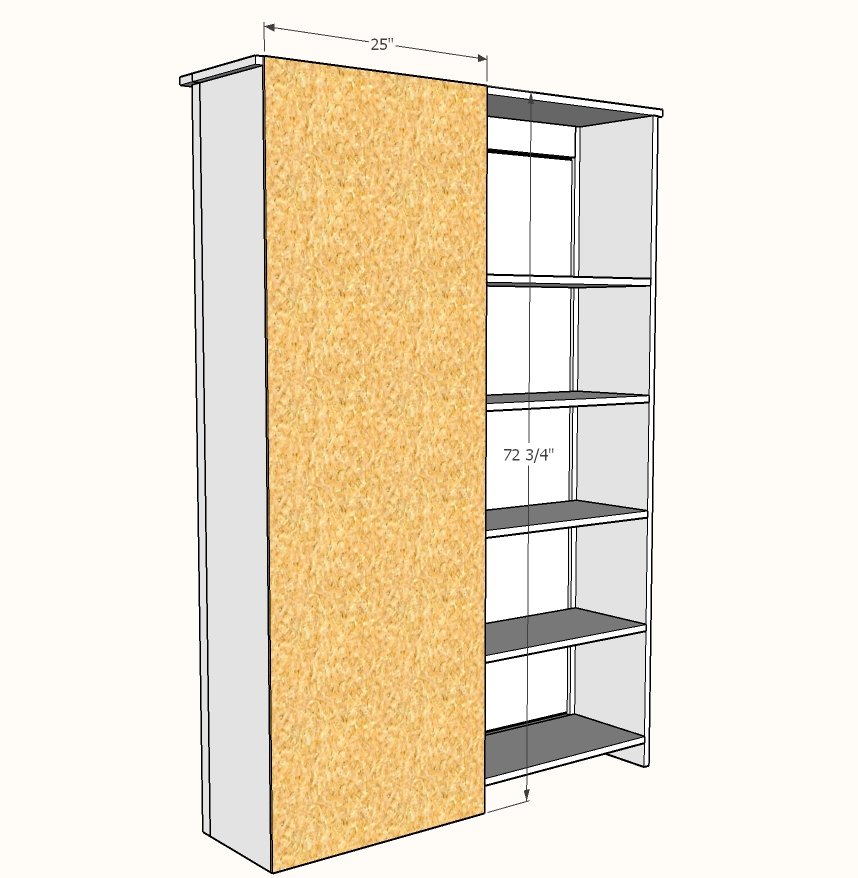
Step 9
Add the barn door hardware to the barn door and the cabinet header. We show how I do this in the video so please take a second to watch.
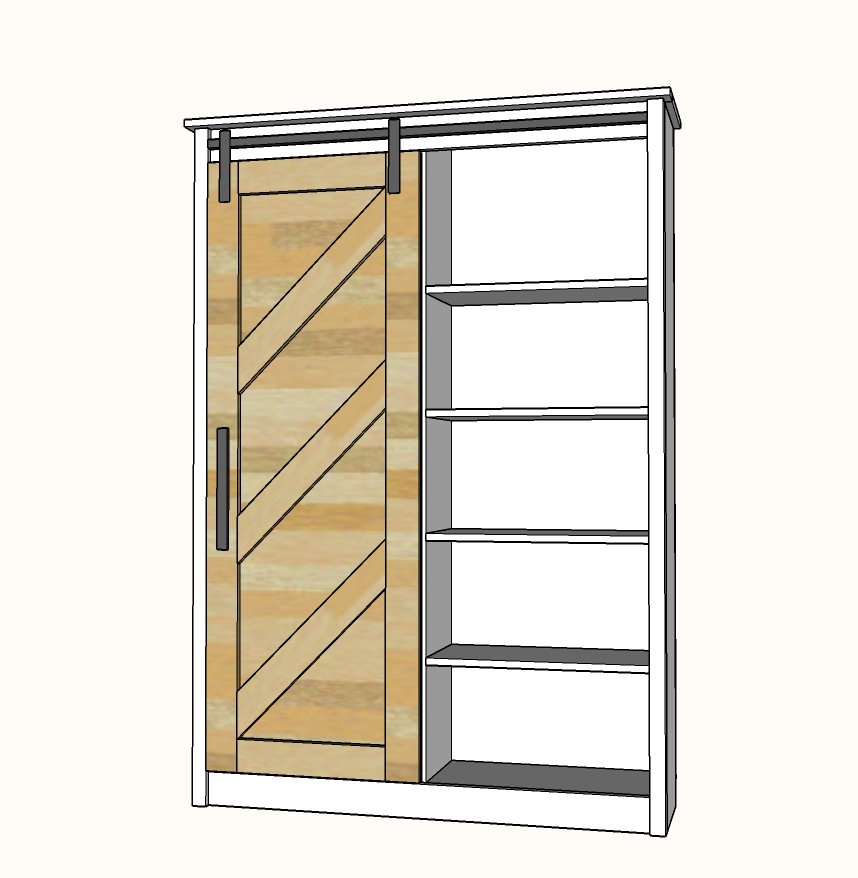
Finishing
Sand all surfaces, starting with a medium grit and finishing with fine. Wipe off the dust, fill any holes or gaps with wood filler, and sand smooth once dry. Apply primer if you're painting, then finish with your choice of paint or stain and seal with a durable clear topcoat. For outdoor projects, use exterior-rated primer, paint or stain, and sealer so the piece stands up to the weather.
Source (temporary): https://www.ana-white.com/woodworking-projects/barn-door-bookcase