Barn Door Cabinet with Mini Fridge and Microwave
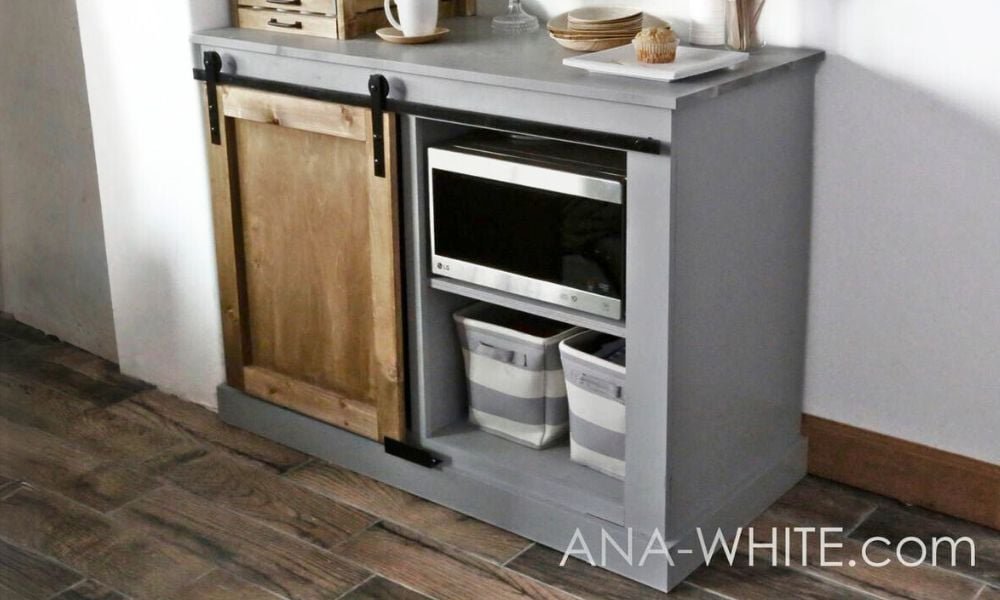
This barn door cabinet holds a mini fridge and microwave! It's perfect for dorm rooms, guest rooms, rec rooms, airbnbs, lobbies, or break rooms! Free
Specifications
| Project type | Buffet, Sideboard and Credenza Plans |
|---|---|
| Room | Bedroom |
| Style | Cottage Style Furniture Plans |
| Difficulty | Intermediate |
| Estimated cost | $150 - $200 |
Dimensions
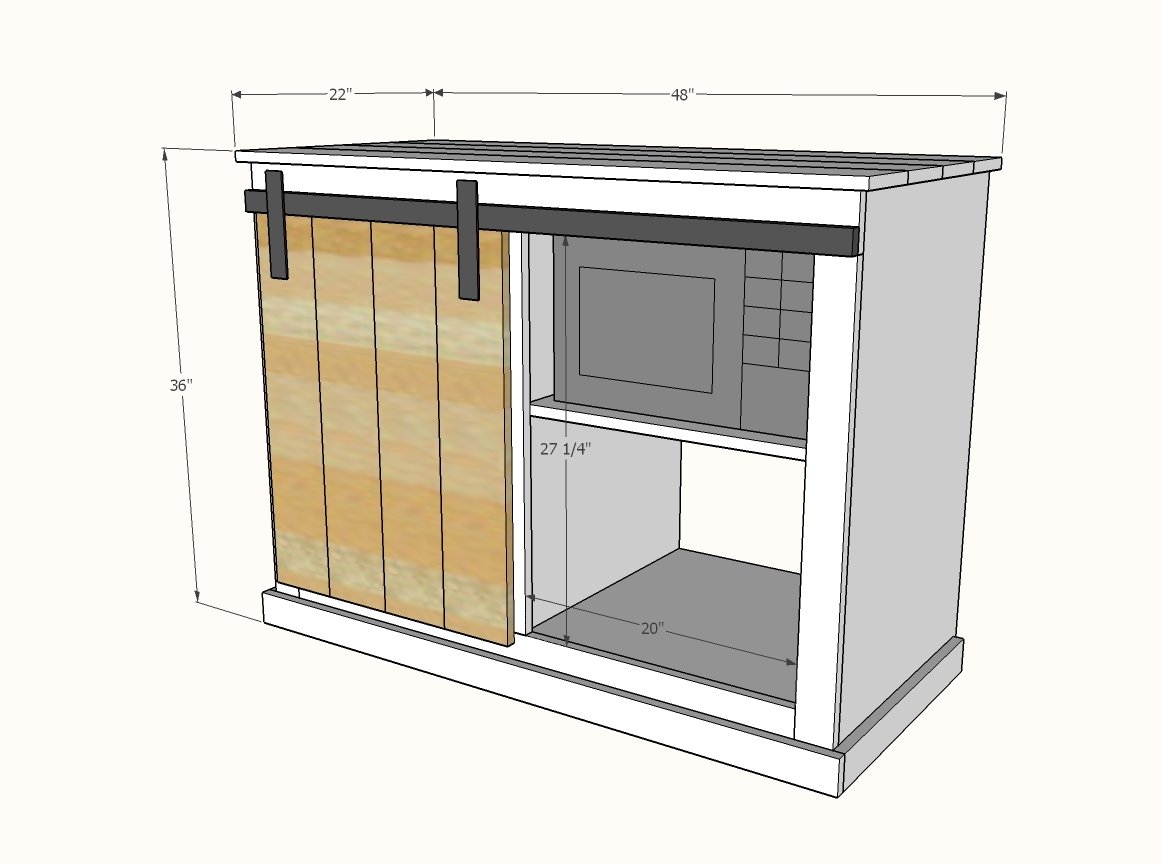
Use the size-specific shopping and cut lists below.
Shopping List
4 - 1x3 @ 8 feet long
1 - 1x2 @ 8 feet long
2 - 1x6 @ 8 feet long
1 - 3/4" plwyood 48" x 96"
1 - 1/4" plywood 24" x 24"
48" barn door hardware
Cut List
- 1 - 3/4" plywood @ 20-1/2" x 45" - bottom
- 2 - 3/4" plywood @ 20-1/2" x 35-1/4" - sides
- 1 - 3/4" plywood @ 20-1/2" x 30-3/4" - divider
- 1 - 3/4" plywood @ 20-1/2" x 22-1/8" - microwave shelf
- 2 - 1x2 @ 22-1/8" - back supports
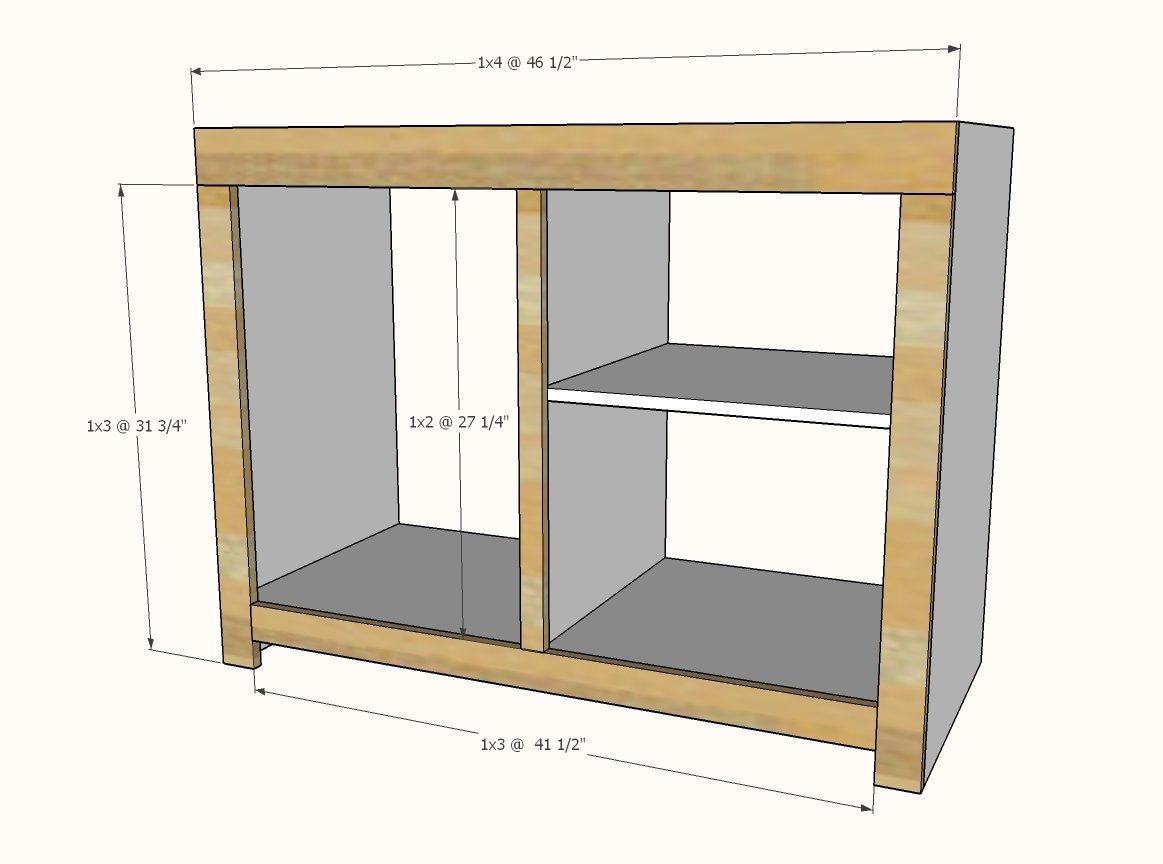
- 1- 1x2 @ 27-1/4" - face frame center
- 2 - 1x3 @ 31-3/4" - face frame legs
- 1 - 1x3 @ 41-1/2" - face fame bottom
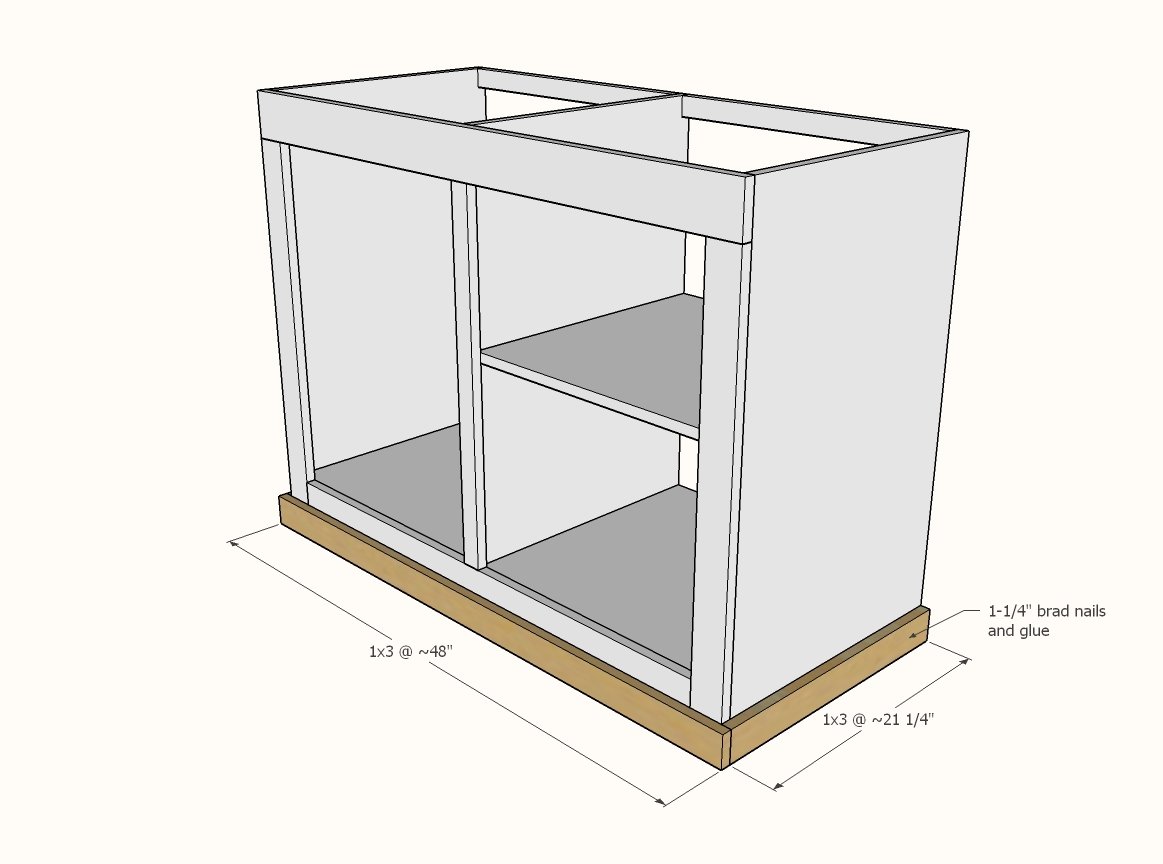
- 2 - 1x3 @ about 21-1/4" - cut to fit - footer sides
- 1 - 1x3 @ about 48" - cut to fit - footer front
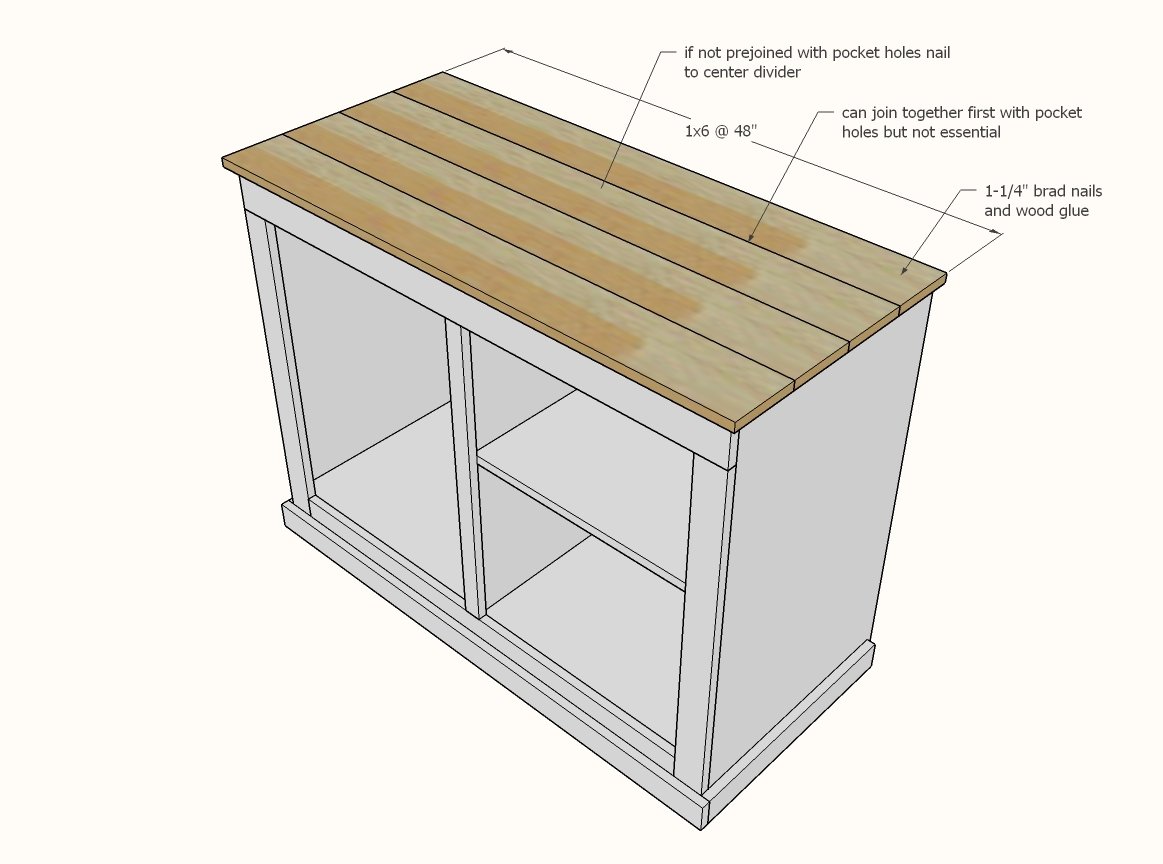
- 4 - 1x6 @ 47-7/8" - top (cut 1x6 boards in half)
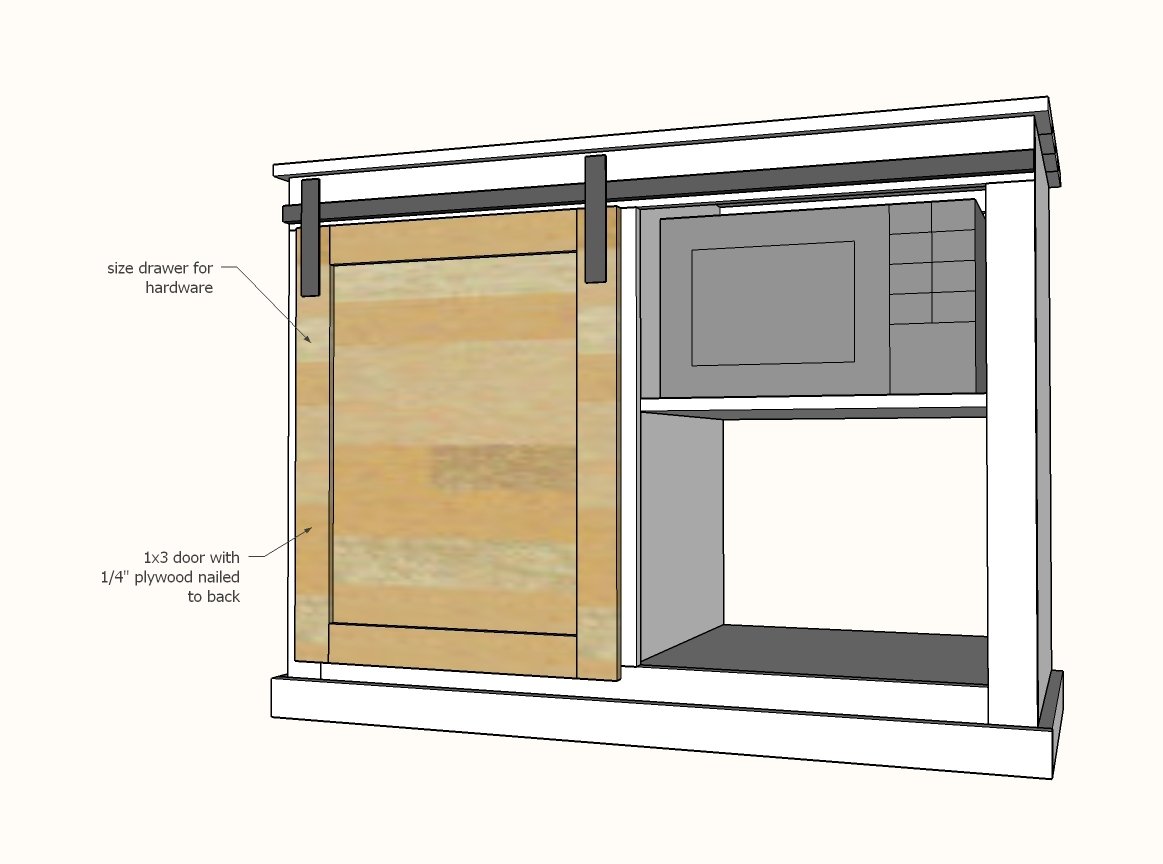
- Door should be cut to fit, approximately 2 - 1x3 @ 28" and 2 - 1x3 @ 17" and Back Plywood 24" x 19"
Tools
- measuring tape
- square
- pencil
- safety glasses
- hearing protection
- kreg-jig
- drill
- circular saw
- compound miter saw
- nailer
- sander
Step-by-step Instructions
Step 1
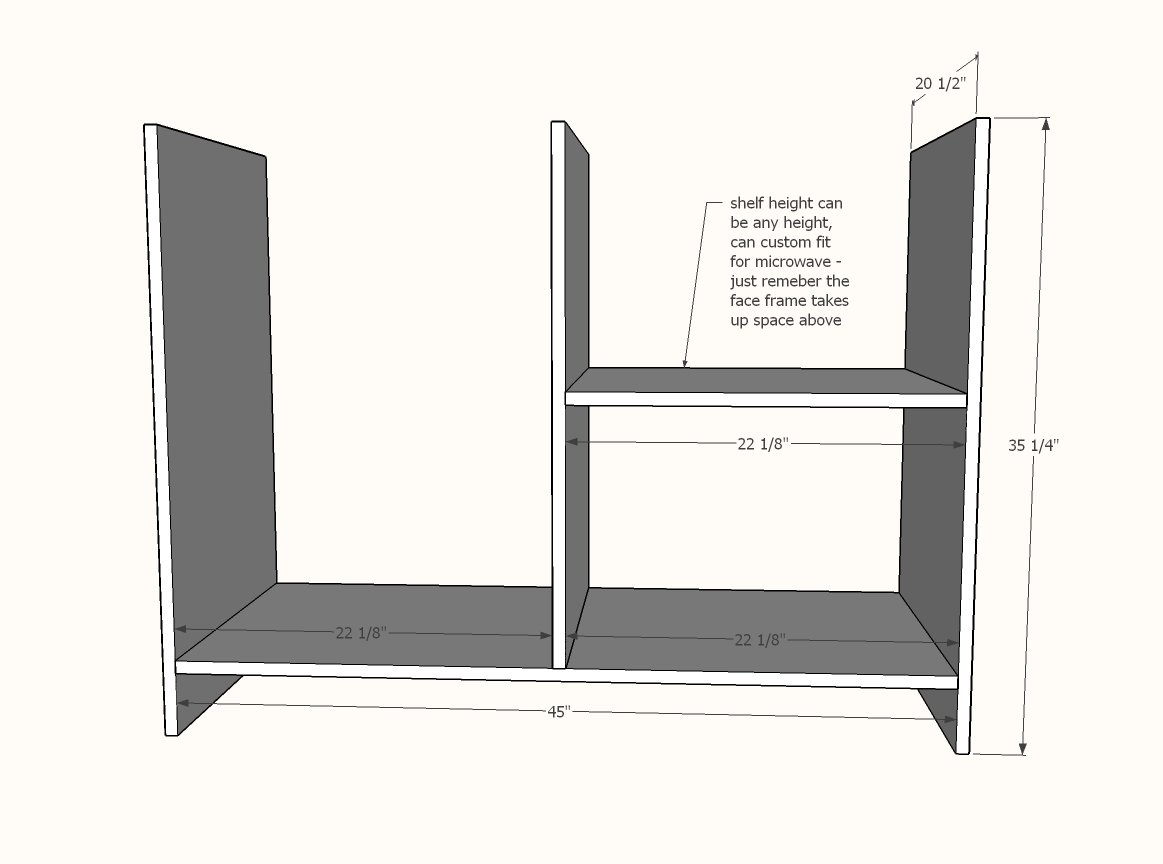
Build the carcass using a Kreg Jig set for 3/4" thick material. Drill three pocket holes at each joint and attach with 1-1/4" pocket hole screws. Leave 3-3/4" space underneath the bottom shelf (or simply use the divider as a spacer when placing the bottom shelf). You can wait to add the shelf (after next step) so the microwave is perfectly placed in the face frame, or add now too.
Step 2
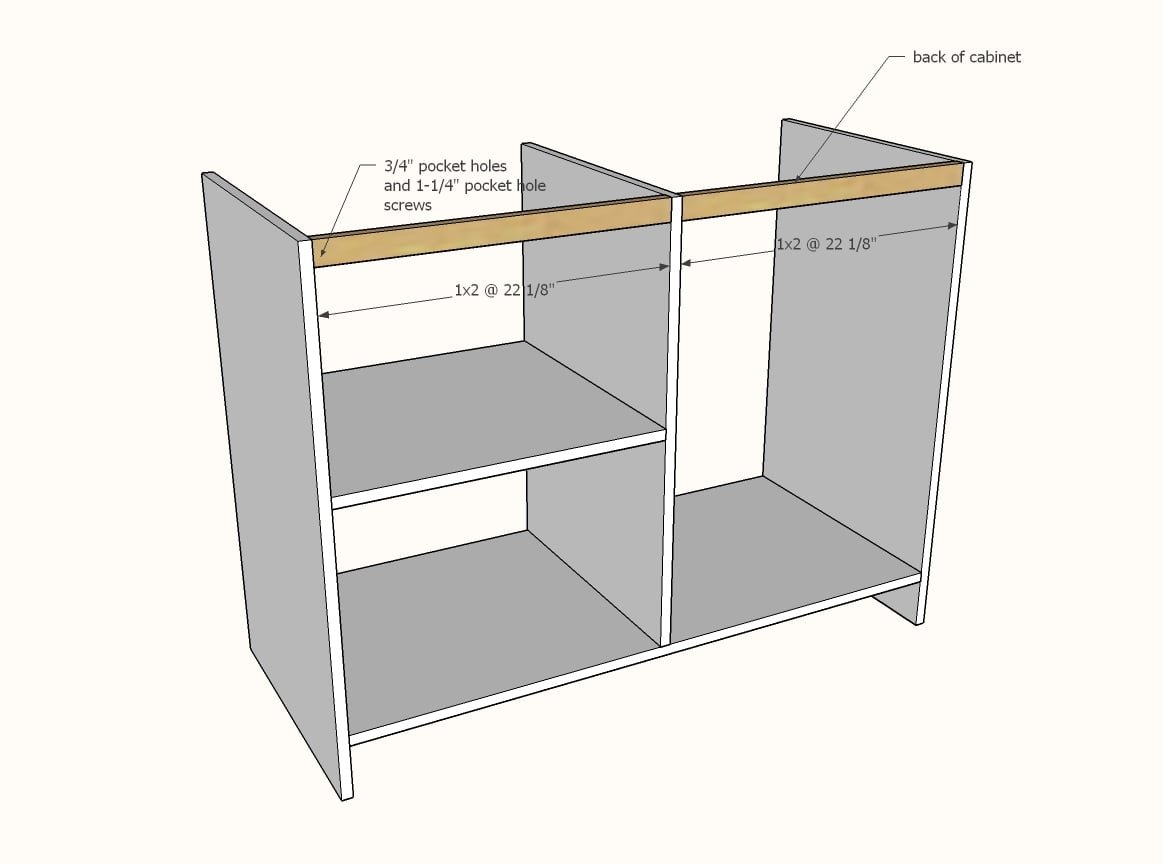
Drill two 3/4" pocket holes on each end of the 1x2 back supports. Attach at back top with 1-1/4" pocket hole screws.
Build the face frame with pocket holes first on your tabletop.
Then attach to front of cabinet with 1-1/4" brad nails and wood glue. Alternatively, you can attach face fram with pocket holes on inside of cabinet as we did in the video.
Measure and cut the footer sides. Nail and glue on with 1-1/4" brad nails.
Measure and cut the front. Nail and glue the front piece on.
Step 5
Step 6
The door should be built to fit the barn door hardware. This is the dimensions that we used for our door with our homeade hardware (tutorial coming soon!)
Finishing
Sand all surfaces, starting with a medium grit and finishing with fine. Wipe off the dust, fill any holes or gaps with wood filler, and sand smooth once dry. Apply primer if you're painting, then finish with your choice of paint or stain and seal with a durable clear topcoat. For outdoor projects, use exterior-rated primer, paint or stain, and sealer so the piece stands up to the weather.
Source (temporary): https://www.ana-white.com/woodworking-projects/barn-door-cabinet-mini-fridge-and-microwave