Barn Shaped Bookshelf
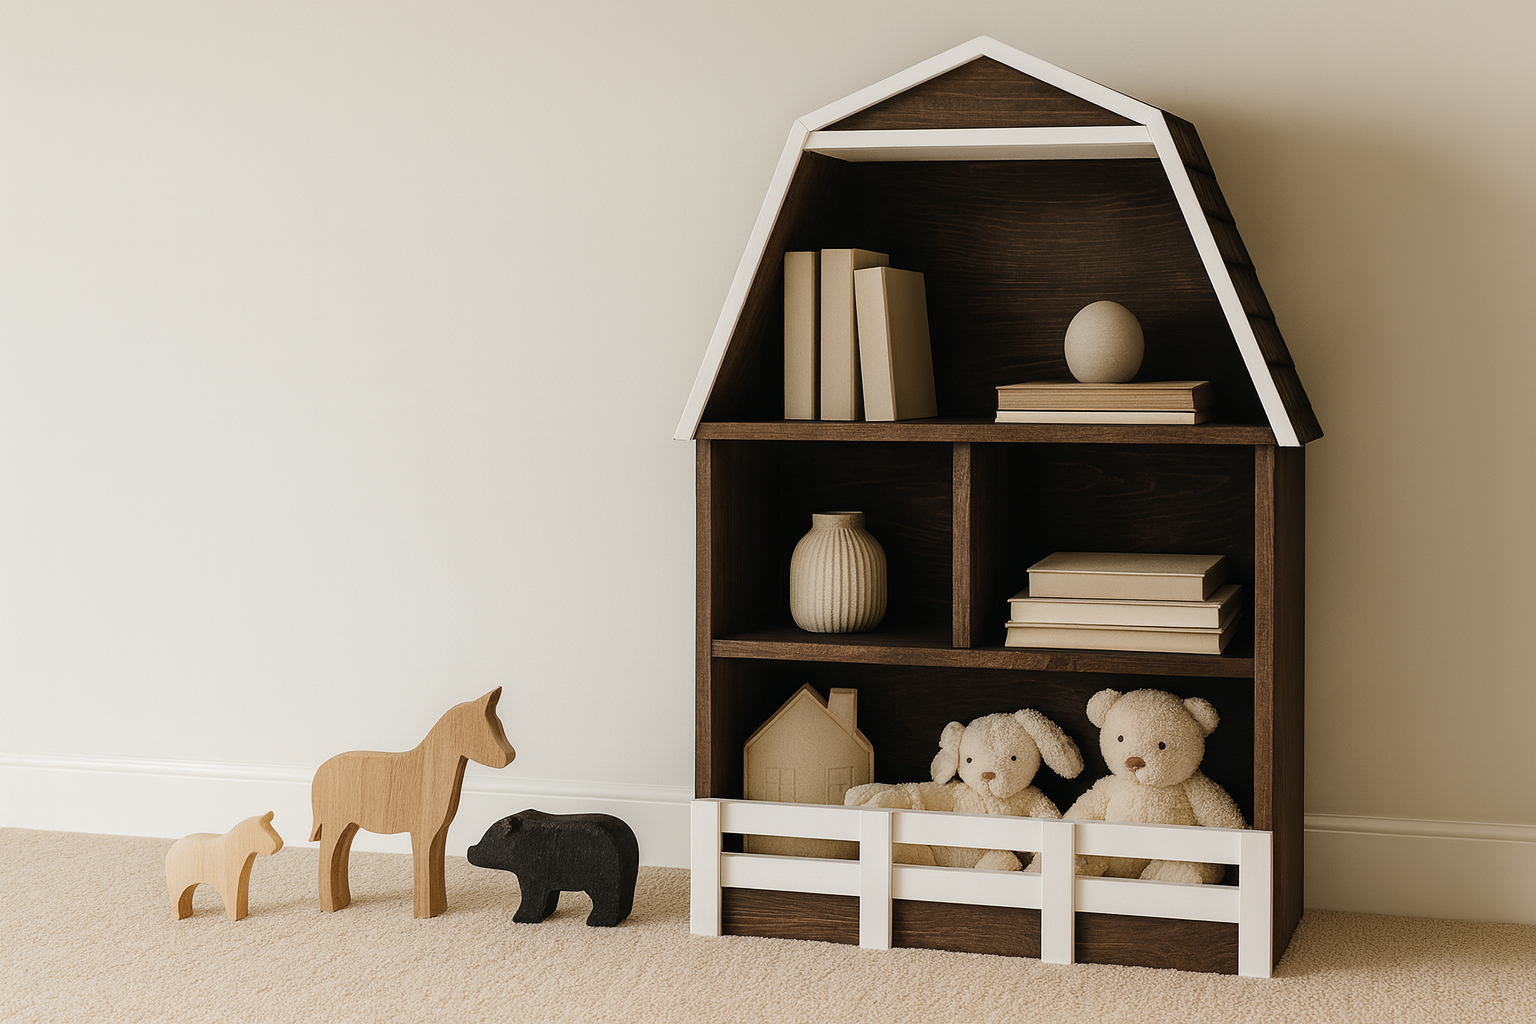
Free Barn Bookshelf Woodworking Plans – DIY Farmhouse-Inspired Storage Bring charm and function to your child’s room, playroom, or nursery with this adorable barn-shaped bookshelf – and build it yourself with! Featuring a classic barn silhouette with a pitched roof, this bookshelf combines rustic style with practical storage. With spacious shelves and a fenced bottom cubby, it's perfect for organizing books, toys, baskets, or decorative accents. The unique farmhouse design makes it a standout piece in any modern or country-style home. Key Features: • • Playful barn design with shingle-style roof and “fence” detail • Roomy shelves for books, toys, and décor • Bottom shelf is ideal for baskets or plush animals • Perfect height for kids to access independently • Beginner-friendly build using common lumber Whether you’re crafting a keepsake for your child or adding farmhouse flair to your home, this DIY bookshelf is as fun to build as it is to style. Download the plans now and start building your barn bookshelf today!
Specifications
| Project type | Toys |
|---|---|
| Room | Kids and Toys |
| Style | Children's and Kid's Room Furniture and Toy Plans |
| Difficulty | Intermediate |
Dimensions
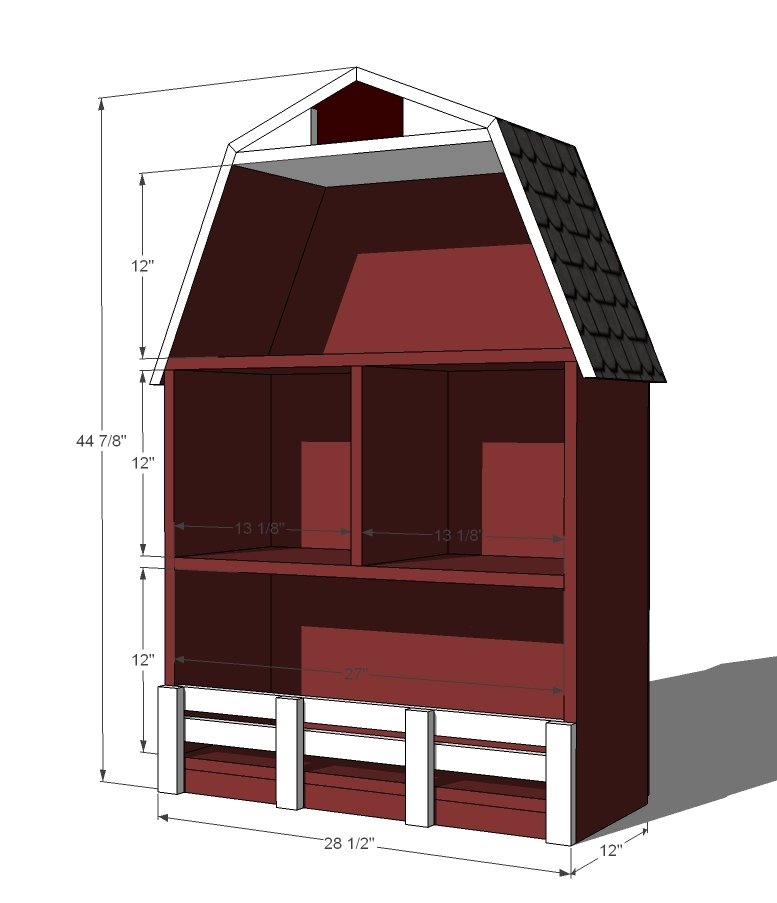
Use the size-specific shopping and cut lists below.
Shopping List
- 3 - 1x12 @ 8 feet long
- 2 - 1x2 @ 8 feet long
- 6" of 1x6 scraps
- 1/2 sheet of 1/4" plywood for back
Cut List
- 4 - 1x12 @ 27” (shelves and sides)
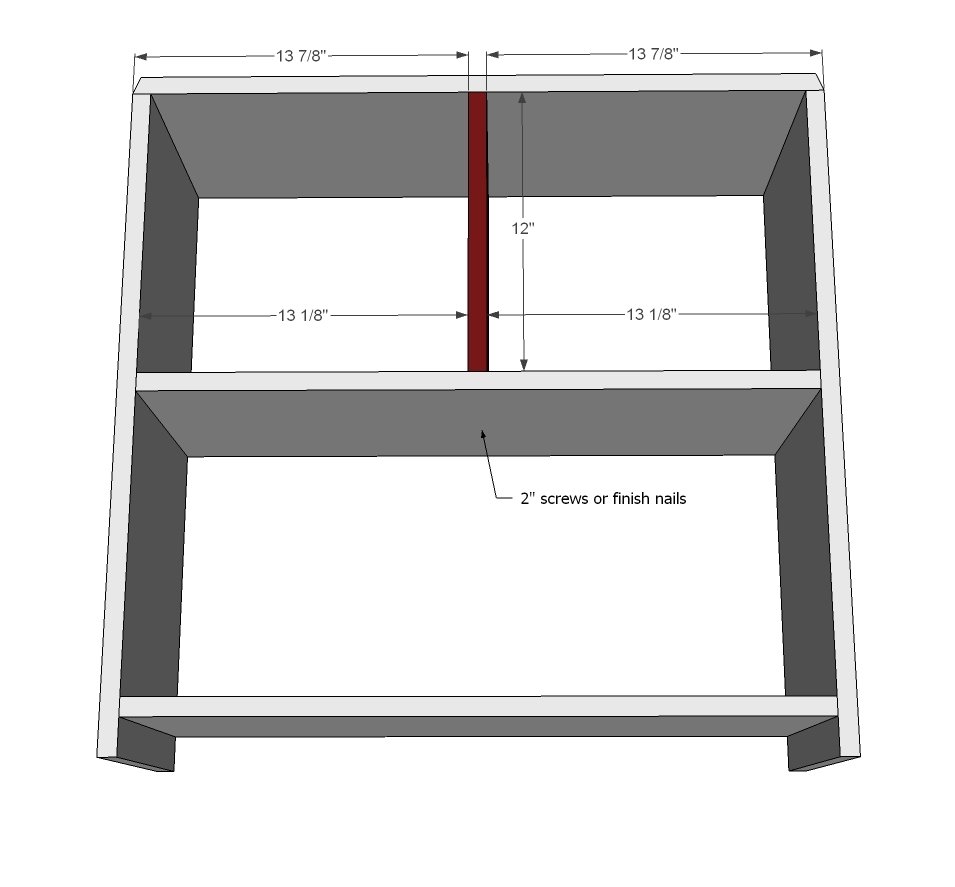
- 1 - 1x12 @ 12” (divider)
- 1 - 1x12 @ 28 1/2” - both ends BEVELED at 22 1/2 degrees off square, long point to long point, ends NOT parallel (middle floor)
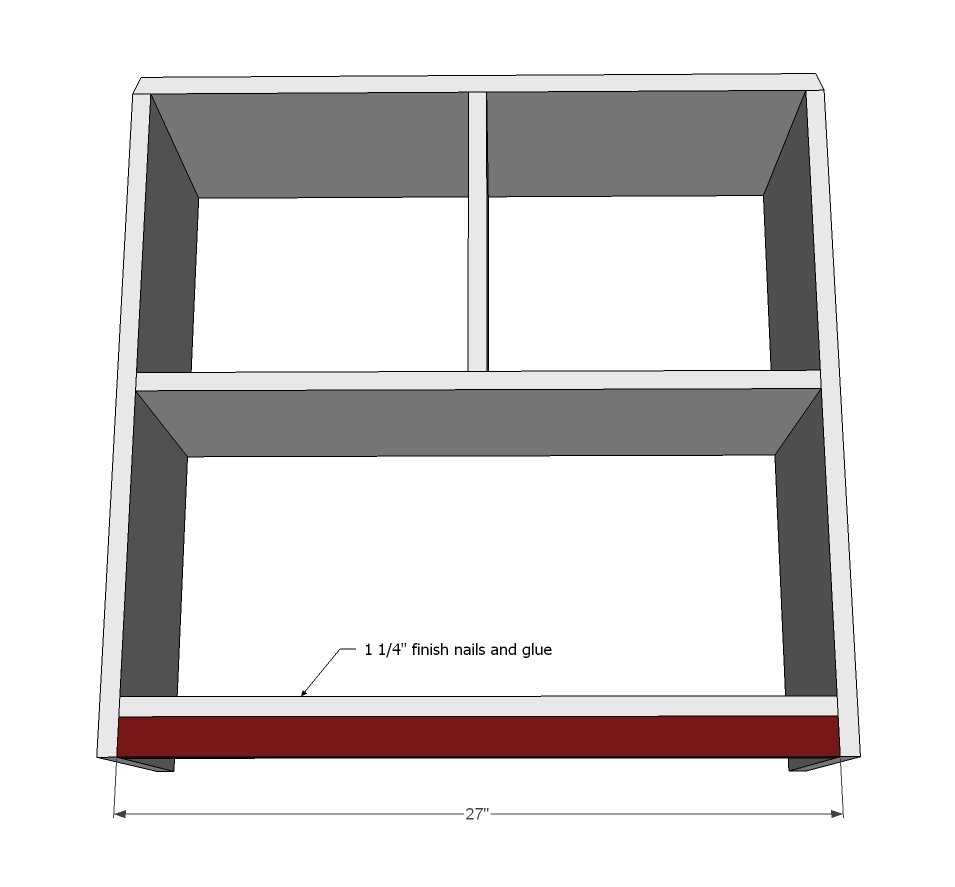
- 1 - 1x2 @ 27" (footer)
- 2 - 1x12 @ 16 1/4” - both ends beveled at 22 1/2 degrees off square, long point to long point, ends NOT parallel (lower roof)
- 1 - 1x12 @ 18” - both ends beveled at 22 1/2 degrees off square, long point to long point, ends NOT parallel (loft floor)
- 2 - 1x12 @ 10” - both ends beveled at 22 1/2 degrees off square, long point to long point, ends NOT parallel (upper roof)
- 2 - 1x6 @ 2 1/4” long point, cut at 22 1/2 degrees off square (optional loft siding)
- Back plywood is 45” x 28 1/2” overall.
FENCE
- 2 - 1x2 @ 27"
- 4 - 1x2 @ 6 3/4"
Tools
- measuring tape
- square
- pencil
- safety glasses
- hearing protection
- kreg-jig
- drill
- compound miter saw
- nailer
- sander
- countersink drill bit
Step-by-step Instructions
Step 1
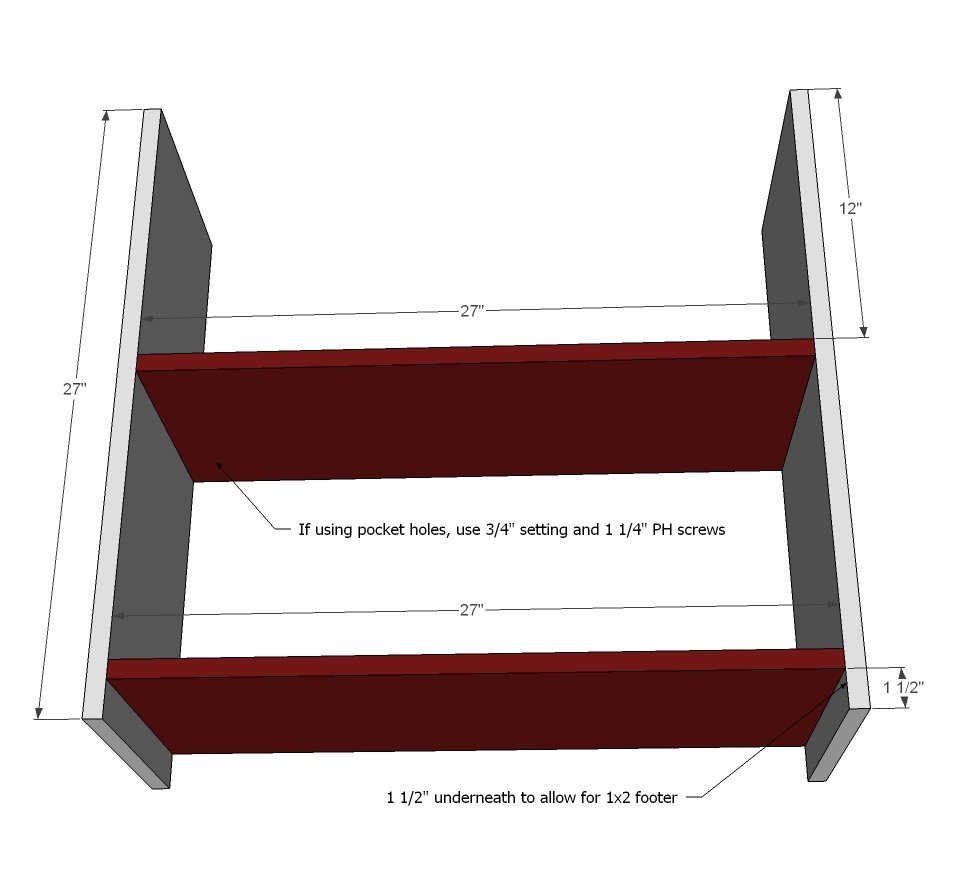
Start by building the bookshelf base. You can use 2" countersunk screws and glue or 3/4" PHs/1 1/4" PH screws and glue, but nails are not recommended because there is no face frame. TIP: If using PHs you may wish to add the top (step 2) first to fit the drill in there, and then add middle shelf second.
Step 2
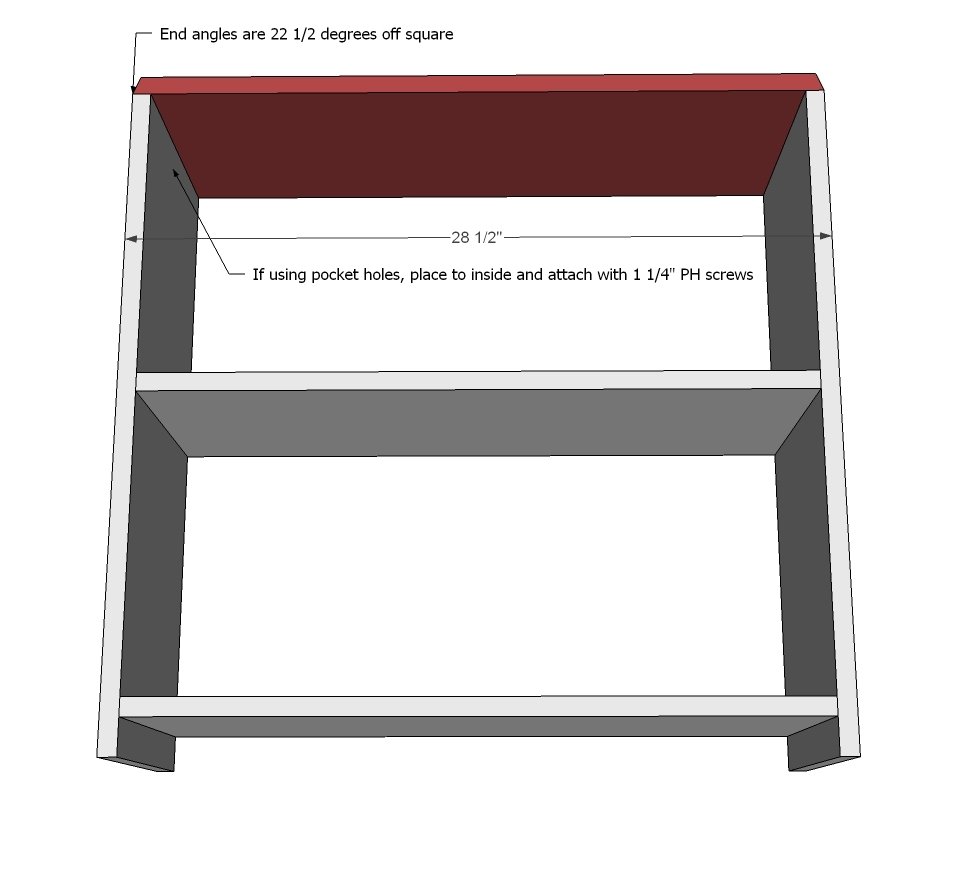
Now add the top.
Step 3
Now add the divider. You can just nail or screw this guy in.
Step 4
And the footer - glue and nails will do the trick here.
Step 5
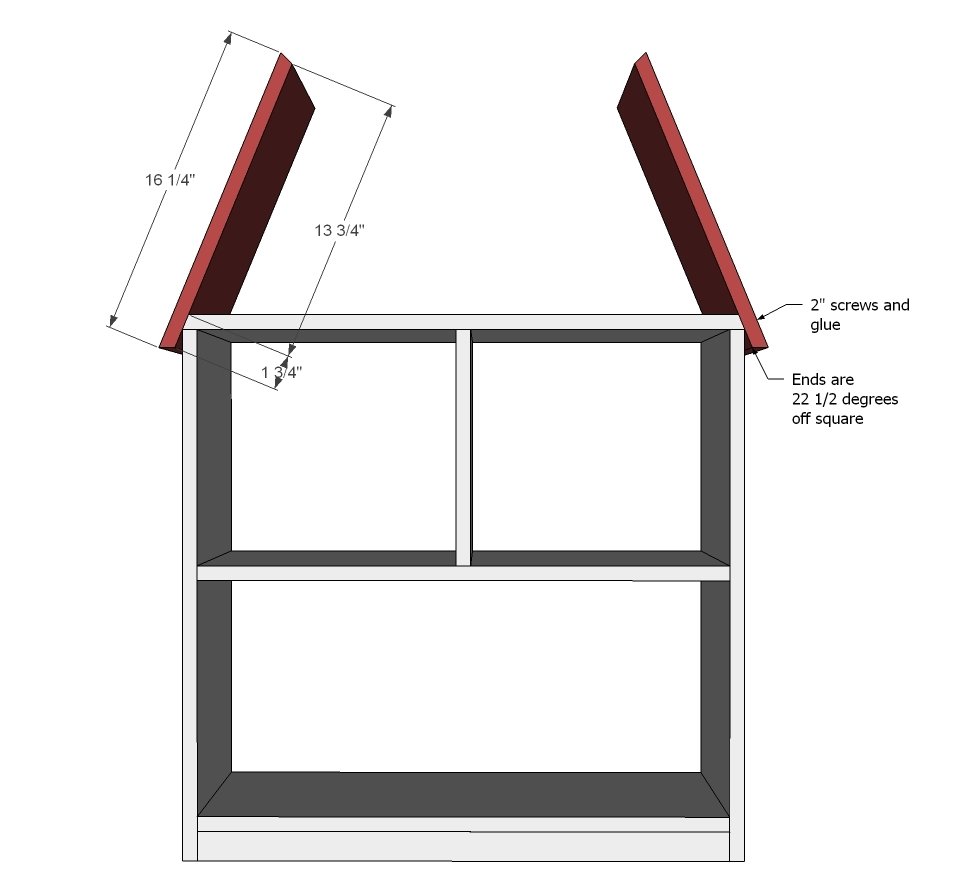
Step 6
Now add the loft floor. Easiest way is 3/4" PHs and 1 1/4" PH screws from underside.
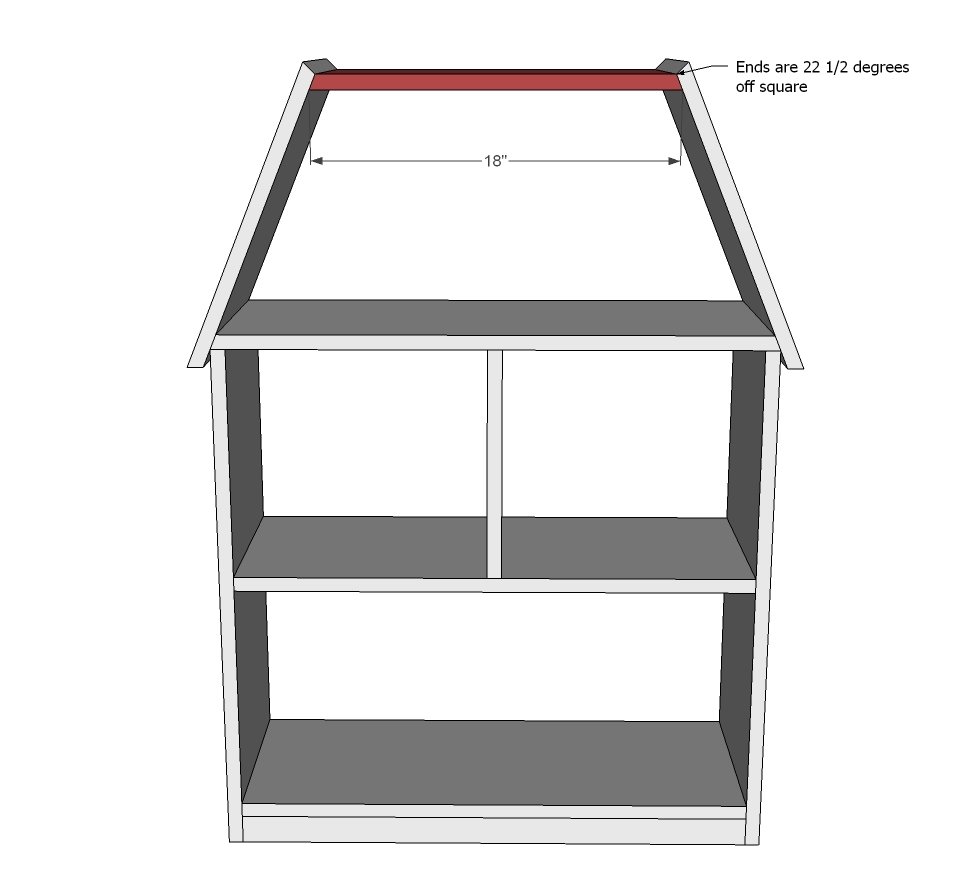
Step 7
Glue and nail the remaining roof pieces in place. The next pieces will strengthen everything up.
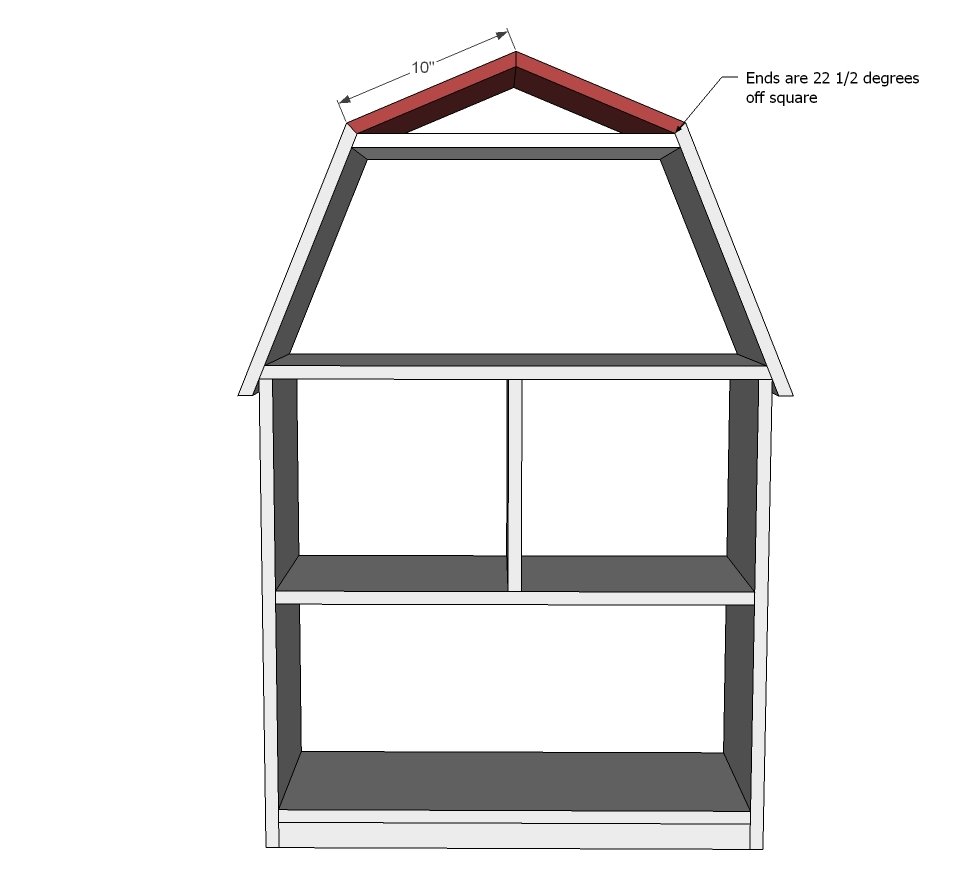
Step 8
Add the roof pieces to secure top roof. Use glue and finish nails.
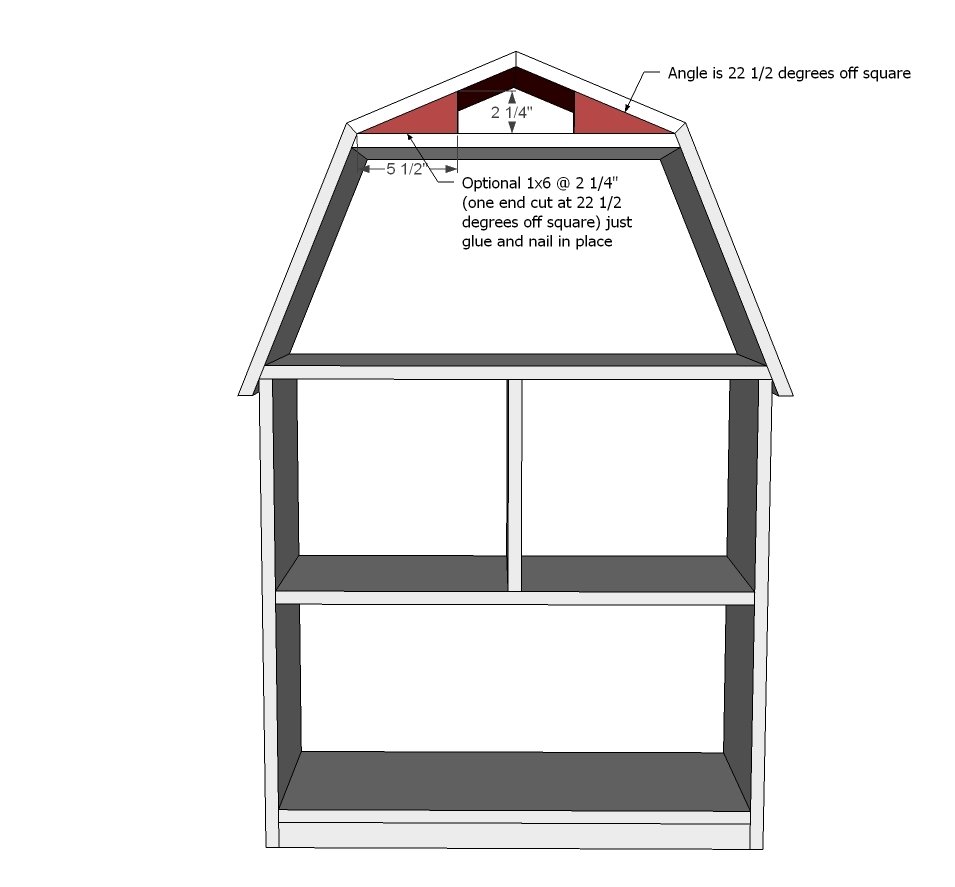
Step 9
Finally, add the back to the entire project with 1 1/4" finish nails and glue.
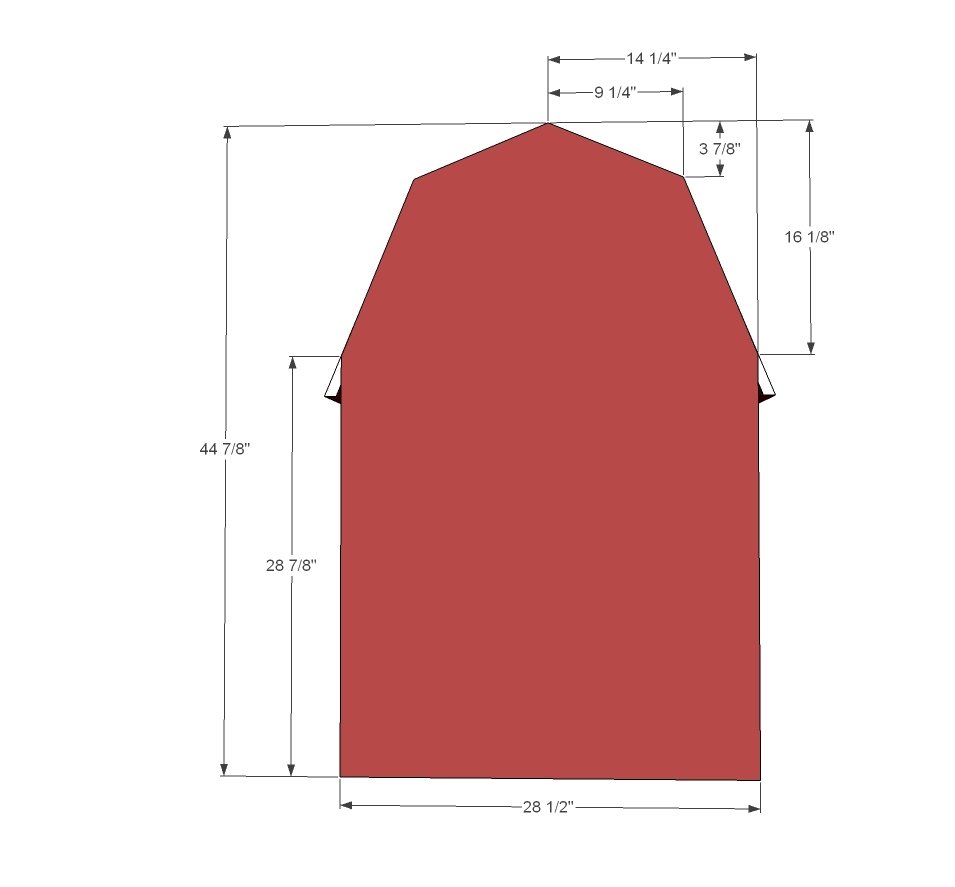
Step 10
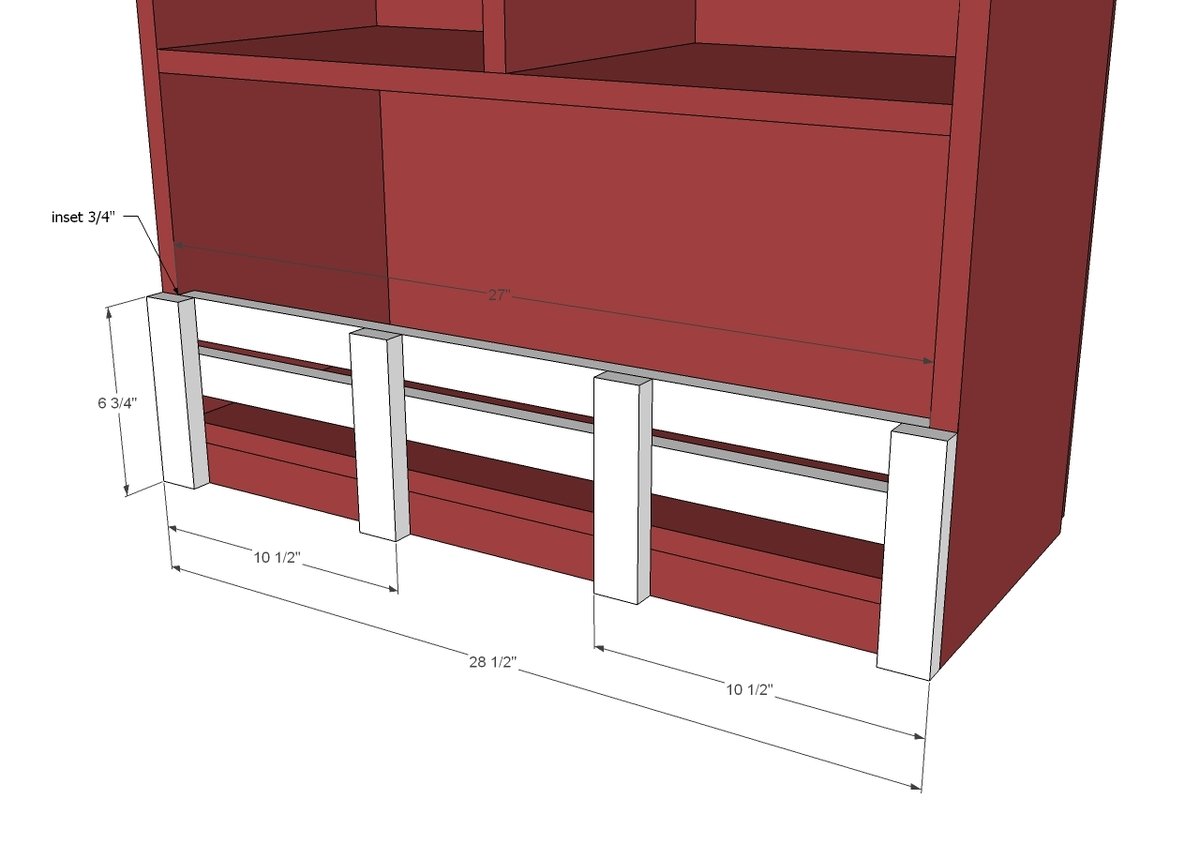
Finishing
Sand all surfaces, starting with a medium grit and finishing with fine. Wipe off the dust, fill any holes or gaps with wood filler, and sand smooth once dry. Apply primer if you're painting, then finish with your choice of paint or stain and seal with a durable clear topcoat. For outdoor projects, use exterior-rated primer, paint or stain, and sealer so the piece stands up to the weather.
Source (temporary): https://www.ana-white.com/woodworking-projects/barn-shaped-bookshelf